
Cable Knit Extended Width Computerized Longarm Quilting Design
This is my latest quilt, sewn *in season* and just for fall. When the top was completed, I knew I wanted to carry the fall theme into the quilting, but I was wracking my brain to think of a fall-themed design that felt like me.
I'll never say never, but in the past, I haven't been "into" pumpkins, fall leaves, or Halloween ghosts, goblins, or spiderwebs. But knitting? Oooooh! Knitting is another story. The fall season gets me in the mooooooood for knitting! 
I taught myself to knit by watching YouTube about fourteen years ago, shortly after giving up my sewing room so we could have a nursery again for our youngest child. I needed a creative and tactile outlet, especially since I couldn't access my sewing machine, and knitting fit the bill. It didn't take up much space, and I loved the challenge of learning a new technique.
For a long while, I would knit one sweater for myself annually, but I haven't done that in probably five years. I miss it! The cardigan I've started with fingering weight yarn is still on my needles, patiently waiting for me. I picked it up again a few weeks ago, and I wish I'd made better notes about where I left off in the pattern. 😬
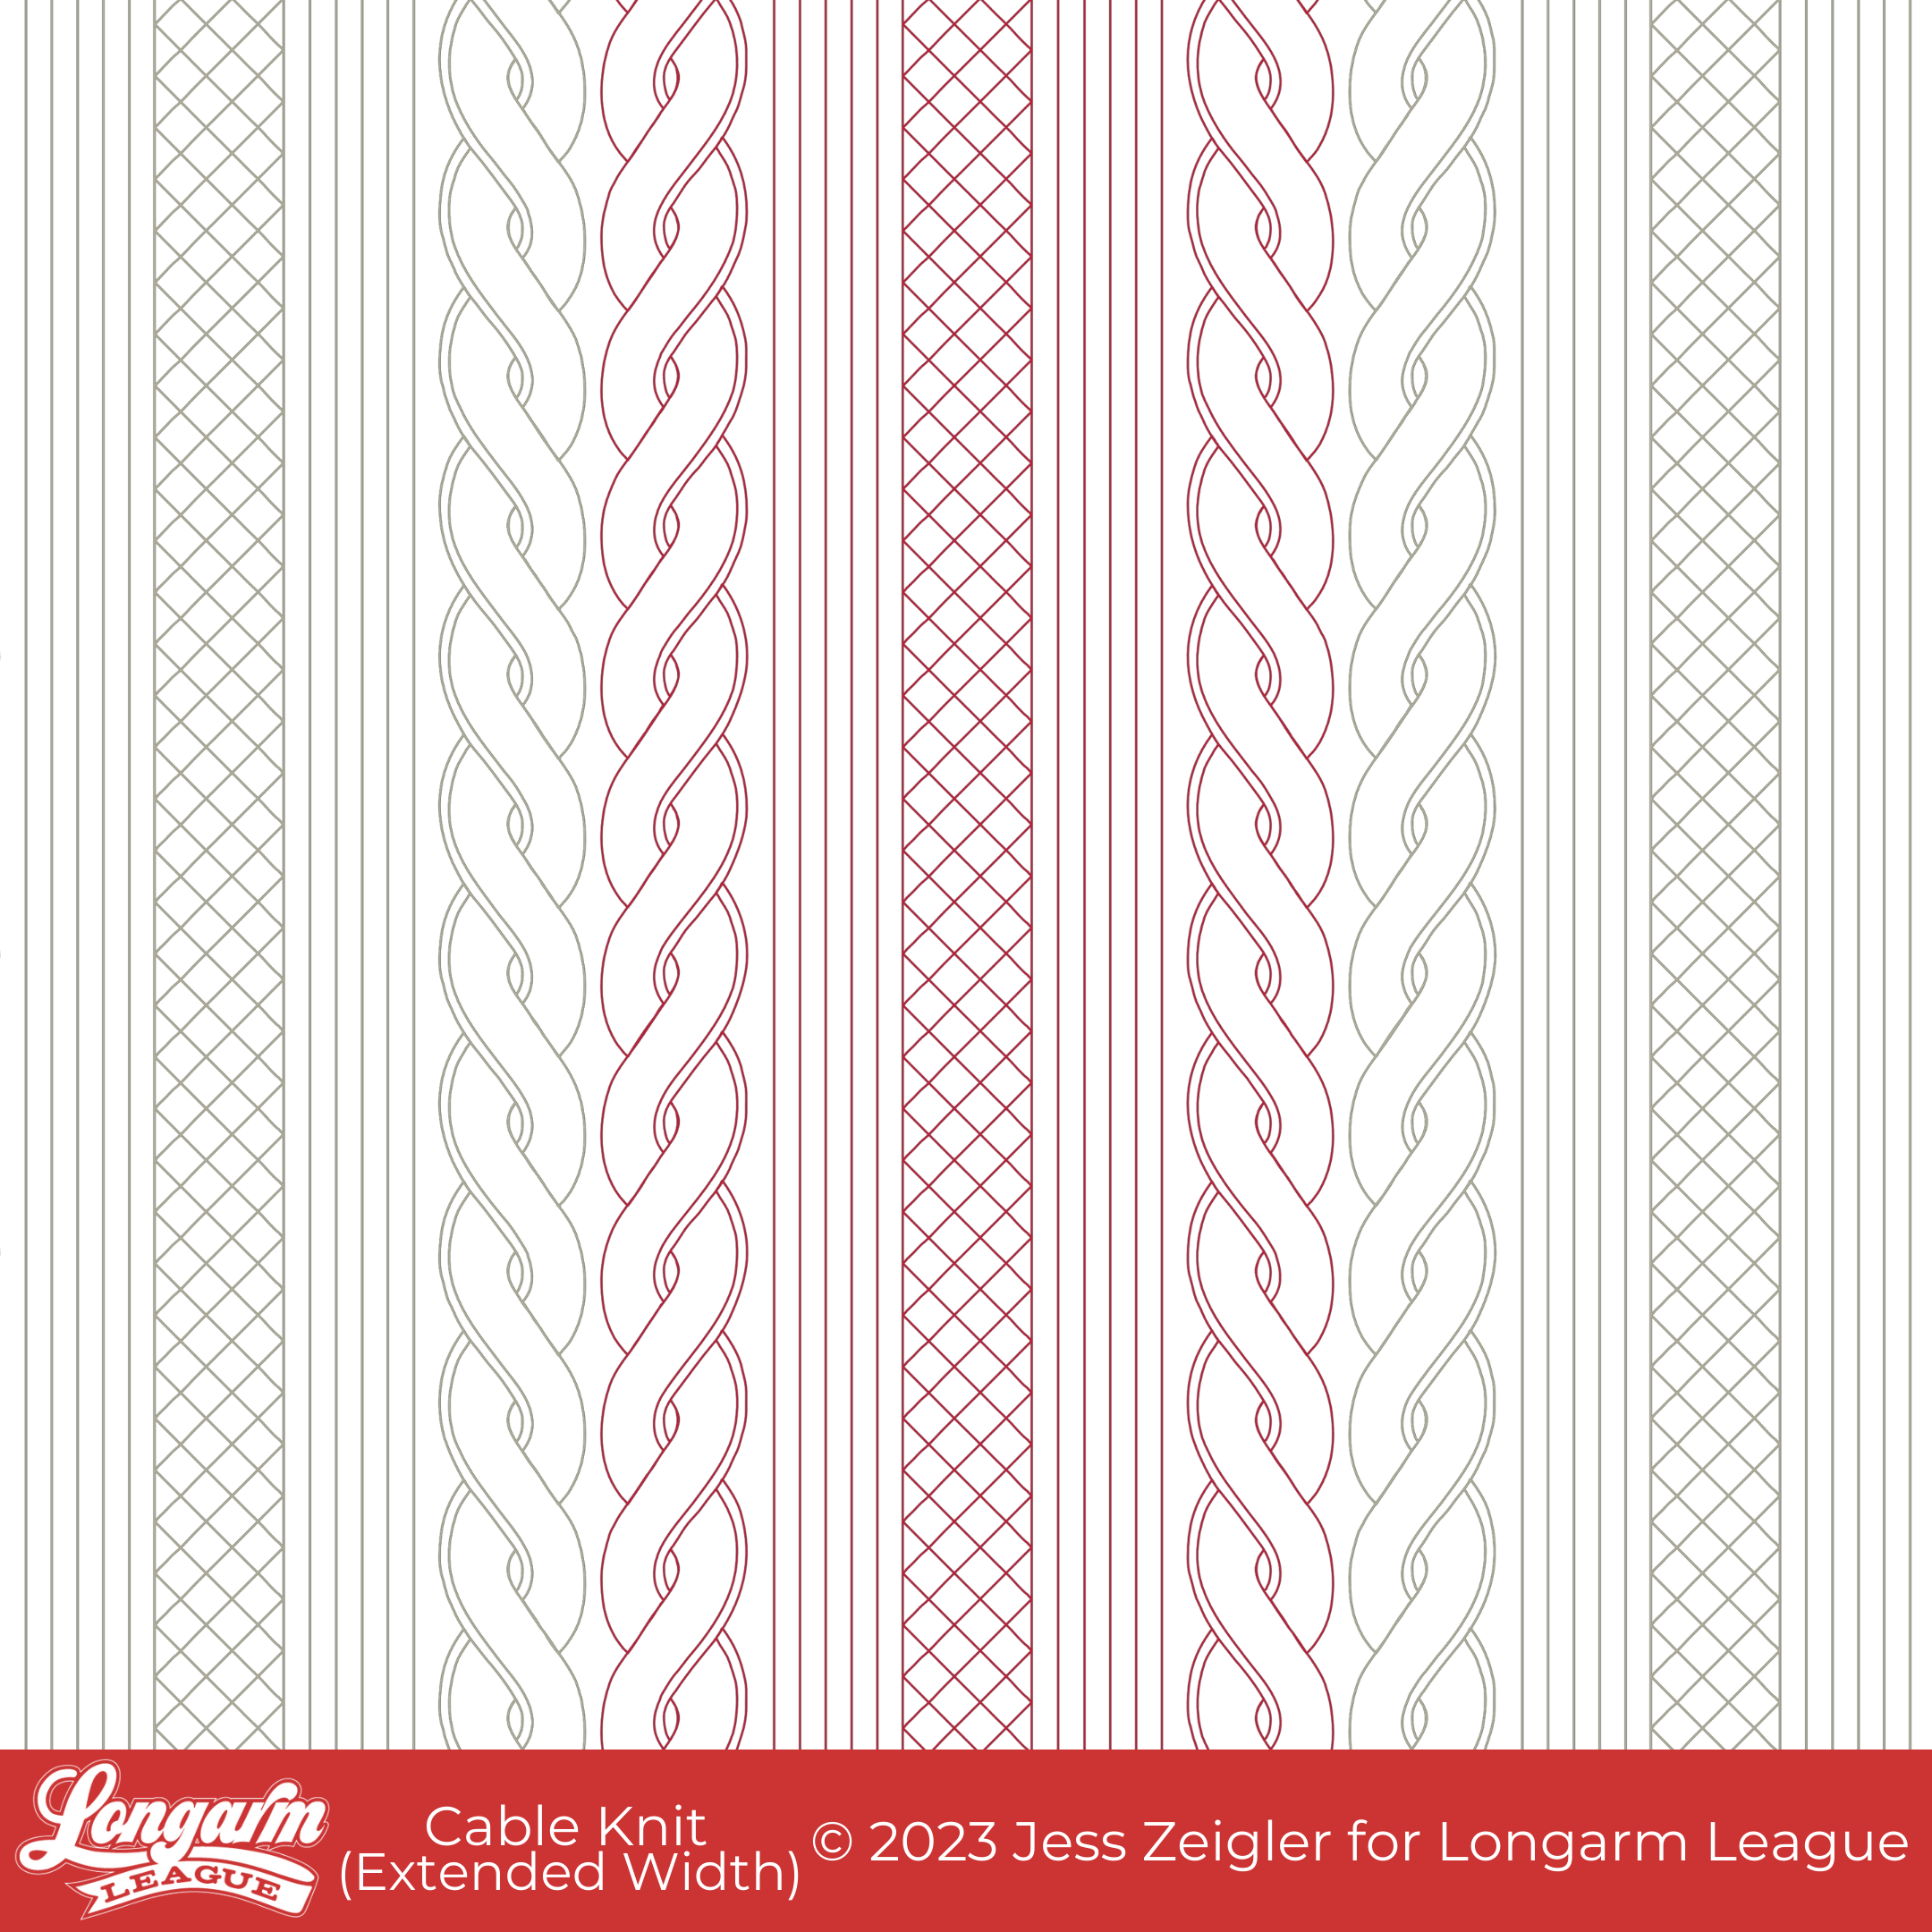
Back to my desire for a fall-themed quilting design: I got very excited about the prospect of using an extended-width block format to build different shapes and textures into sections that could be easily repeated to mimic the columns of a cable knit sweater. Huzzah!
I borrowed the cable shape from a previous design of mine called Sweater Weather and simplified it. The echoed edge of the cable means less backtracking and further emphasizes the mirrored nature of the cables.
When knitting cables, a pattern will often call for contrasting stitches surrounding the cables so they look more prominent. That's the idea of this design, too. The straight lines set off the mirrored cables, and the cross-hatching sections provide even more texture and contrast in scale.
The Quilt
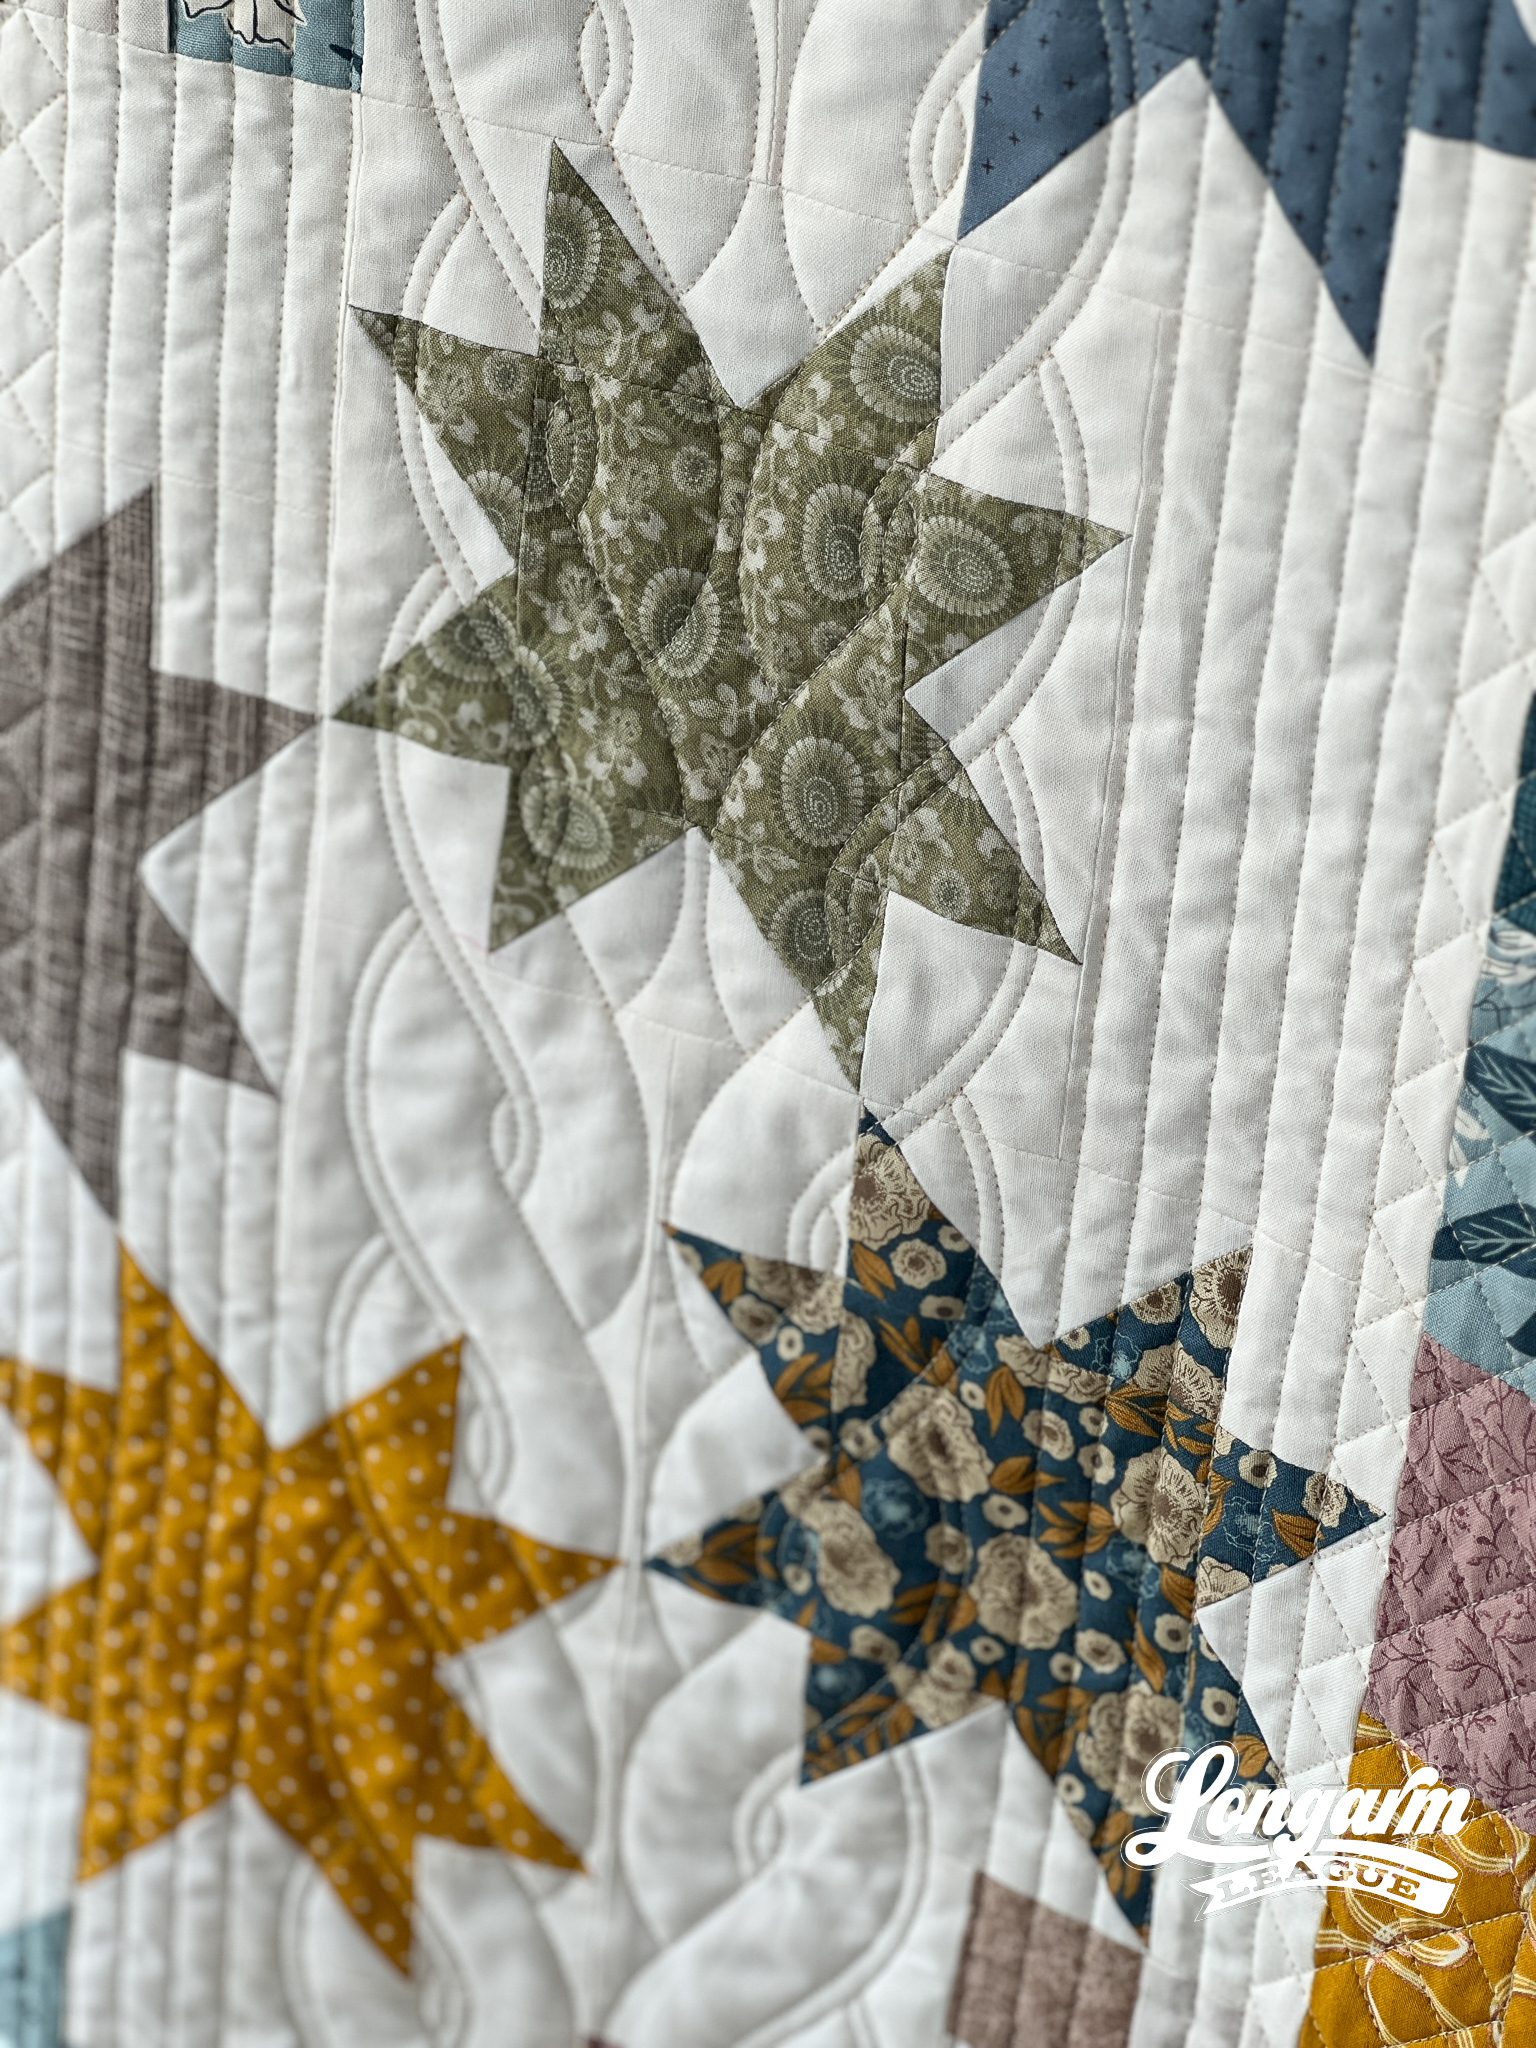
I was lucky enough to take a class from Doug Leko of Antler Quilt Design last month. It was hosted at The Gathering, which is a retreat center owned by Lisa Bongean of Primitive Gatherings in Larsen, Wisconsin. The class and retreat focused on this Interwoven pattern from Doug's Stashtastic 2 book.
I had a blast at the retreat—who cares if I only finished one whole block while I was there for four days?
The photo below shows the A blocks on my design wall once I got back home and the B blocks in my hands right before I started laying the whole thing out.


I was determined to use fabrics from my stash when choosing fabrics for this quilt. I had a fat quarter bundle curated by Stitch Supply that incorporated many prints from Slow Stroll, a fabric line from Fancy That Design House. I was able to add in lots of other golds, tans, and blues from my stash, along with some long-neglected purples and greens.
I'm all about using a wide back and jumping into the quilting phase once a top is done, but it was very satisfying to take the extra time to square up some yardage and piece the back. Most prints that went into the backing had languished on my shelves for over a decade.
The Quilting Particulars
Most importantly, this is an extended-width design. For help with this kind of design, refer to our blog post here.
Second-most-important: to get the design to have a vertical orientation, you'll want to load your quilt top on its side.
Give yourself a bit of space (~0.25") between the block repeats so that you have some wiggle room between the cables. There's a bit of space between the different elements of each block (i.e., cables, straight lines, cross-hatching), so you'll want the spacing between blocks to reflect similar spacing.
The "Cable Knit" file is programmed to stitch left-to-right and right-to-left to maximize efficiency. If your machine has trouble traveling right-to-left, use the file "Cable Knit L to R." This version will stop at the right so you can move the machine head back to the left to stitch each element. Both files are included in the purchase.
There's a video of the stitch path at the top of this blog post to see how the various sections are quilted.
Here are the sizing specifications for how I set up this design using my Intelliquilter (75" x 90" quilt size):
Block height: 12.78"
Gap between blocks: +0.25"
Offset: none
Backtracking: some
Here's a look at the included PDF:
If you use Cable Knit on a quilt, we'd love for you to use the hashtag #cableknitpanto and tag @longarmleague on Instagram so we can see how you use it! You can also visit our full digital design shop to take a look at all our previous designs.


Interested in getting new digital pantograph designs like this one on the day they're released (and at a deep discount)? Sign up for our Digital Panto Club and get them delivered straight to your inbox on the first Wednesday of each new month.


Jess Zeigler
Longarm League Commish & Owner of Threaded Quilting Studio, LLC.


