
Clamour Bundle - Four E2E Clamshell Quilting Designs with Many Options
Hello friends! I'm showcasing a bundle for you today. Instead of narrowing a variety of clamshell designs down to one, I've bundled them together so that you can have many options!
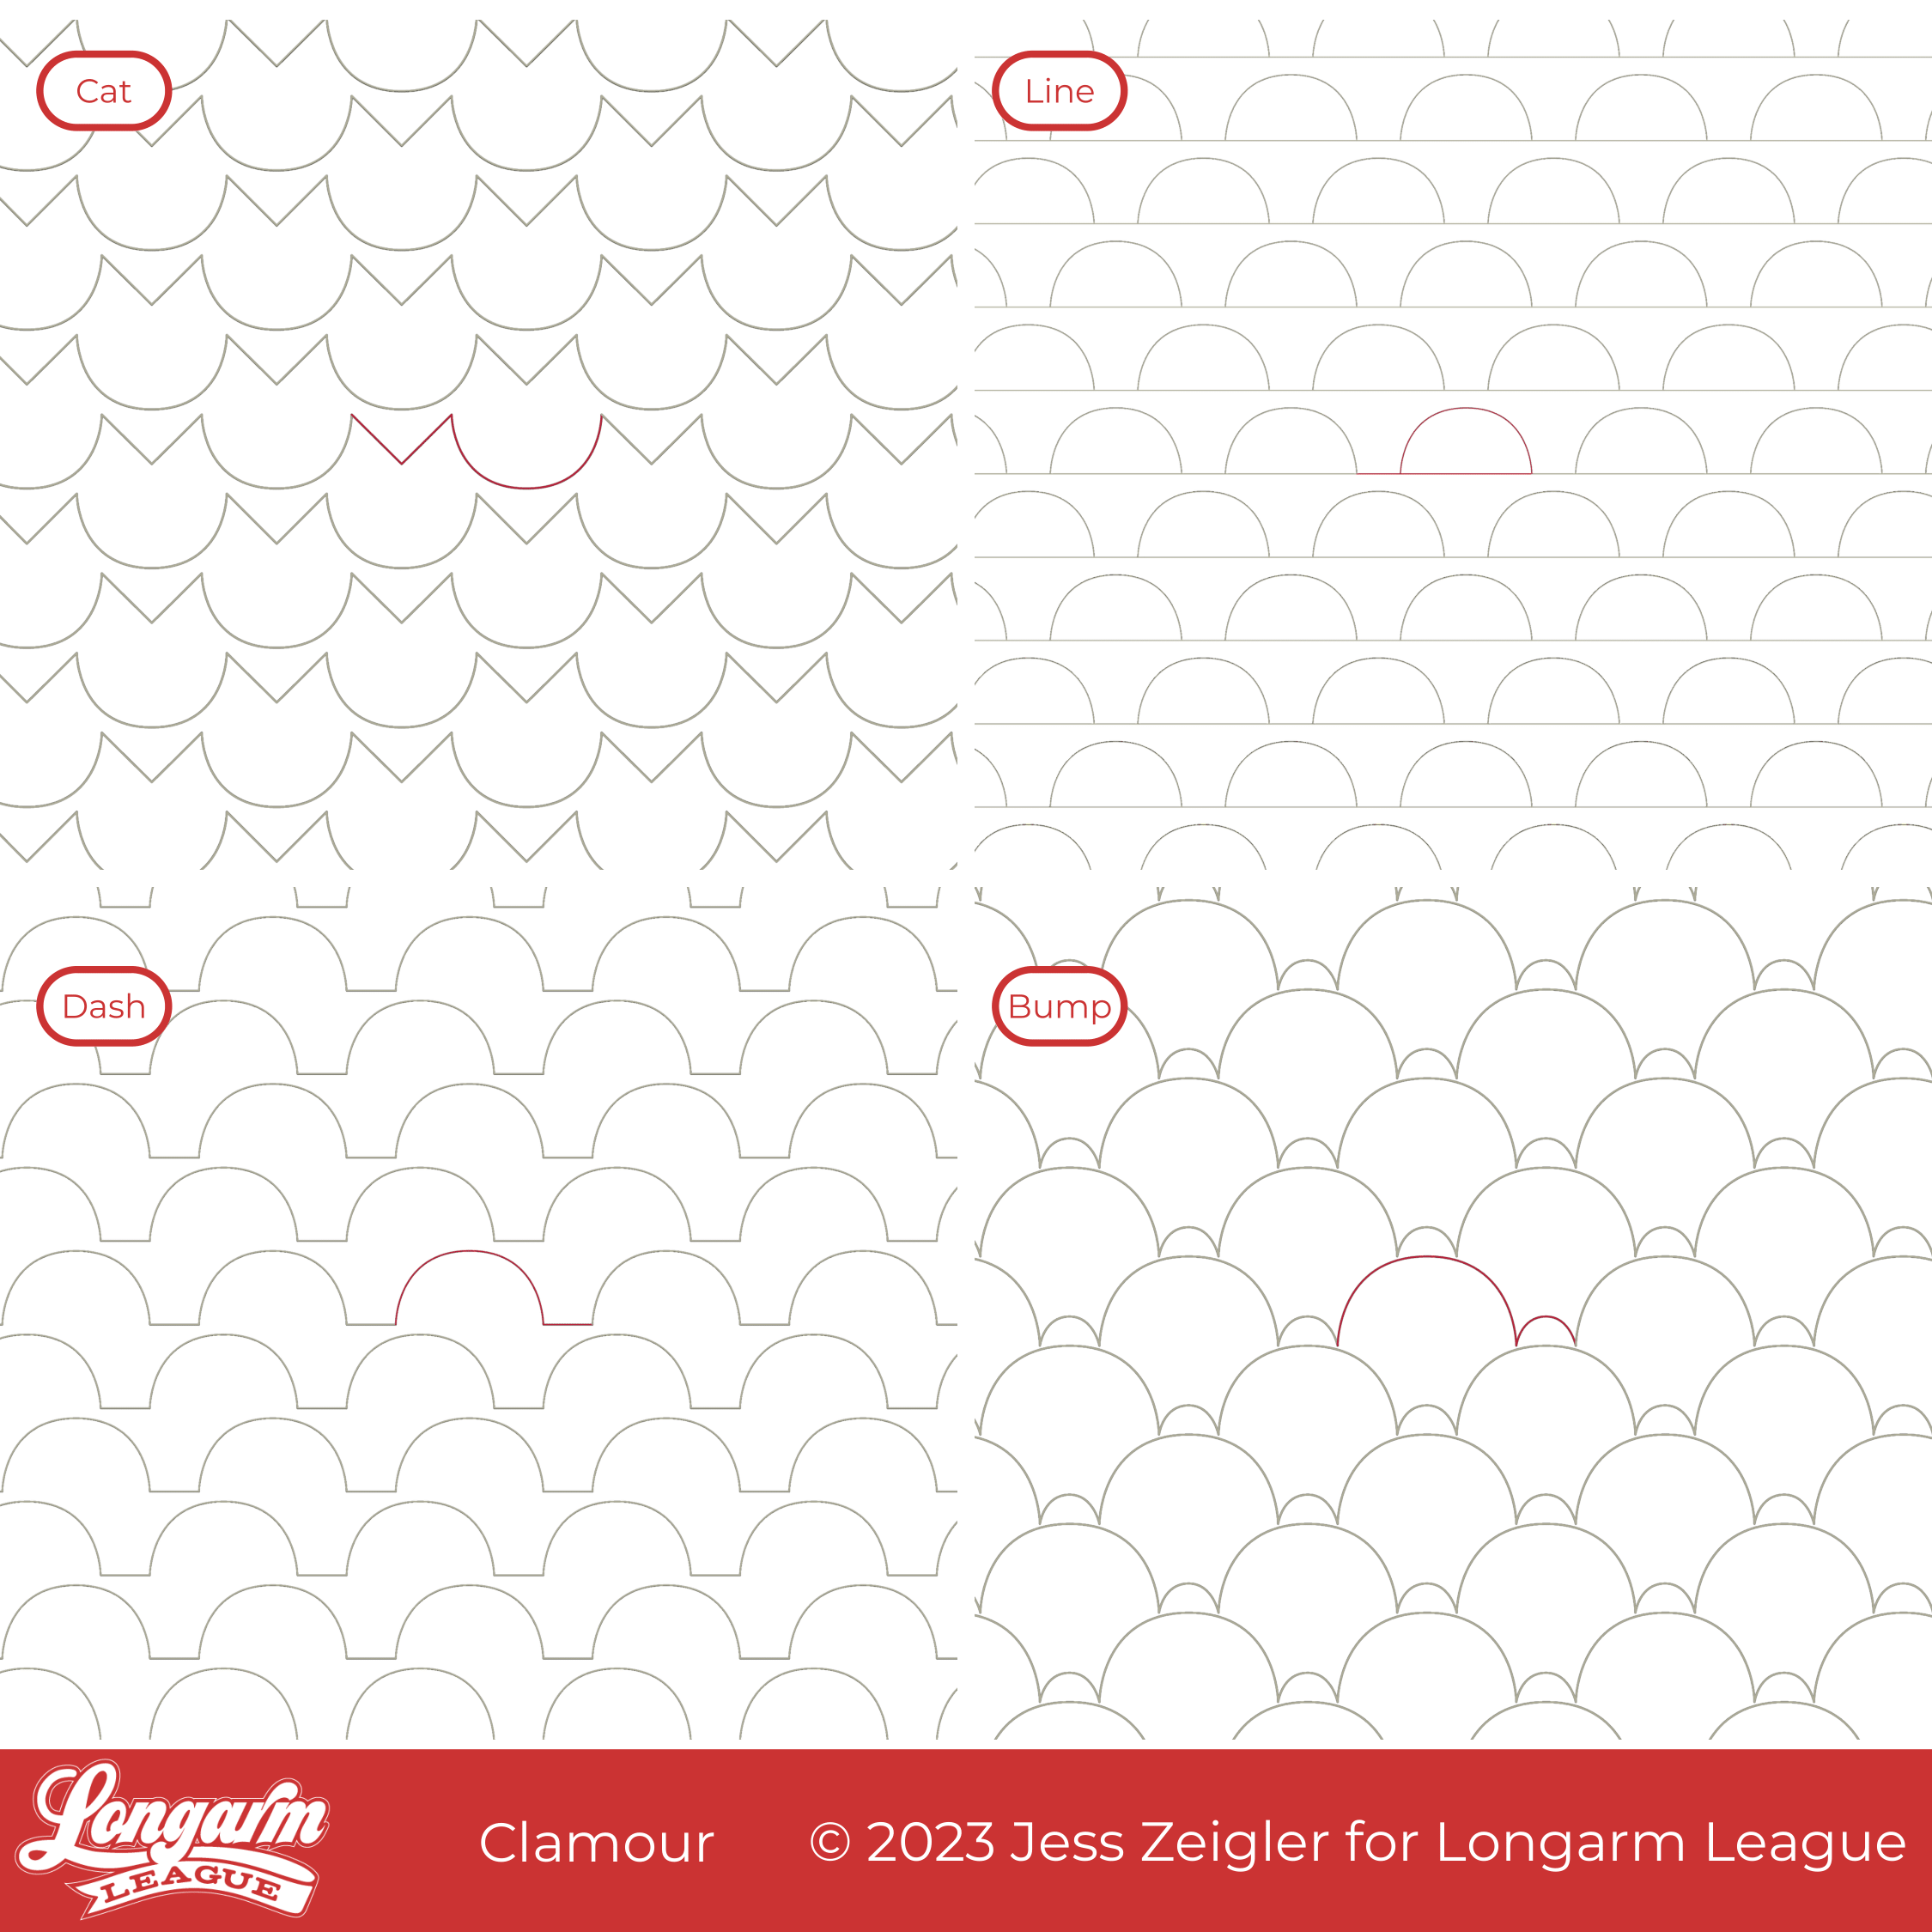
There are FOUR edge-to-edge designs included in the Clamour bundle:
Cat
Line
Dash
Bump
All of this started because the Des Moines flag inspired me. I live in the Des Moines metro area, and the flag below represents bridges in the city. I created a few simple clamshell shapes designed to have some spacing between the clamshells, one with a line traveling under the clamshells (or on top if you'd like to flip it vertically like bunting) and one with a short line between. In the bundle, these are represented by Line and Dash.
From there, I stumbled upon a variation that looked like cute cat heads in a simple and easy stitch path, so I knew I needed to include it too. We have a cat-friendly (cat-laden?) household, if you haven't met me yet. 👋

Let's talk about the Cat option now, because that's what I decided to use over the weekend on this freshly pieced quilt top.
It's so fast and simple to stitch! I intentionally left space between rows so the lines don't have to touch or meet up exactly. This makes realignment a breeze, and your eye connects the shapes anyway, which to me is a win-win.
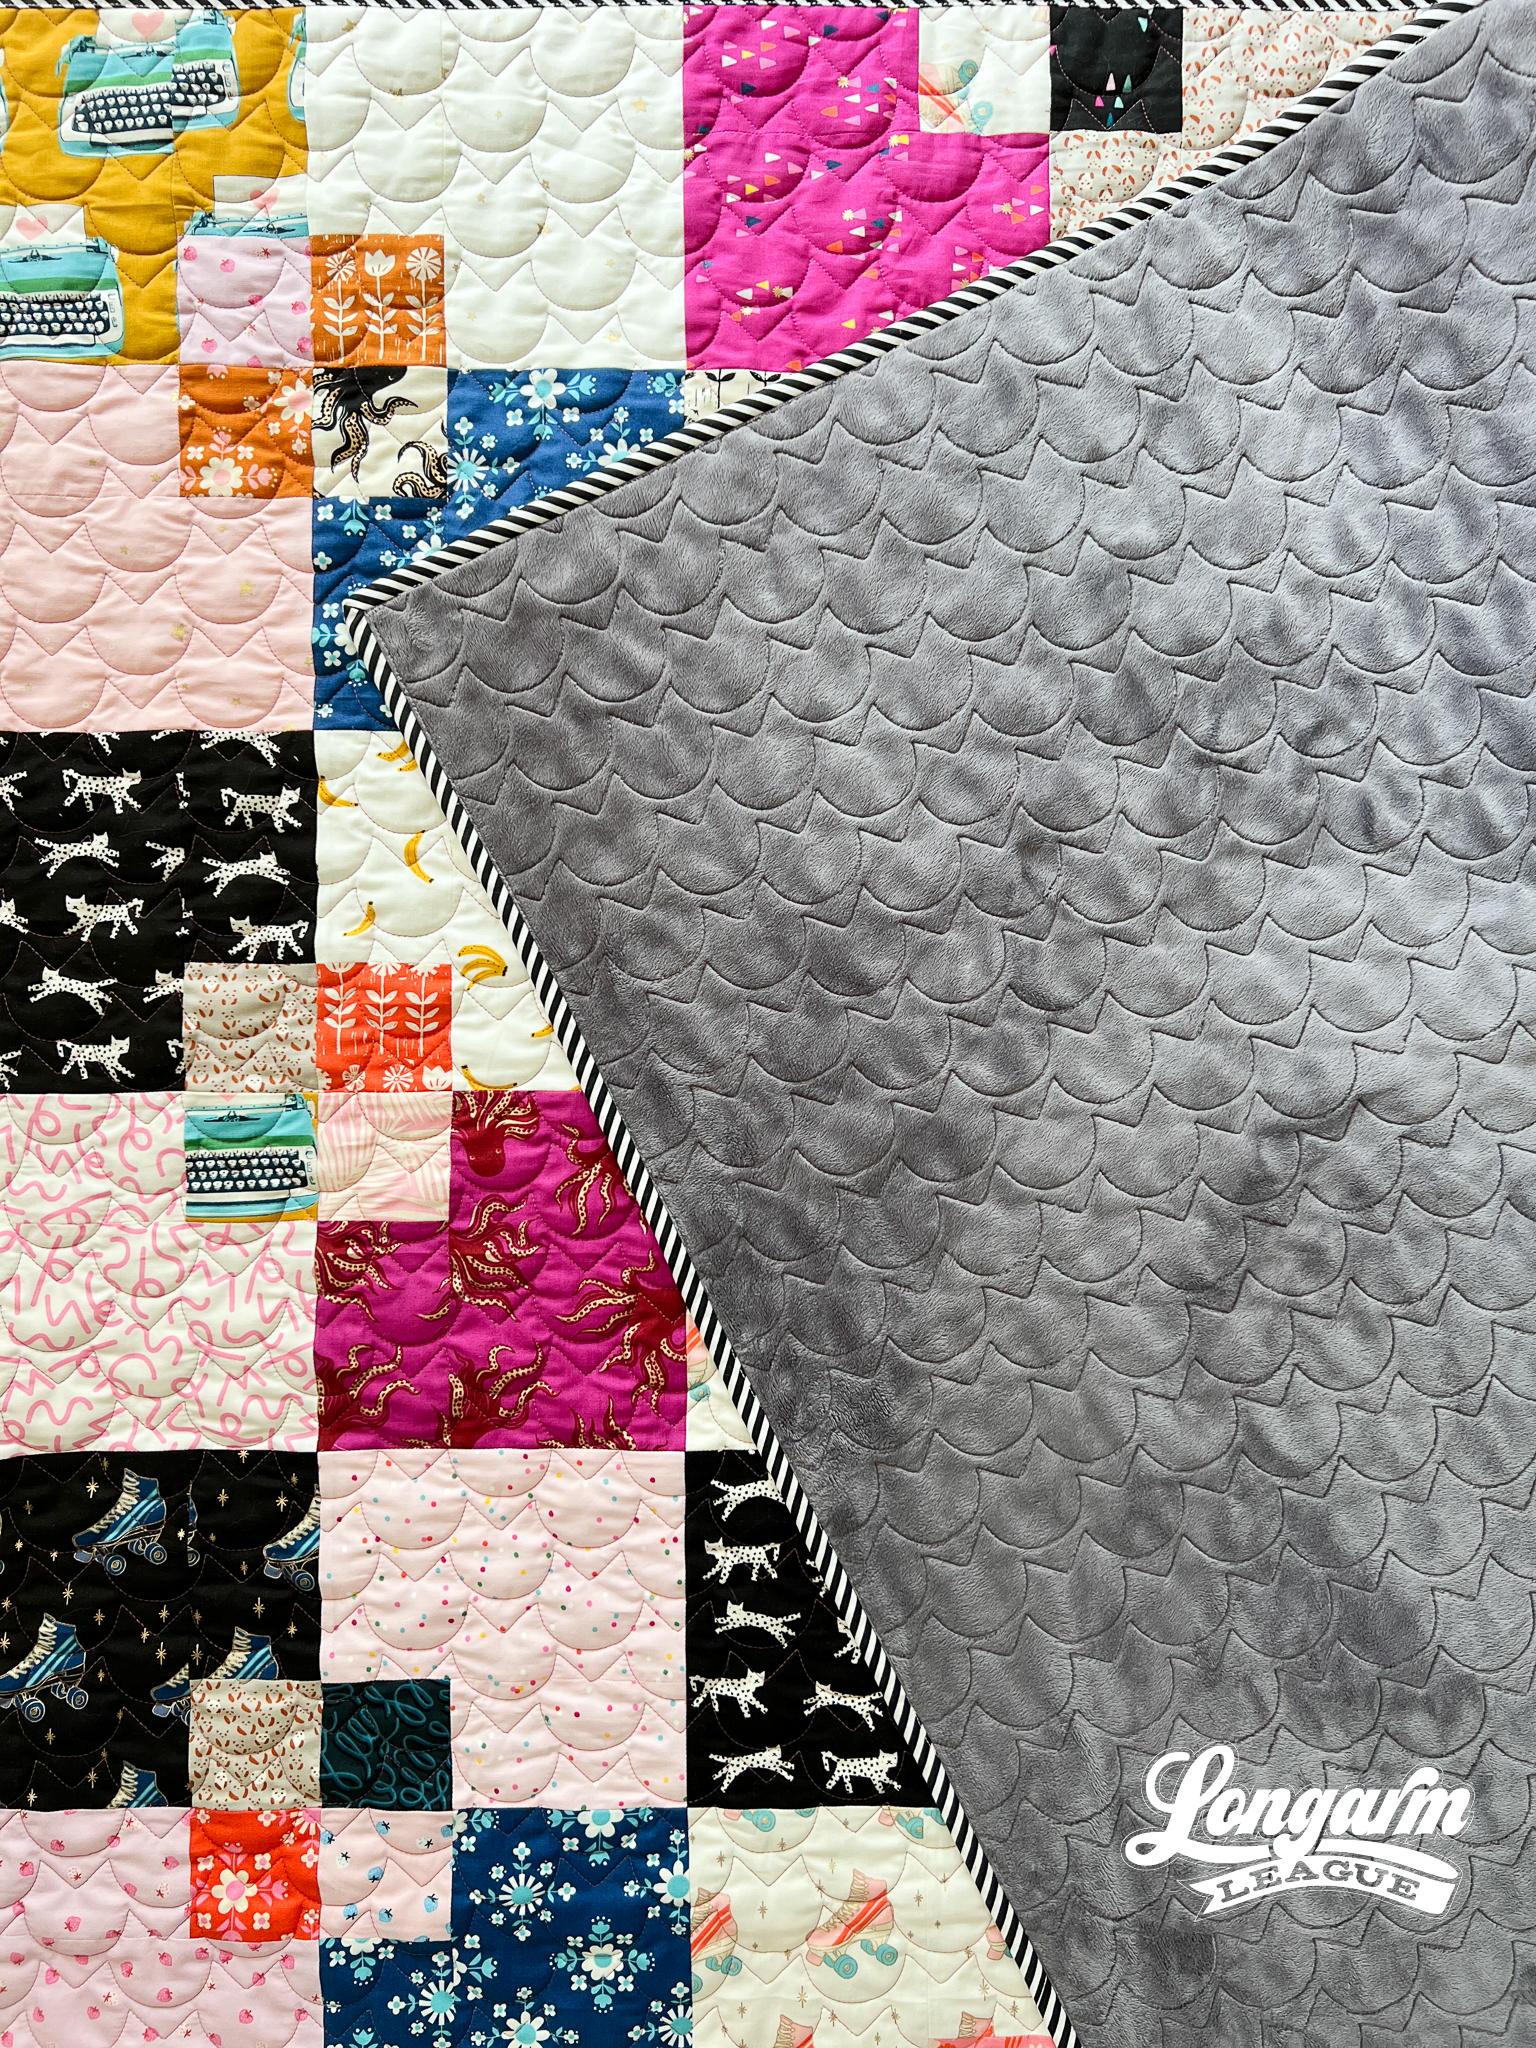
The Quilt
My friend Lilo of Trace Creek Quilting posted about her new pattern called Welcome Party last week and I bought it immediately. It looked like a fun and easy pattern that could handle some medium-scale prints I had in the Darlings 2 Fat Quarter Bundle from Ruby Star Society. AND IT WAS!
The pattern exceeded expectations in its clarity and organization. I was able to quickly cut all the fabrics I needed and then chain-piece my heart out. The older I get, the more I like to buy other people's patterns instead of figuring quilts out on my own. I made a slight modification so that my version was between a lap and throw size, which was easy to do with the cutting charts provided.
Most fabrics are Darlings 2 by Ruby Star Society, but I added a few prints from Sarah Watt's Birthday collection. There are some Reverie and Strawberries and Friends fabrics in there, too.
Minky Backing Detour
For the backing, I found two decent-sized minky trimmings left over from the backs of other quilts, one gray and one light pink. I seamed them together and used them as the back for this quilt. I had never stitched minky together before, and it was interesting.
I knew I'd likely keep this quilt, so I'll admit I wasn't too careful when I sewed the minky pieces together. I didn't make sure the grain of the fabrics was going in the same direction—in fact, I had to sew the straight-of-grain with the cross-grain of the other piece because that's the only way the backing would have been large enough. I didn't even square off any edges before sewing—partially because I was lazy and partially because I had little length to spare.
I placed the pieces right-sides together, pinned them, increased my stitch length on my sewing machine to about 3 and went for it. It didn't turn out too bad! It didn't pucker and wasn't saggy, but it wasn't very straight. I loaded the top of the backing with the selvege edge of one of the pieces, but the seam was noticeably crooked when I advanced to the seamed part. After it was all said and done—quilted, trimmed, and bound—it isn't very obvious, but as it was on the frame, it was. If this were for a client's quilt, I would have taken the time to create two straight edges before seaming them together, but I got away with hurrying through this time.
Before I started working regularly with Minky, I treated it with kid gloves and was generally afraid something was going to go wrong. Now that I've experimented with loading it differently on my canvas leaders and seaming like no one is watching, I find it pretty forgiving.
My most important advice is not to overstretch minky when it's on the longarm frame. The second most important thing is that fibers from the minky can pop up to the front, so try to use a backing color that won't contrast with the top.
The Quilting Details

I want to say again that I think the beauty of this design is the speed and NOT having to match lines up row-to-row, so please don't feel like you have to decrease the gap for the lines to touch; it'll just make it more difficult.
Here are the sizing specifications for how I set up this design using my Intelliquilter (57" x 71" quilt size):
Row height: 1"
Gap: 0"
Pattern height: 1" (measurement from top to bottom of the repeat)
Offset: 50%
Backtracking: none
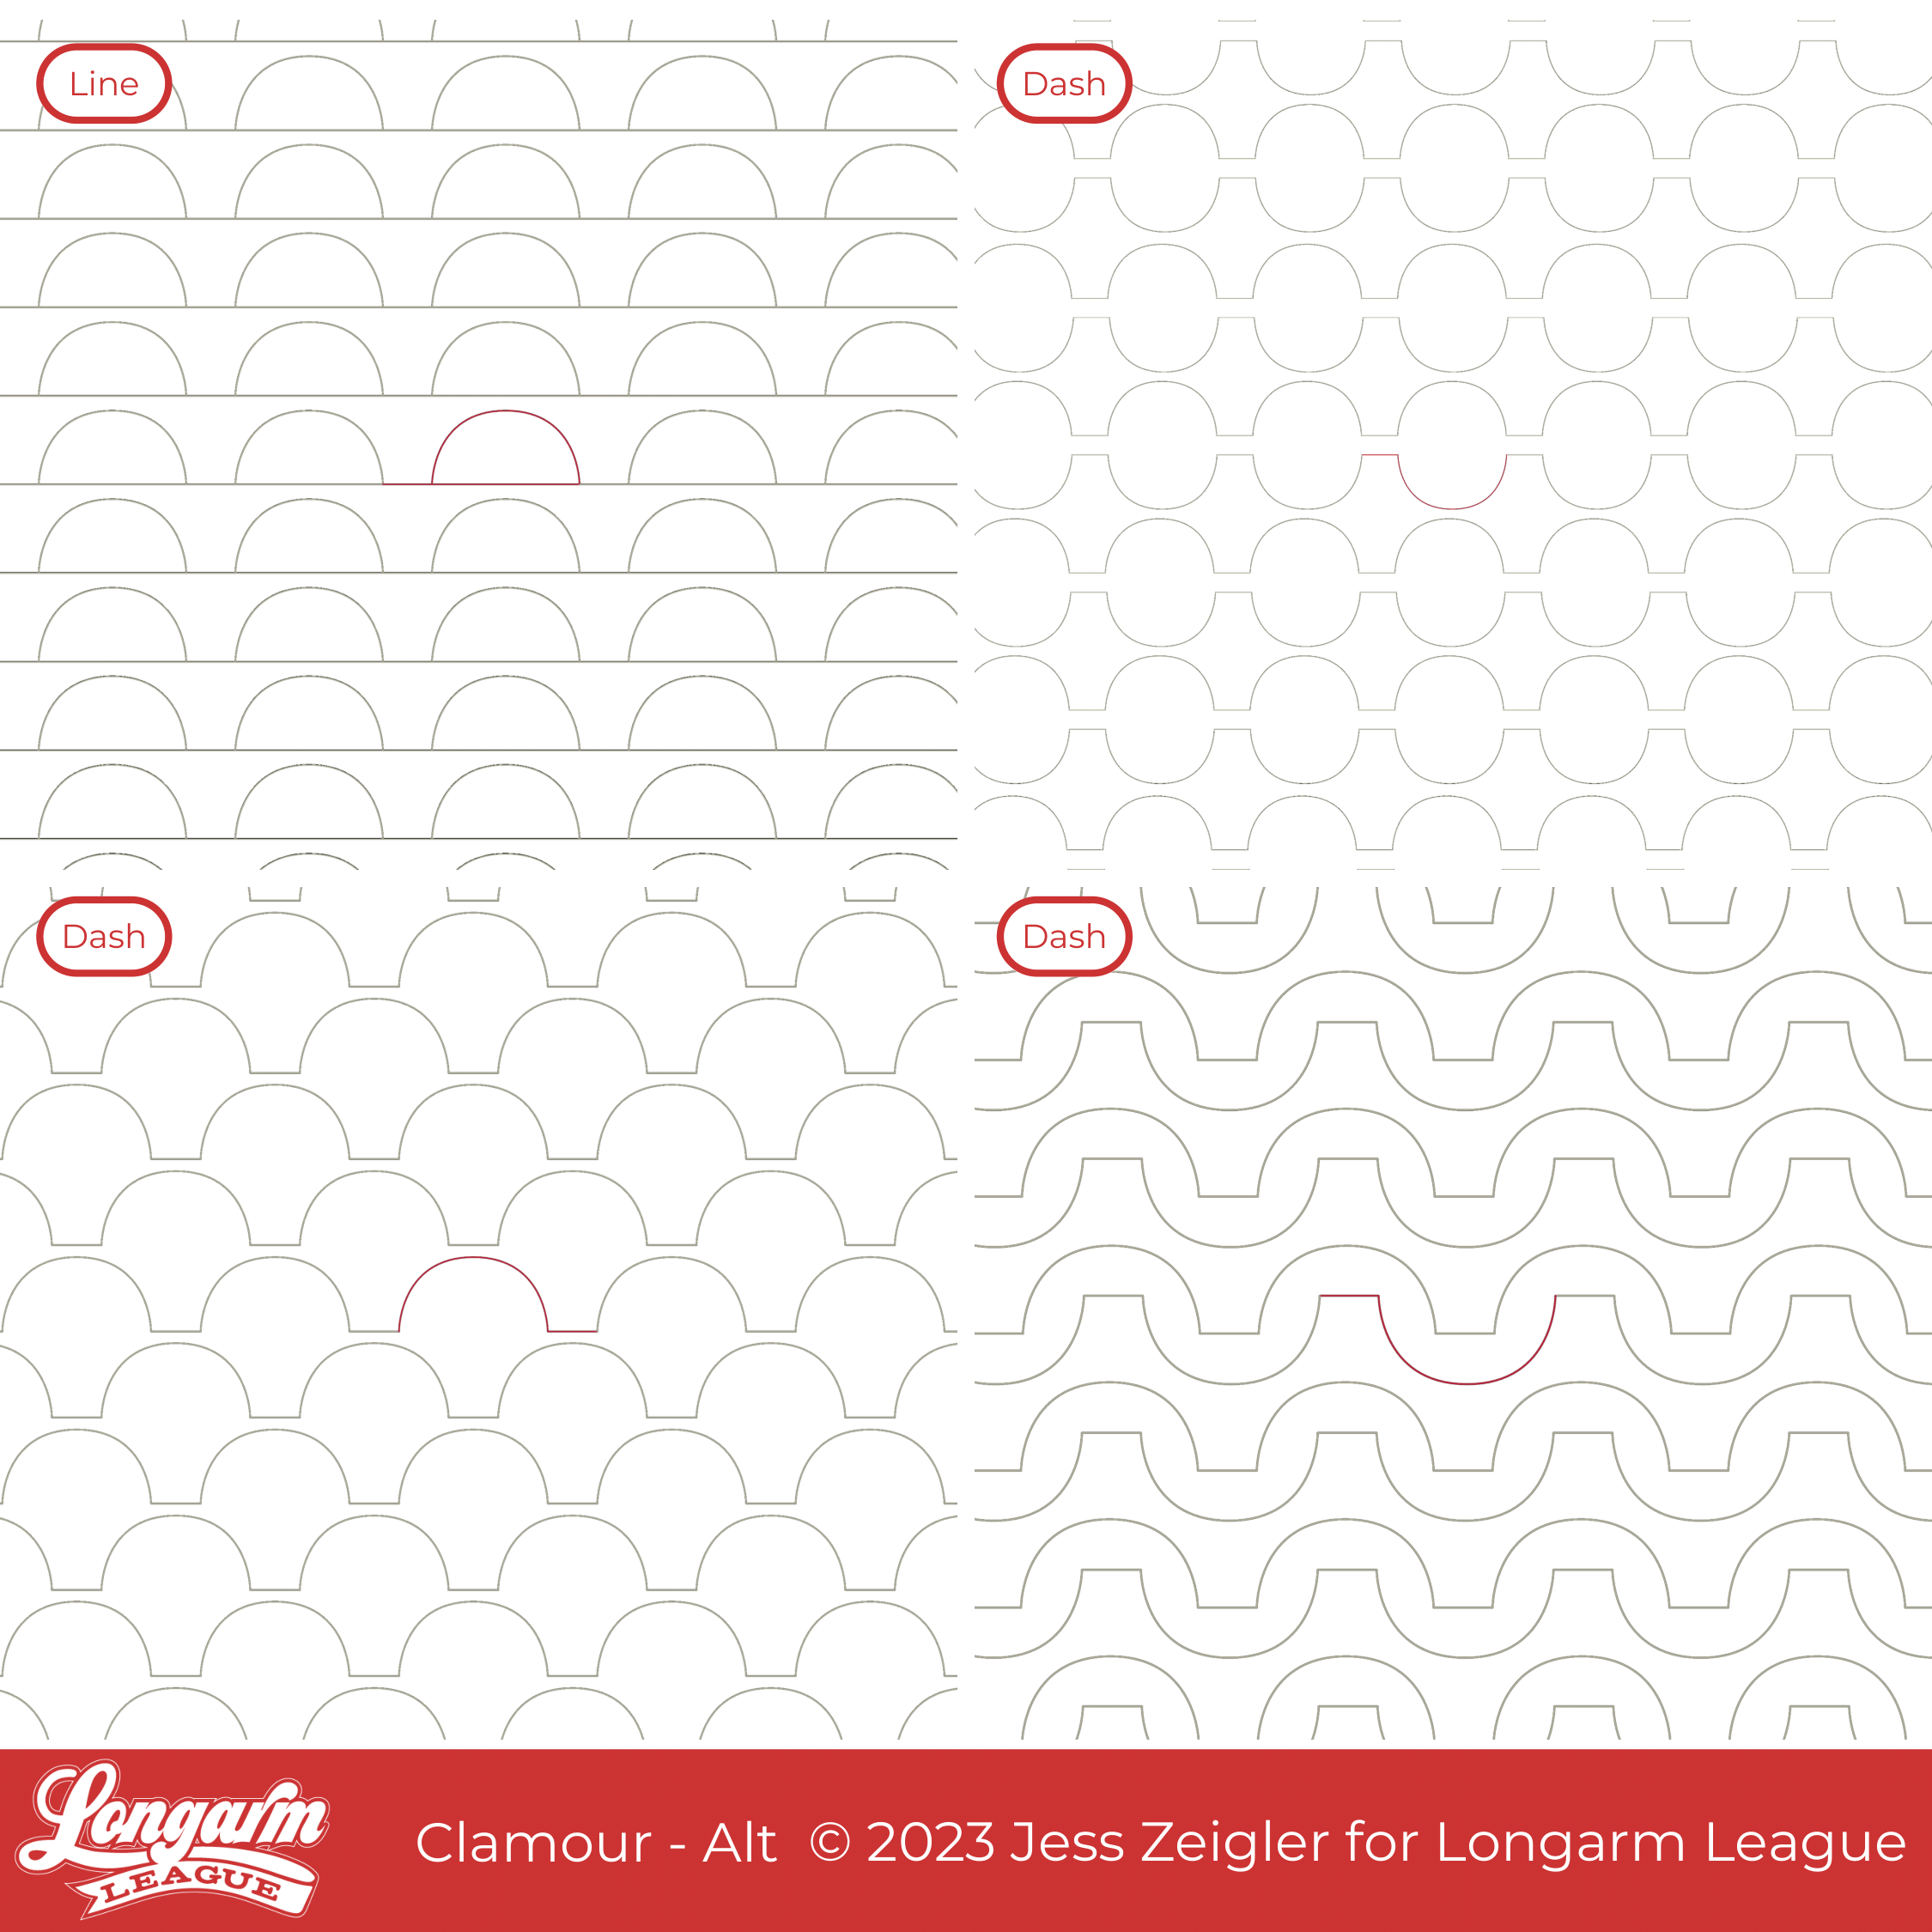
Here's a look at the included PDF. There are two pages of the PDF to show more options with the four designs you'll get in this bundle.


And now, I want to share another option in the Clamour Bundle I used for this Irish Chain quilt top I made with scrap fabrics earlier this year.

This is the Dash option from the bundle.
I don't know if it's a me-thing, but when considering quilting designs on a quilt made up of entirely 2" finished squares, I DO NOT want the quilting to be as regular as the piecing. Do you know what I mean? I want the quilting to contrast enough that it's not going to look weird or out of place if the very regularly spaced quilting gets off-kilter at some point throughout the quilting process.
That's why I wanted to offset the Dash design at 25%. It gives it a more randomized, almost cloud-like texture. 
With Dash—as with the Cat option—I intentionally created space between the rows so that the rows would not touch.
If you refer to the PDF previews shown above, I found a lot of great options for the Dash design. You could use a more "regular" looking offset at 50%. Allowing space between the rows would be an easy version of a clamshell so you don't have to worry about any points meeting up.
If your software has the functionality, there were some fun effects I was able to create by flipping every other row vertically with the Dash pattern. You could create a look of circles or beads or offset inverted rows by 50% and close the gap to get a ridge shape.

There's just something special about simple repeated shapes that makes the quilting texture so inviting!
The Double Irish Chain Quilt
Remember earlier in this blog post when I said I prefer buying other people's patterns these days?
I thought it'd be a great use of 2.5" scrap squares to have the "open" area of a Double Irish Chain quilt be made up of all of the scrap squares. I mocked it up in EQ8 and got to work while I was at retreat. Because of my pretty tote full of all nicely cut 2.5" squares, my brain automatically assumed that all the white and black fabric yardage that I bought for this project (not scraps) should also be sub-cut in 2.5" squares. As I started to piece my first few blocks together, I realized how efficiently I could have pieced the black and white portions had I sewed strip sets! Oh well. A pattern would have likely saved me some time, but it all worked out in the end.
And lastly, Bump is just a quirky variation of a traditional clamshell. With that one, I think it would look best at a 50% offset and with the rows closely nested, if not touching—which would increase the difficulty of the design when using it.

If you use any design from the Clamour bundle on a quilt, we'd love for you to use the hashtag #clamourpanto and tag @longarmleague on Instagram so we can see how you use it! You can also visit our full digital design shop to view our previous designs.
Interested in getting new digital pantograph designs like this one on the day they're released (and at a deep discount)? Sign up for our Digital Panto Club and get them delivered straight to your inbox on the first Wednesday of each new month.

Jess Zeigler
Longarm League Commish & Owner of Threaded Quilting Studio, LLC.


