
Explore Edge-to-Edge Quilting Design
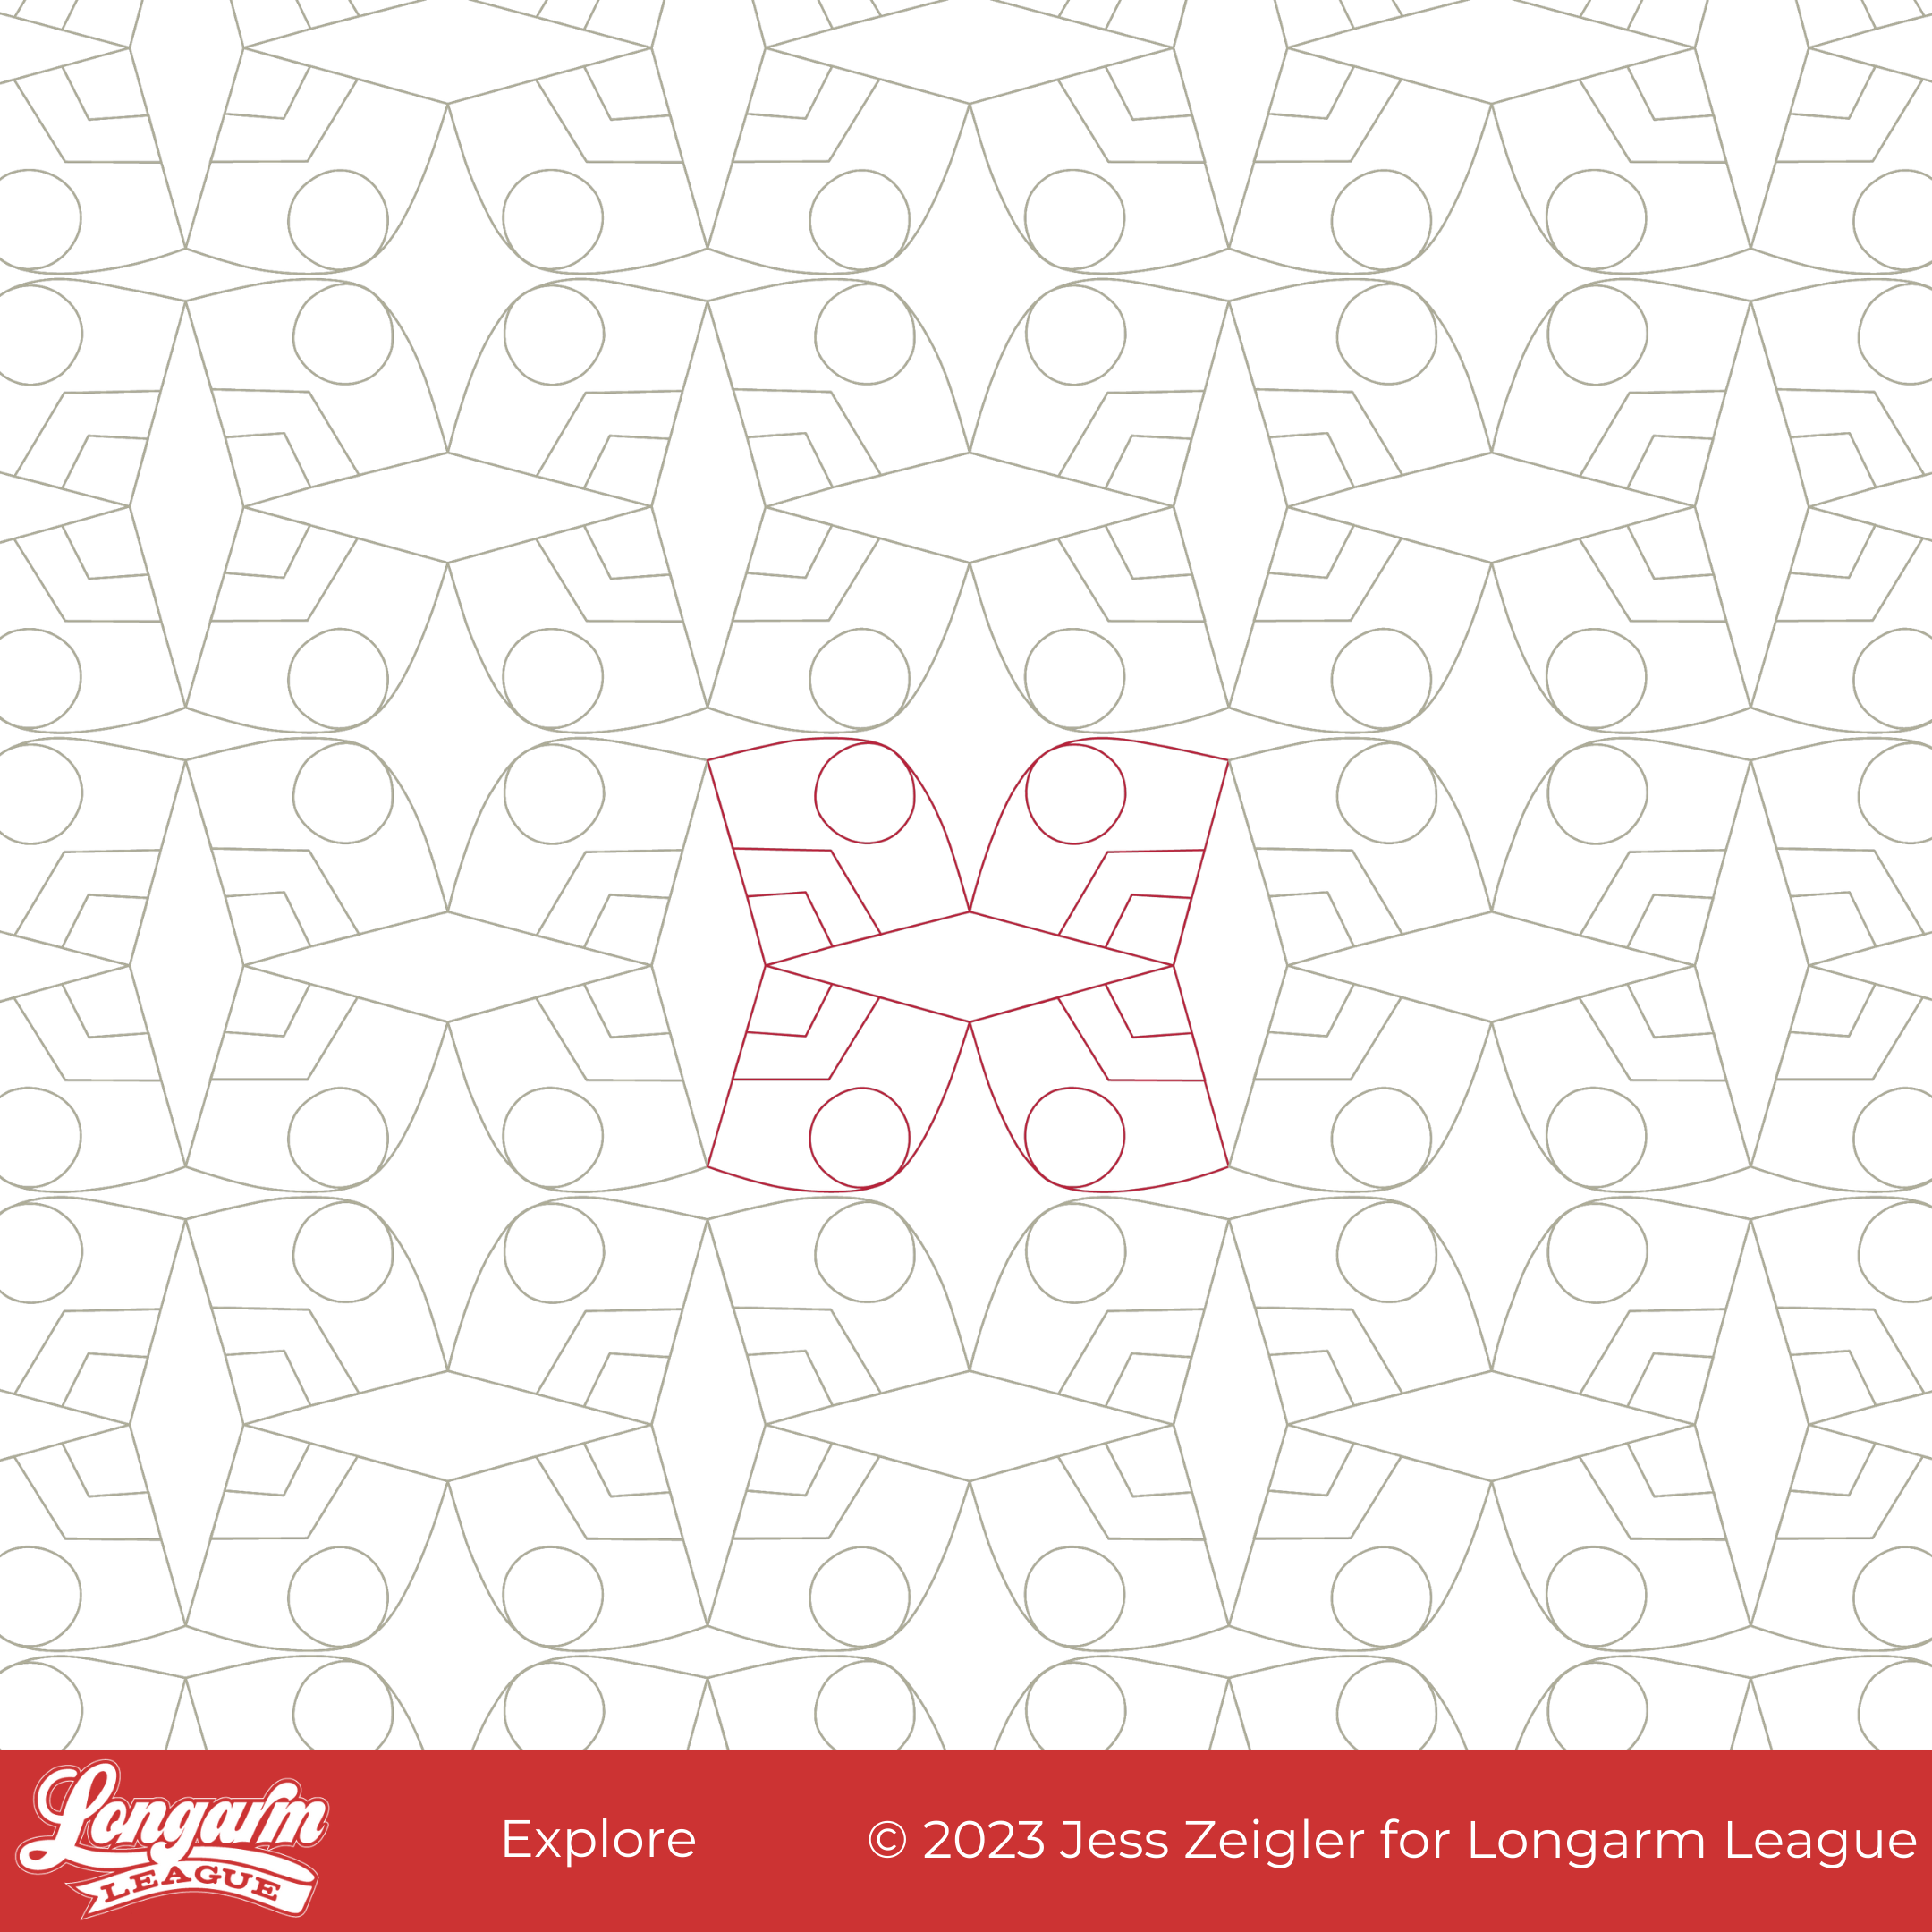
What started as a baseball diamond shape morphed into something that looked reminiscent of a graphic for America's National Parks. From there, I repeated the shapes at odd angles so that some secondary and tertiary diamonds emerged, but the "explore" feeling from an imagined poster never left.
What I like about this design is the graphic boldness of straight lines, angles, curves, and circles all playing together.
I found it funny that because I used such low volume AND extremely low contrast fabrics in this quilt, the quilting design pretty much swallowed up the whole quilt pattern! I was shocked by how little I could see the quilt pattern after quilting. Oops!


The Quilt
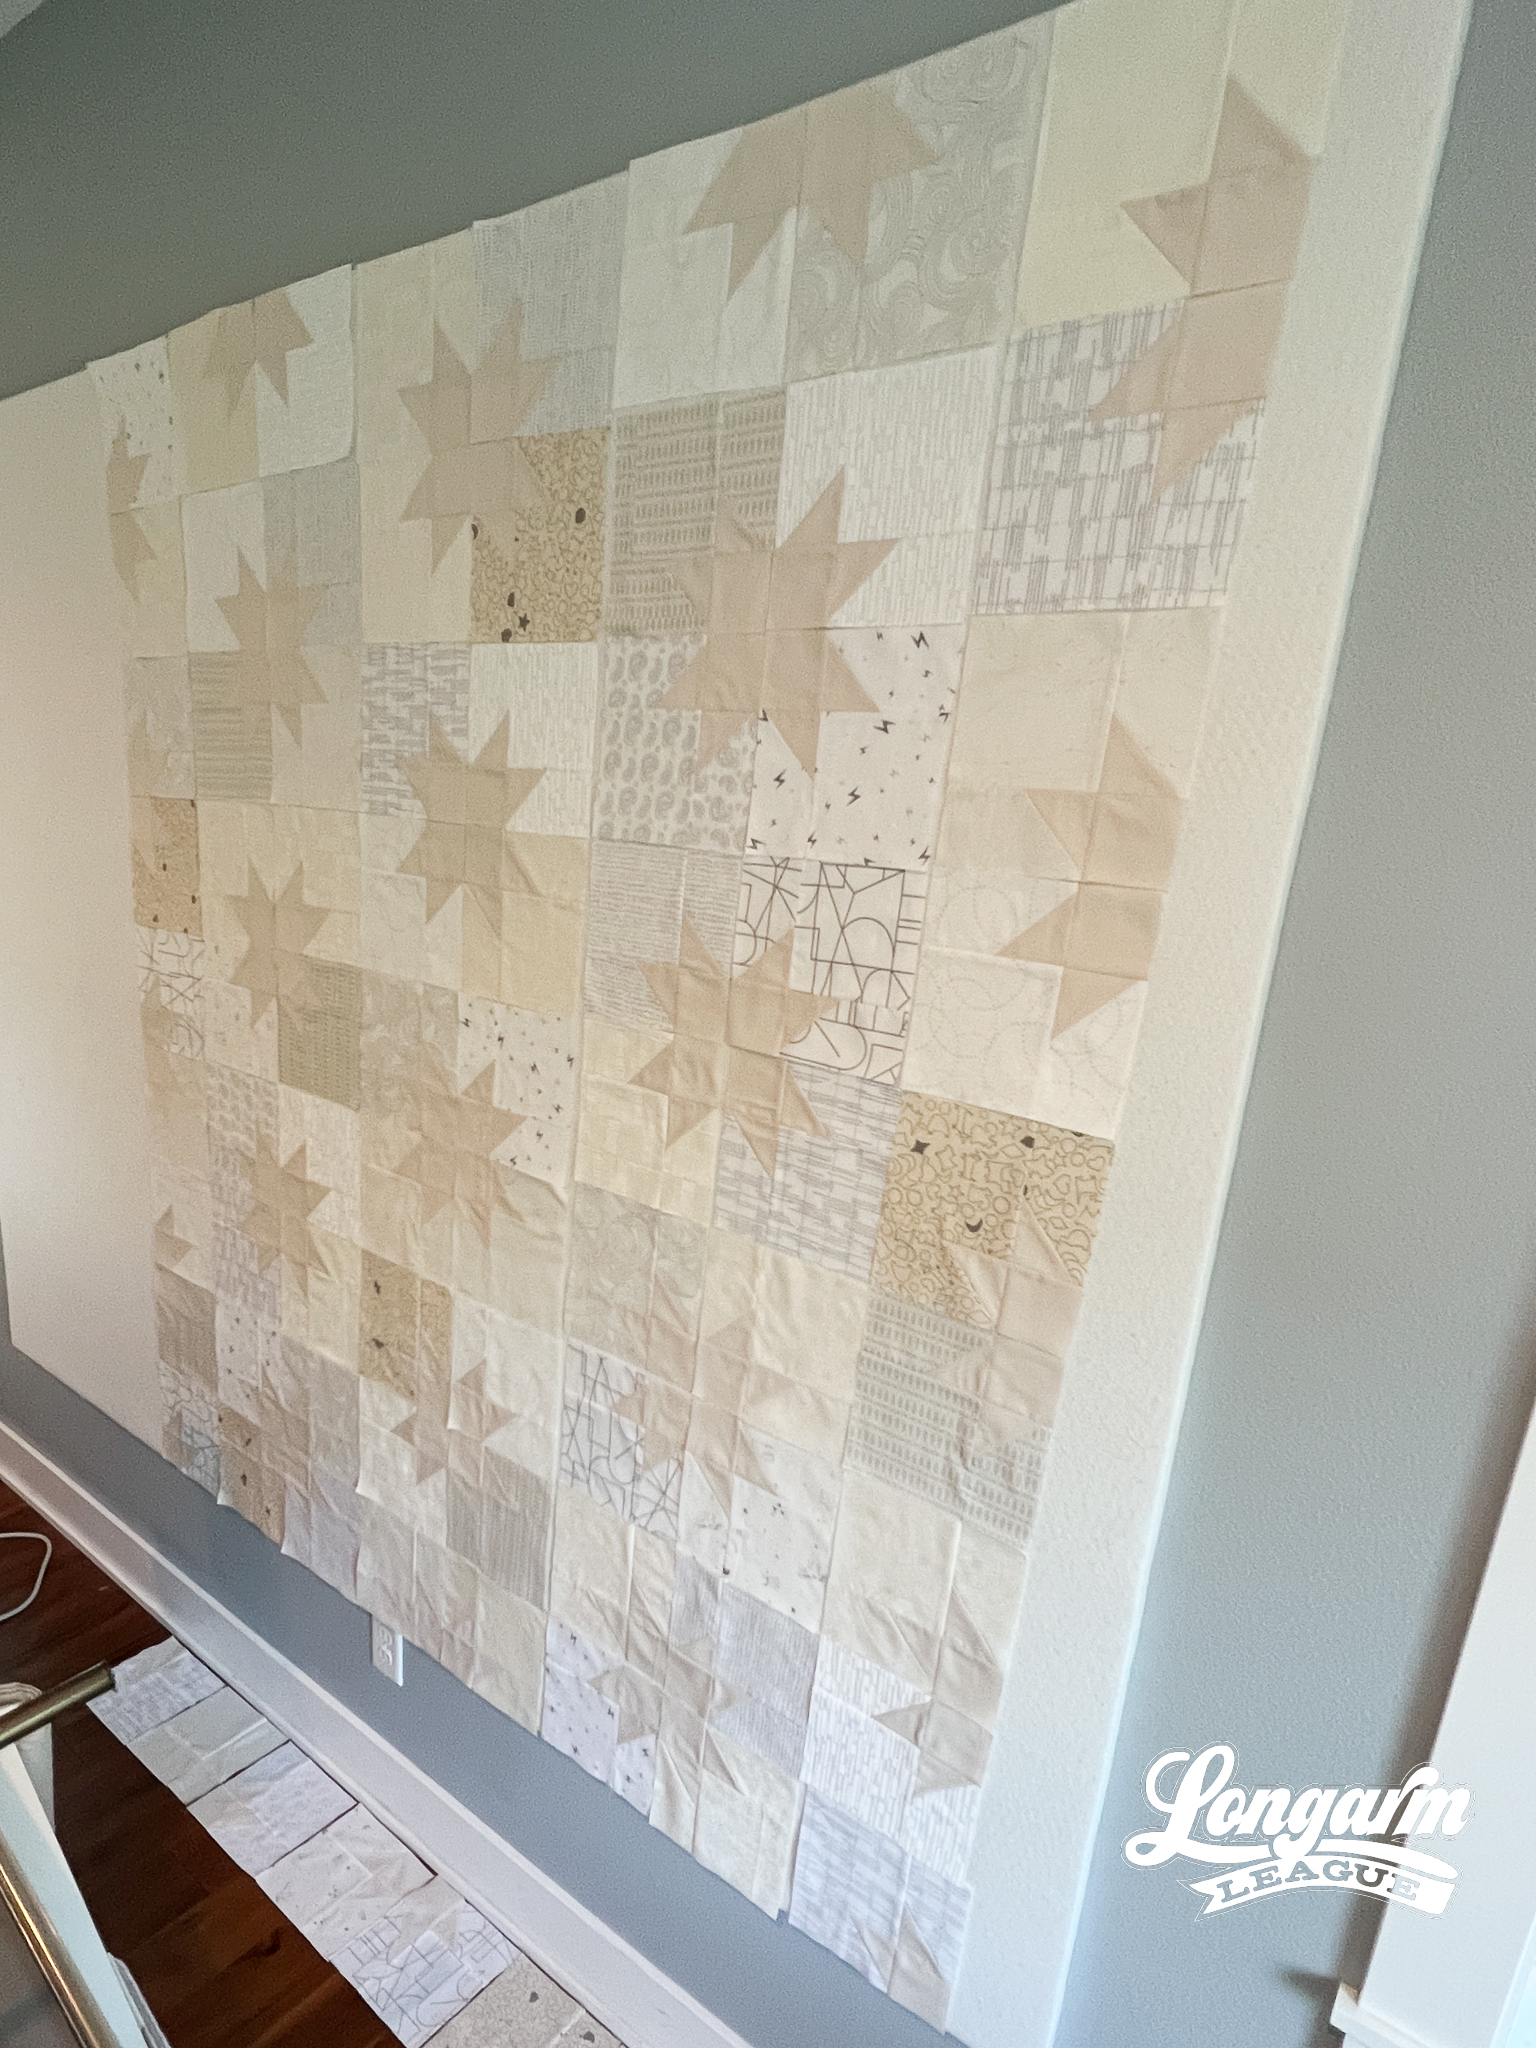
Believe it or not, this quilt is the Star Pop II quilt by Emily Dennis of Quilty Love. Here it is on my design wall before quilting as proof there were stars involved. Ha!
And then, after quilting: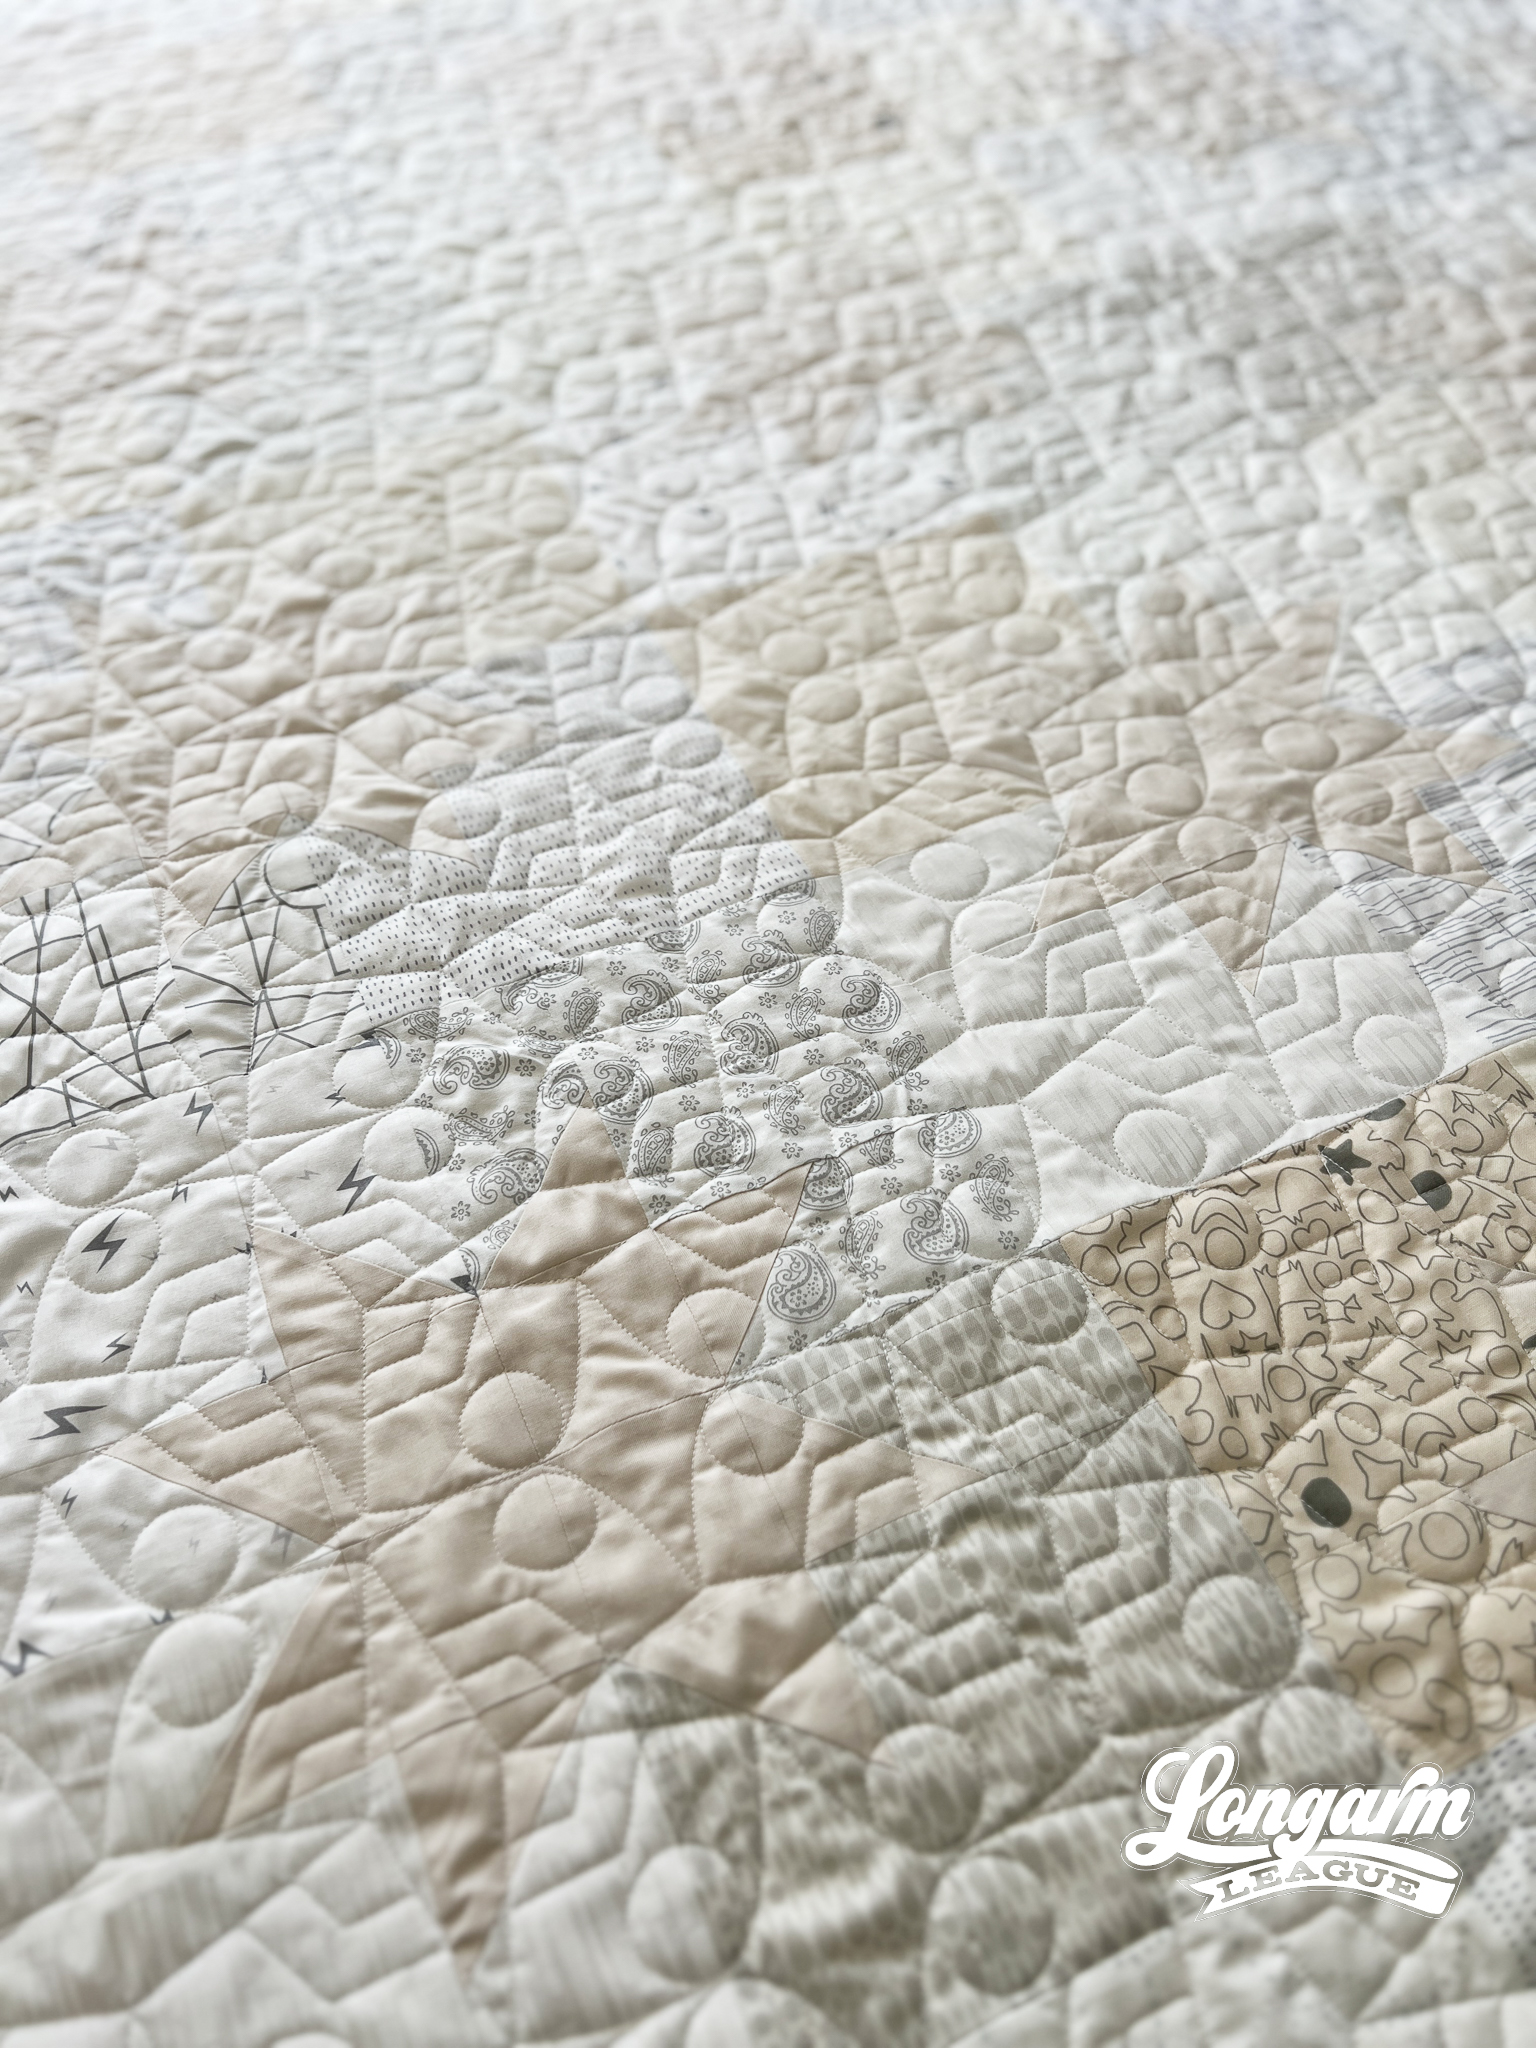
To be sure, I knew that the patchwork would be subtle. It was intentional. This was a wedding quilt for a cousin of mine who got married last month. I visited the couple's online registry and saw mainly white and neutral colors. So, I went shopping at my friend Kristen's shop and bought all low-volume prints for this project. I used one light beige solid for the star fabric.
I backed it with a white minky fabric, which is always a good bet for showcasing the quilting stitches. 
The Quilting Particulars
I didn't use any space or gaps between the rows, but you could add a small gap between rows to make the alignment easier. It'll decrease the chances of the rows inadvertently overlapping, and I don't think the rows need to touch to carry out the secondary designs. 
Otherwise, it was smooth sailing. There is some minor backtracking that occurs, but nothing too difficult.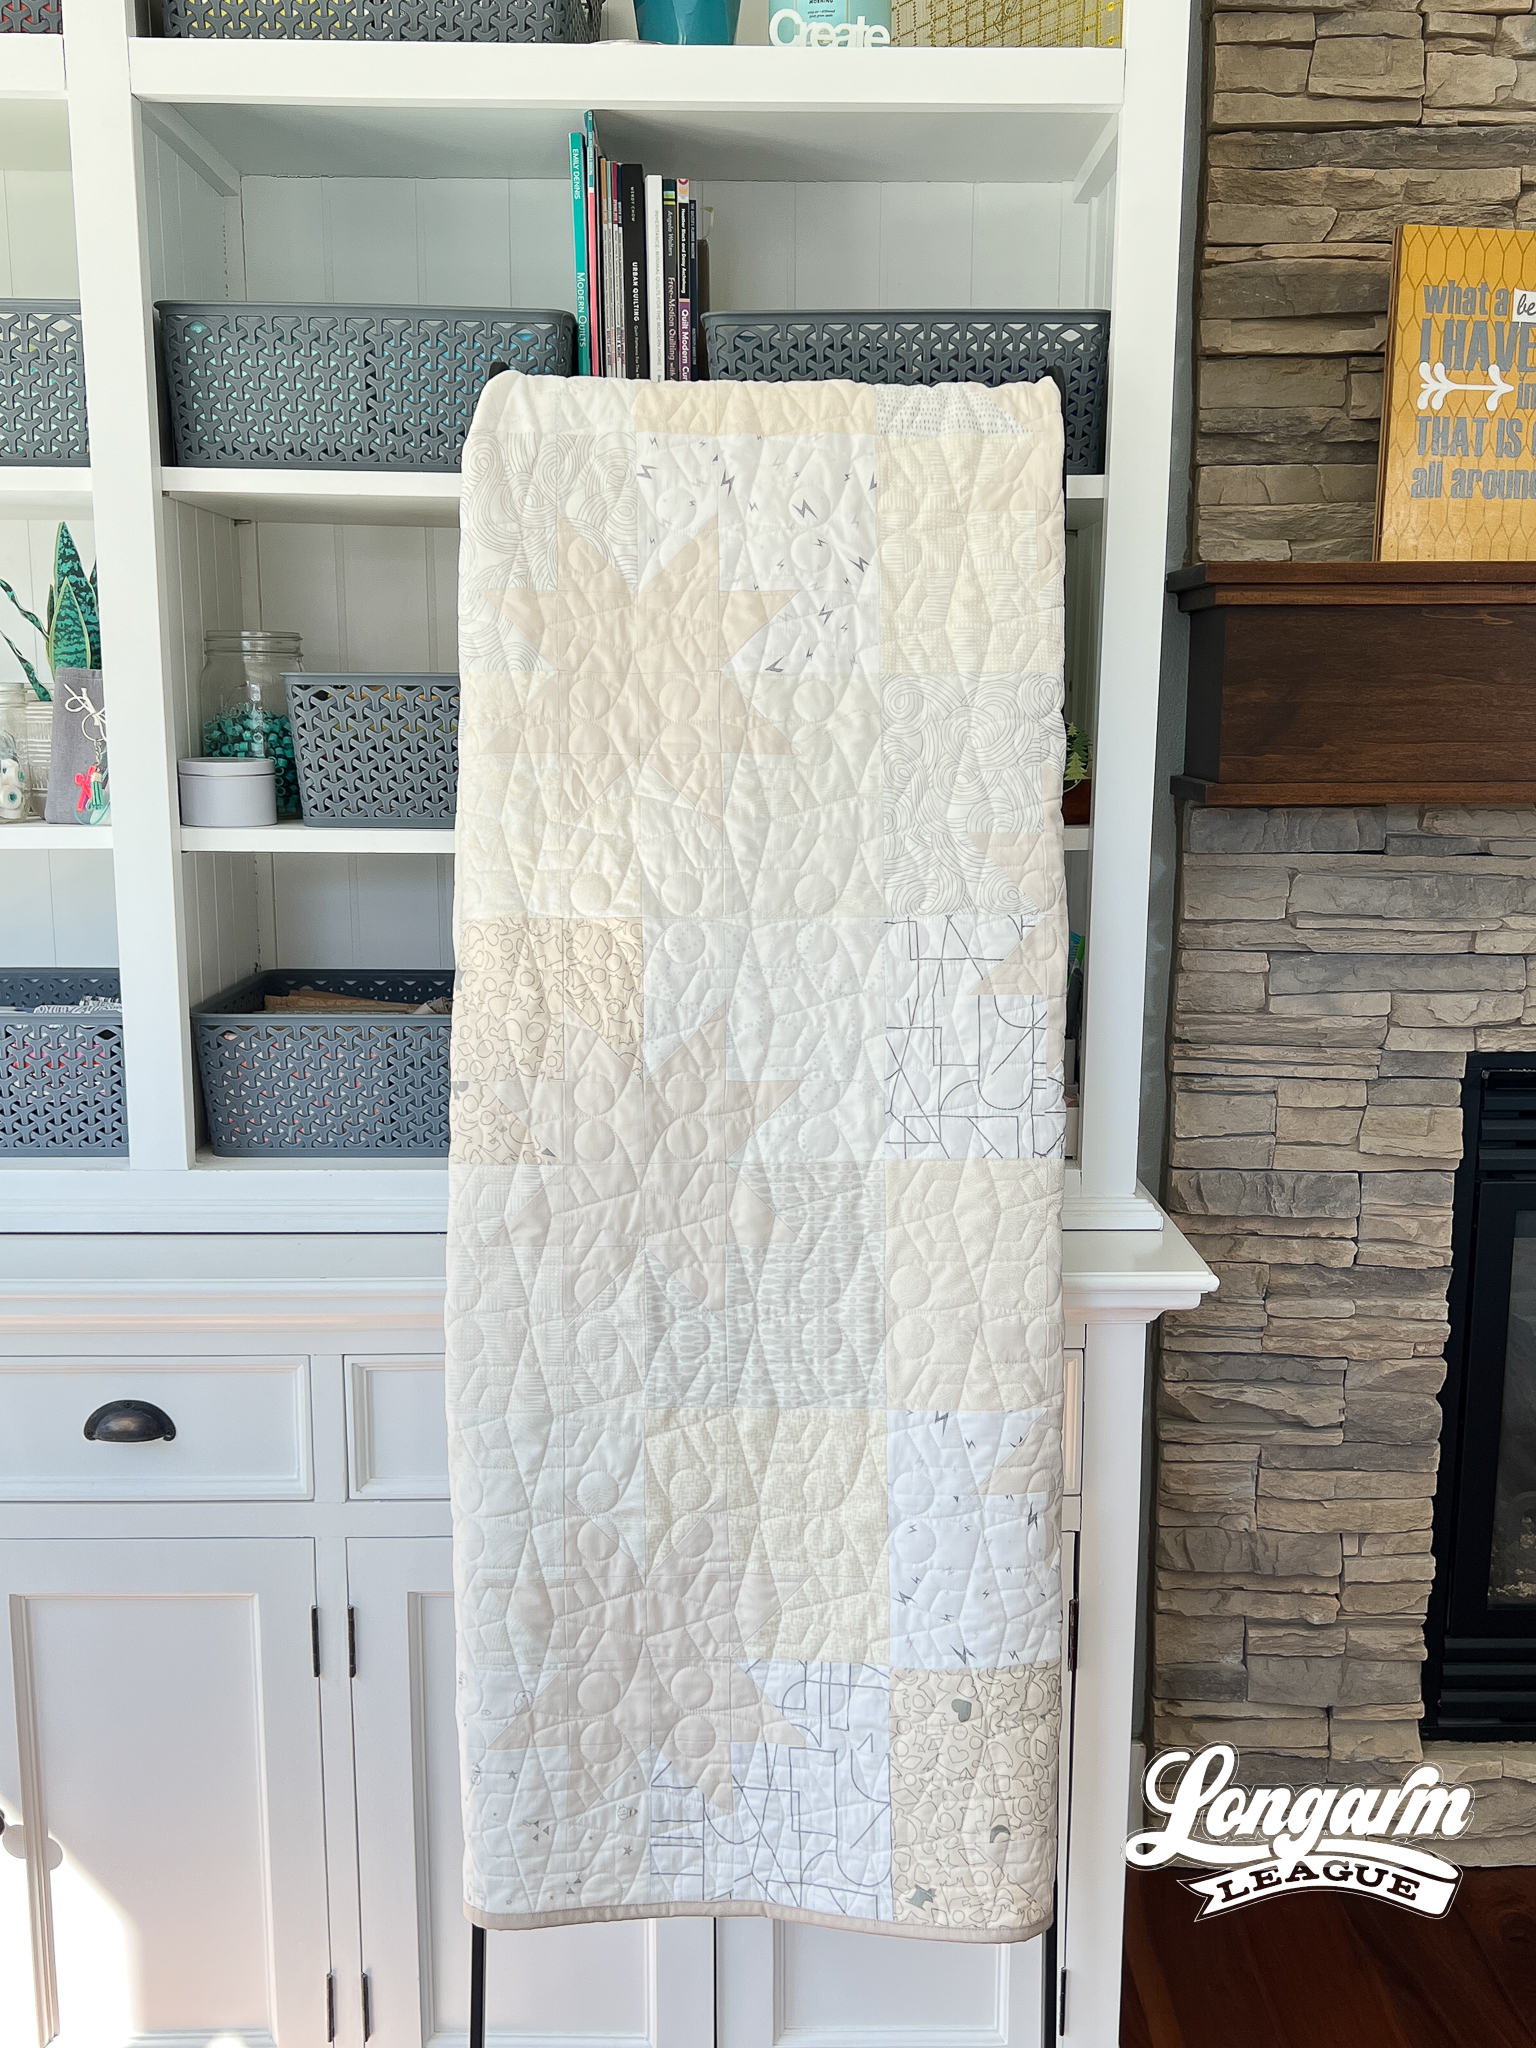
There's a video of the stitch path at the top of this blog post to see the stitch path to see how it works.
Here are the sizing specifications for how I set up this design using my Intelliquilter (60" x 75" quilt size):
Row height: 6"
Gap: 0"
Pattern height: 6" (measurement from top to bottom of the repeat)
Offset: none
Backtracking: some
Here's a look at the included PDF: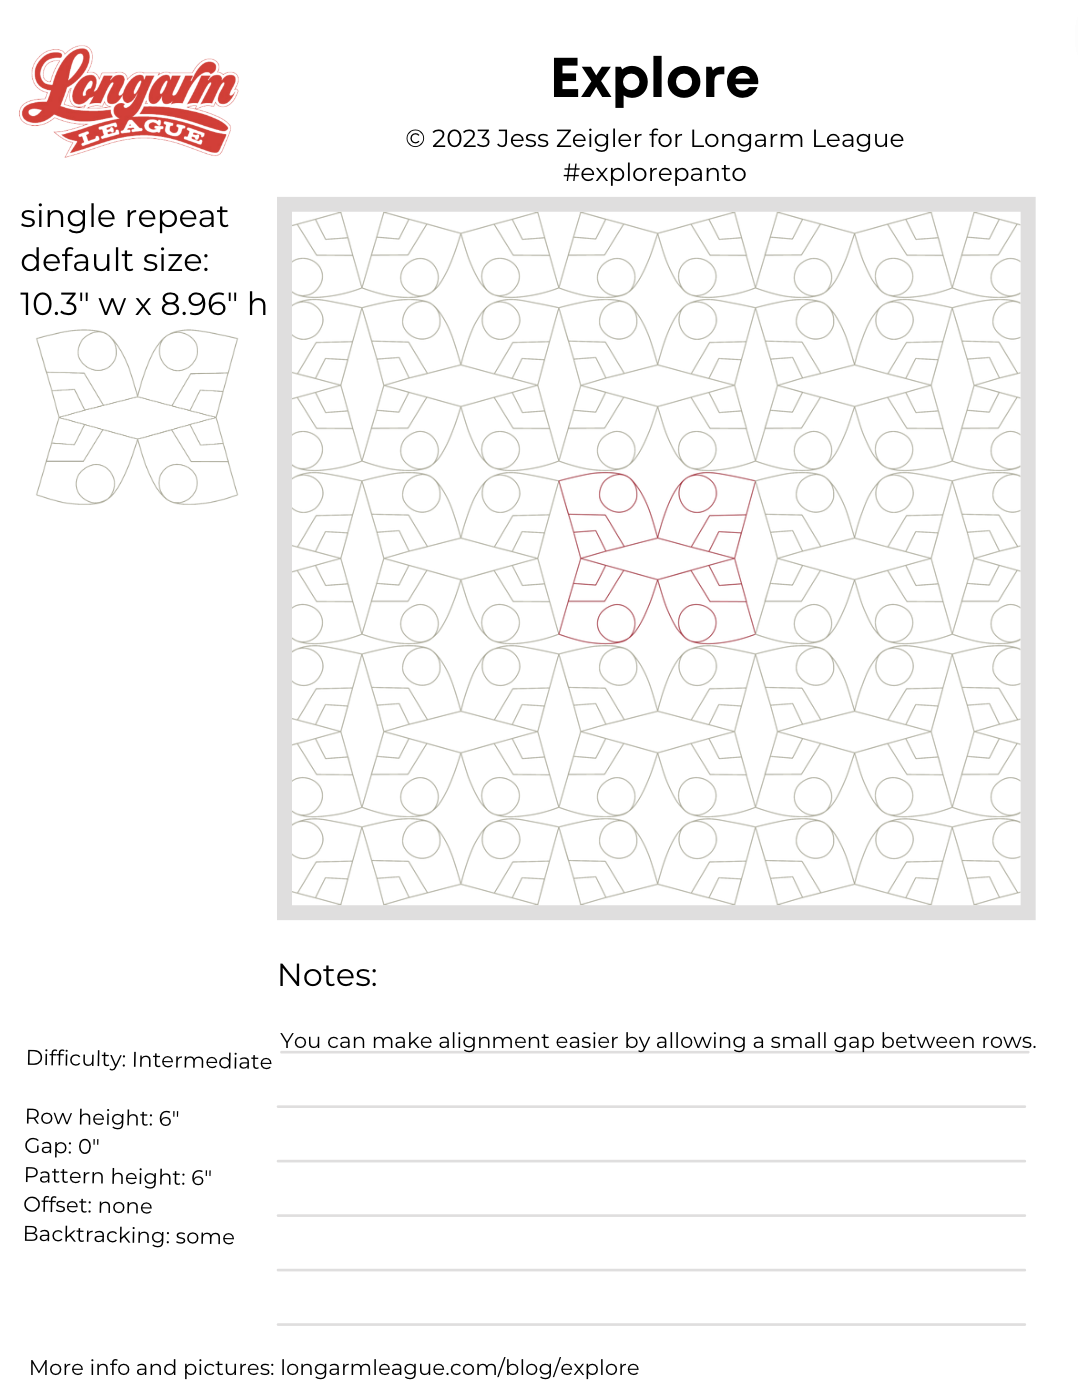
If you use Explore on a quilt, we'd love for you to use the hashtag #explorepanto and tag @longarmleague on Instagram so we can see how you use it! You can also visit our full digital design shop to take a look at all our previous designs.
Interested in getting new digital pantograph designs like this one on the day they're released (and at a deep discount)? Sign up for our Digital Panto Club and get them delivered straight to your inbox on the first Wednesday of each new month.

Jess Zeigler
Longarm League Commish & Owner of Threaded Quilting Studio, LLC.


