
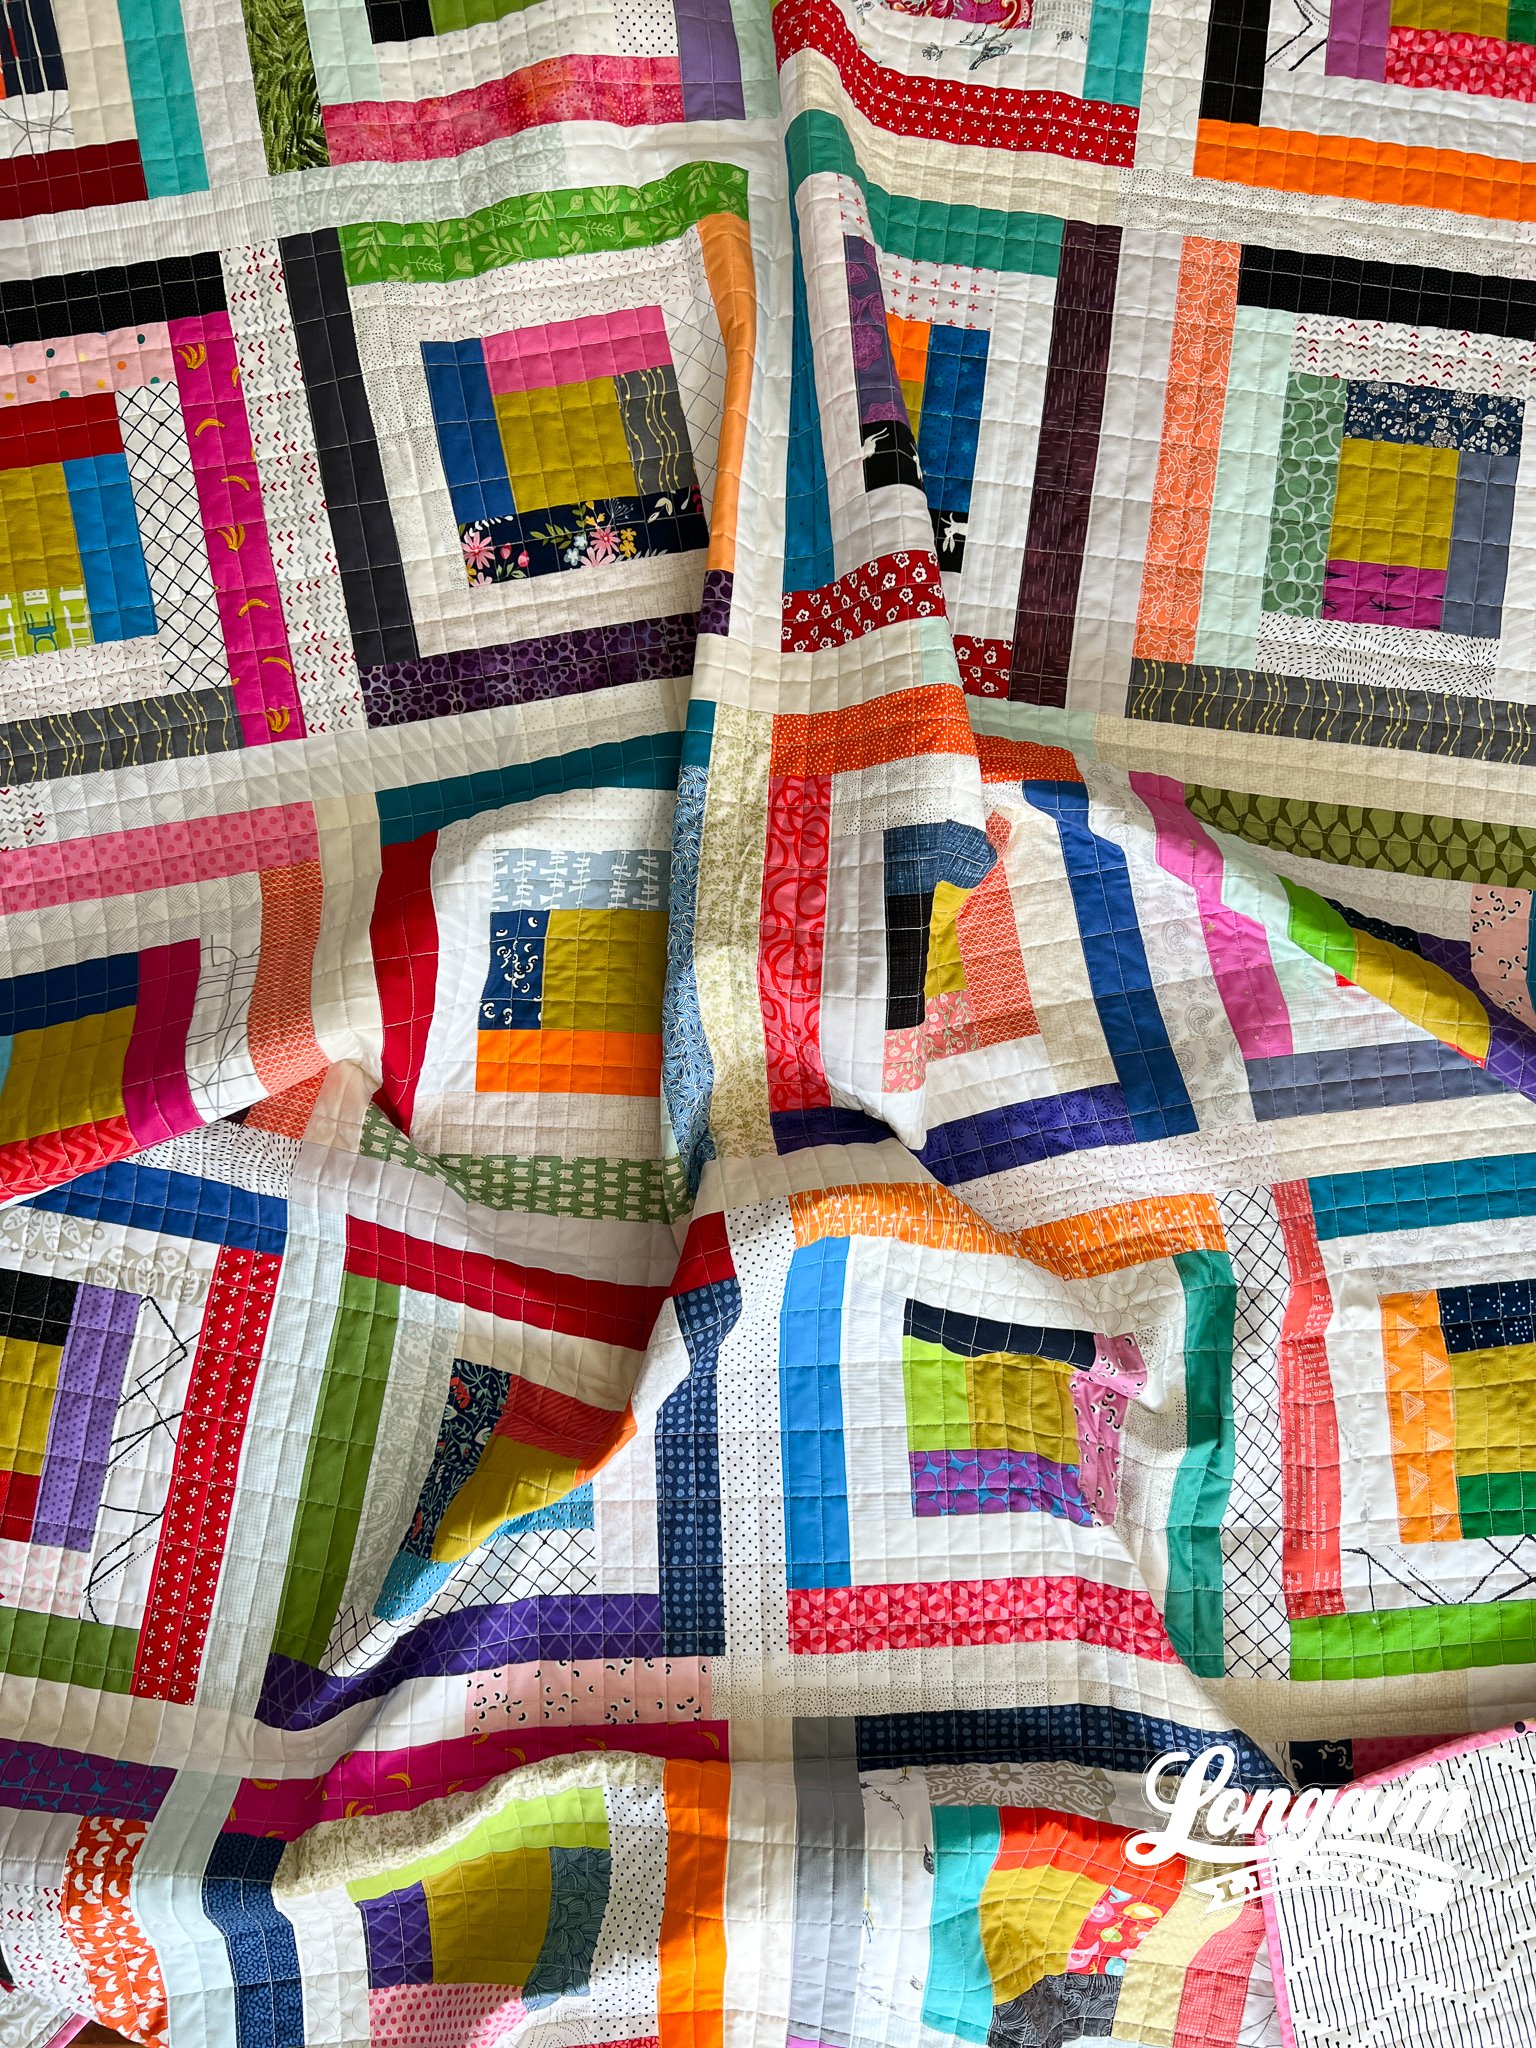
Ledger Edge-to-Edge Modern Quilting Design
Ledger is a tricky design to execute and not for those who stress about perfection. How is this for a sales pitch?! But also? OMG, I'm in love with the modern-looking result!
I like to be upfront about the degree of difficulty of a design because I'd hate for a beginner to get frustrated.
Ledger has a look you might only expect to see from careful walking-foot quilting on a domestic machine. But luckily—no basting, quilt wrangling, or taking it off the frame and re-mounting it halfway—is involved with this method.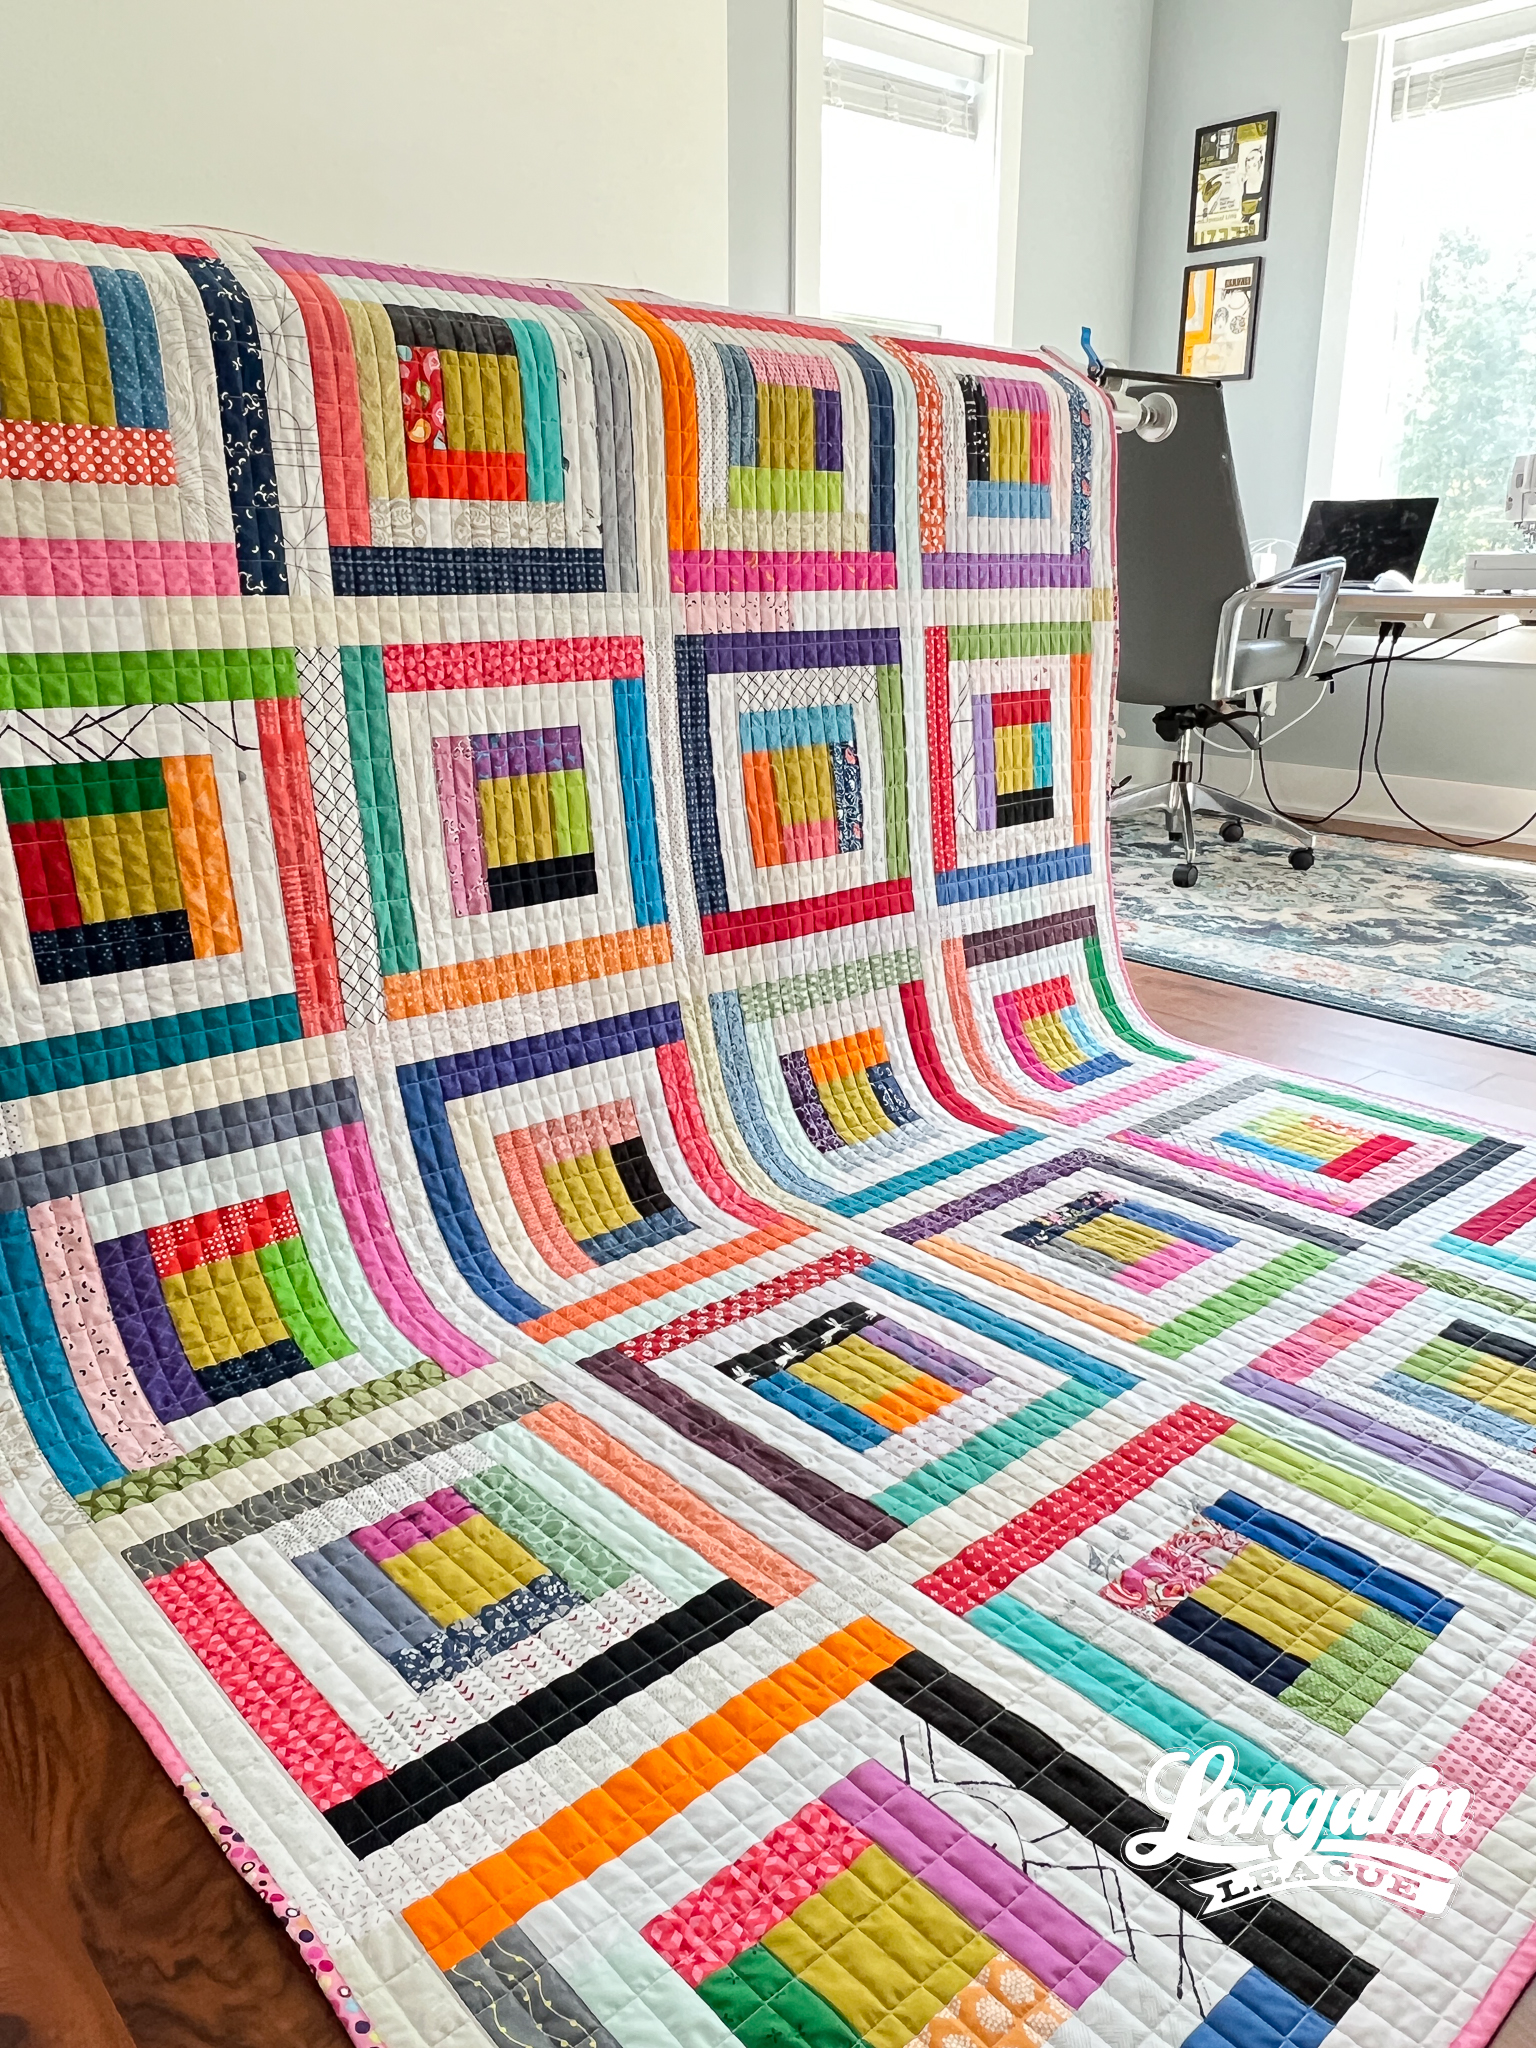
I was feeling very ho-hum about this quilt top when I finished it at a retreat earlier this year, but after I quilted it, my excitement meter went up.
WAY UP! 📈 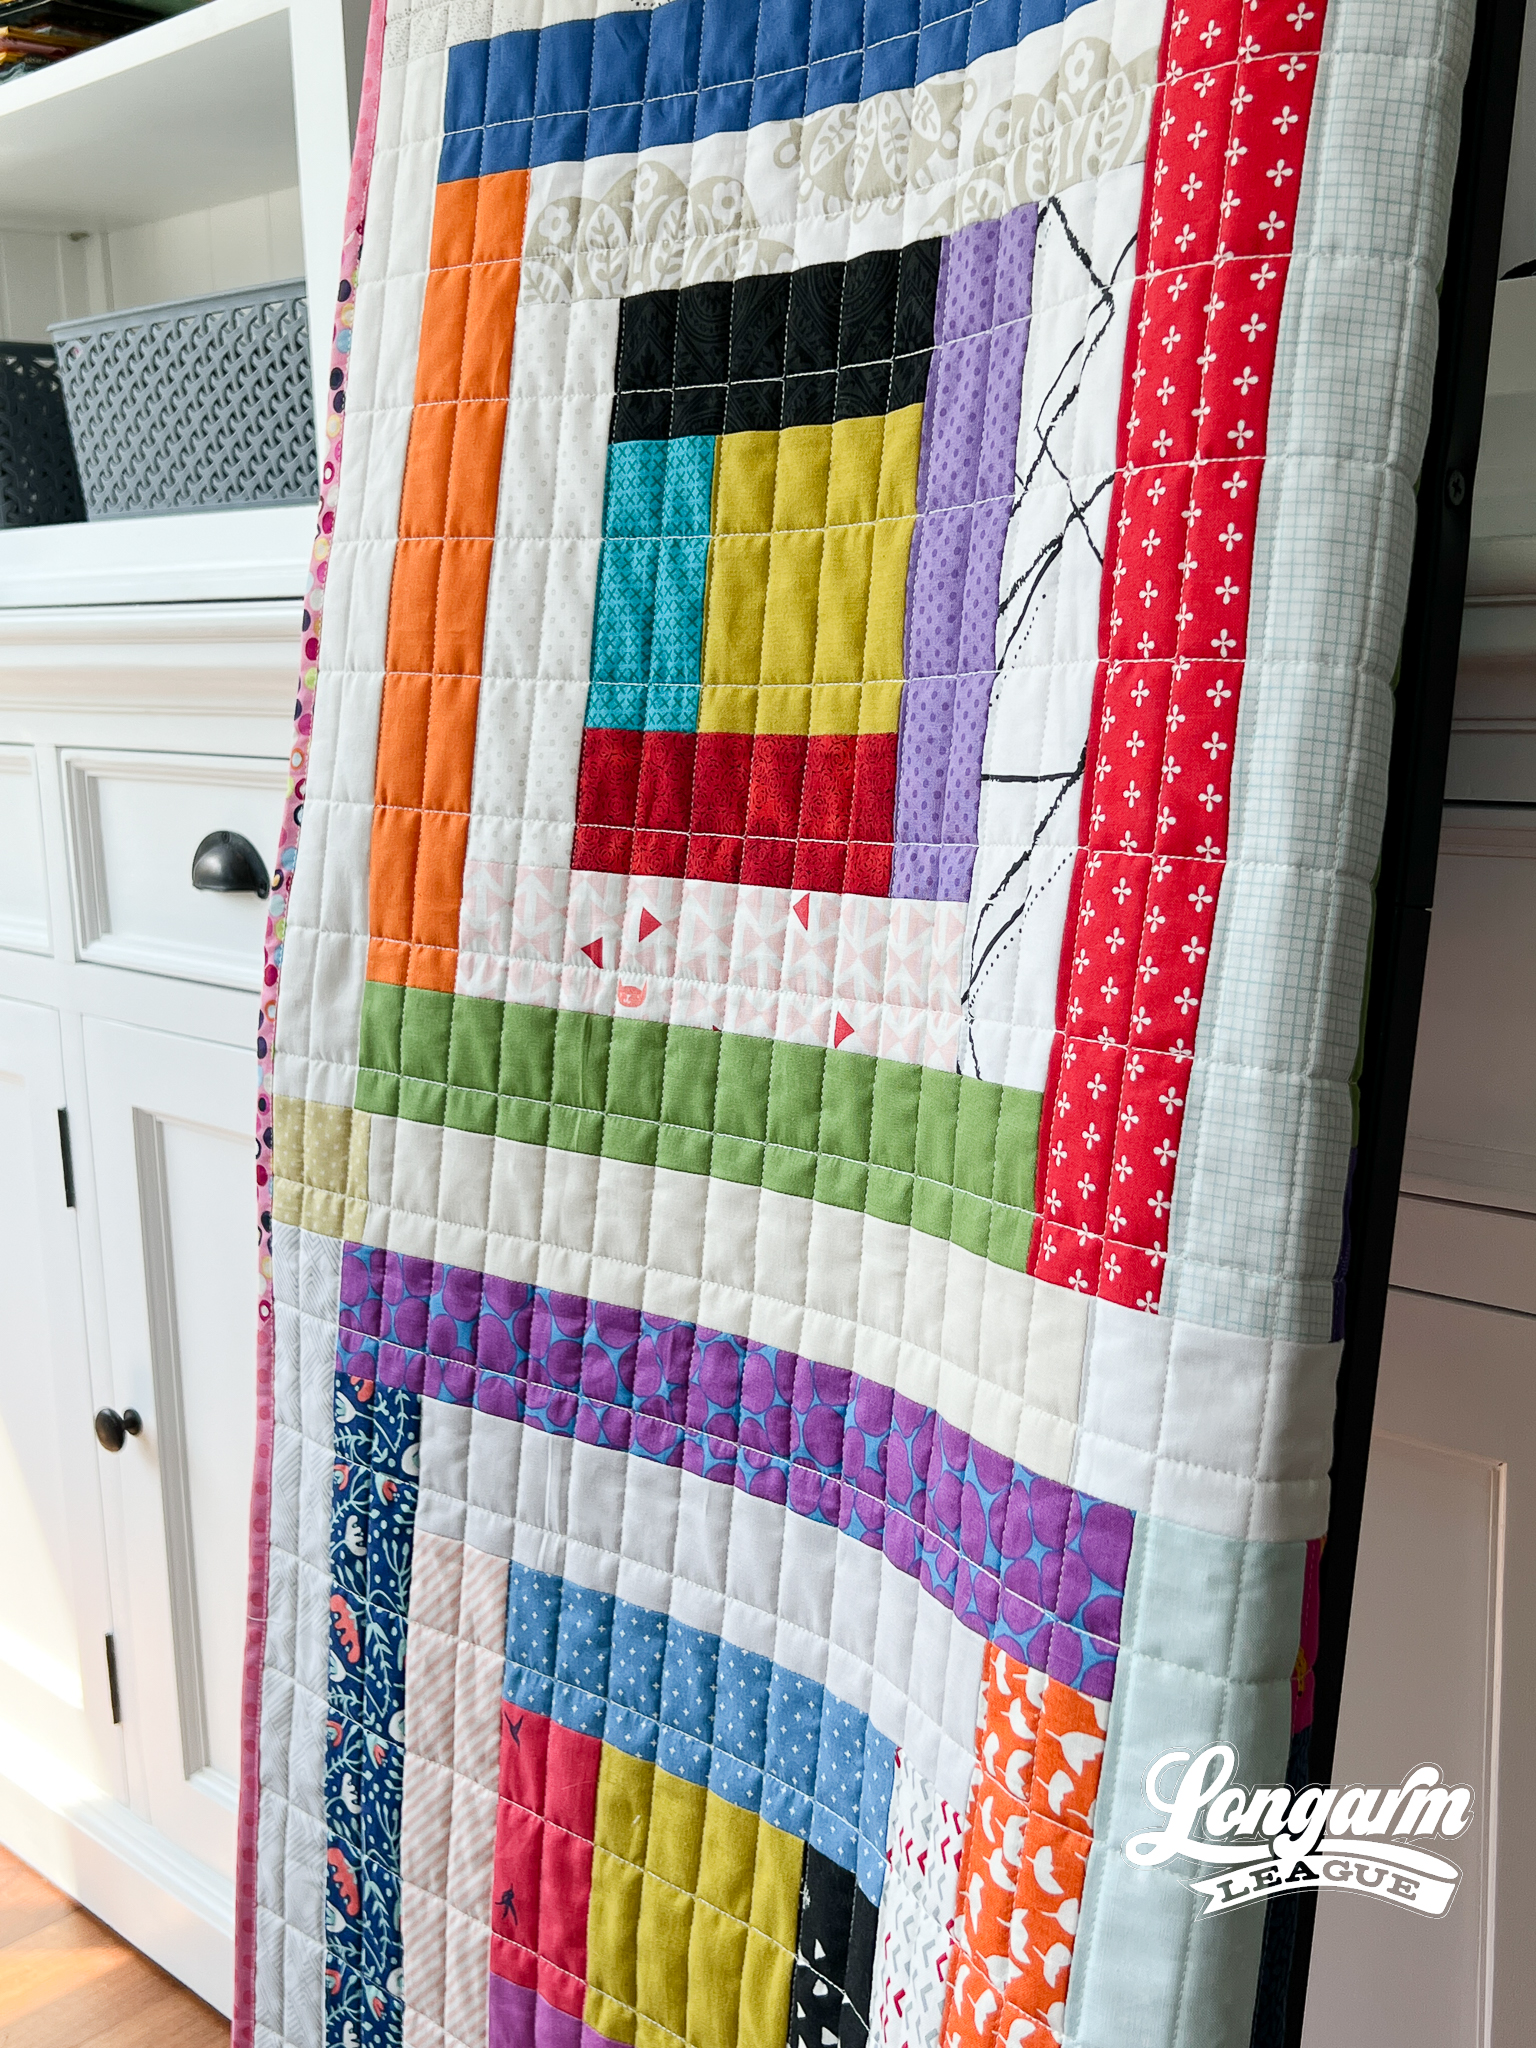
I decided to experiment with grid quilting as an edge-to-edge design, building the grid "brick-by-brick". You can watch the video of the stitch-out at the top of the blog post to see what that looks like.
I wanted to keep the longer lines of the rectangle free from backtracking, but doing it this way means all of the shorter sides are double-stitched. Re-stitching the short sides immediately (instead of later in the sequence) ensures it will line up on target.
I was surprised I didn't have to micromanage it during the quilting process like I thought I would. Just like if the design was stitching a big pass at a time (instead of line-by-line), I only found it necessary to watch closely after advancing to a new section and realigning. 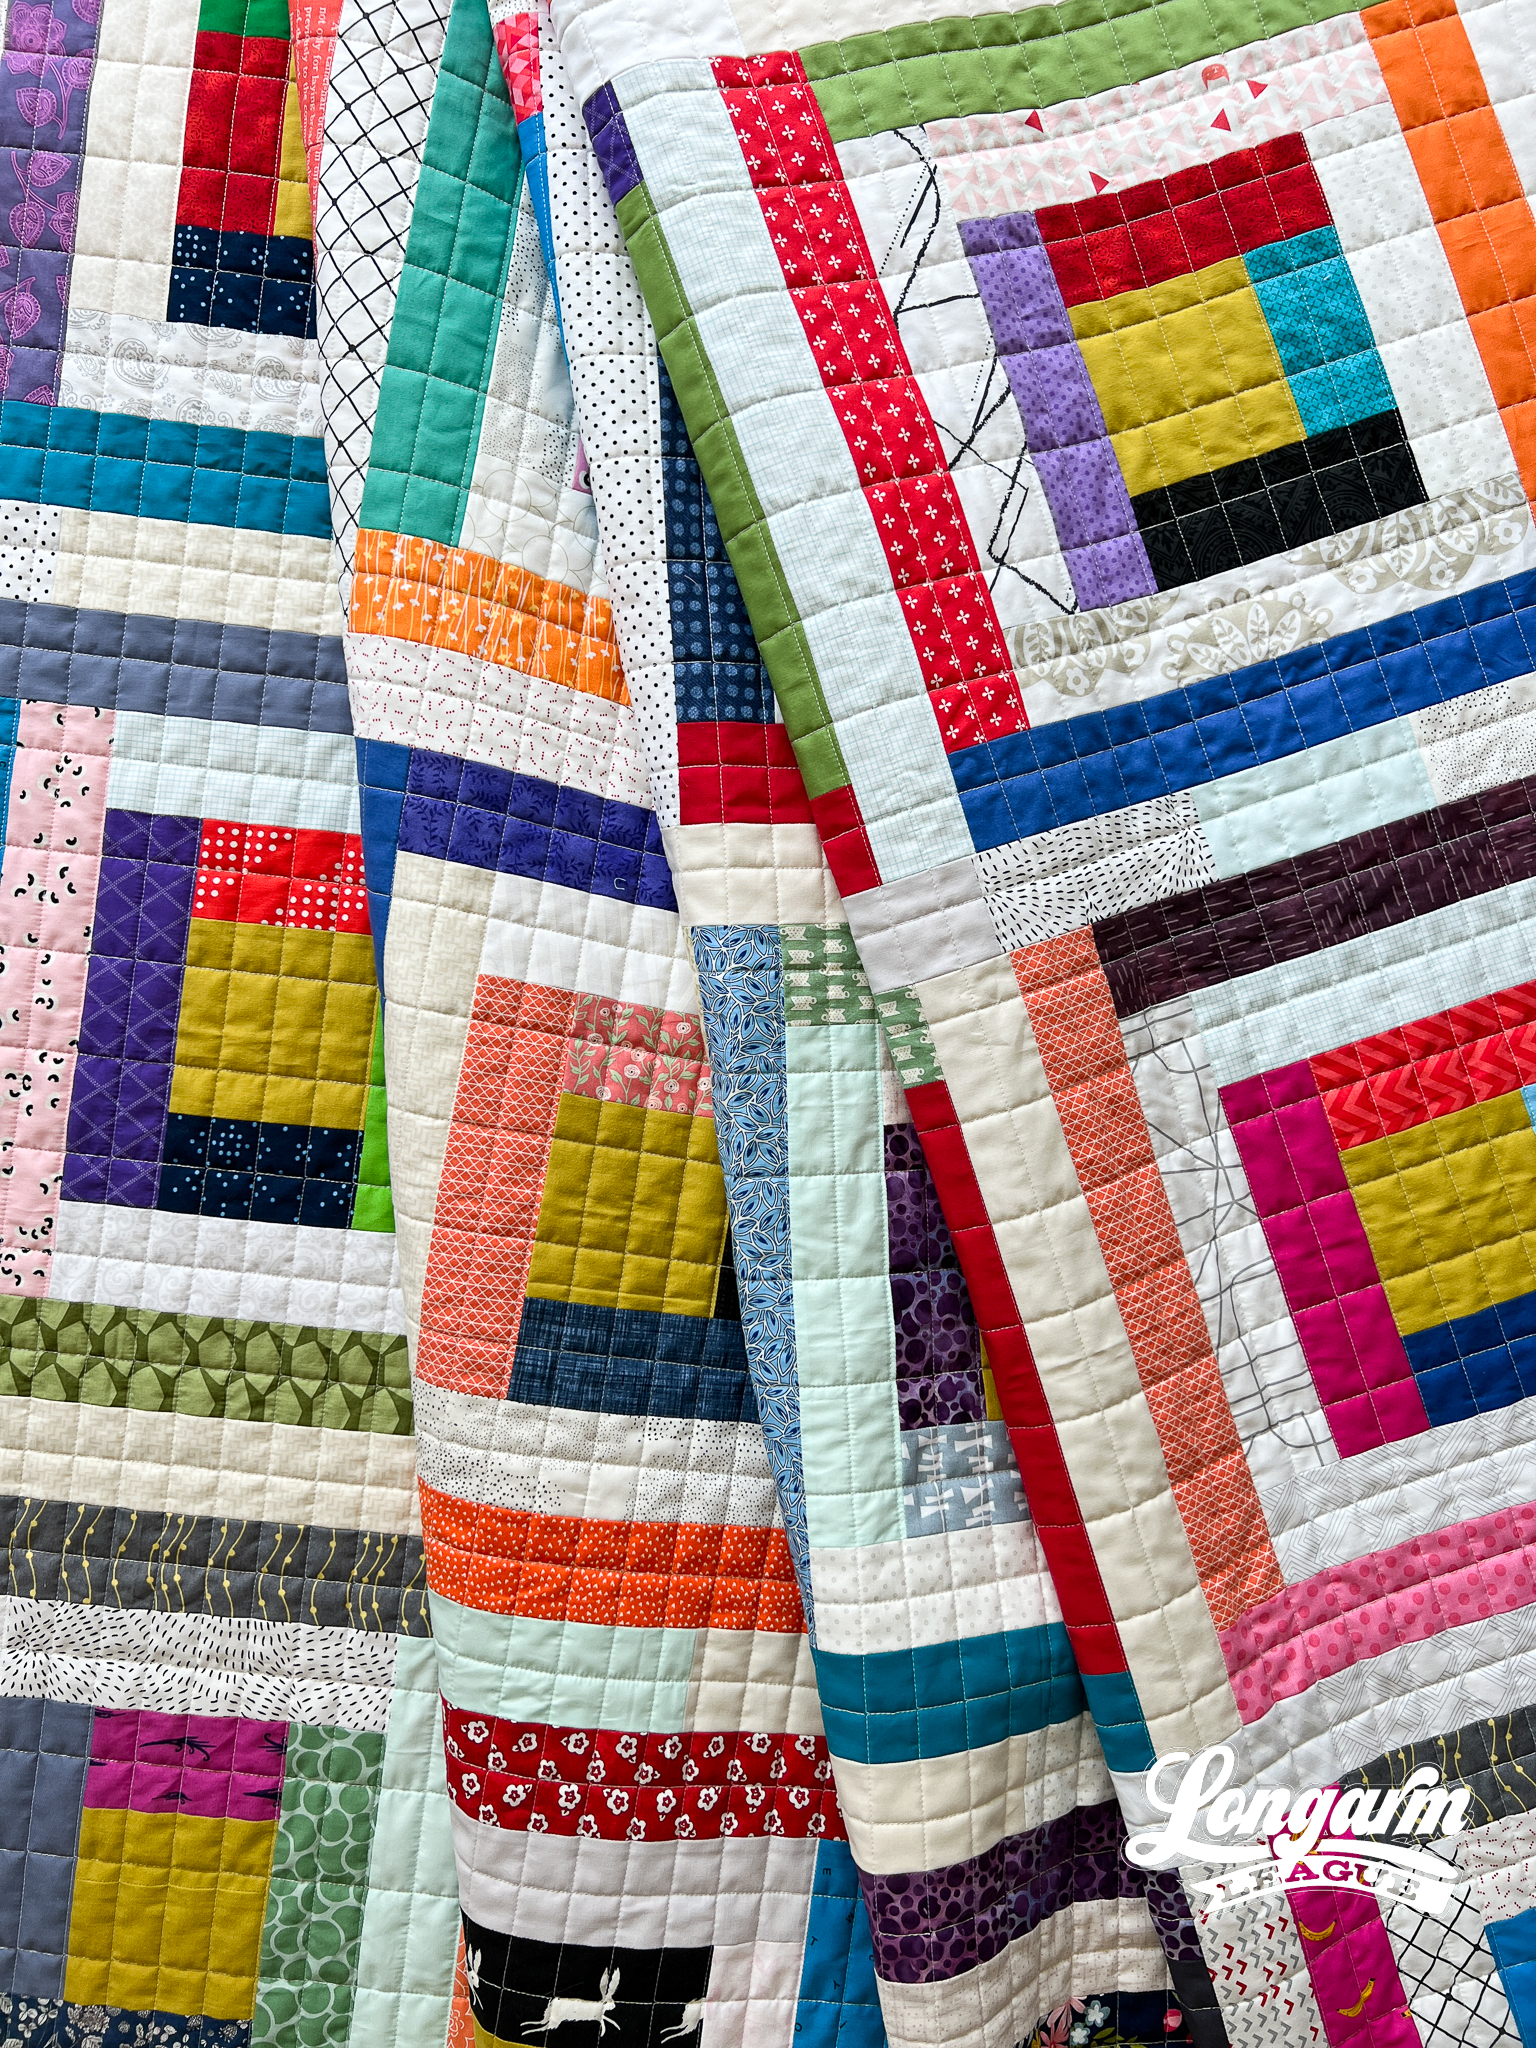
The Quilt
Before I left for a retreat, I pre-cut fabrics from my stash to get a lot of fast, "mindless" sewing in while talking and eating amongst friends. I challenged myself to use all the scraps I'd cut and not worry too much about the colors clashing. I didn't cut extra pieces, so there wasn't any auditioning for what looked best with each block. 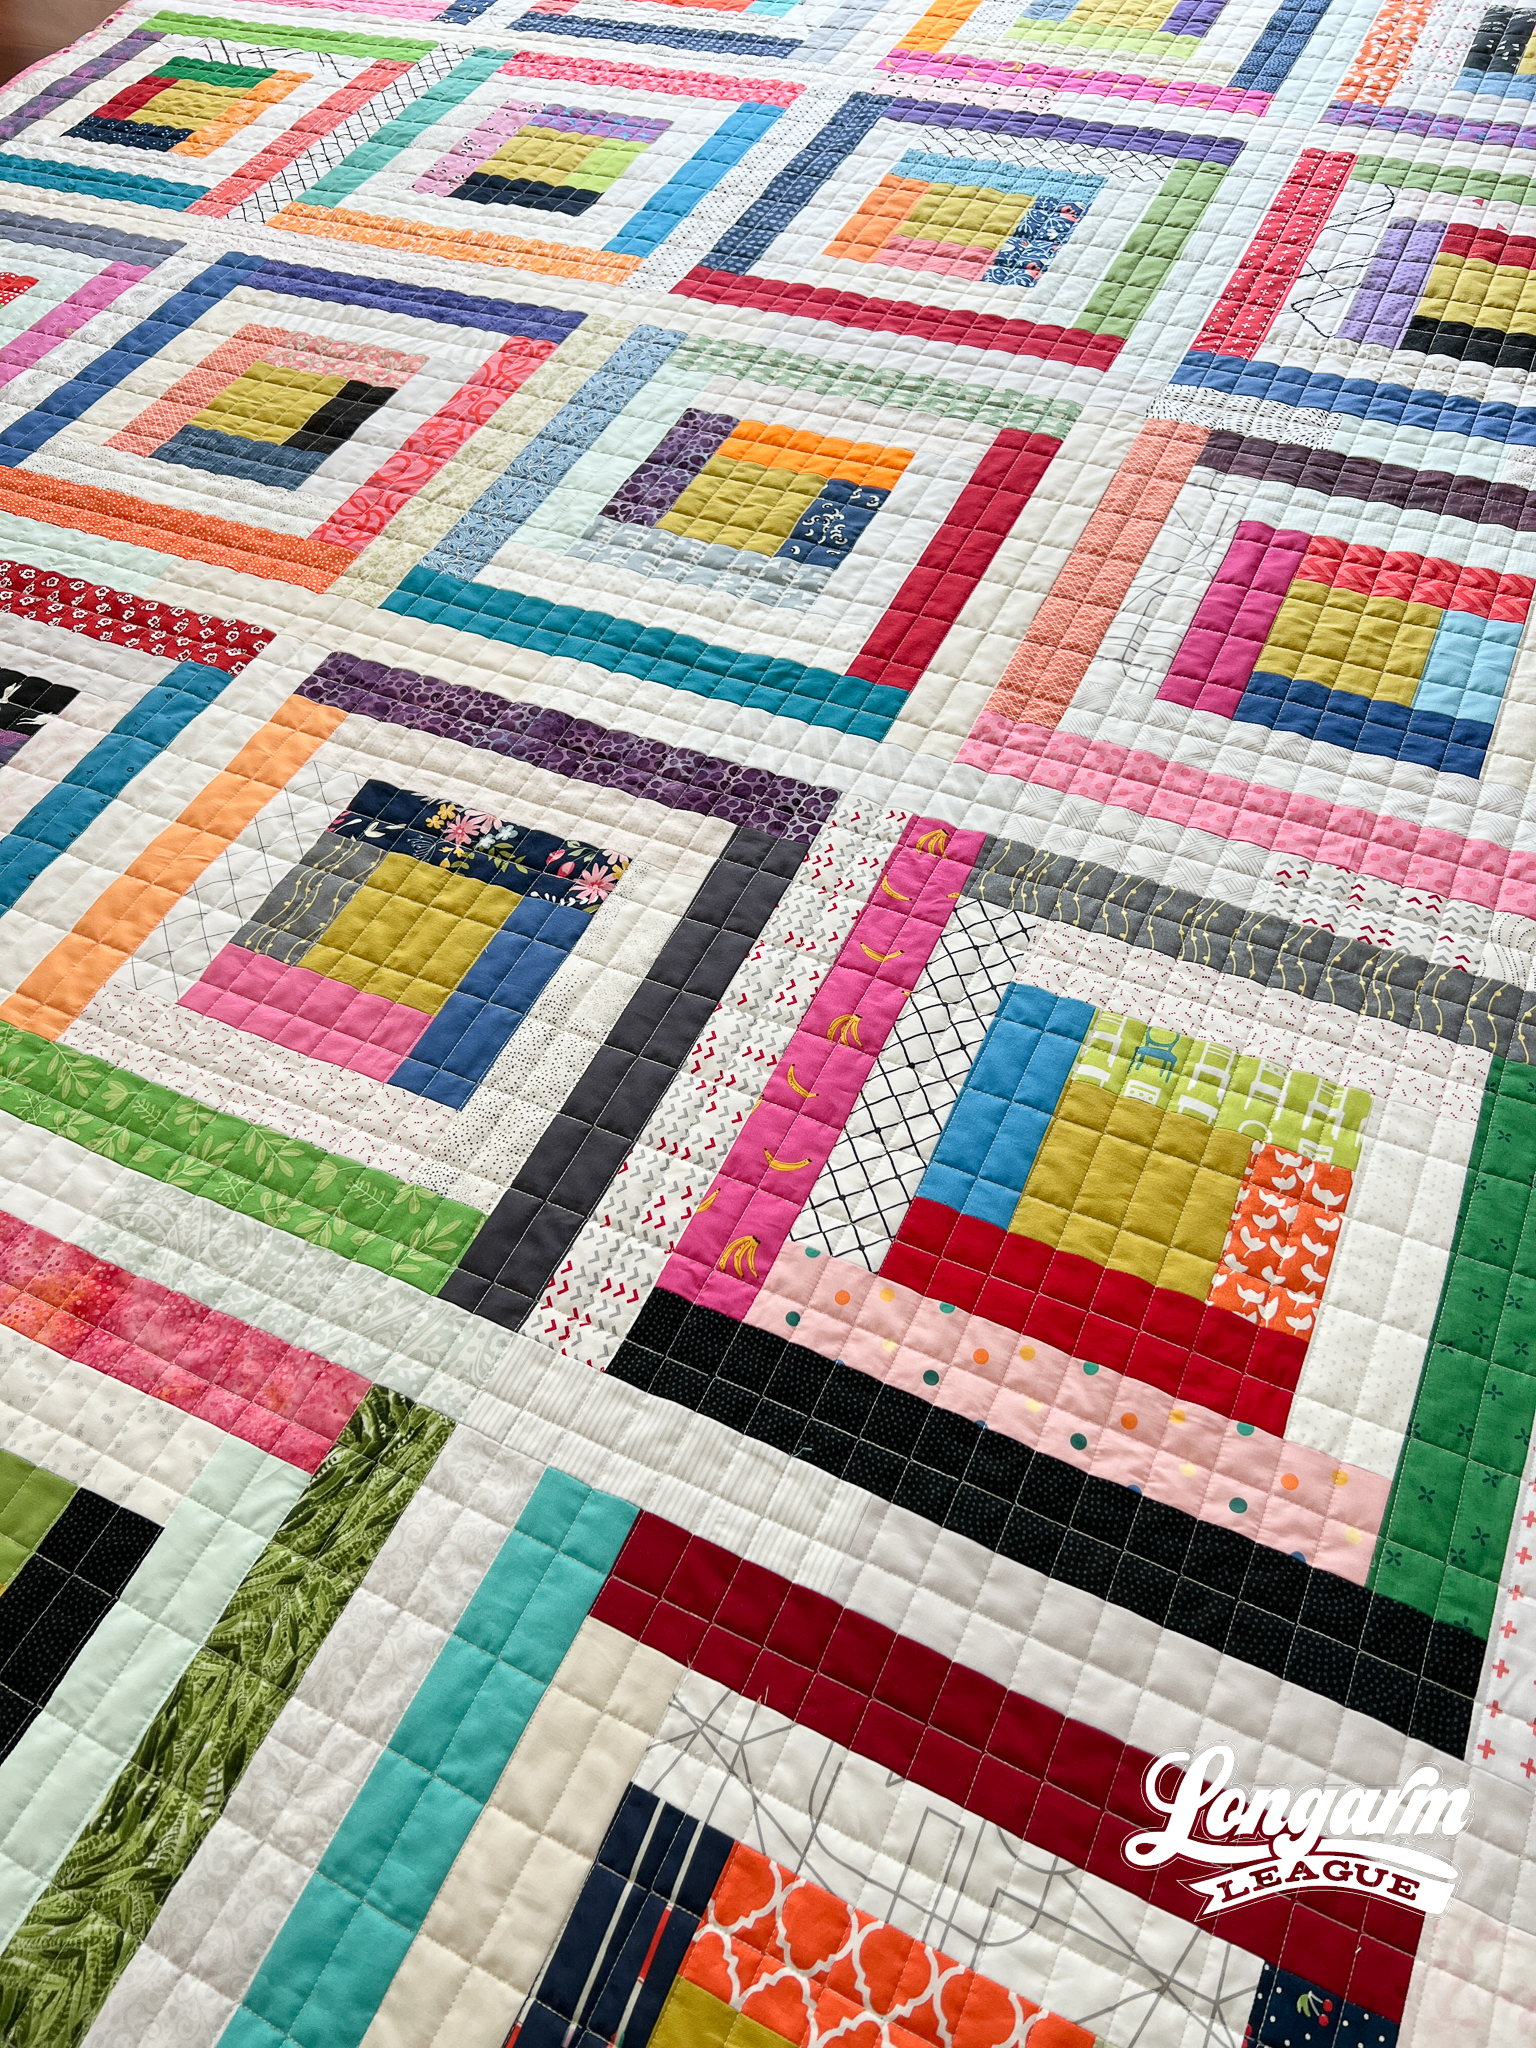
I don't do well with black, red, and orange fabrics, and I generally like my palettes to be muted vs. punchy. My thought when I finished this top was, "Well? I tried something new. I used my scraps." In other words, I didn't have anything to lose regarding the quilting because I didn't like it much.
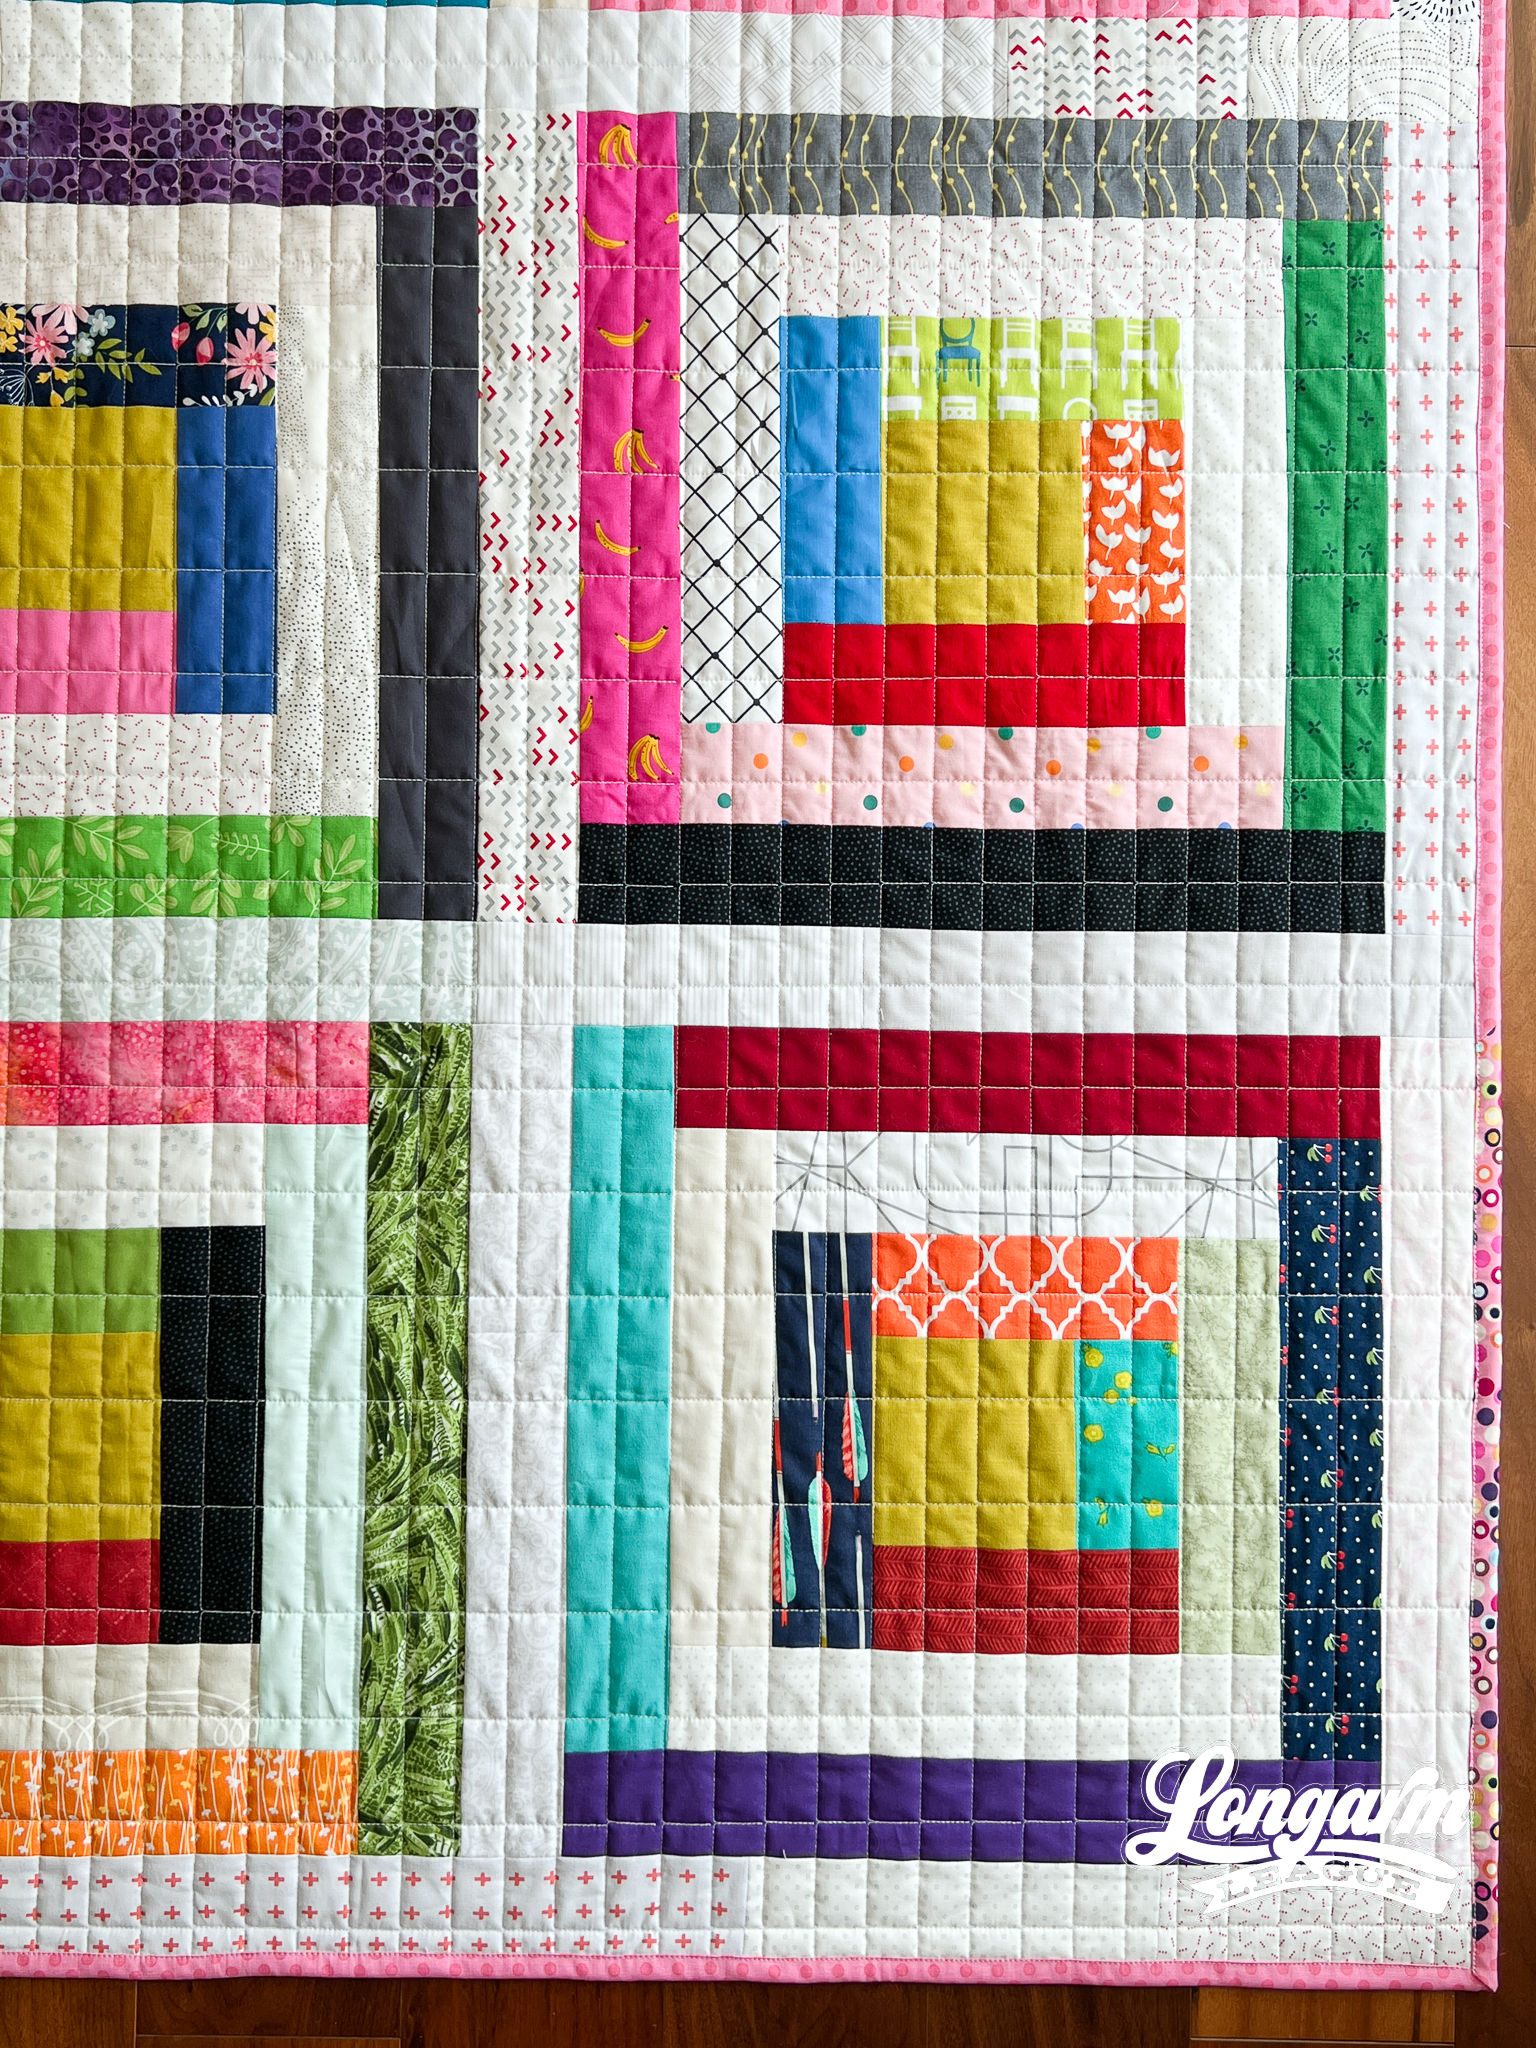
I felt like the quilting redeemed the whole project!
So, now that we know all's well that ends well, do you want my quilt recipe? These aren't directions, as you may have noticed, but cutting dimensions and quantities for each part of the block.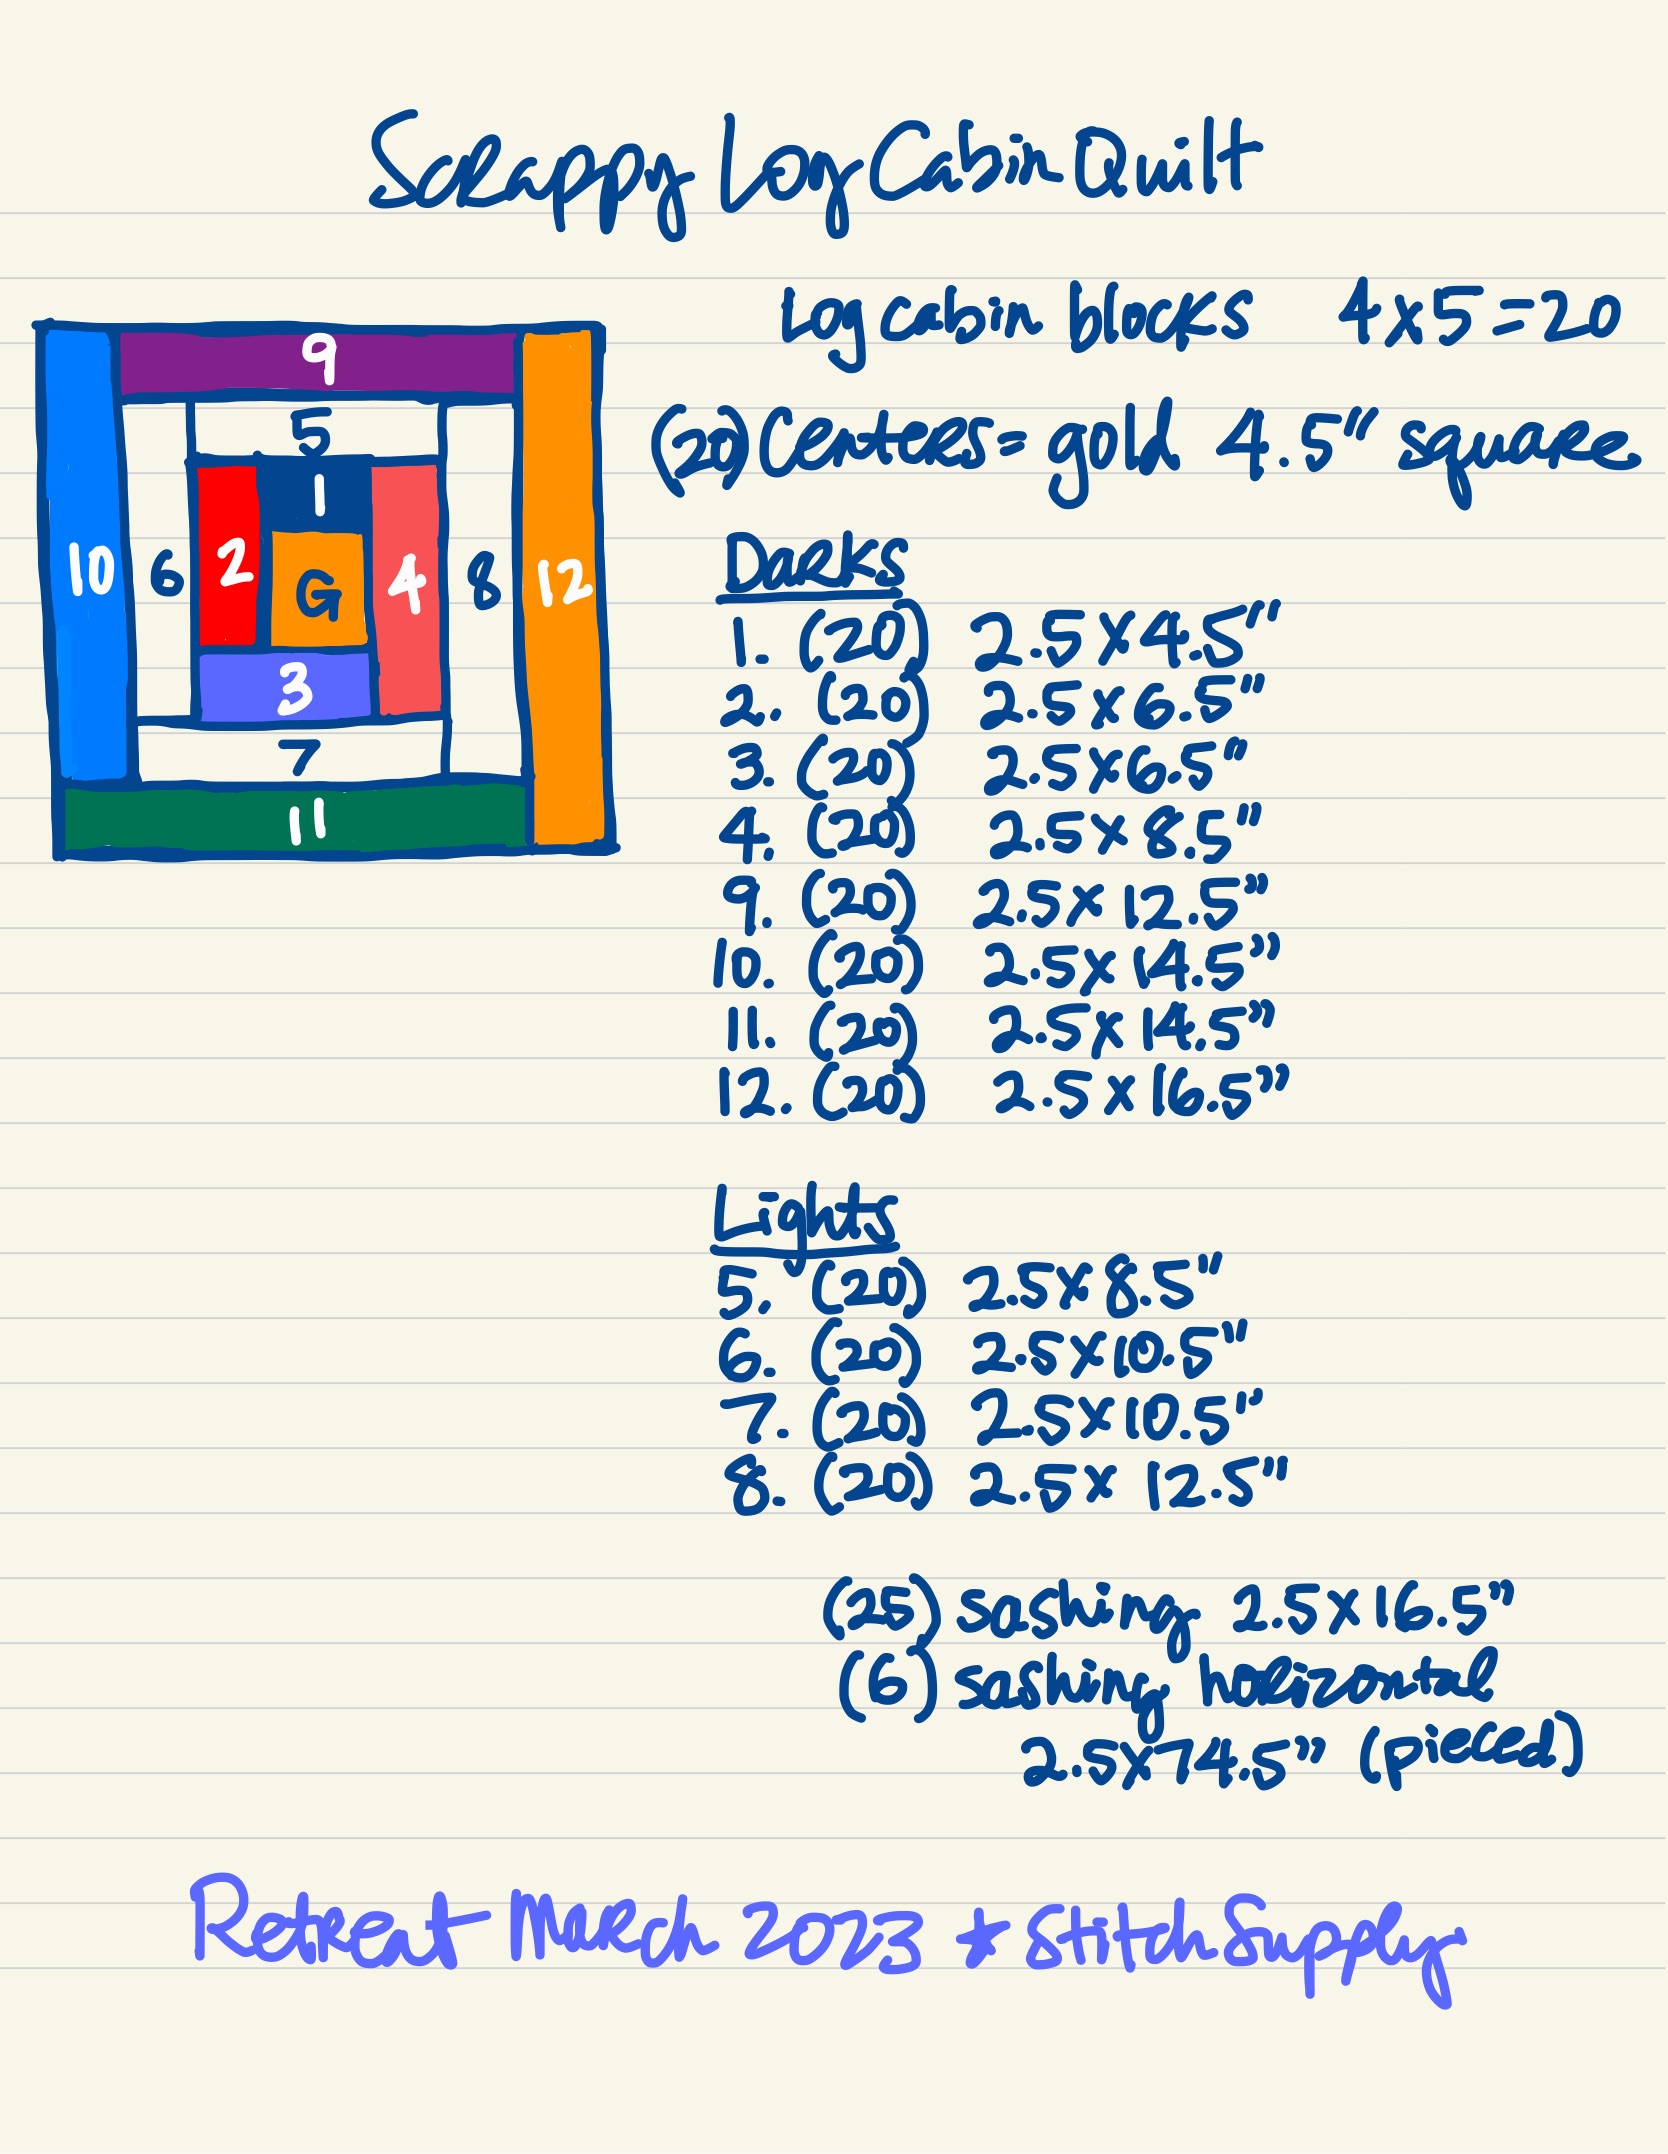
Download a printable PDF of the above here.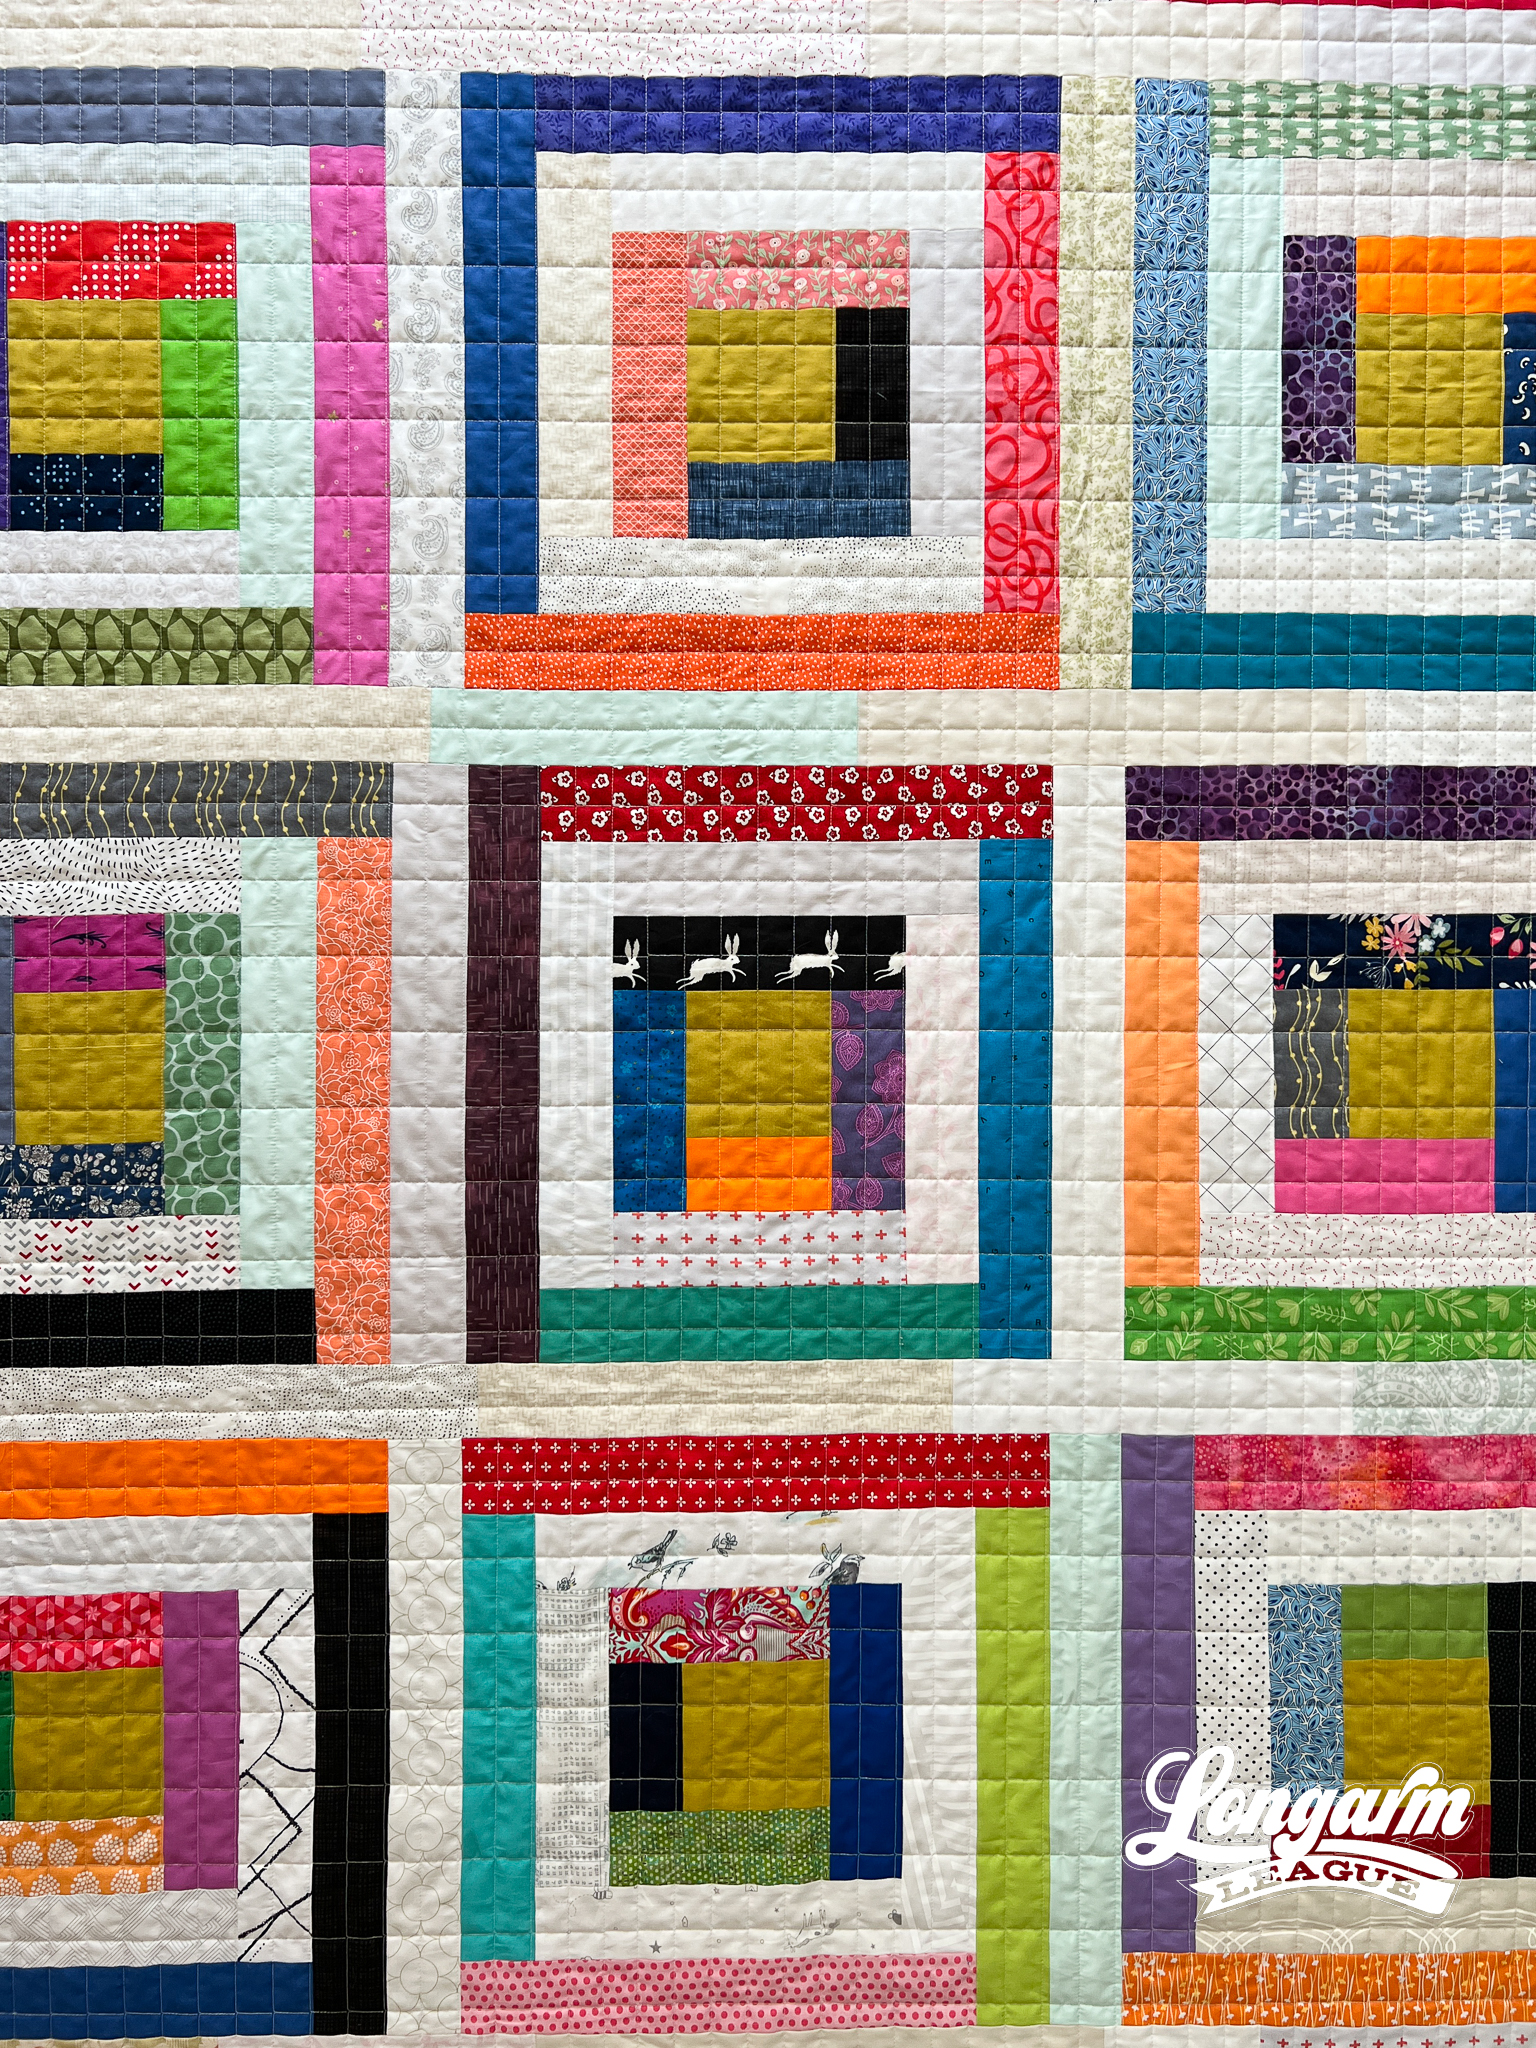
The Quilting Particulars
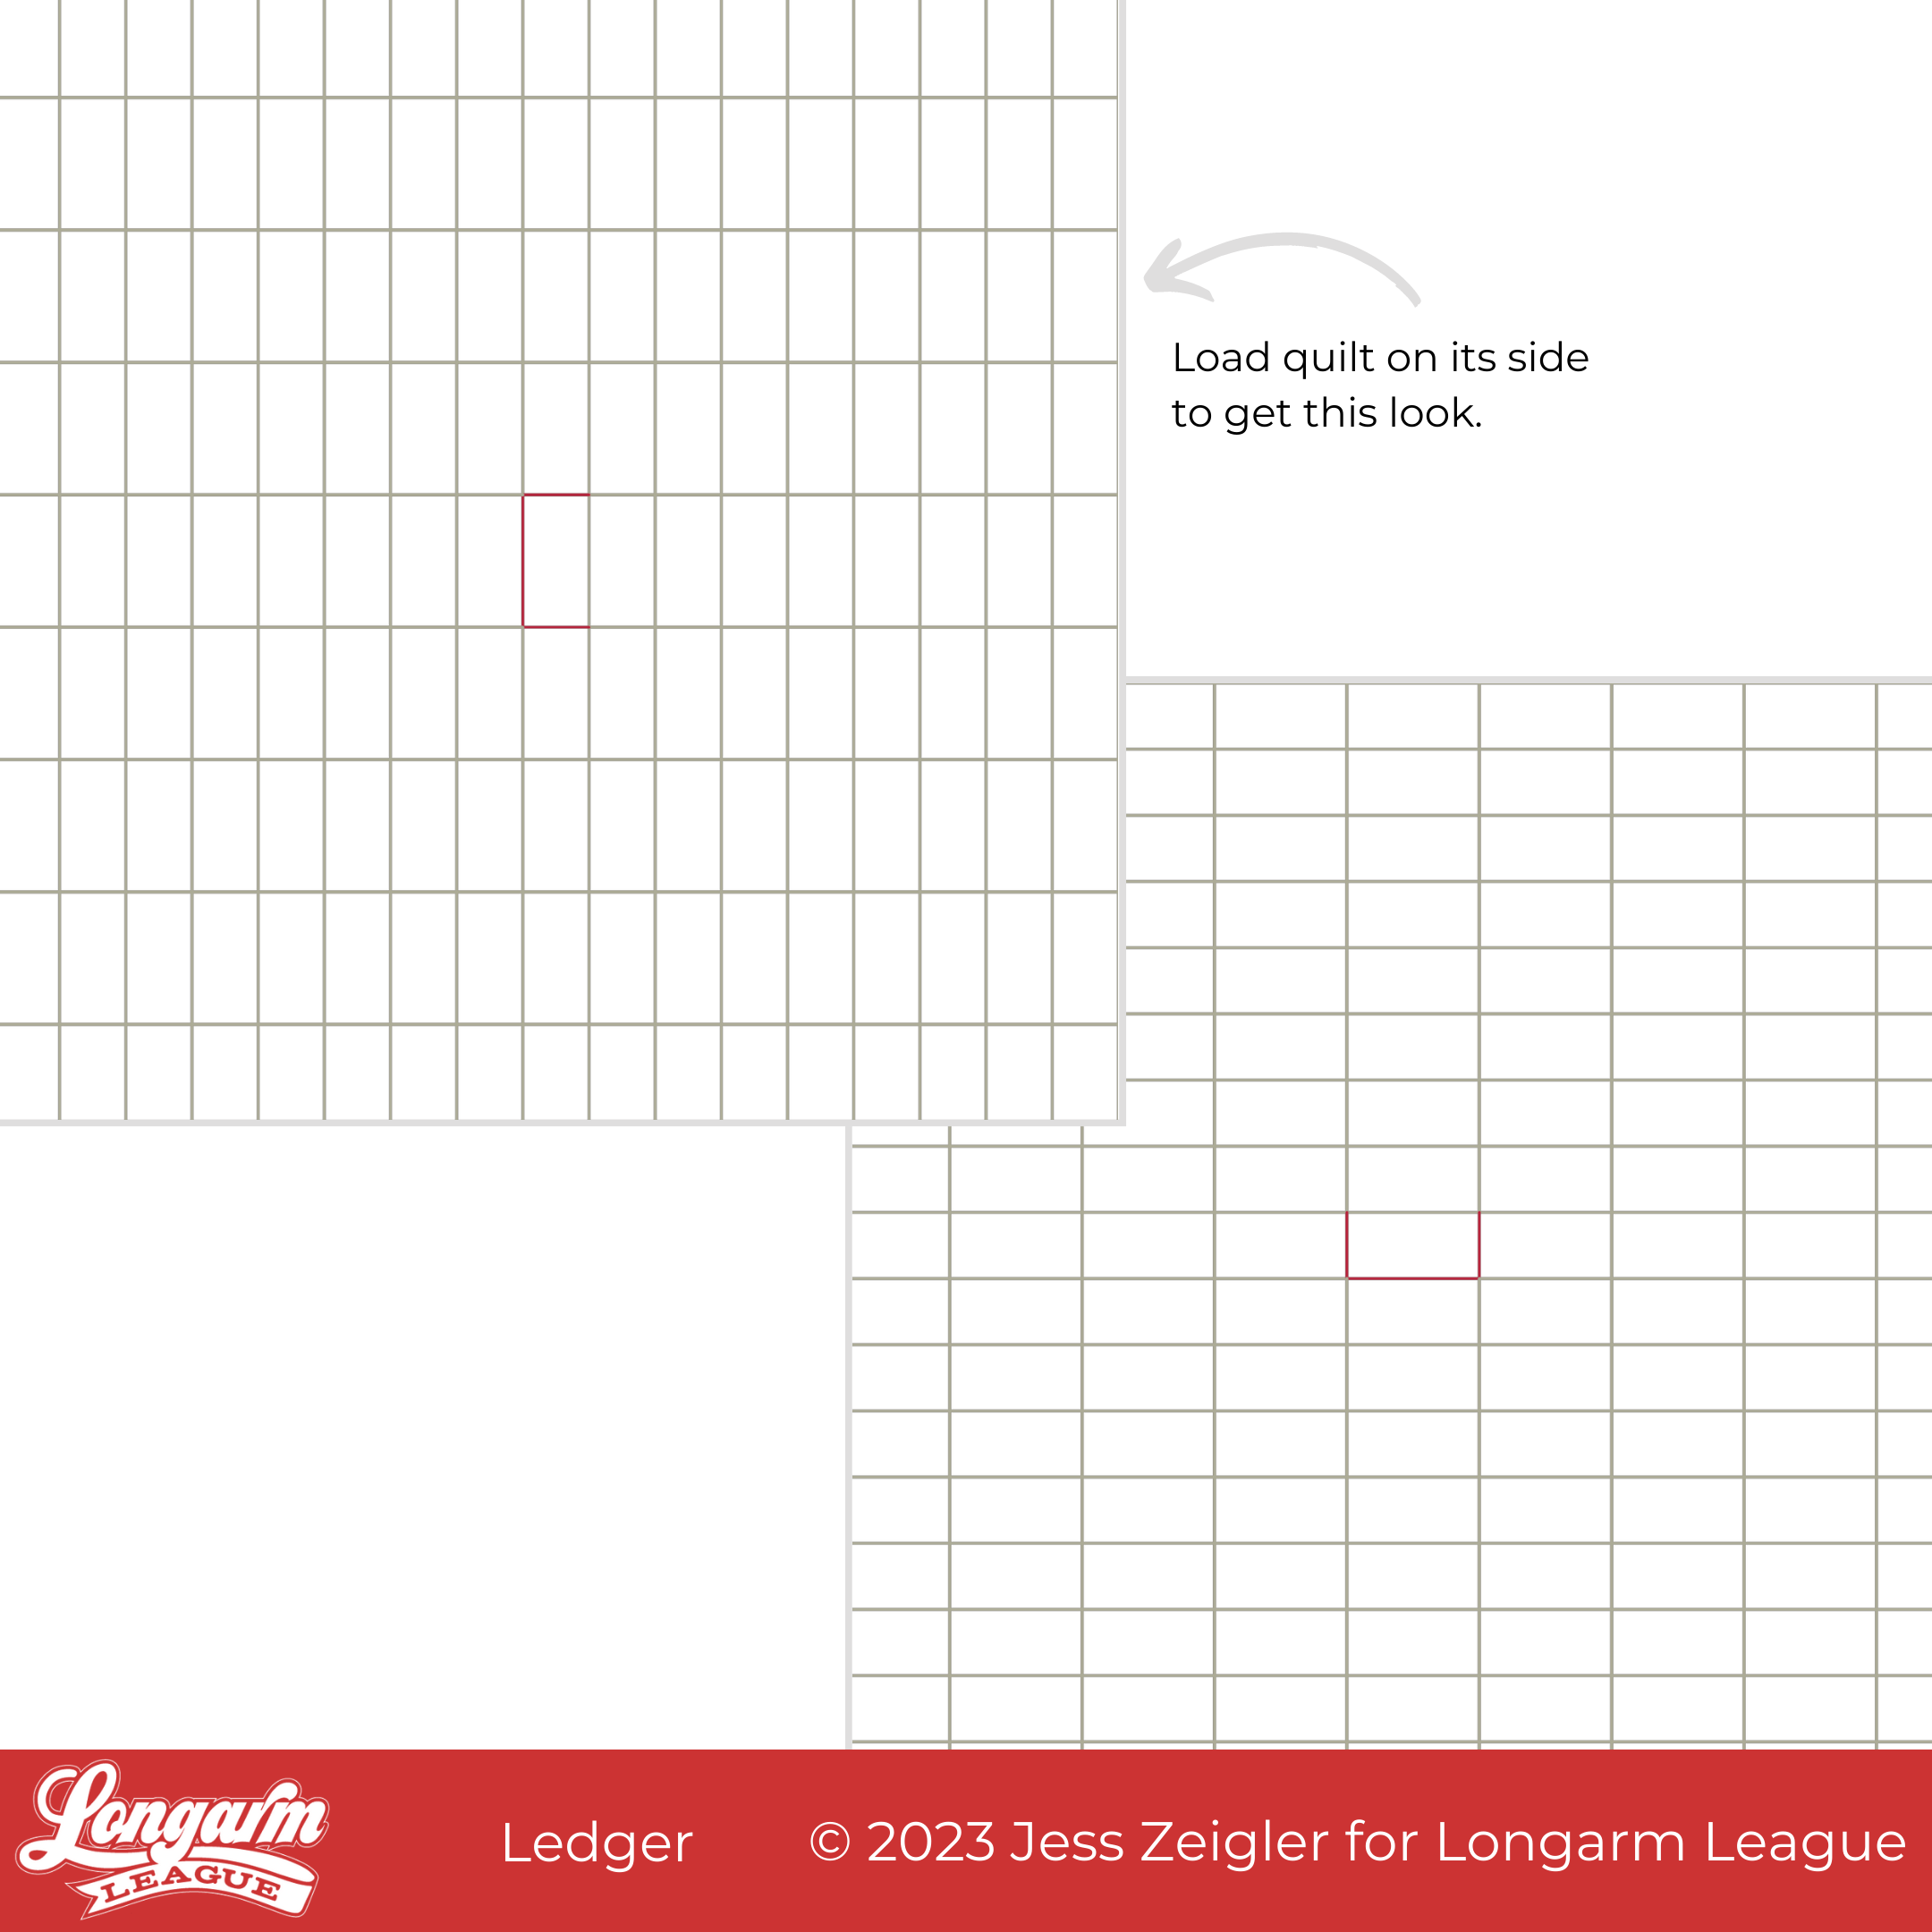
To get vertically oriented rectangles as shown on this quilt, it's important to load the quilt top on its side. Of course, you can stitch this design out "as is" to keep the rectangles in the horizontal orientation, too. Either one works; it's just a matter of preference. You could even use an offset to stagger the rows giving it a traditional brick look. This would technically work either vertically or horizontally.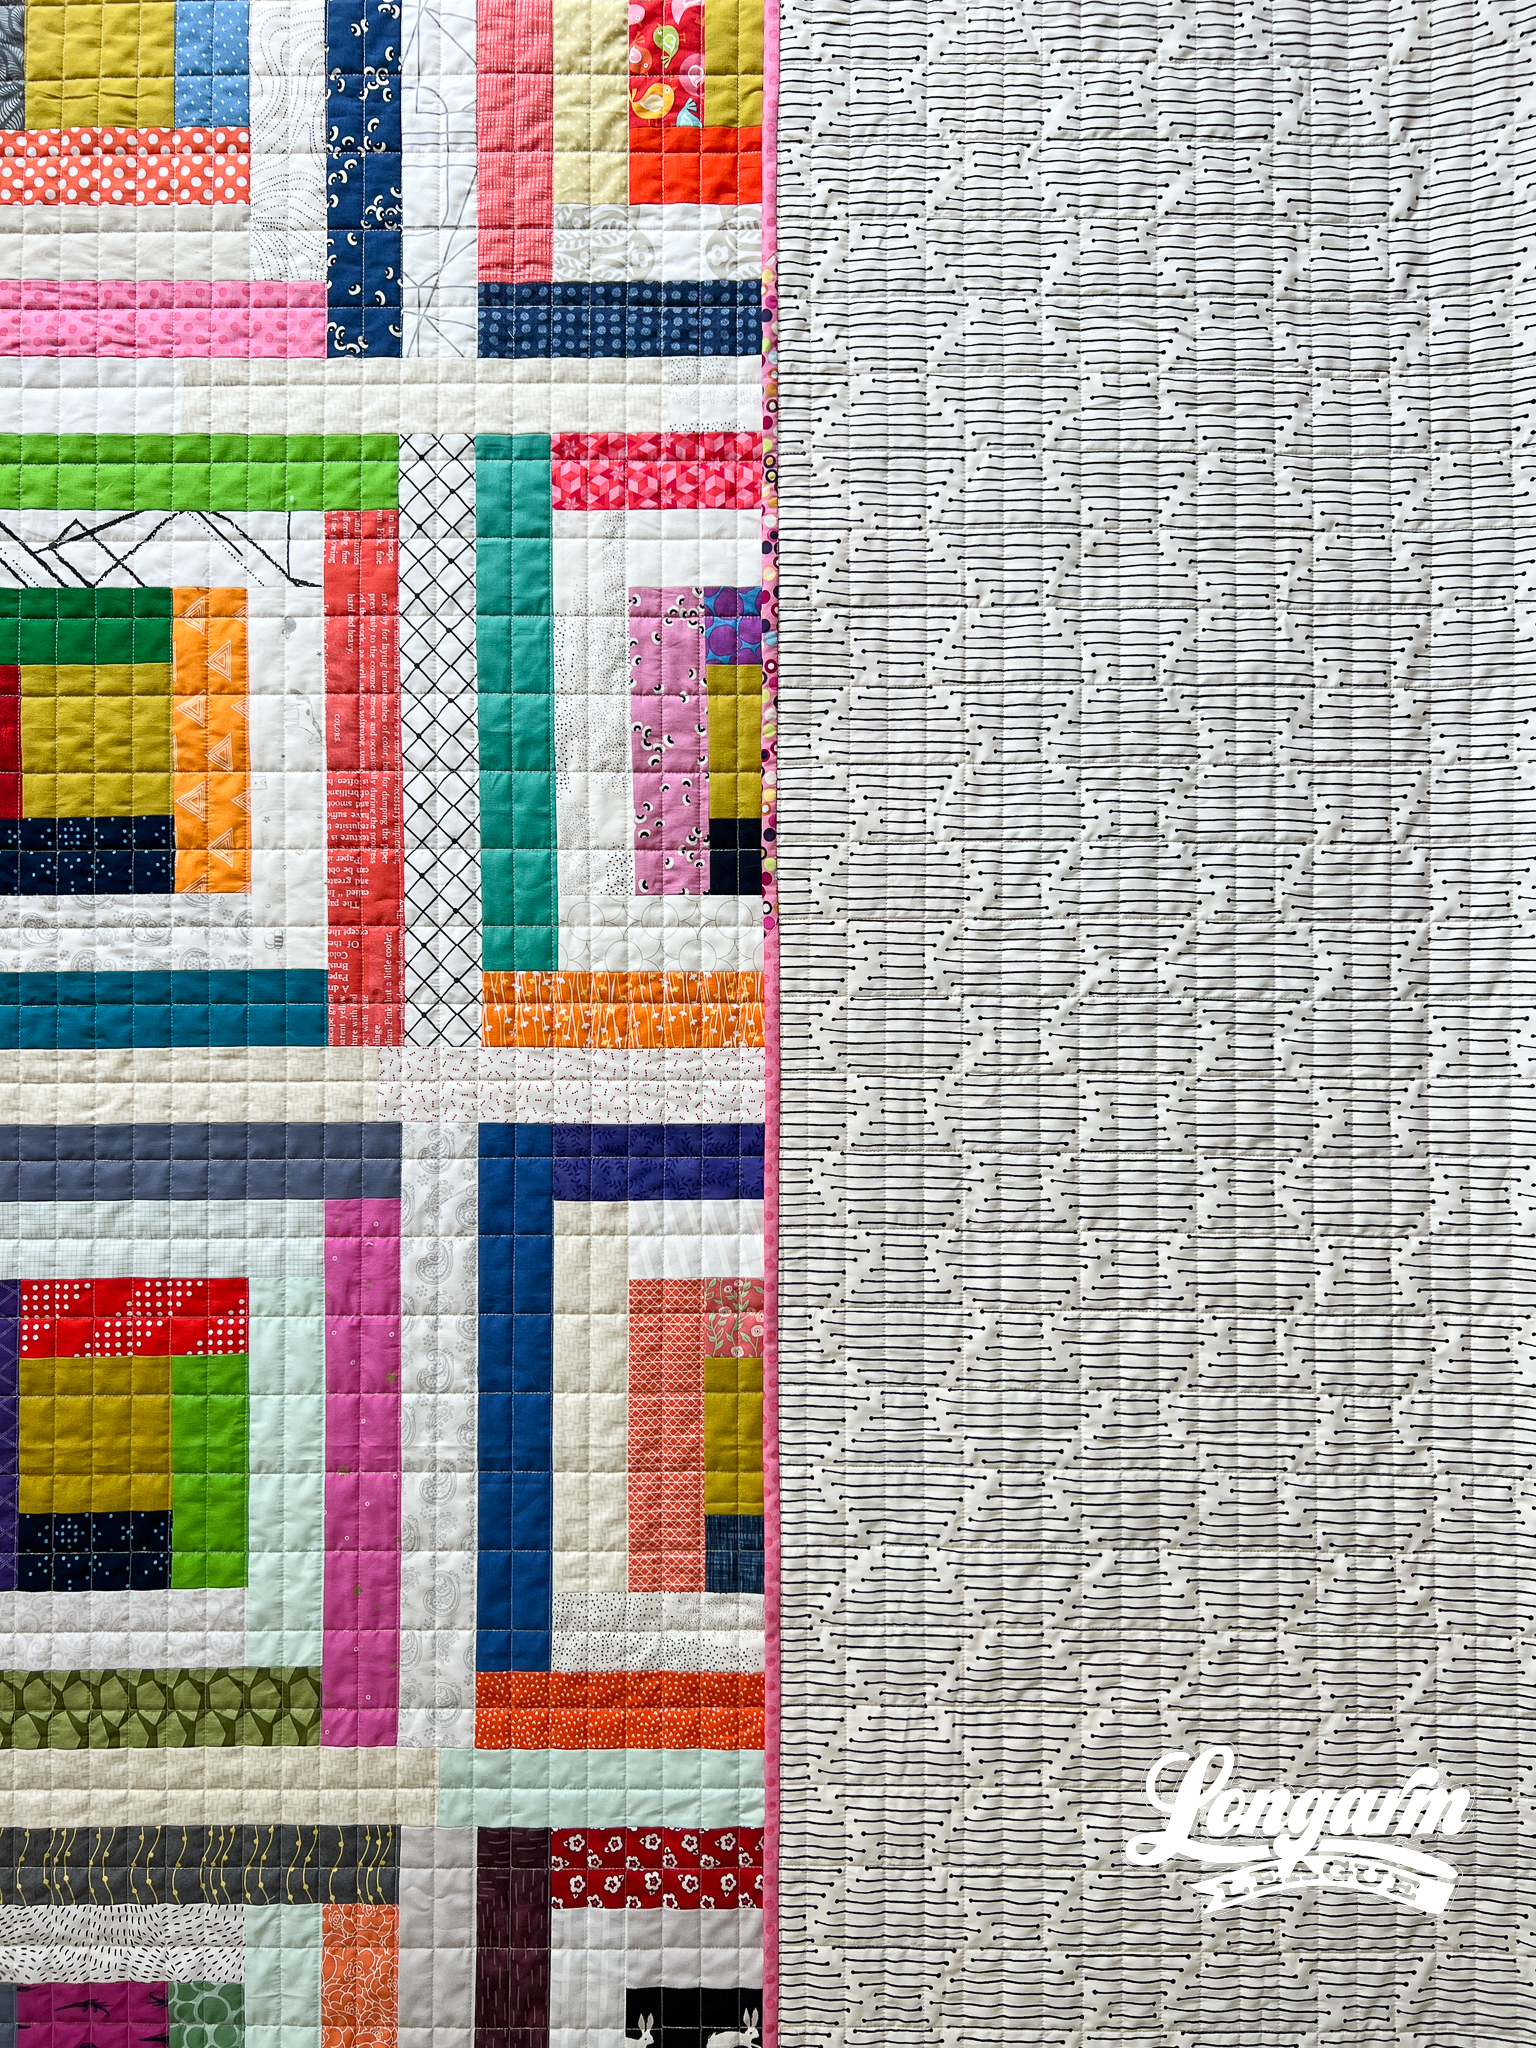
My preference is the vertical way without the offset.
When I stitched this out, I started every row from the left and decided not to alternate stitching the rows from left-to-right and then back right-to-left. I believe this technique helps when you don't have any wiggle room between rows and alignment needs to be precise. You can reference our other alignment tips here.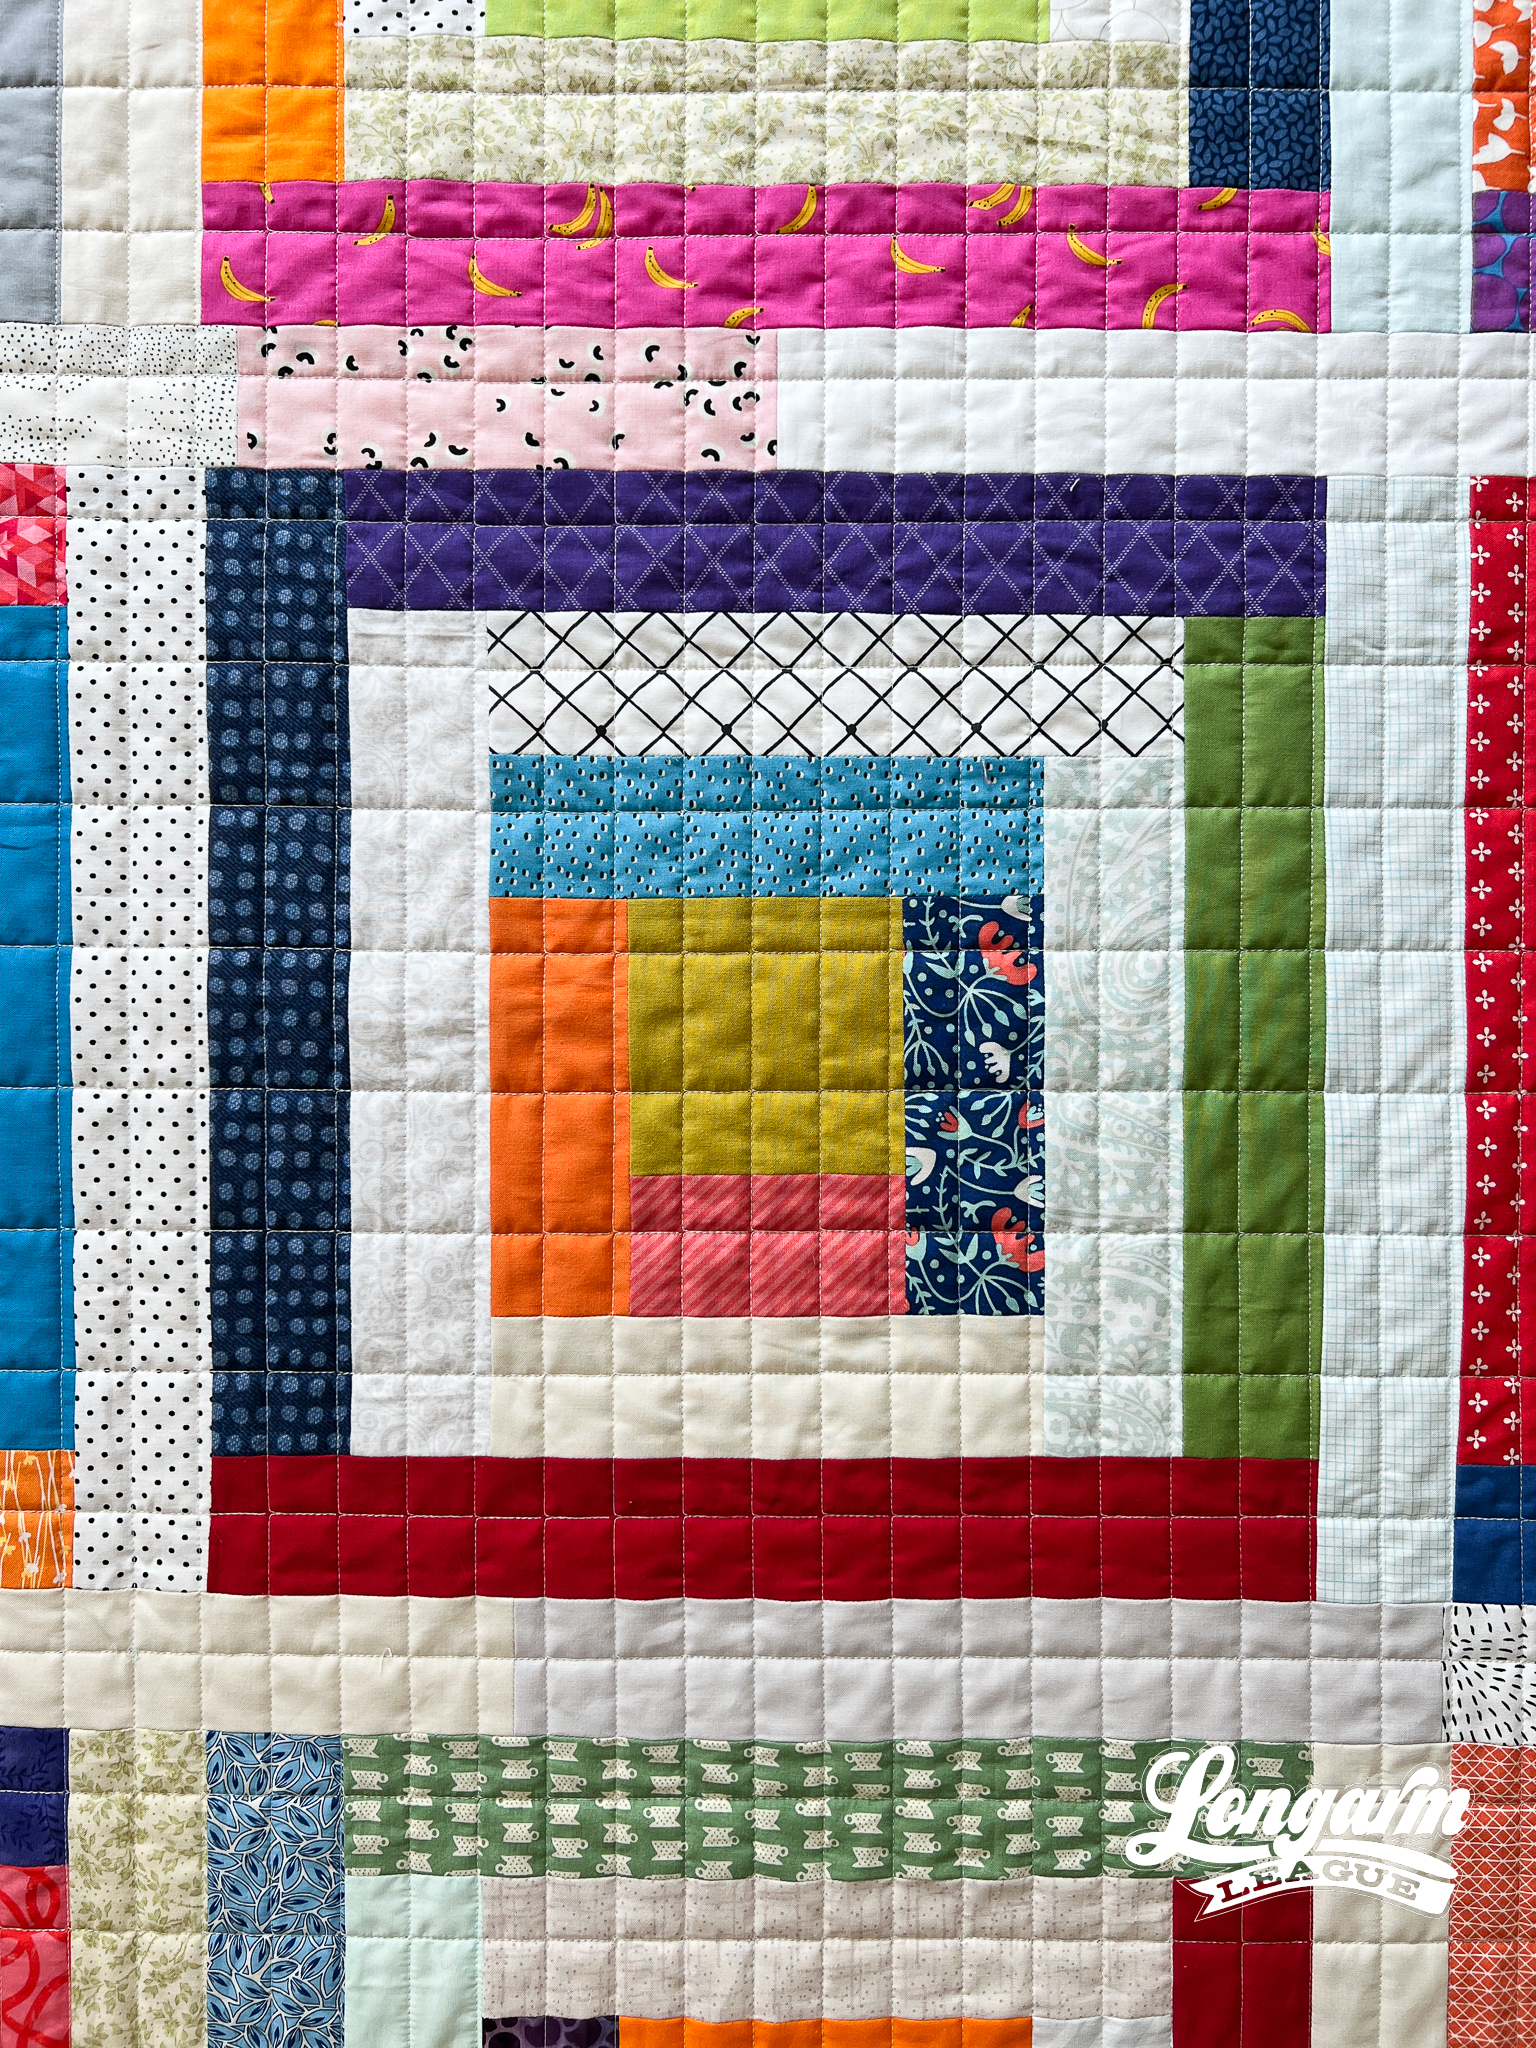
Leading up to this release, I had a sudden "vision" of a different way to digitize the stitch path that would result in no backtracking. It felt like a flash of brilliance, but when I tested the new stitch path, it didn't work as well. I tweaked some things and tried again on a different quilt, but it still wasn't as good as the original.
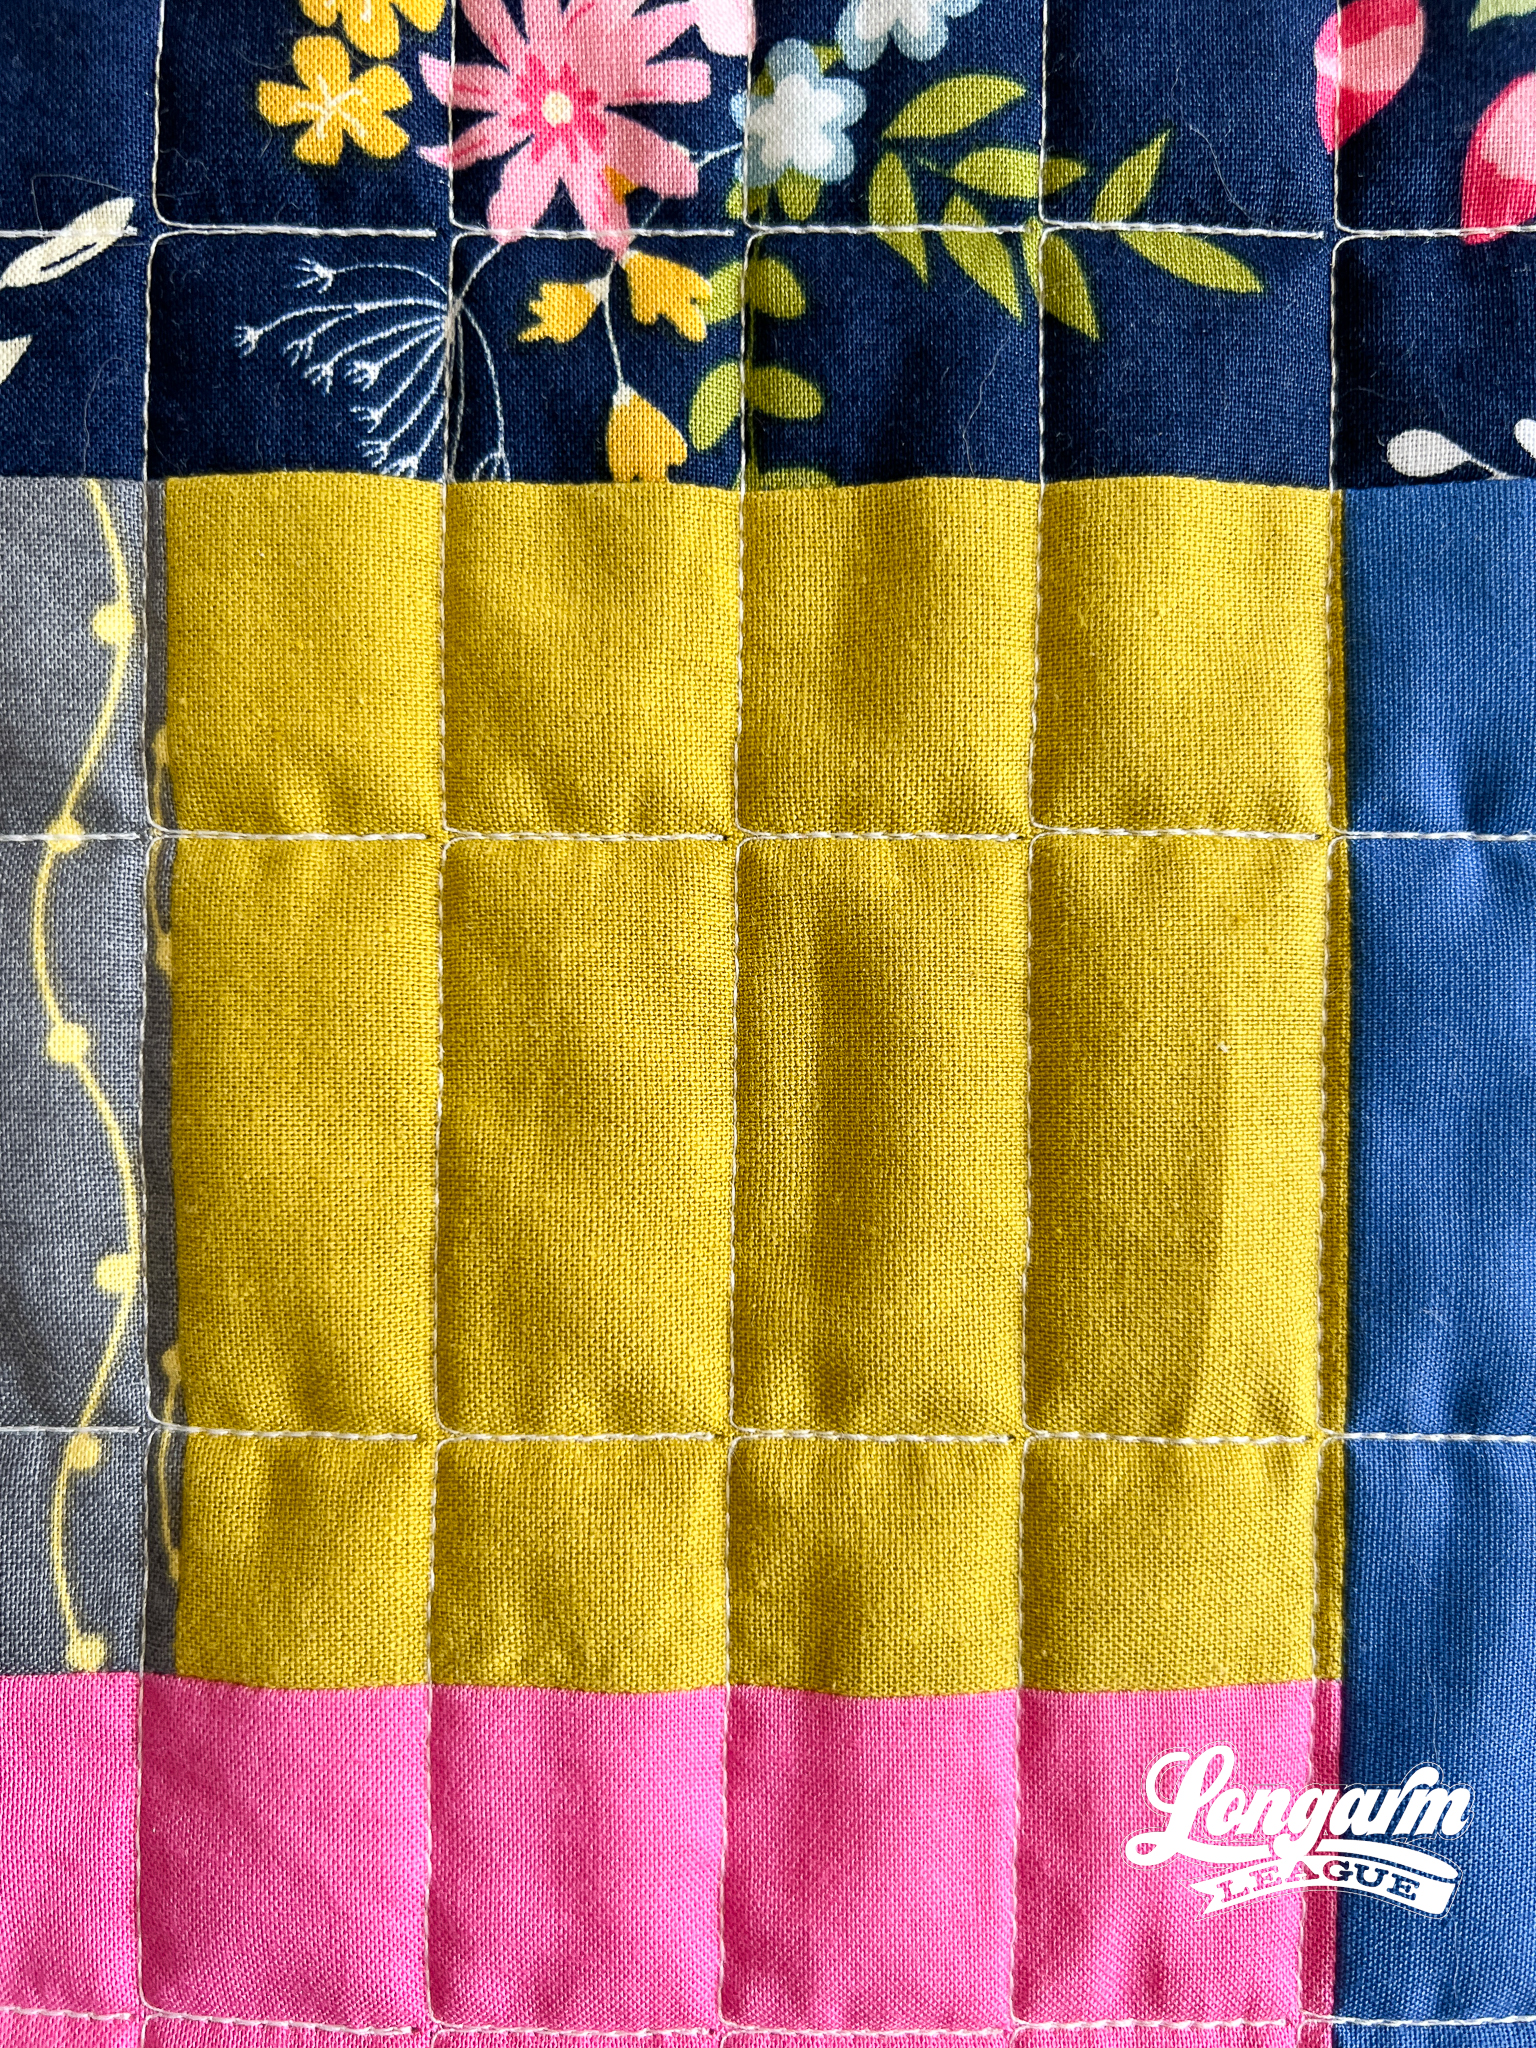
I'm including an extreme close-up picture so you can see the imperfections. If I cared about closing that little gap even more (it doesn't bother me, but I know it may bother others), I would adjust the gap between rows during the setup in my software so that it overlapped by two clicks instead of one. The gaps aren't very noticeable when you zoom out just a bit.
I mentioned this earlier, but there's a video of the stitch path at the top of this blog post to see the stitch path.
Here are the sizing specifications for how I set up this design using my Intelliquilter (75" x 93" quilt size):
Row height: 1"
Gap: -0.01"
Pattern height: 1.01" (measurement from top to bottom of the repeat)
Offset: none
Backtracking: some
Here's a look at the included PDF: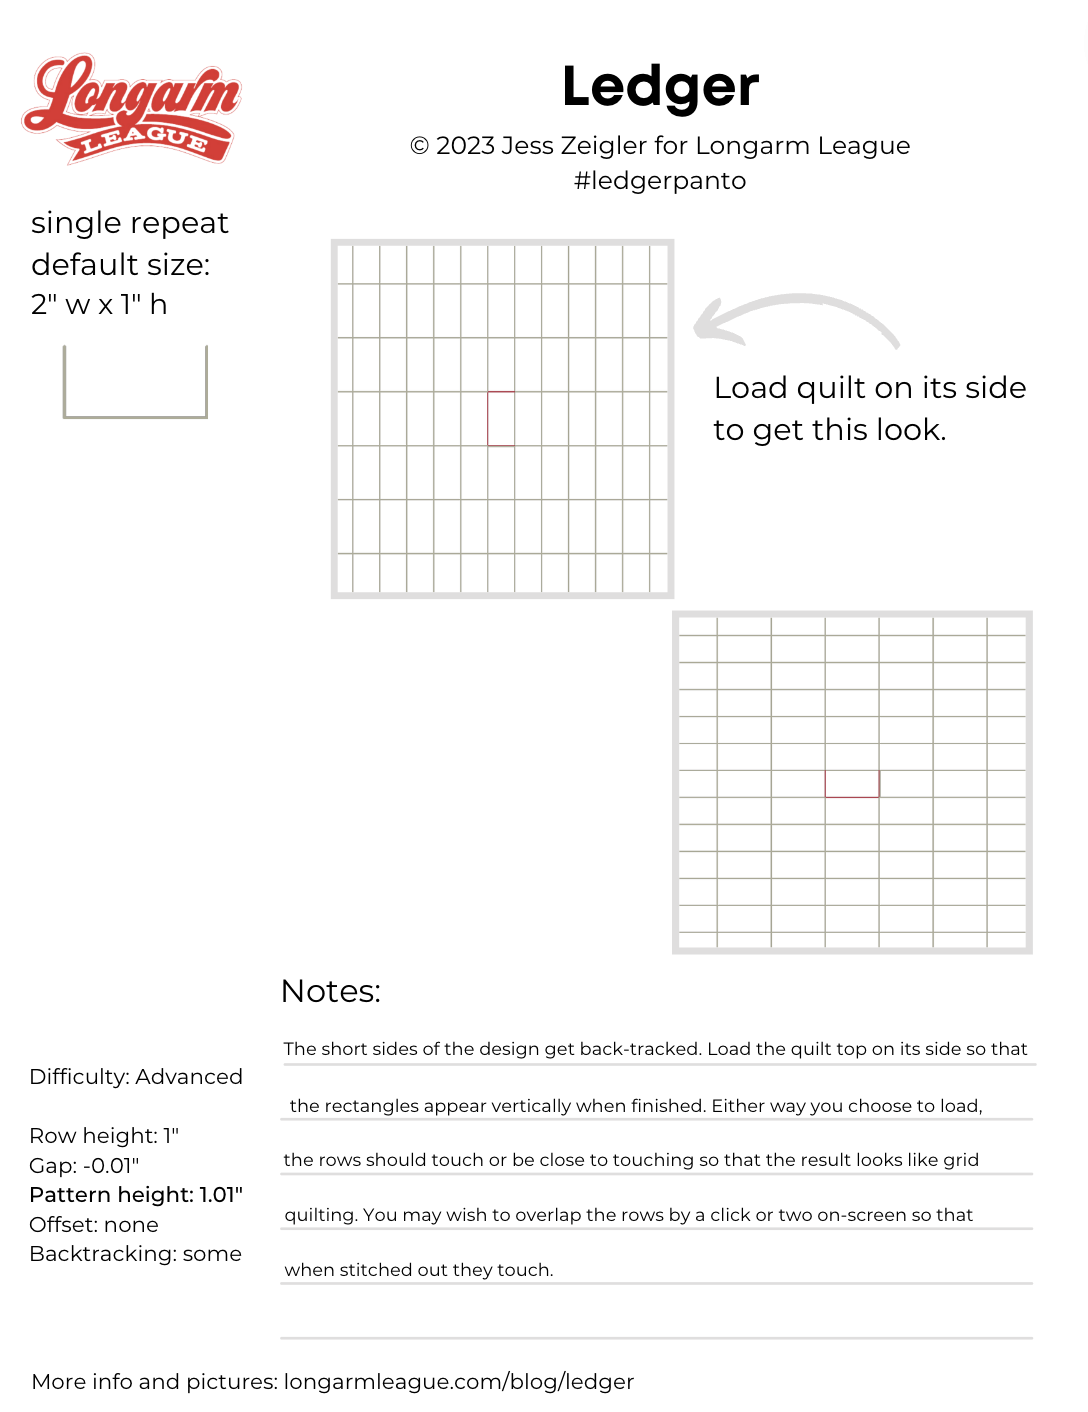
If you use Ledger on a quilt, we'd love for you to use the hashtag #ledgerpanto and tag @longarmleague on Instagram so we can see how you use it! You can also visit our full digital design shop to take a look at all our previous designs.
Interested in getting new digital pantograph designs like this one on the day they're released (and at a deep discount)? Sign up for our Digital Panto Club and get them delivered straight to your inbox on the first Wednesday of each new month.

Jess Zeigler
Longarm League Commish & Owner of Threaded Quilting Studio, LLC.


