
Tread Lightly Modern Digital Quilting Edge to Edge Design on a Vintage Quilt

 Tread Lightly is named as such because of an embossed design I came across on Pinterest that looked like shoe tread... I don't think it was, but it very much could be, don't you think?
'Tread lightly' is also a key phrase used in a pivotal moment in the series Breaking Bad. Since we watched that series again with our teenagers recently, it was fresh in my mind. Oh boy—on the last watch-through, I really hated Walter White! But that's a topic for another day.

Oh yes, back to "shoe tread". This design is sort of like a simplified serpentine meander with a well-placed circle within each shape. The alternating blob directions—pointing up and then down—make for an interesting way to fill space and result in easy-to-nest rows.
It's always nice to have some wiggle room when realigning an edge-to-edge design.

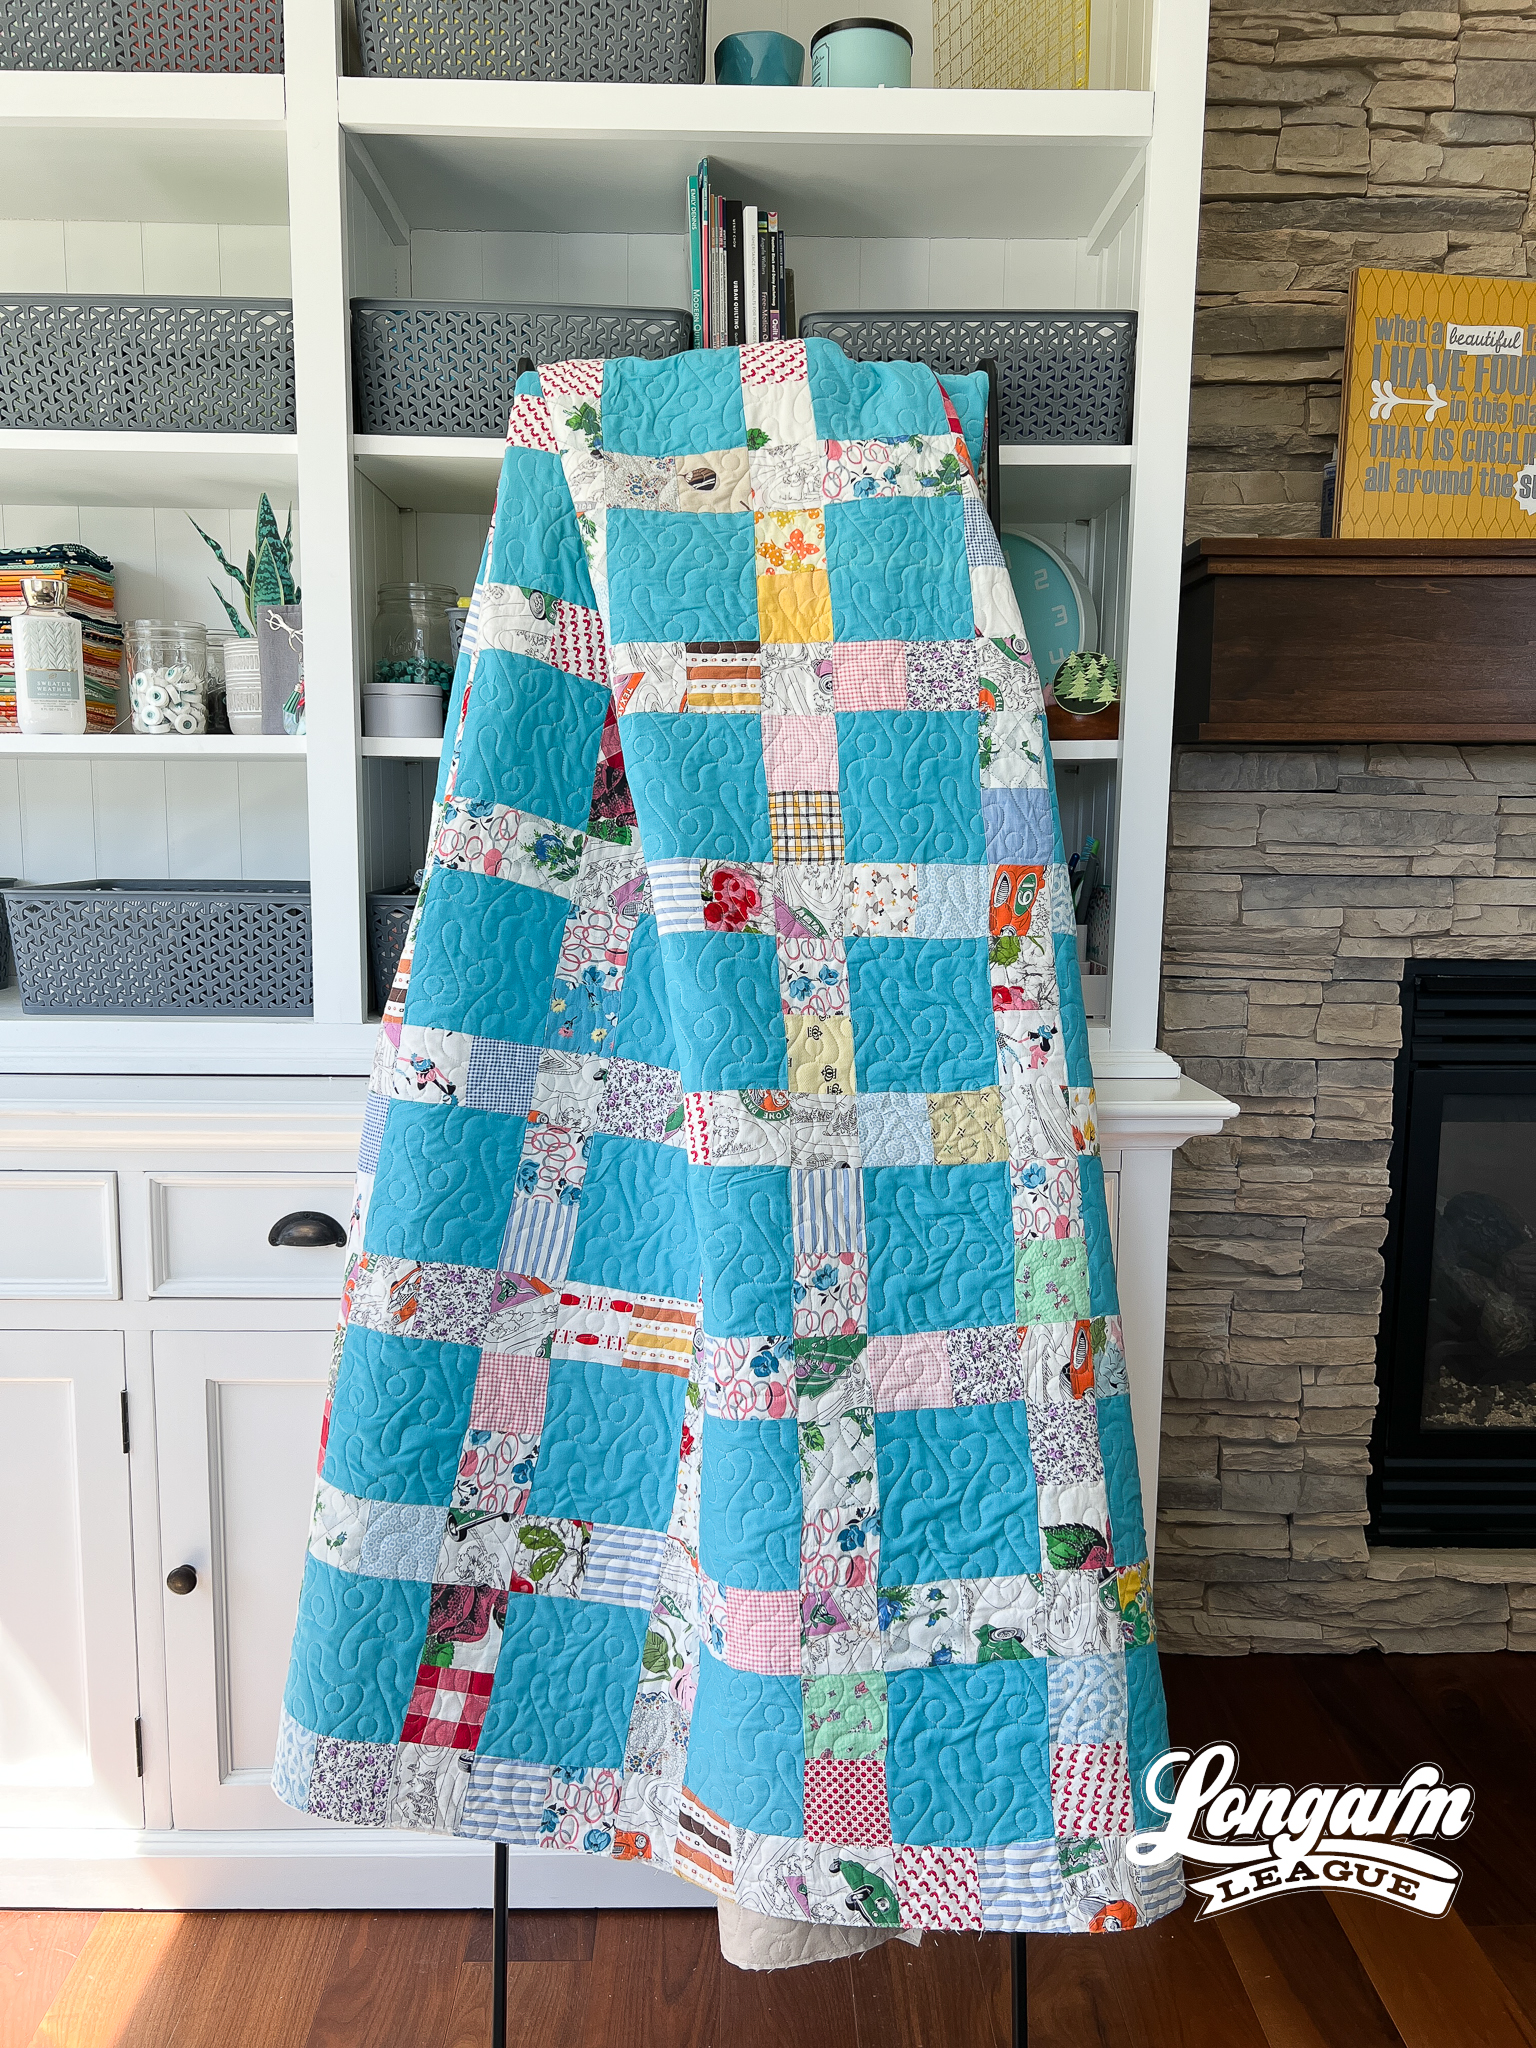
The design is quirky and fun and would be great for kids quilts or any modern top. I was so excited to use it on this vintage top that was gifted to me—it very much fits the fun vibe!

The Quilt
A year and a half ago at Christmastime, my husband's aunt gifted me this vintage top that had been stored at her house for quite some time. We *think* it might have been made by Josh's great-grandma who died a year before he was born. I don't know how old the top is, but it was stored in an Red Wing Boots box that had a price tag of $28.95 attached. Can you remember the last time when a pair of leather work boots sold for that much? :) That box was a treat in itself.
I'm so glad Josh's aunt gifted it to me because I truly adore the quirky fabrics and the imperfections of the piecing. And I LOVE the solid aqua blue fabrics that set off all of the other prints. I find it very cheerful!
Vintage tops like this commonly have fullness in the patchwork, which is understandable knowing they were made when cutting tools were more primitive than the fancy rotary cutter and rulers we use today. It was pieced by machine and not hand, which helped keep it in such a durable condition.
To prep this top for quilting on the longarm frame, I first looked it over really well. 🔎 Most—if not all—fabrics are cotton, so that was good to note for making repairs and using an iron without fear of melting anything.
I used safety pins and sewing clips to mark the areas that needed attention. There were maybe 10-15 spots where the seams had split and just a few places where I needed to replace ripped or torn fabric. In those cases, instead of replacing the whole square, I just added bits of fabric from my stash and seamed them in so that the quilt would remain strong.
As I worked through the spots, I also trimmed stray and knotted threads. It looked as though the top had been washed, so I had my work cut out for me. There are blue nests of threads in all of the little trash receptacles in my room because I just kept finding more and more to trim from the underside.
I used a generous amount of spray starch on the whole quilt while pressing it. This worked well to shrink the areas of fullness right before loading the quilt on my frame. There are just a few puckers that happened during the quilting process, but I can live with that. I also didn't "micromanage" the quilt as it stitched out. Some of those puckers probably could have been avoided with some aggressive hand-surfing. But that's the thing with starting with such a perfectly imperfect top—I didn't feel the pressure to make it be something it's not.
I had just enough 108" wide fabric (Kona Parchment) on the bolt to use as the backing, so that's what I did. I always like how solid fabrics show the quilting really well.
The Quilting Details
A video of the stitch path appears at the top of this blog post.
Here are the sizing specifications for how I set up this design using my Intelliquilter (79" x 90" quilt size):
Row height: 3.5"
Gap: -0.57"
Pattern height: 4.07" (measurement from top to bottom of the repeat)
Offset: none
Backtracking: minimal
The backtracking occurs in the tiny vertical line that connects the circles within each shape. At the scale above, each circle is about 5/8" in diameter.
Here's a look at the included PDF: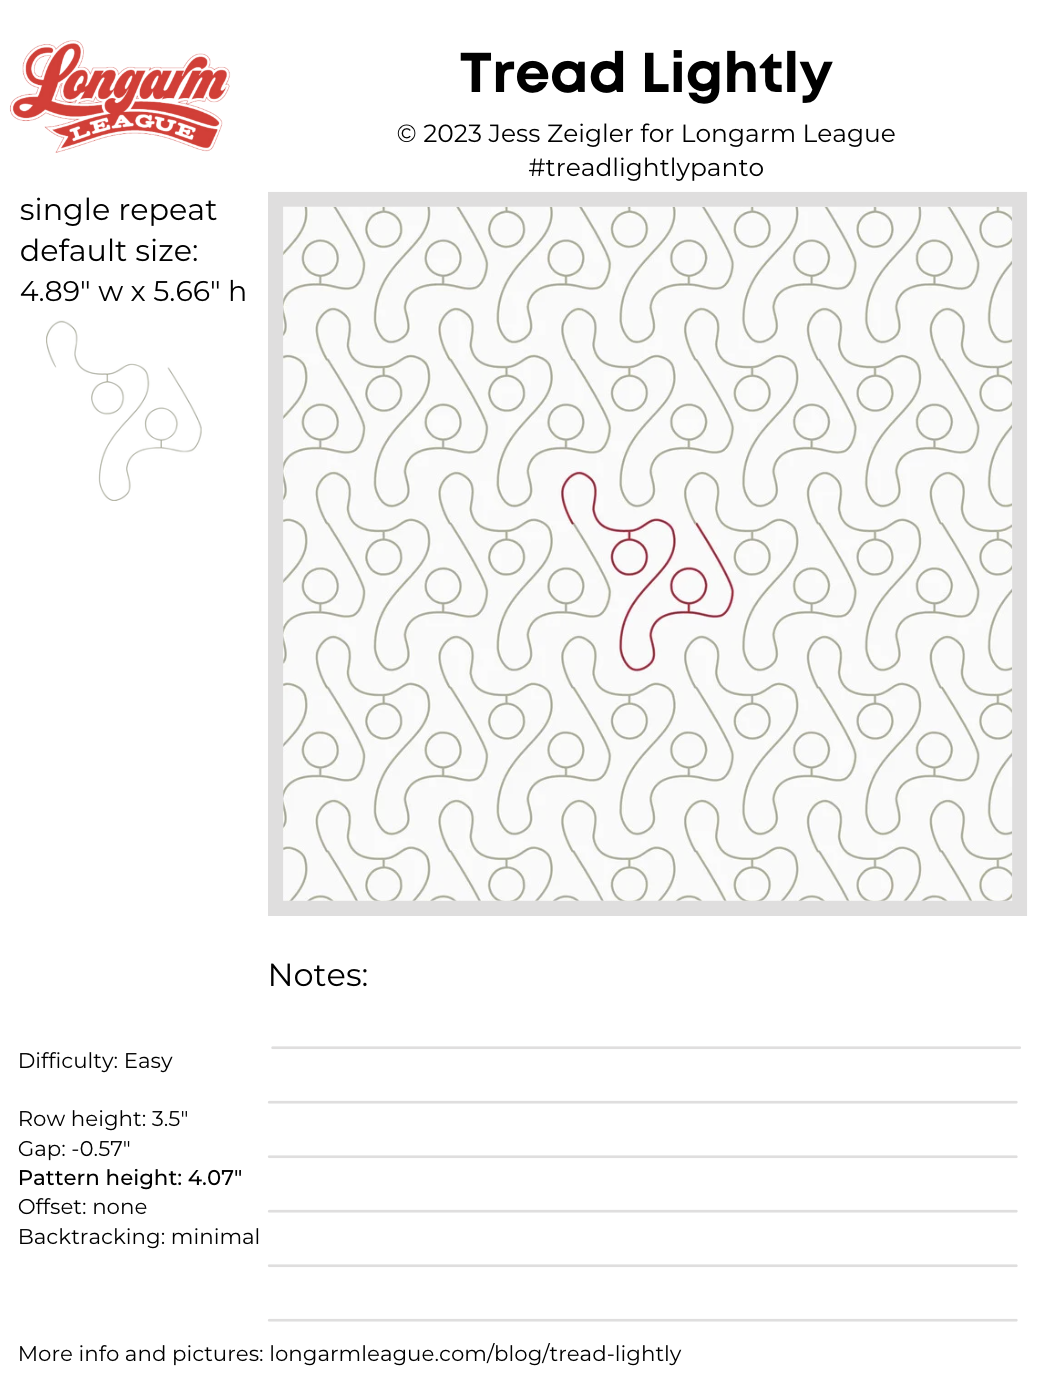

If you use Tread Lightly on a quilt, we'd love for you to use the hashtag #treadlightlypanto and tag @longarmleague on Instagram so we can see how you use it! You can also visit our full digital design shop to take a look at all our previous designs.
Interested in getting new digital pantograph designs like this one on the day they're released (and at a deep discount)? Sign up for our Digital Panto Club and get them delivered straight to your inbox on the first Wednesday of each new month.

Jess Zeigler
Longarm League Commish & Owner of Threaded Quilting Studio, LLC.


