
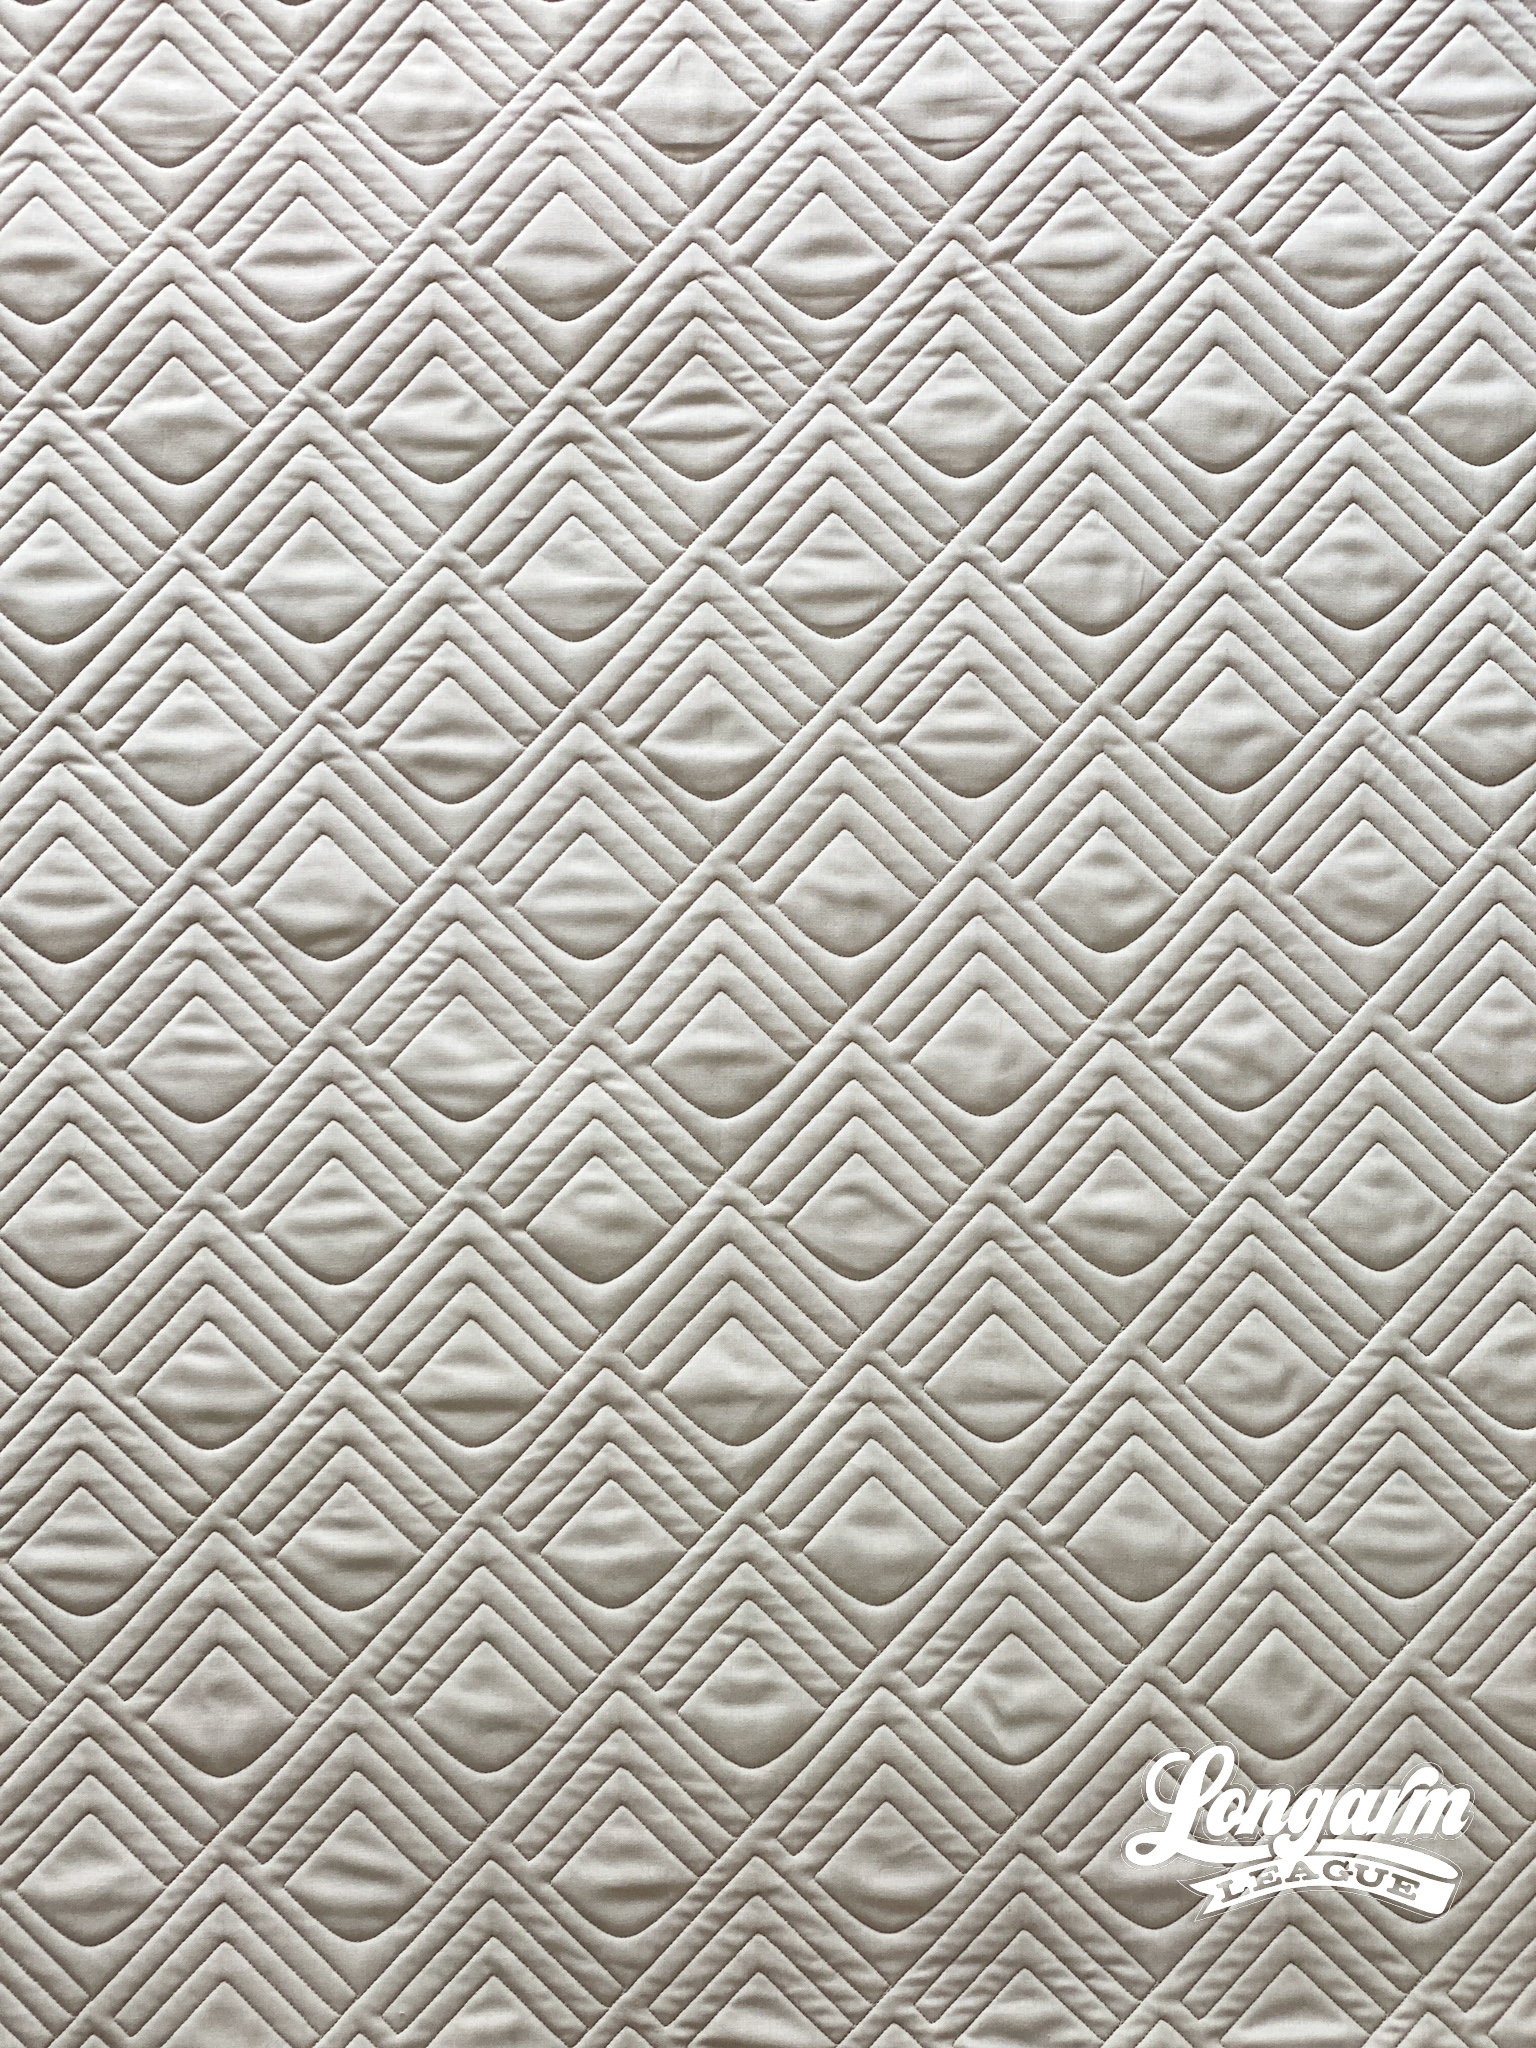
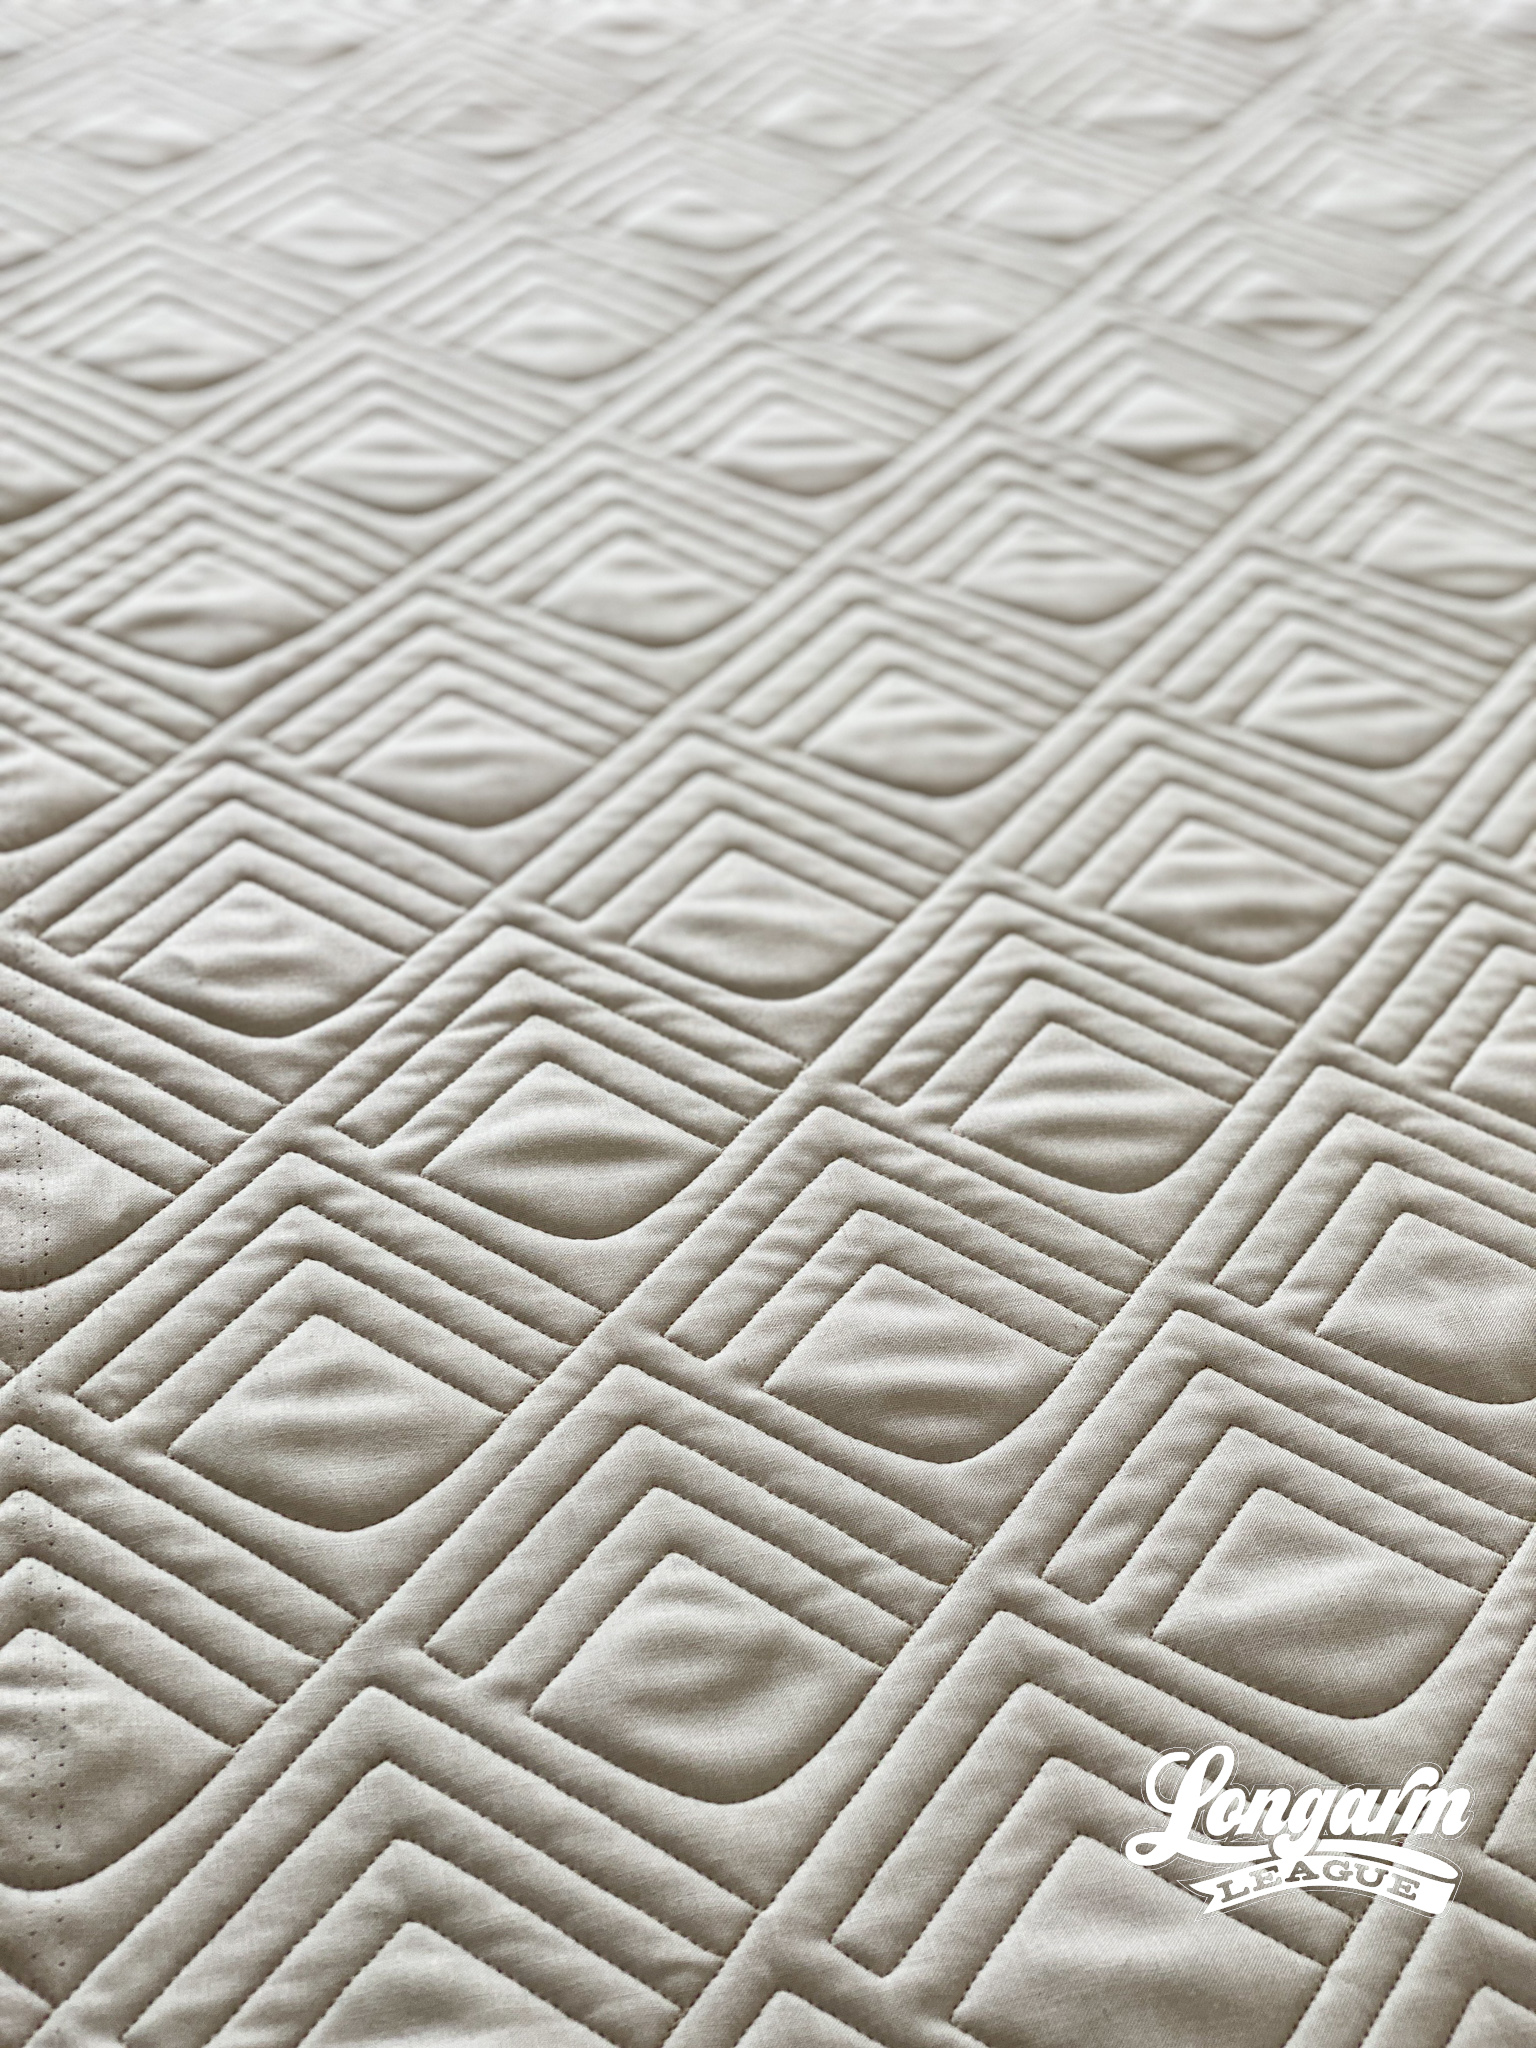
Boho Bulbs Edge-to-Edge Digital Pantograph for Computerized Quilting
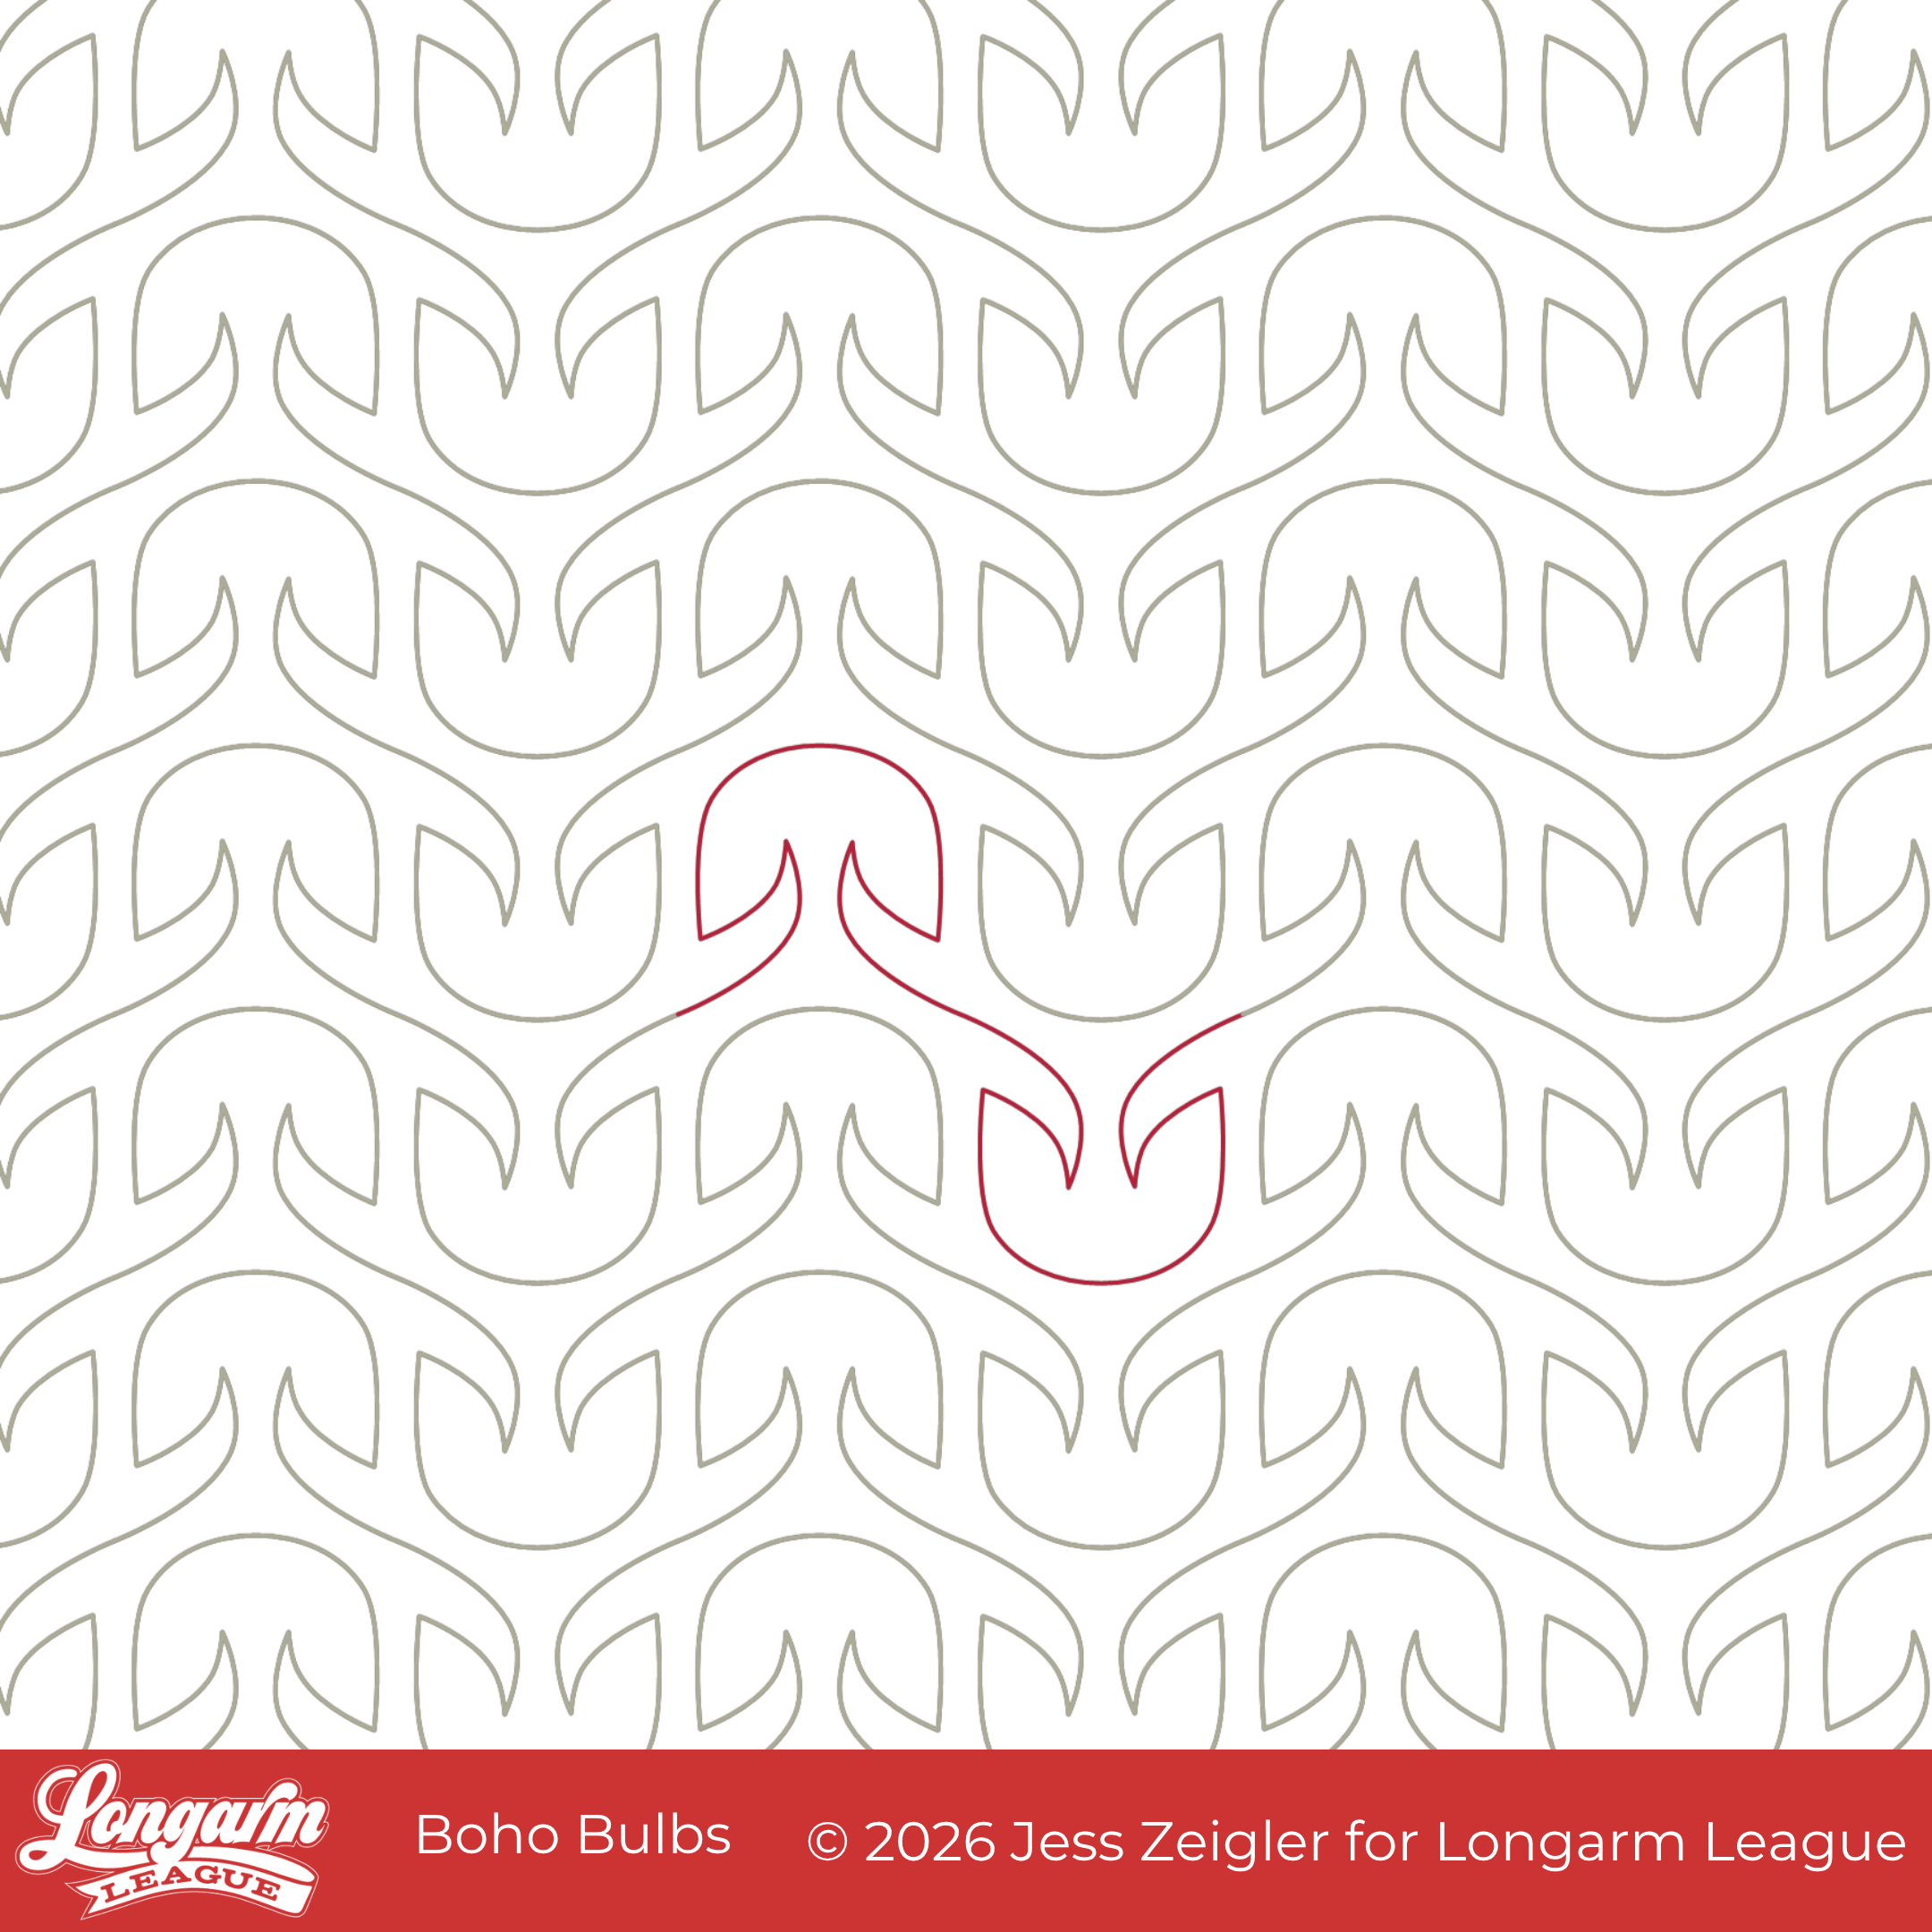
I started playing around with a version of this design in 2022. I named it Willow in my original digital sketch because it resembled more of a willow tree to me. The sides descended further, and there was greater separation between the "leaves" and the "trunk". But I knew it was never quite right, so I kept making adjustments. I played around with making some nodes sharp and pointy, and then round, and then a combination. 
This design started working for me when I shortened up and tapered the sides, and smoothed out the top. Only, then it didn't look like a willow tree anymore, so it needed a new name.
Boho Bulbs draws on a simple, symmetrical, motif both oriented vertically and then inverted to create an interlocking pair that does not need an offset. It's clean and consistent, with just enough personality to keep it from feeling rigid.
This digital edge-to-edge design is great on floral quilt tops like the one shown in here in the blog post. Its simple, geometric nature also...
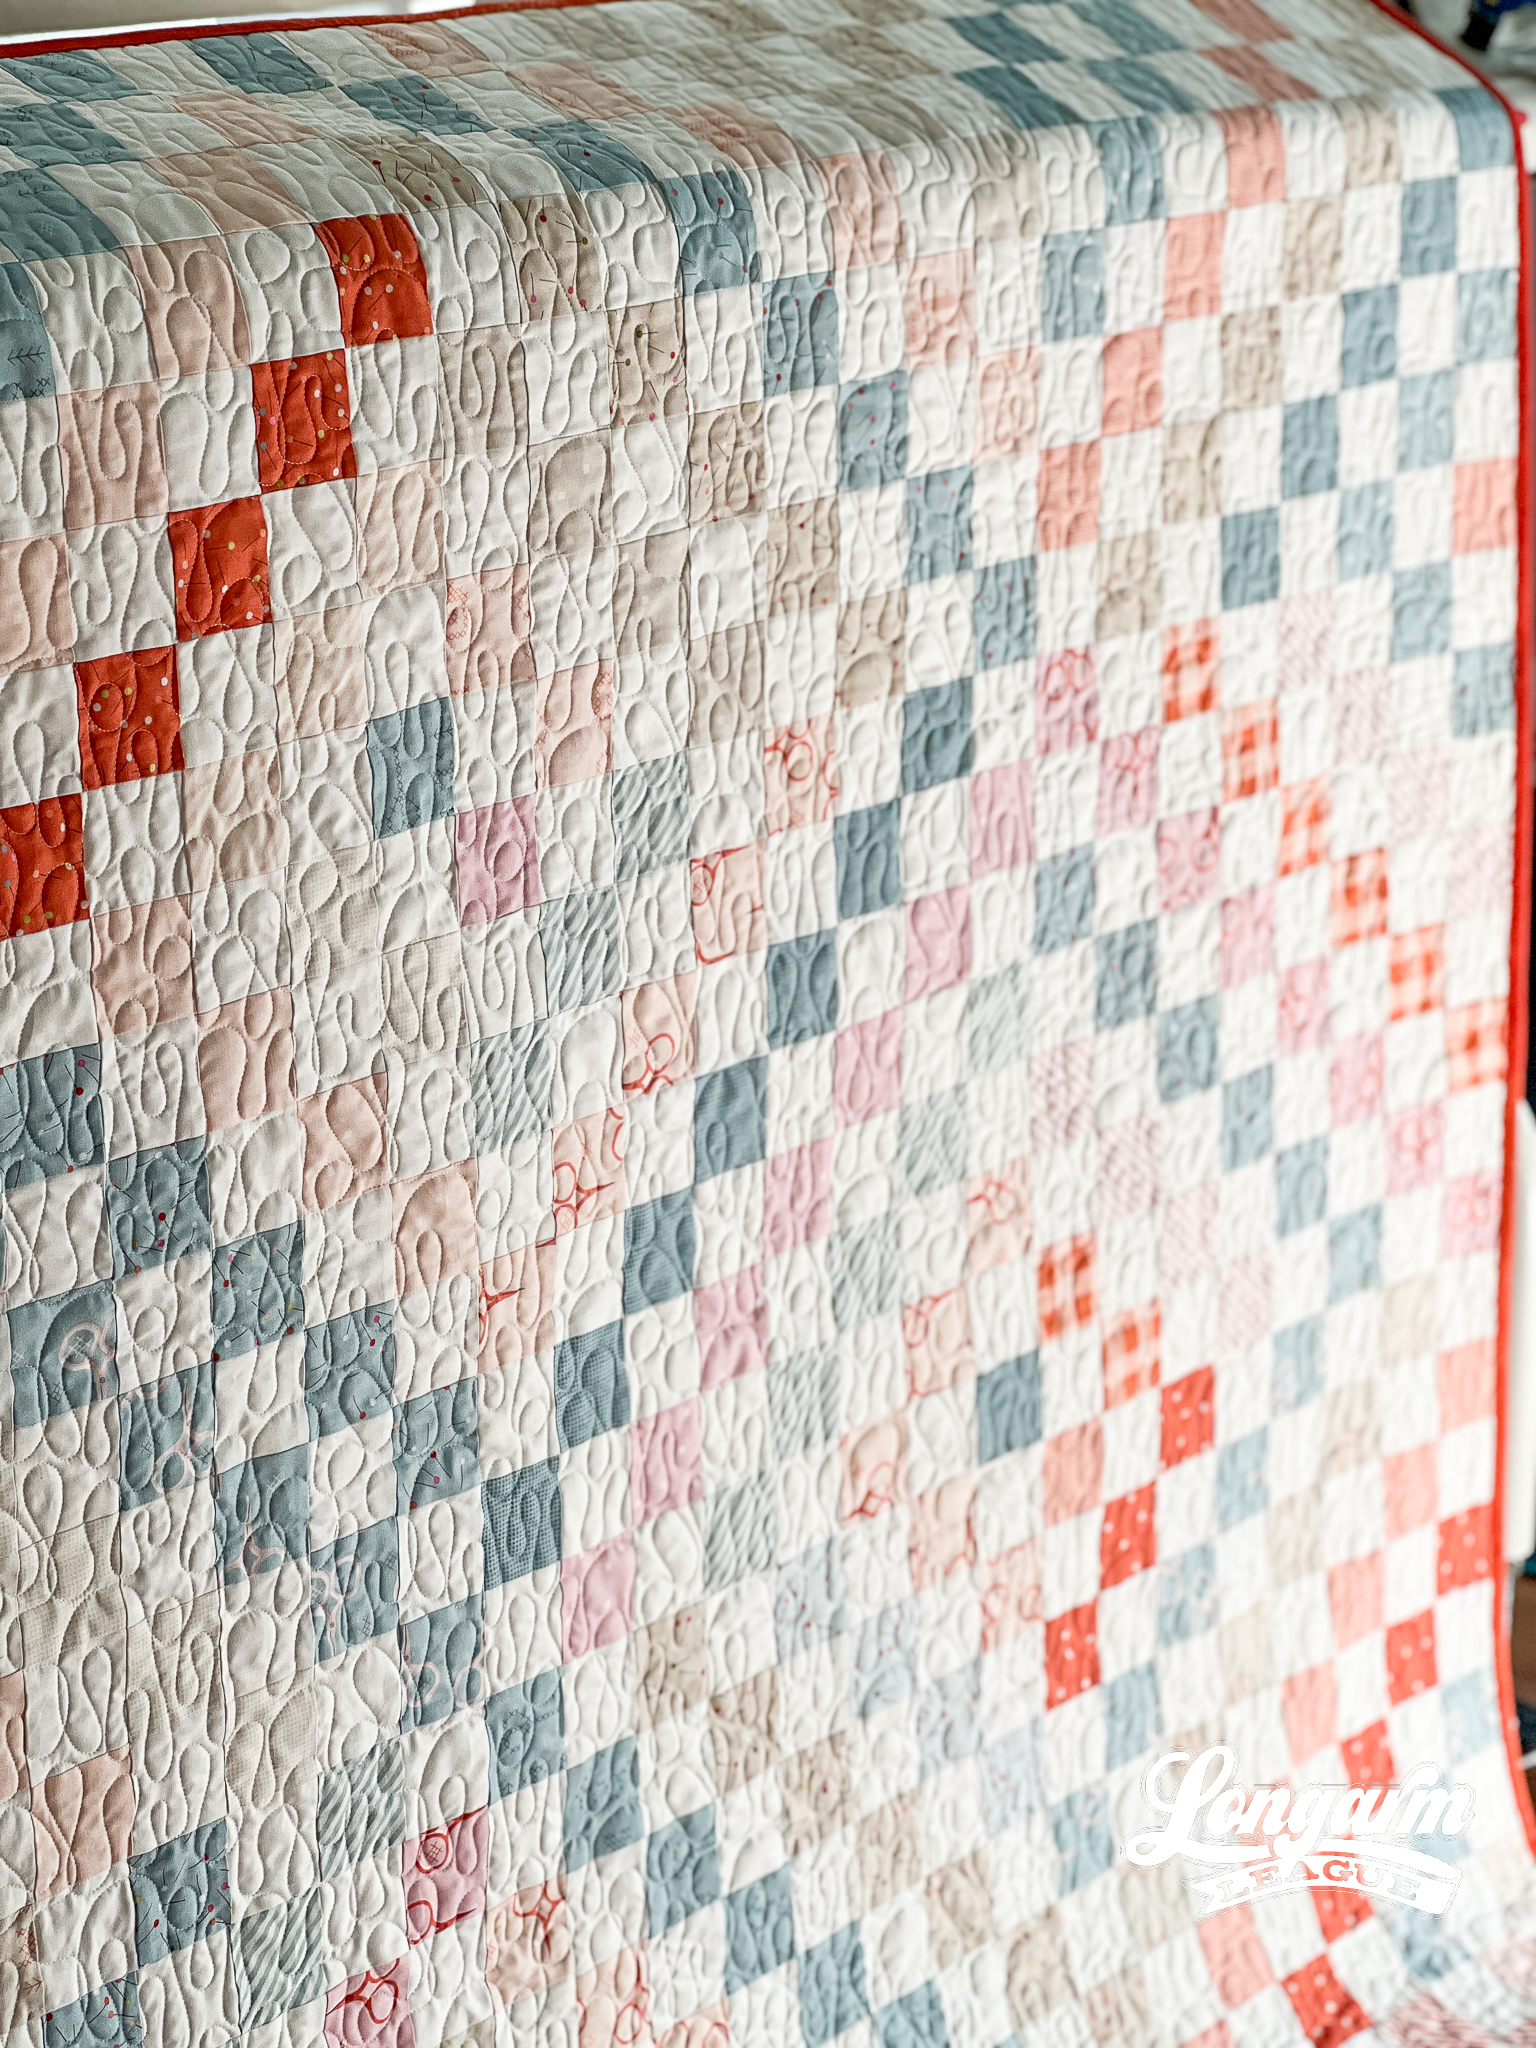
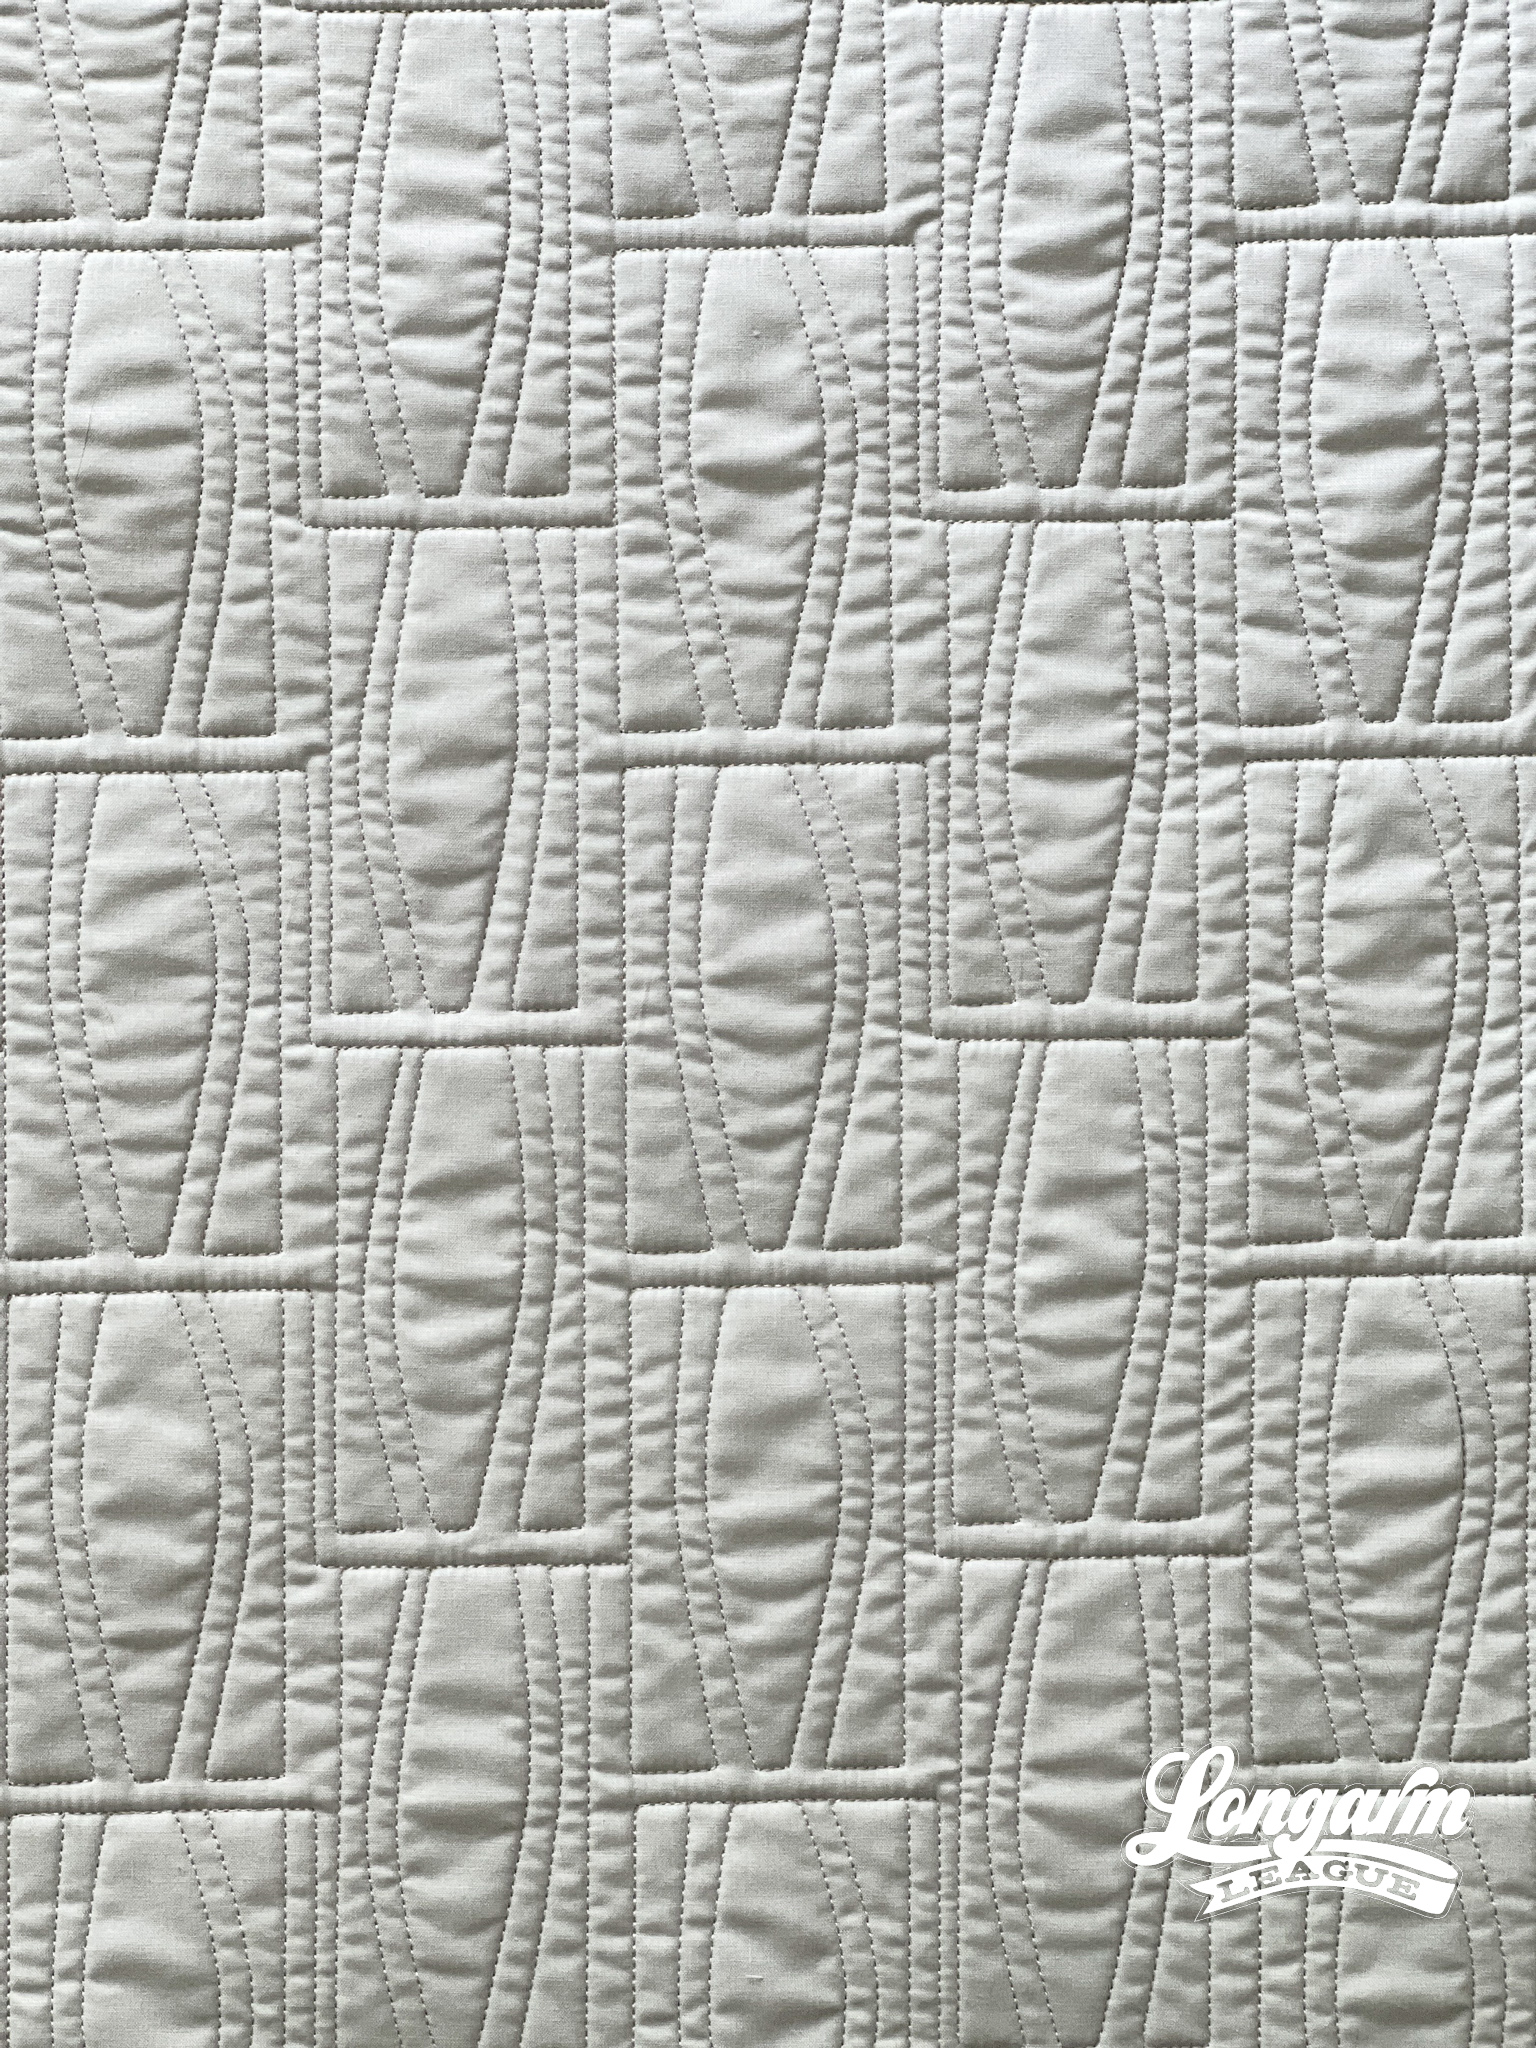
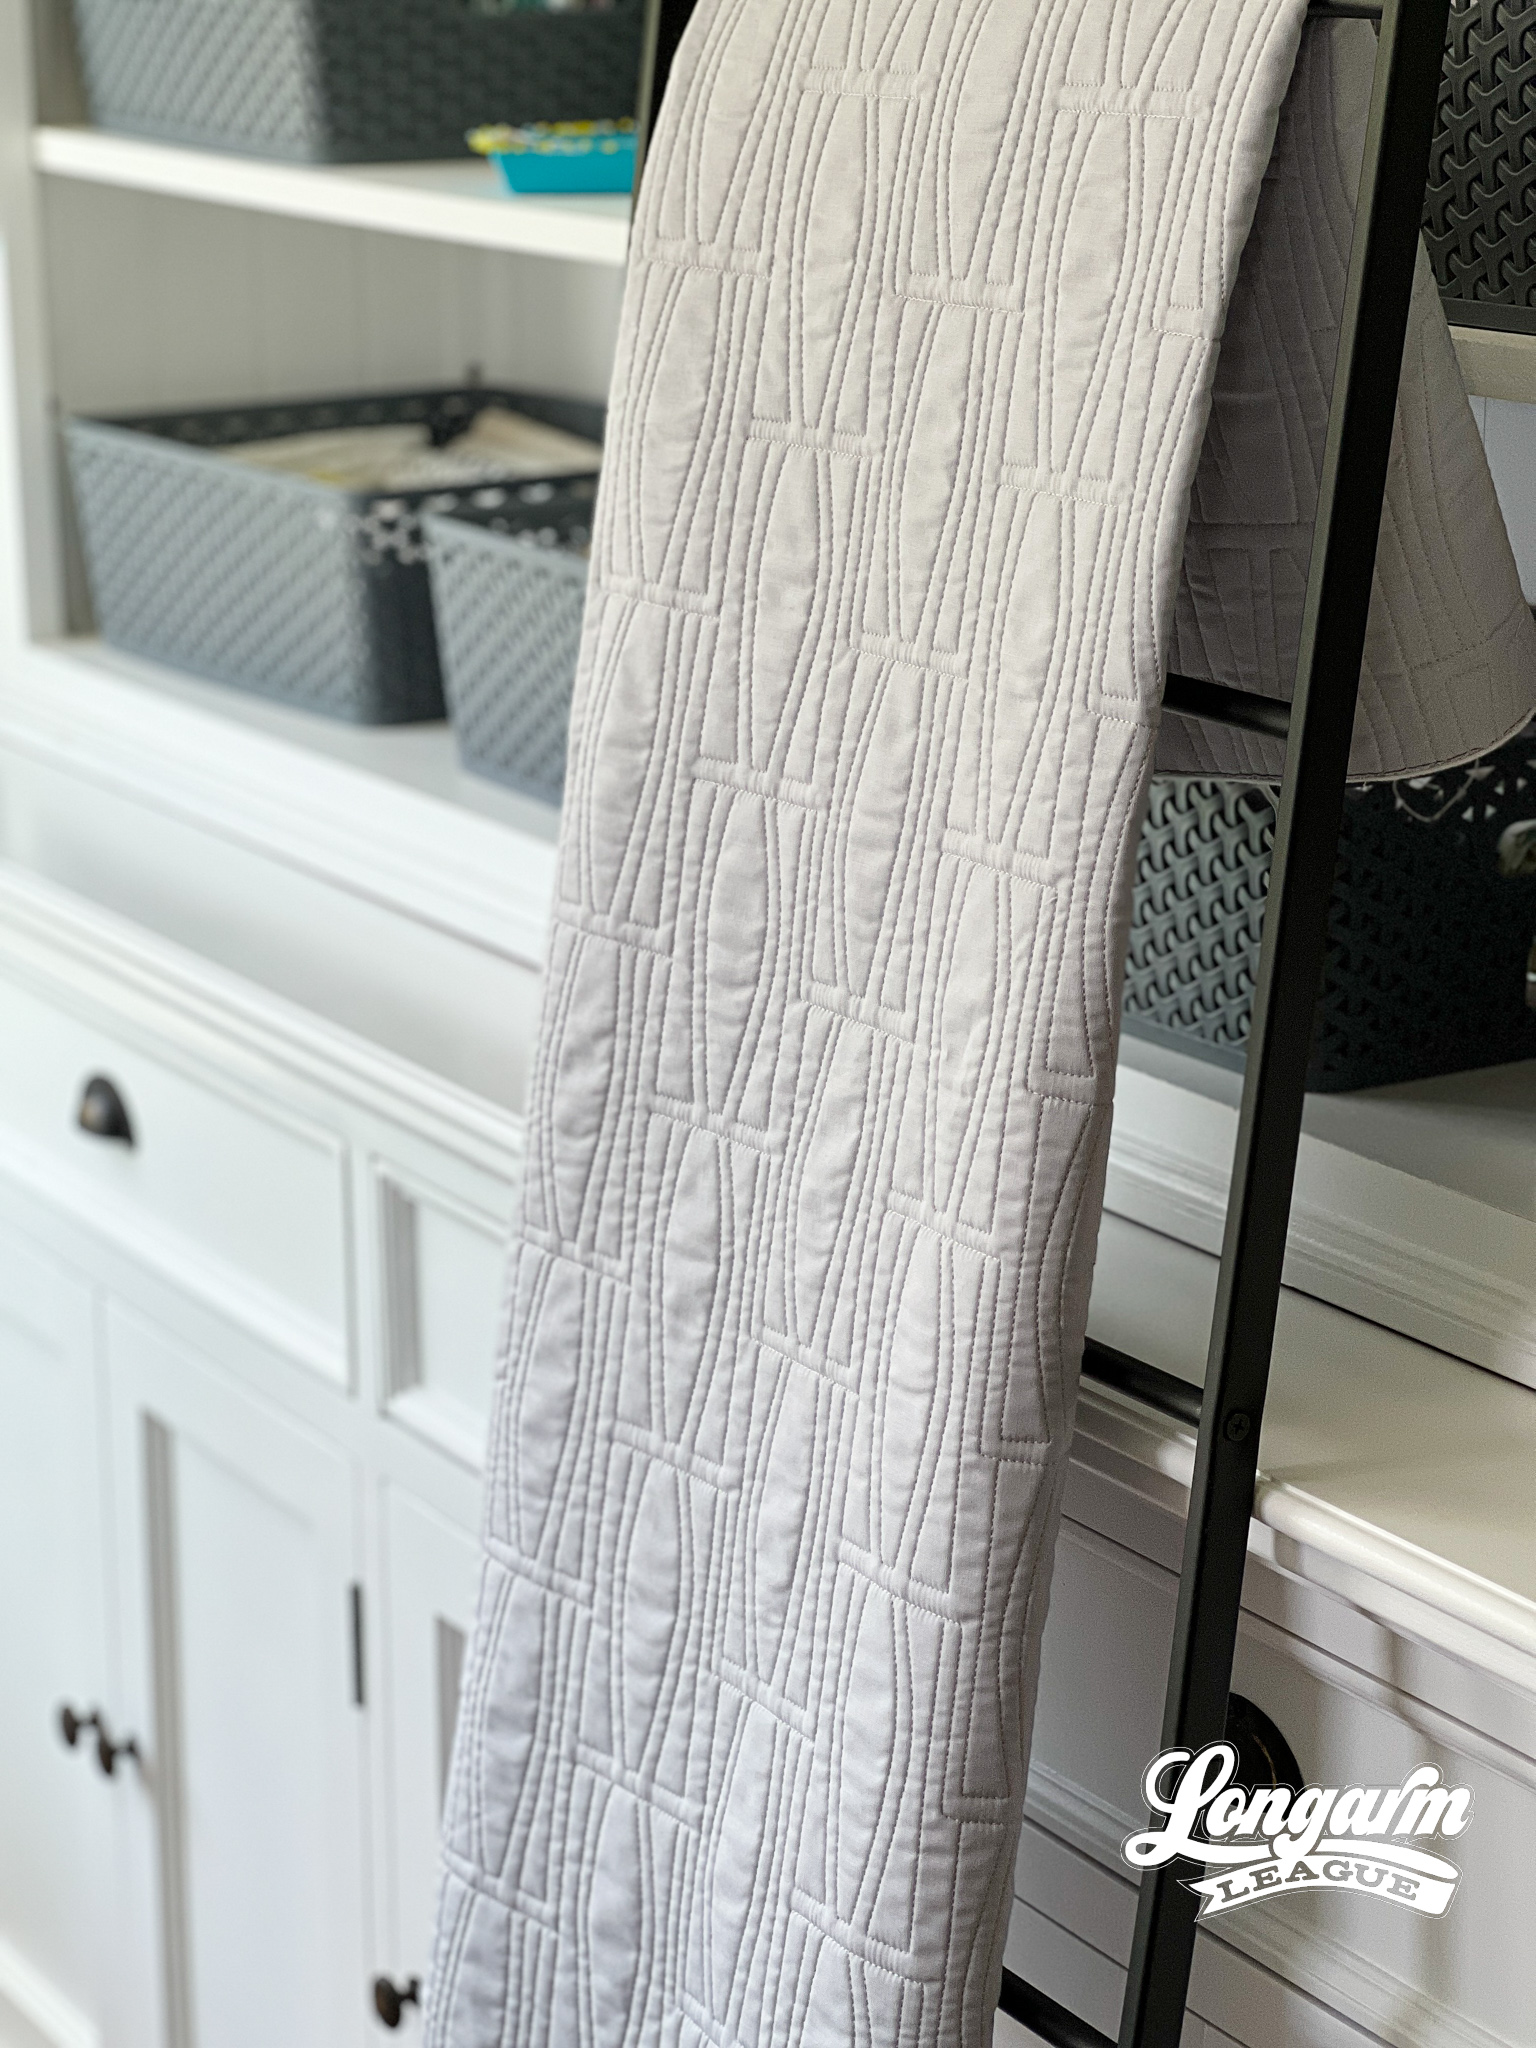
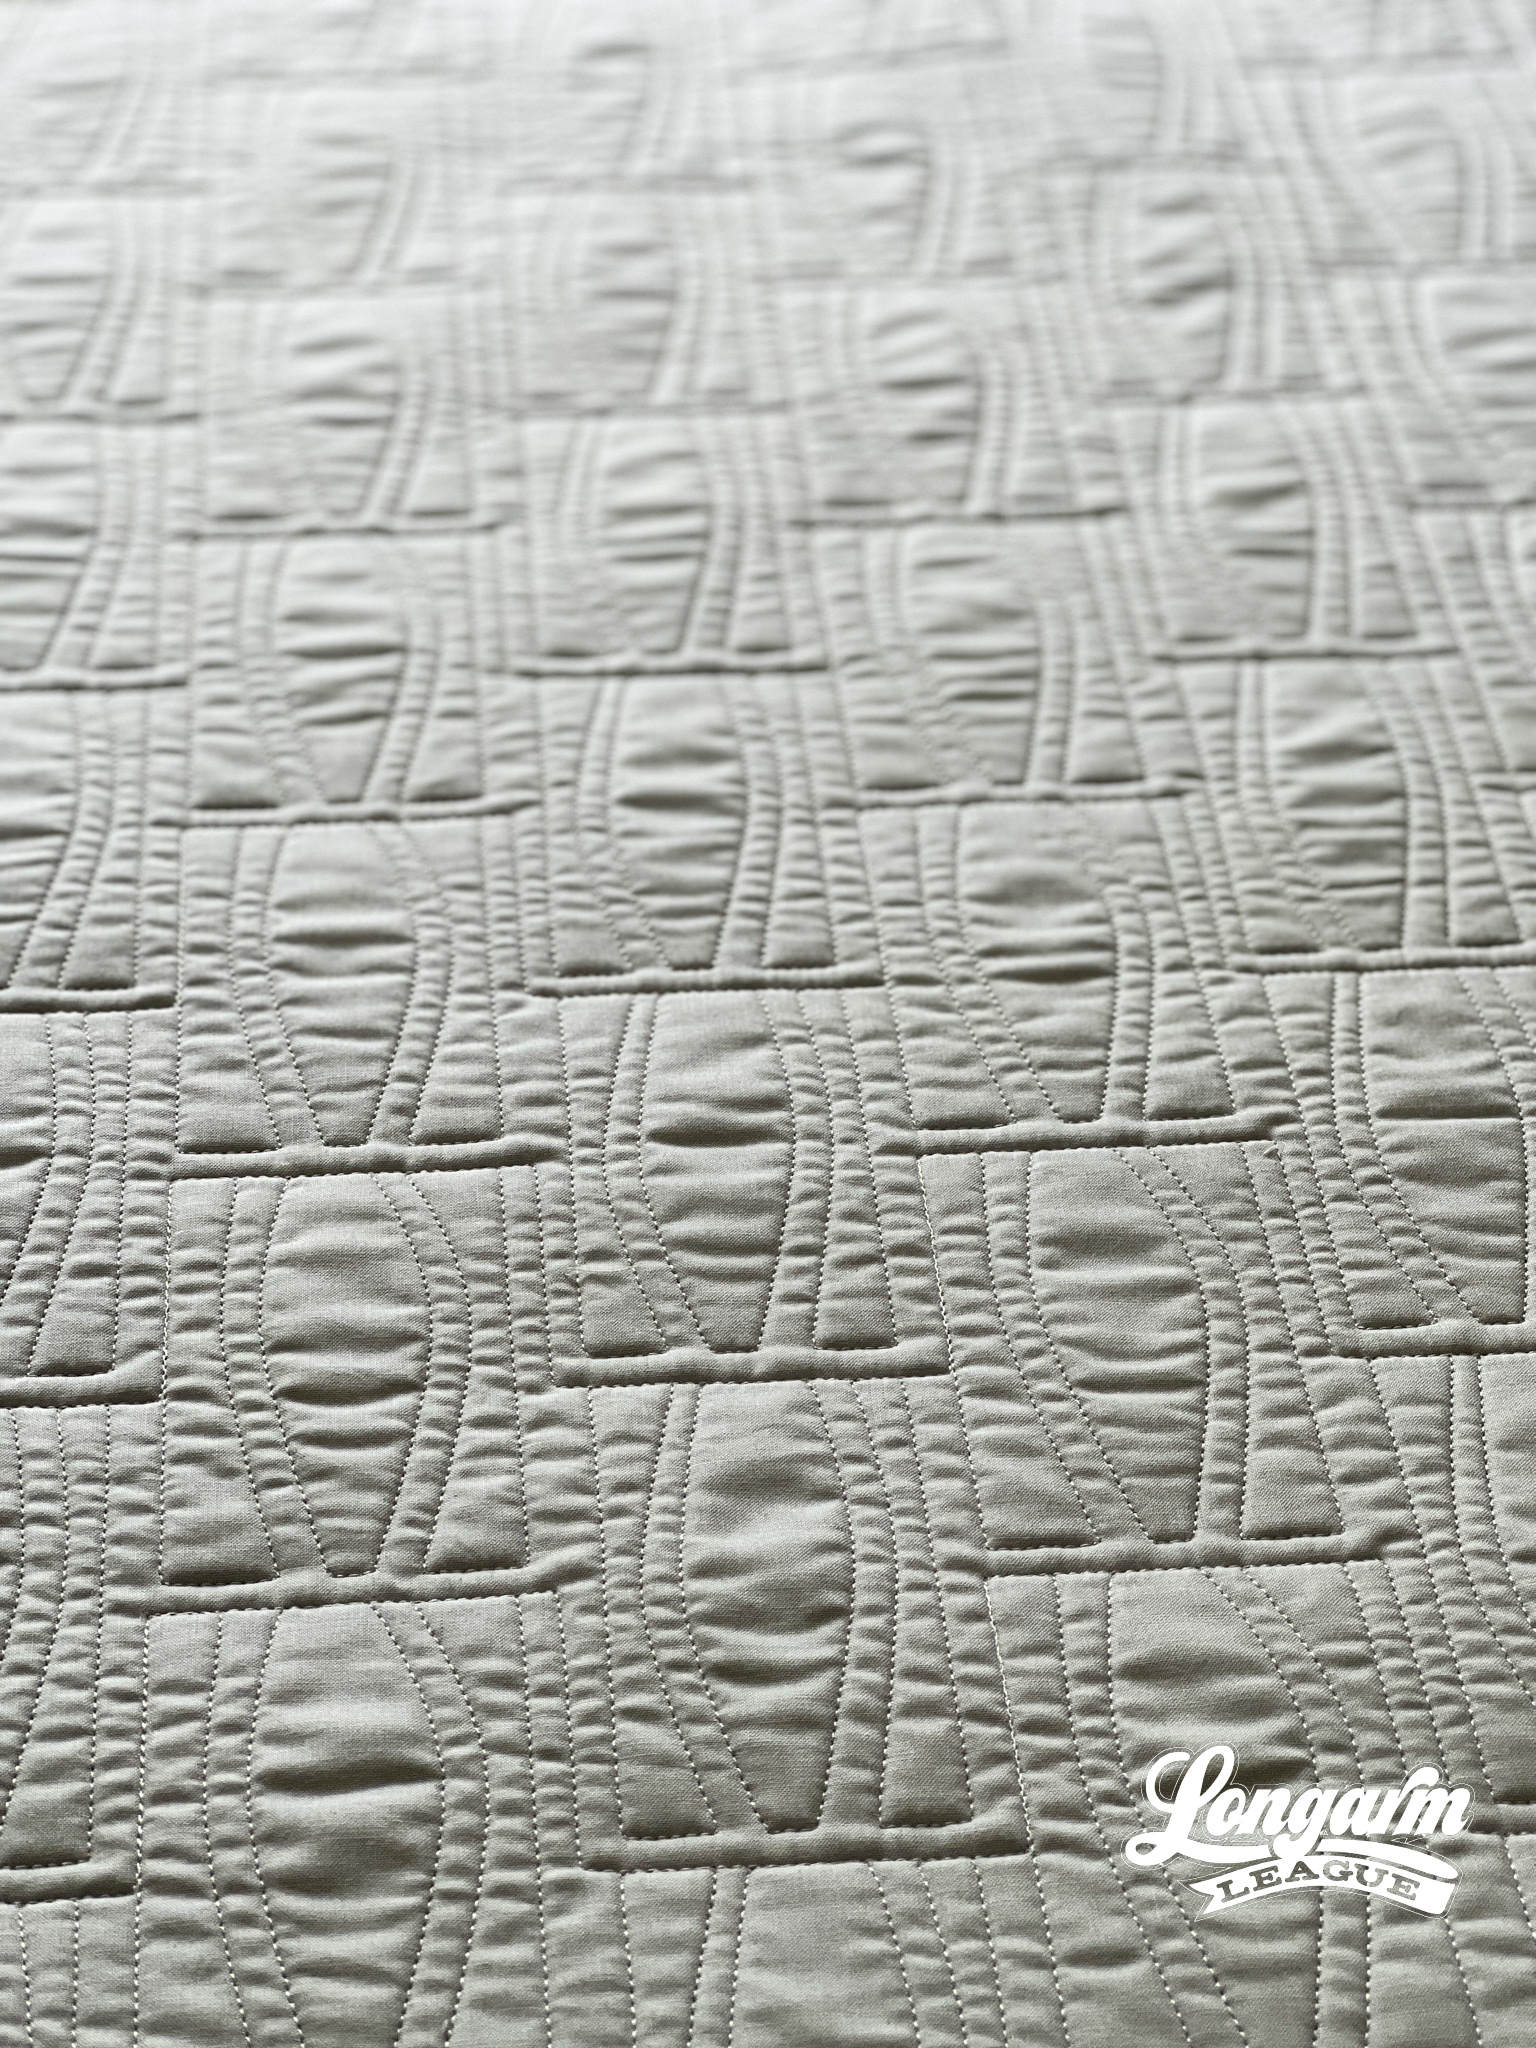
Modra E2E Digital Longarm Quilting Design
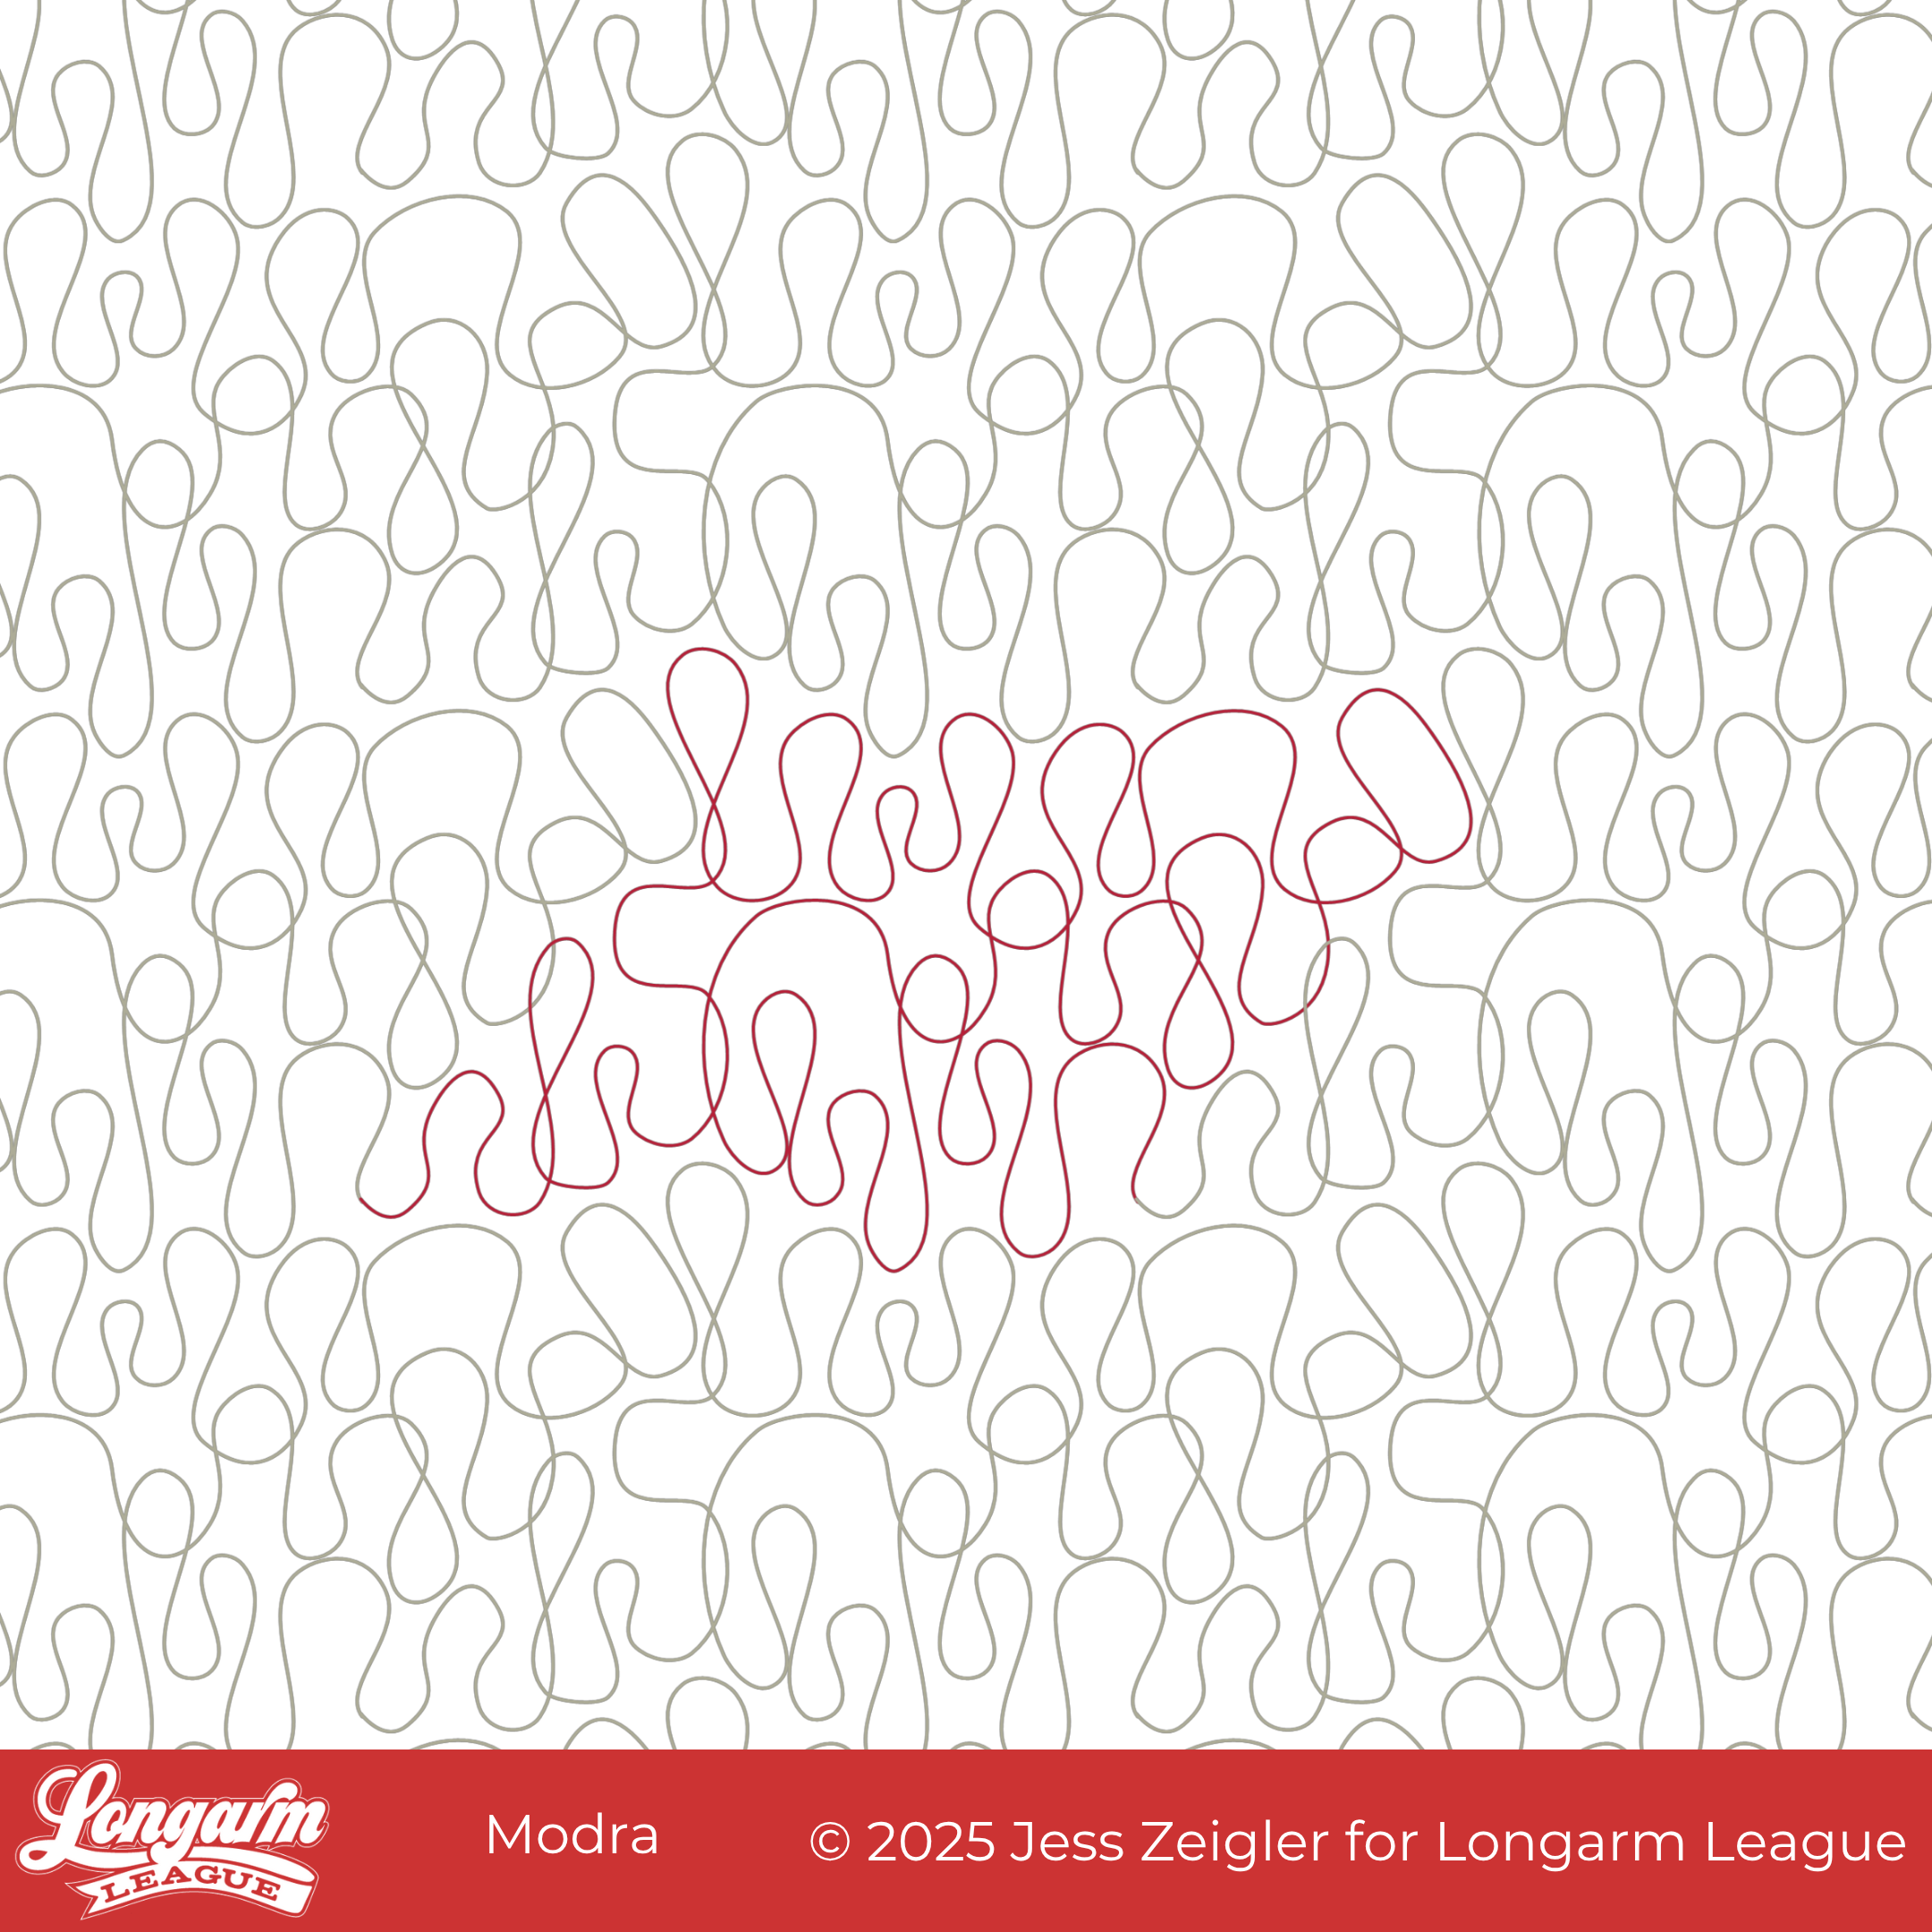
Feeling groovy? Our newest edge-to-edge design brings a healthy dose of retro rhythm and abstract movement to your quilts. Meet Modra, a modern meandering classic in the making.
This design originated as an interpretation of a city skyline—if you can believe it—with all rectangular shapes and mostly 90º angles. I wanted different sizes and shapes of "buildings", but when it looked very sharp and uninviting, I changed the line nodes to smooth in my software and was delighted! I loved the "ribbon candy" of it all, maintaining the irregular intervals and sizes.
I couldn't help but think it hinted at a mid-century look. It's quirky but polished, free-flowing but intentional. There are places where the stitch path overlaps slightly.
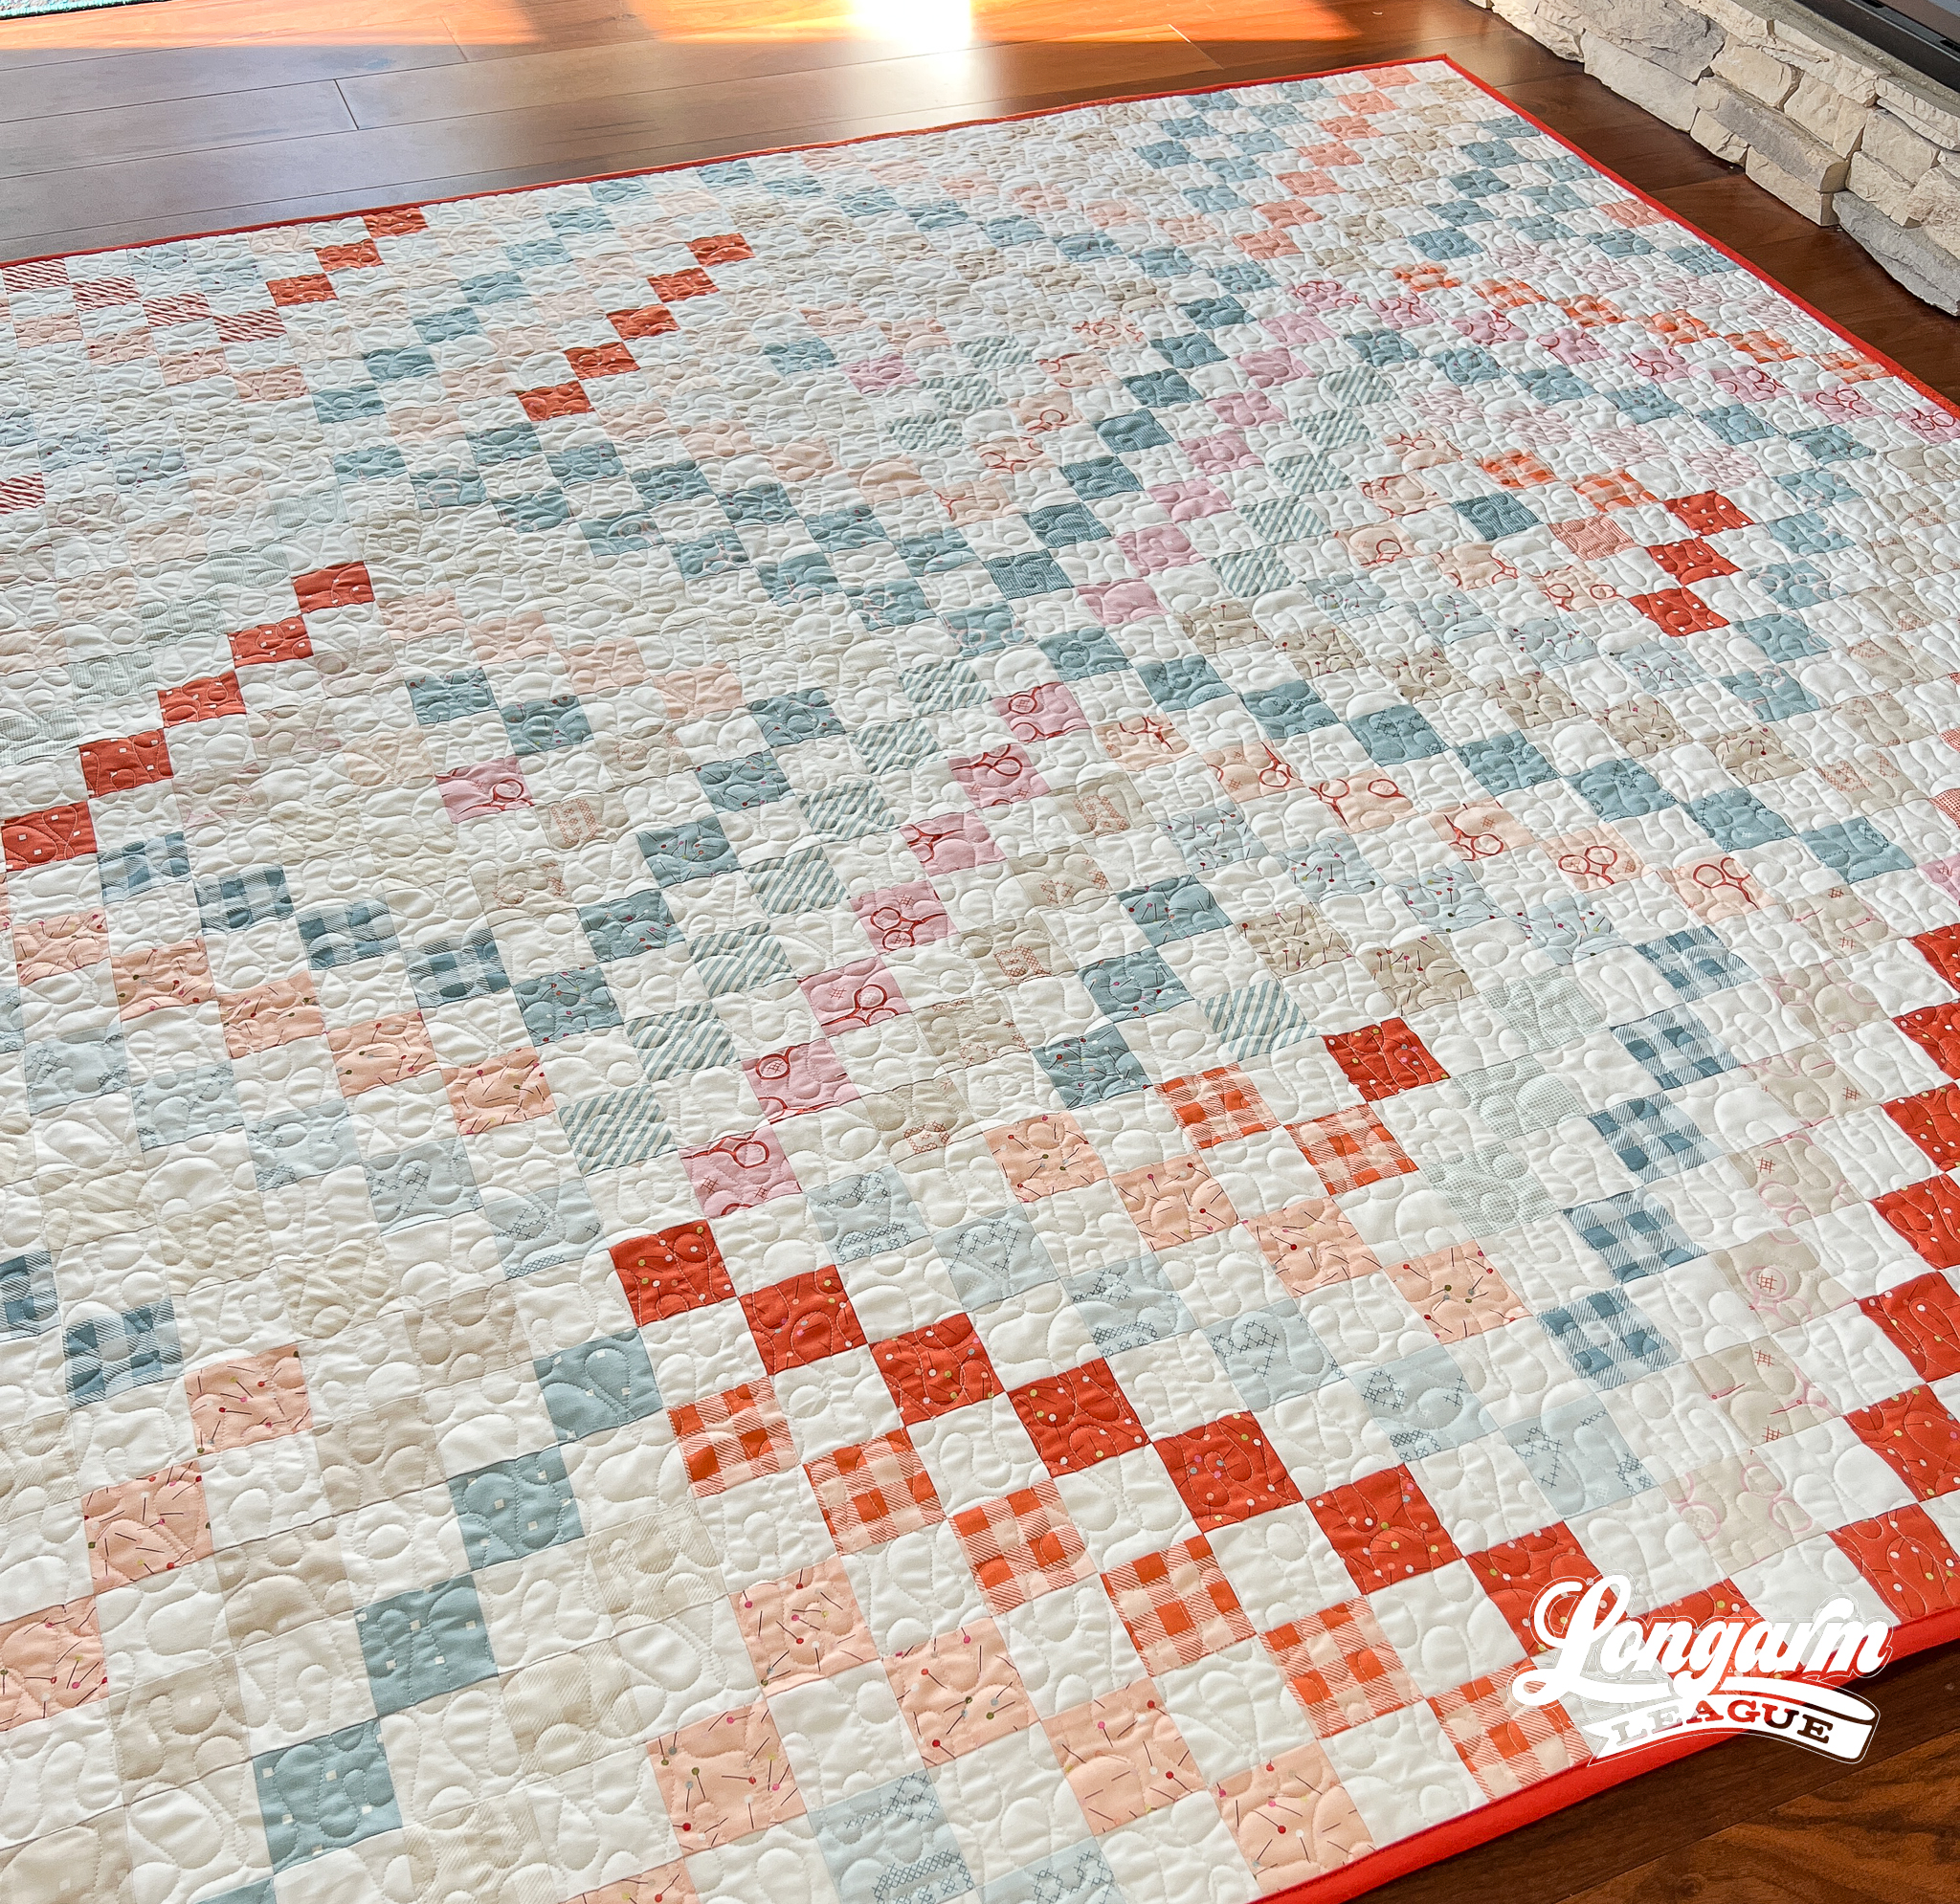
I chose to quilt Modra on this quilt top because of the variation of the lines. I generally don't like to put simple repeated E2E designs on a quilt made of only 2" squares. I prefer some variety when the patchwork is uniform.
Modra stitches like...
Lovebirds Edge-to-Edge Digital Quilting Pantograph

I'll always prefer a "graphic" style of panto design over a novelty one. That's my preferred aesthetic. With that in mind, meet Lovebirds! It's a kinda-sorta, lovey-dovey (ahem) take on a novelty concept for Valentine's Day... and beyond.

In each repeat, you'll find two pairs of lovebirds joined in an amorous but discreet pose. Awfully romantical! 💕
The mirrored shapes, gentle curves, and circles still work together to give the design a graphically strong quality that will result in a nice texture when quilted.

The Quilt
Quilt Pattern
I hopped aboard the bandwagon and joined Quilty Love's Patchwork Hearts II Quilt Along that started a few weeks ago (January 2025). Having sewn many of Emily Dennis's patterns before, I knew this would be fast-n-fun and a great way to use the fabrics I already had instead of buying new. It is a quick-win kind of project. The original Patchwork Hearts pattern is smaller in scale and while it would take more time, it's also very cute and requi...
Quarter - Extended-Width Quilting Design

Quarter is an extended-width design that began as one-quarter of a circle. I thought this would work best as an extended-width design so that I could get every other row to alternate directions.
If you are new to extended-width pantograph designs, I'd encourage you to visit this blog post, which provides more information about this unique format. These designs are different than traditional edge-to-edge designs and may require different configurations or settings with your software.

I like this design because of the simplicity of the basic shape, yet when traveling in different directions, it creates interesting texture and movement!

I was excited to try this new pantograph on this quilt top because it's just a touch "busy" with many bright colors, the secondary diagonal element (fields and furrows layout) created by the placement of the log cabin blocks, and the stars. I liked the idea of a small-scale quilting design to add texture, fearing a more complex quilting d...
Refract Edge-to-Edge Design

Refract is a simple, geometric design that was designed with modern quilts in mind. And boy oh boy, is this a modern quilt!
The combination of smooth curves and lines gives a unique look. I also love the diamond shapes that form between rows. ✨
This abstract design could look like gems, paving stones, ribbons, or waves that cascade across a quilt top. But primarily, I like how simple, repeated geometric shapes provide texture as a backdrop to the patchwork.

The Quilt
If you've been reading this blog or (knowing me as a person) for any length of time, you might recognize that this style is out of my norm, but it was a fun departure!
I made this quilt top during a workshop I took with friend and brilliant quiltmaker Riane Menardi Morrison back in 2016. In the workshop, we made large traditional blocks and deconstructed them. As you might guess, my starting point was a log cabin block with that lovely gold on one half of the block, white on the other, and the black and white s...
Royal Extended Width Computerized Quilting Design

This is Royal, the newest extended-width digital quilting design from your friends (me) at Longarm League!


Royal, as an extended-width design, operates like this:
• The first trip across the quilt will quilt the "crown elements" (aka the spiky shapes) with the circles up.
• Then, it'll quilt a straight line right to left, then stitch two more lines left to right and then right to left.
• Next, it'll stitch the same spikey shapes (circles down this time) left to right.
• This is followed by three more straight lines, ending on the left edge and ready for another repeat unless you need to stop to advance the quilt. 
This edge-to-edge quilting design would look super cute on a princess's quilt (I'm assuming you know one)! But it could also work for a Crown Royal quilt. Have you come across one? They incorporate fabric from the pouches included with Crown Royal Whiskey bottles - it's a thing. Or perhaps you get a Kansas City Royals baseball quilt? Boom! This design would be per...
Rich Girl Extended Width Digital Quilting Design
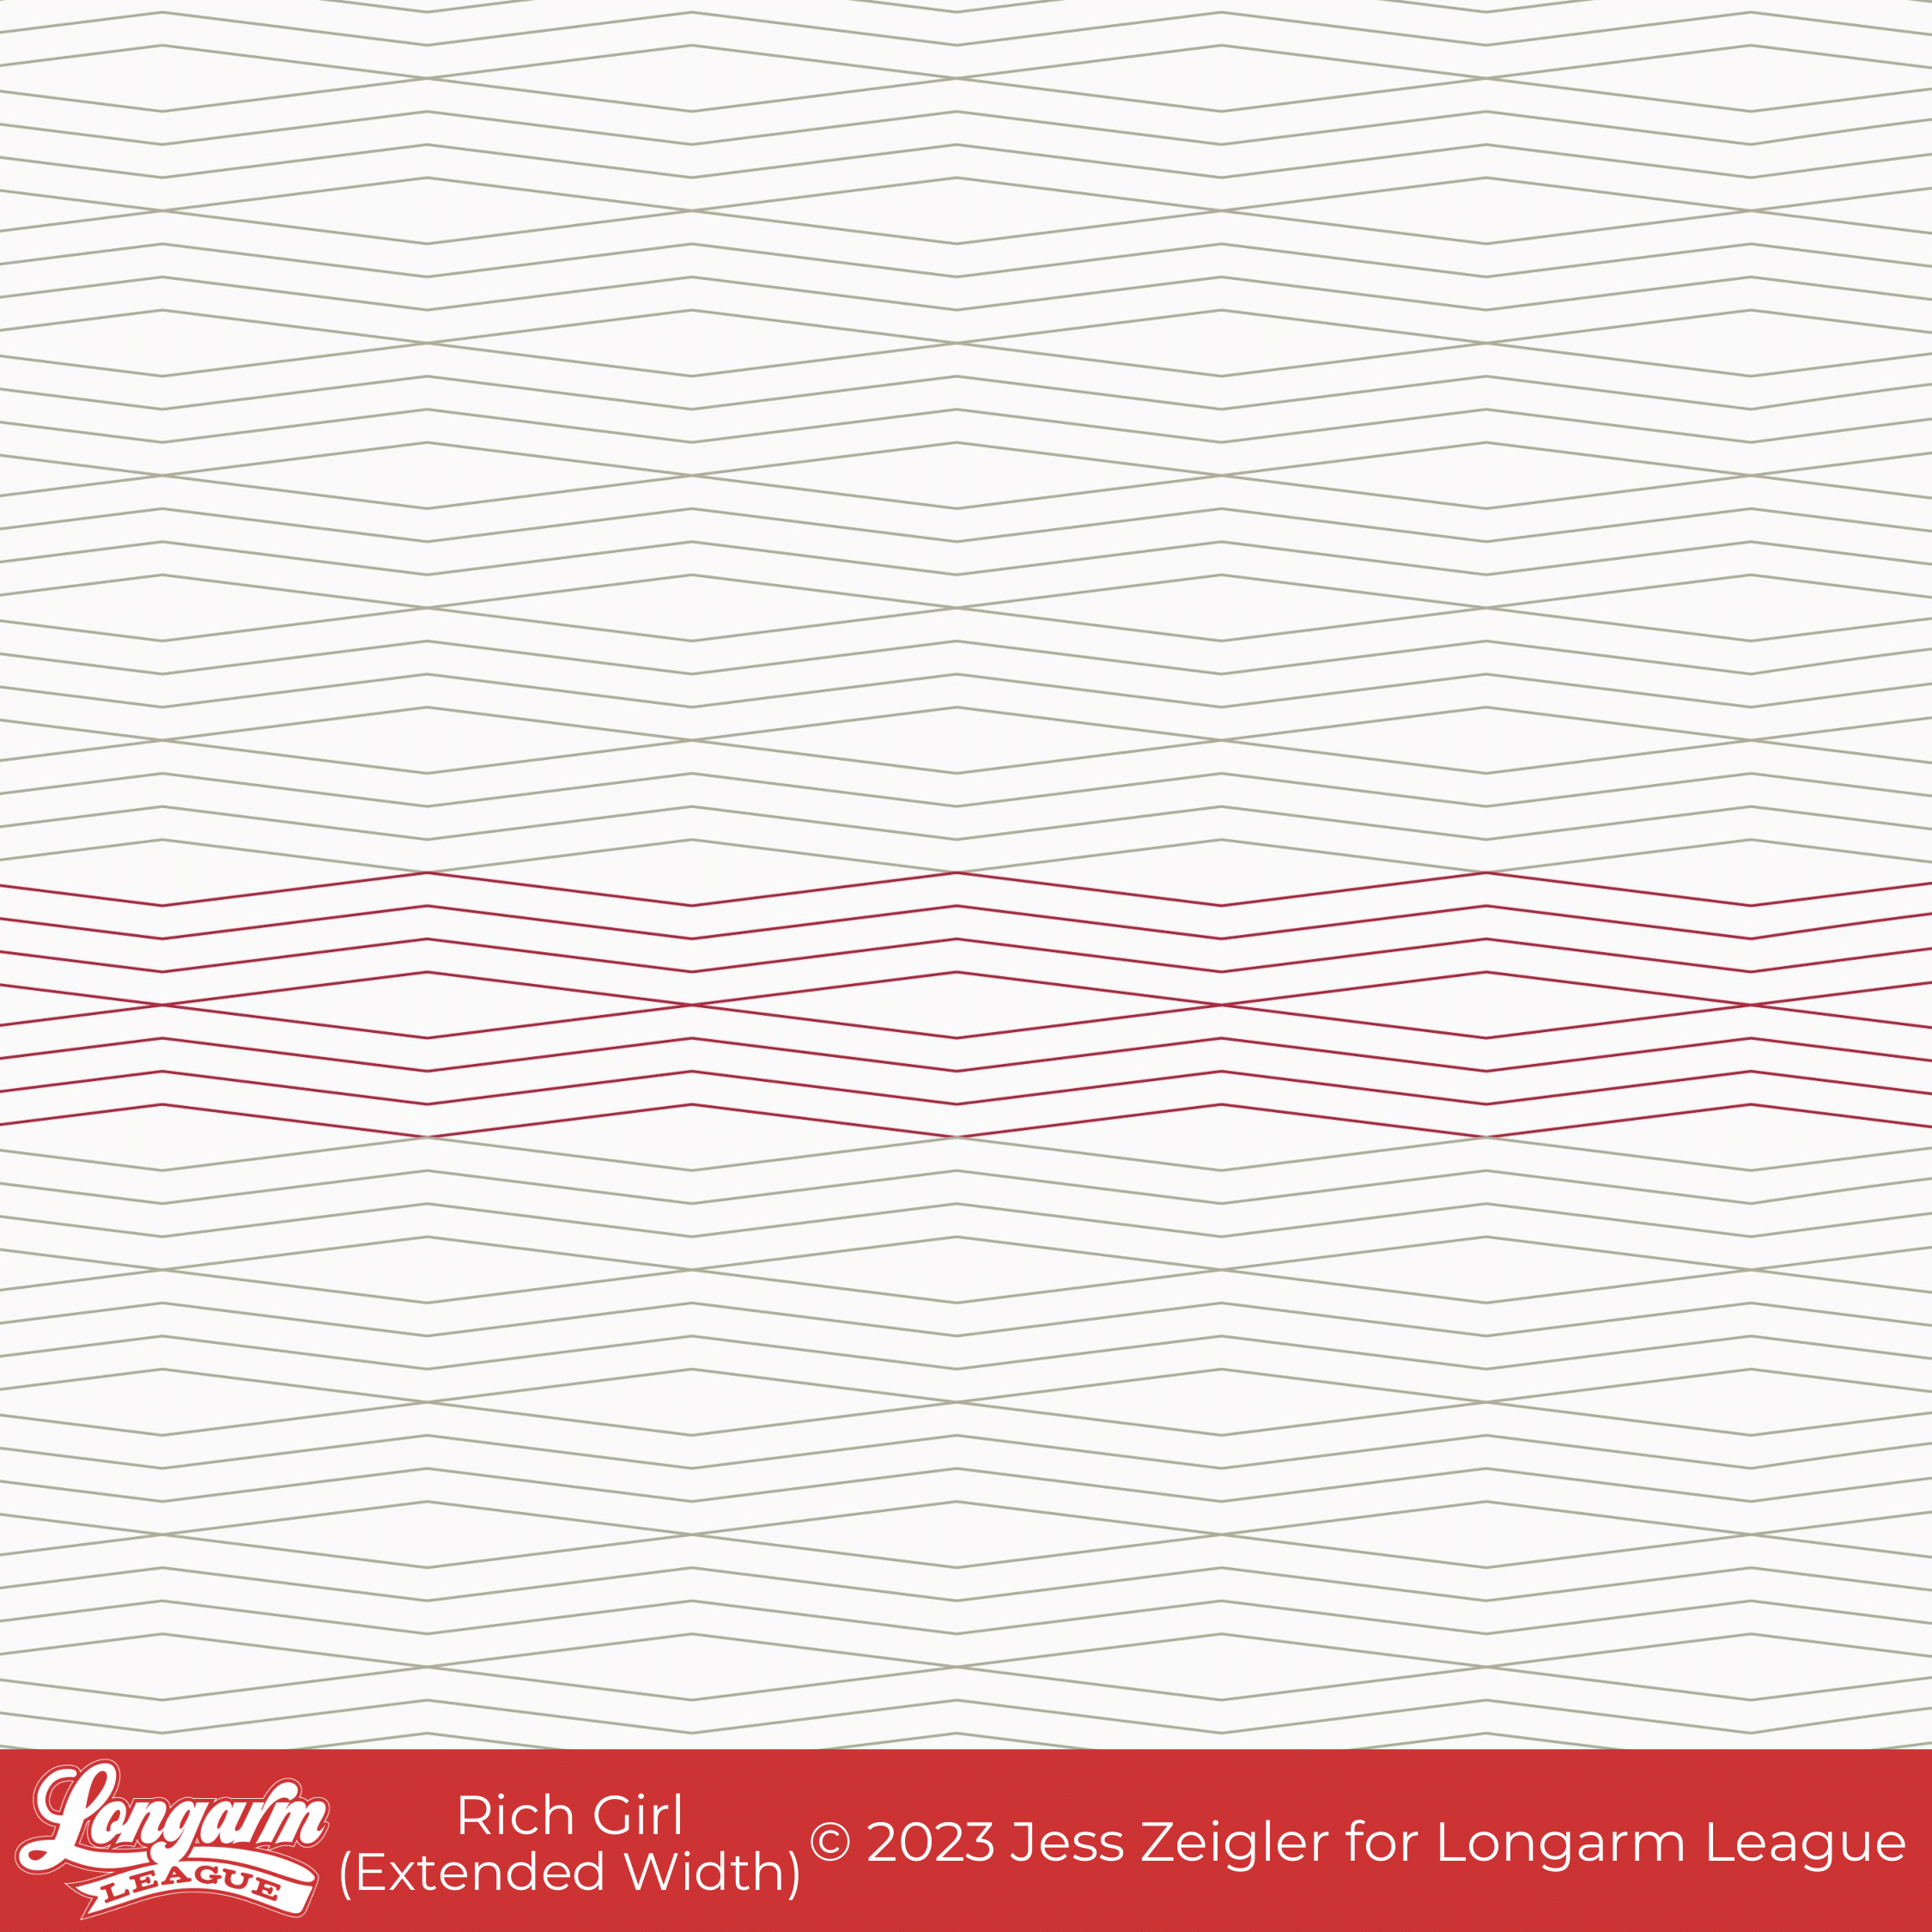
The Design
Are you familiar with "extended width" digital quilting designs? Usually, the standard files we upload contain one repeat that's multiplied side by side across and down the quilt by our software when in pantograph mode. With extended width designs, the design itself is typically around 100" wide—give or take—with any repeating sections "built in". If you are new to this kind of design, read more here (including specific info if using Intelliquilter). The main takeaway is that they need to be set up as a block pattern.
Rich Girl is an extended width design that stitches out very quickly. The echoed lines are angled very subtly, but the diamond shapes that result amidst the lines give just the right amount of contrast in their open spaces.
This is a perfect design to use as an alternative to straight line quilting. It will unify a busy quilt top like straight lines do so well, but with a bit of added, low-key interest. 
As I was stitching this out, the design ...
Wishbone Edge-to-Edge Digital Pantograph
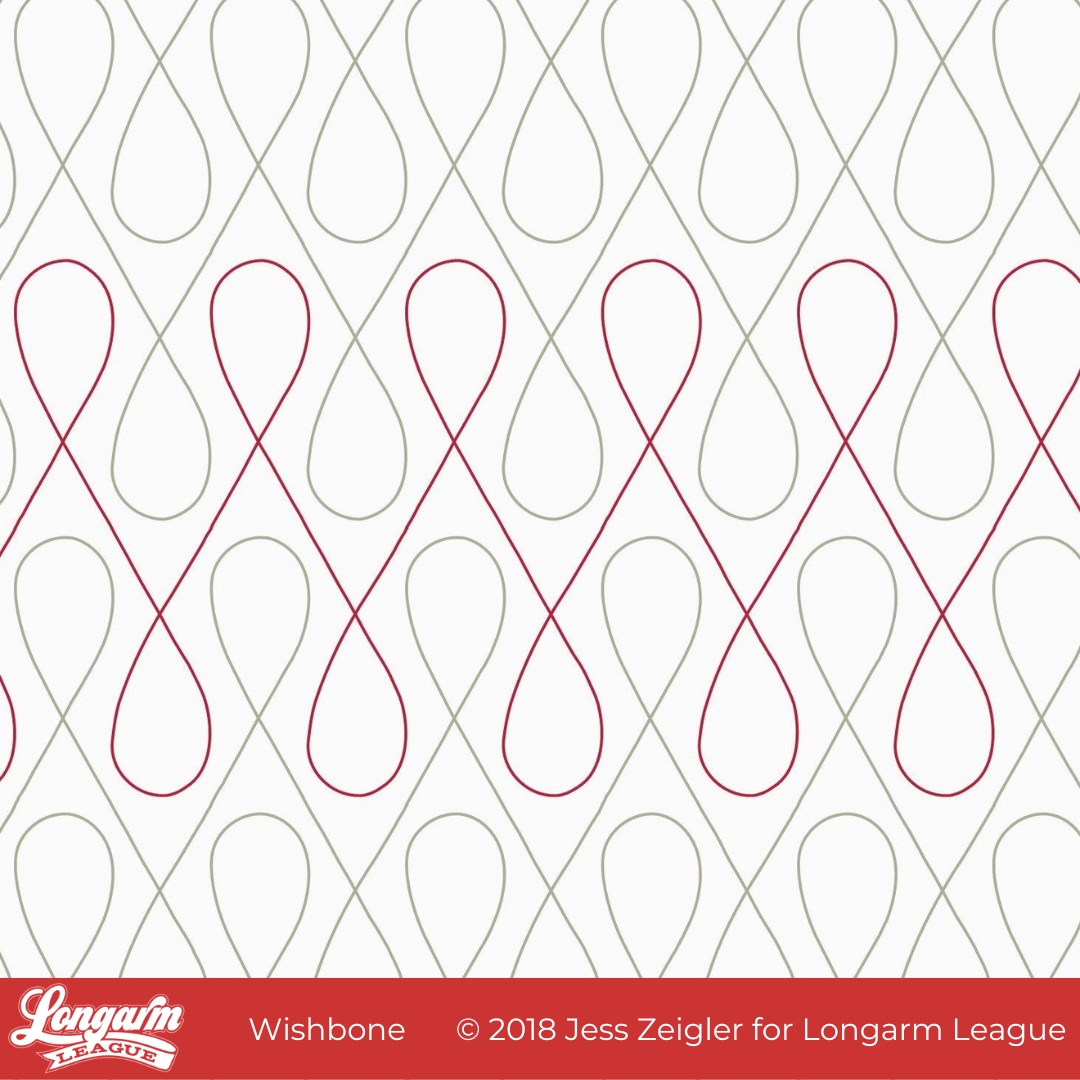
Wishbone History
Do you know how long I've been meaning to write a blog post about Wishbone? Well, I started this draft in August of 2020. The design was a few years old by that point.
Wishbone is the first design I ever released to the public in September 2019, mere weeks after the Longarm League membership started for the first time. I designed it the prior year due to the frustration of not being able to find a design simply referred to as 'Loops' by some Statler Stitcher owners I followed on Instagram.
I spent hours combing the Internet with the intent to buy the looped design, but resorted to making a version of my own when I couldn't locate it. This gave me a chance to use my Intelliquilter's editing tools to create the must-have elements that I wanted: 60º angled lines and meaty "teardrop" shapes that would nest with the rows above and below.
The resulting design lived on my tablet for a long while until I bought Art and Stitch software and was able to export it, s...
Groove Digital Pantograph Design
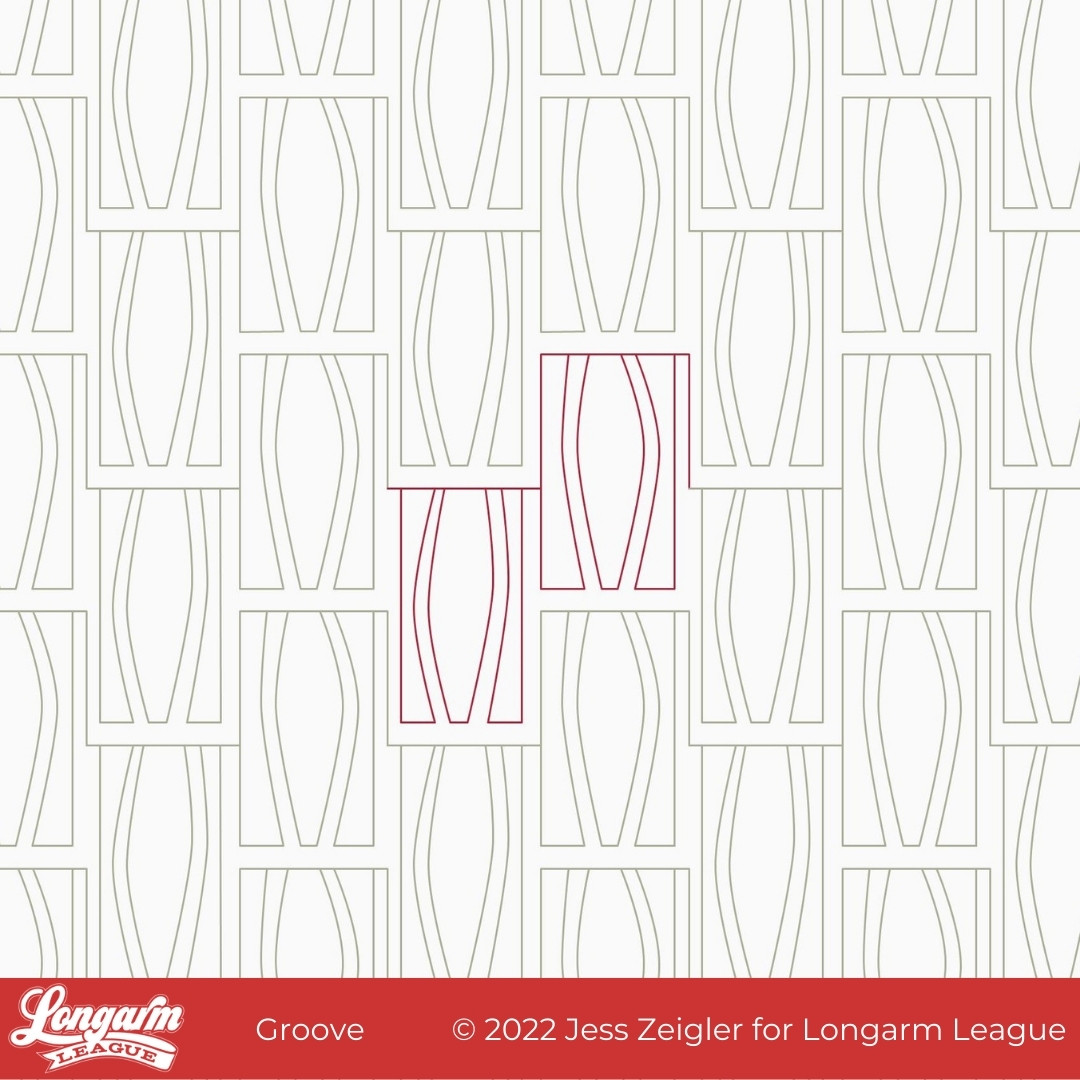
The inspiration for the Groove design came from the subtle curve of lava lamps. I really liked the idea of non-symmetrical, gentle curves contained within the straight lines and perpendicular angles that "house" the lava lamp shapes.
Do I detect a "mid-century modern" vibe here? It wasn't intentional but I also wouldn't be mad about that. Not one bit!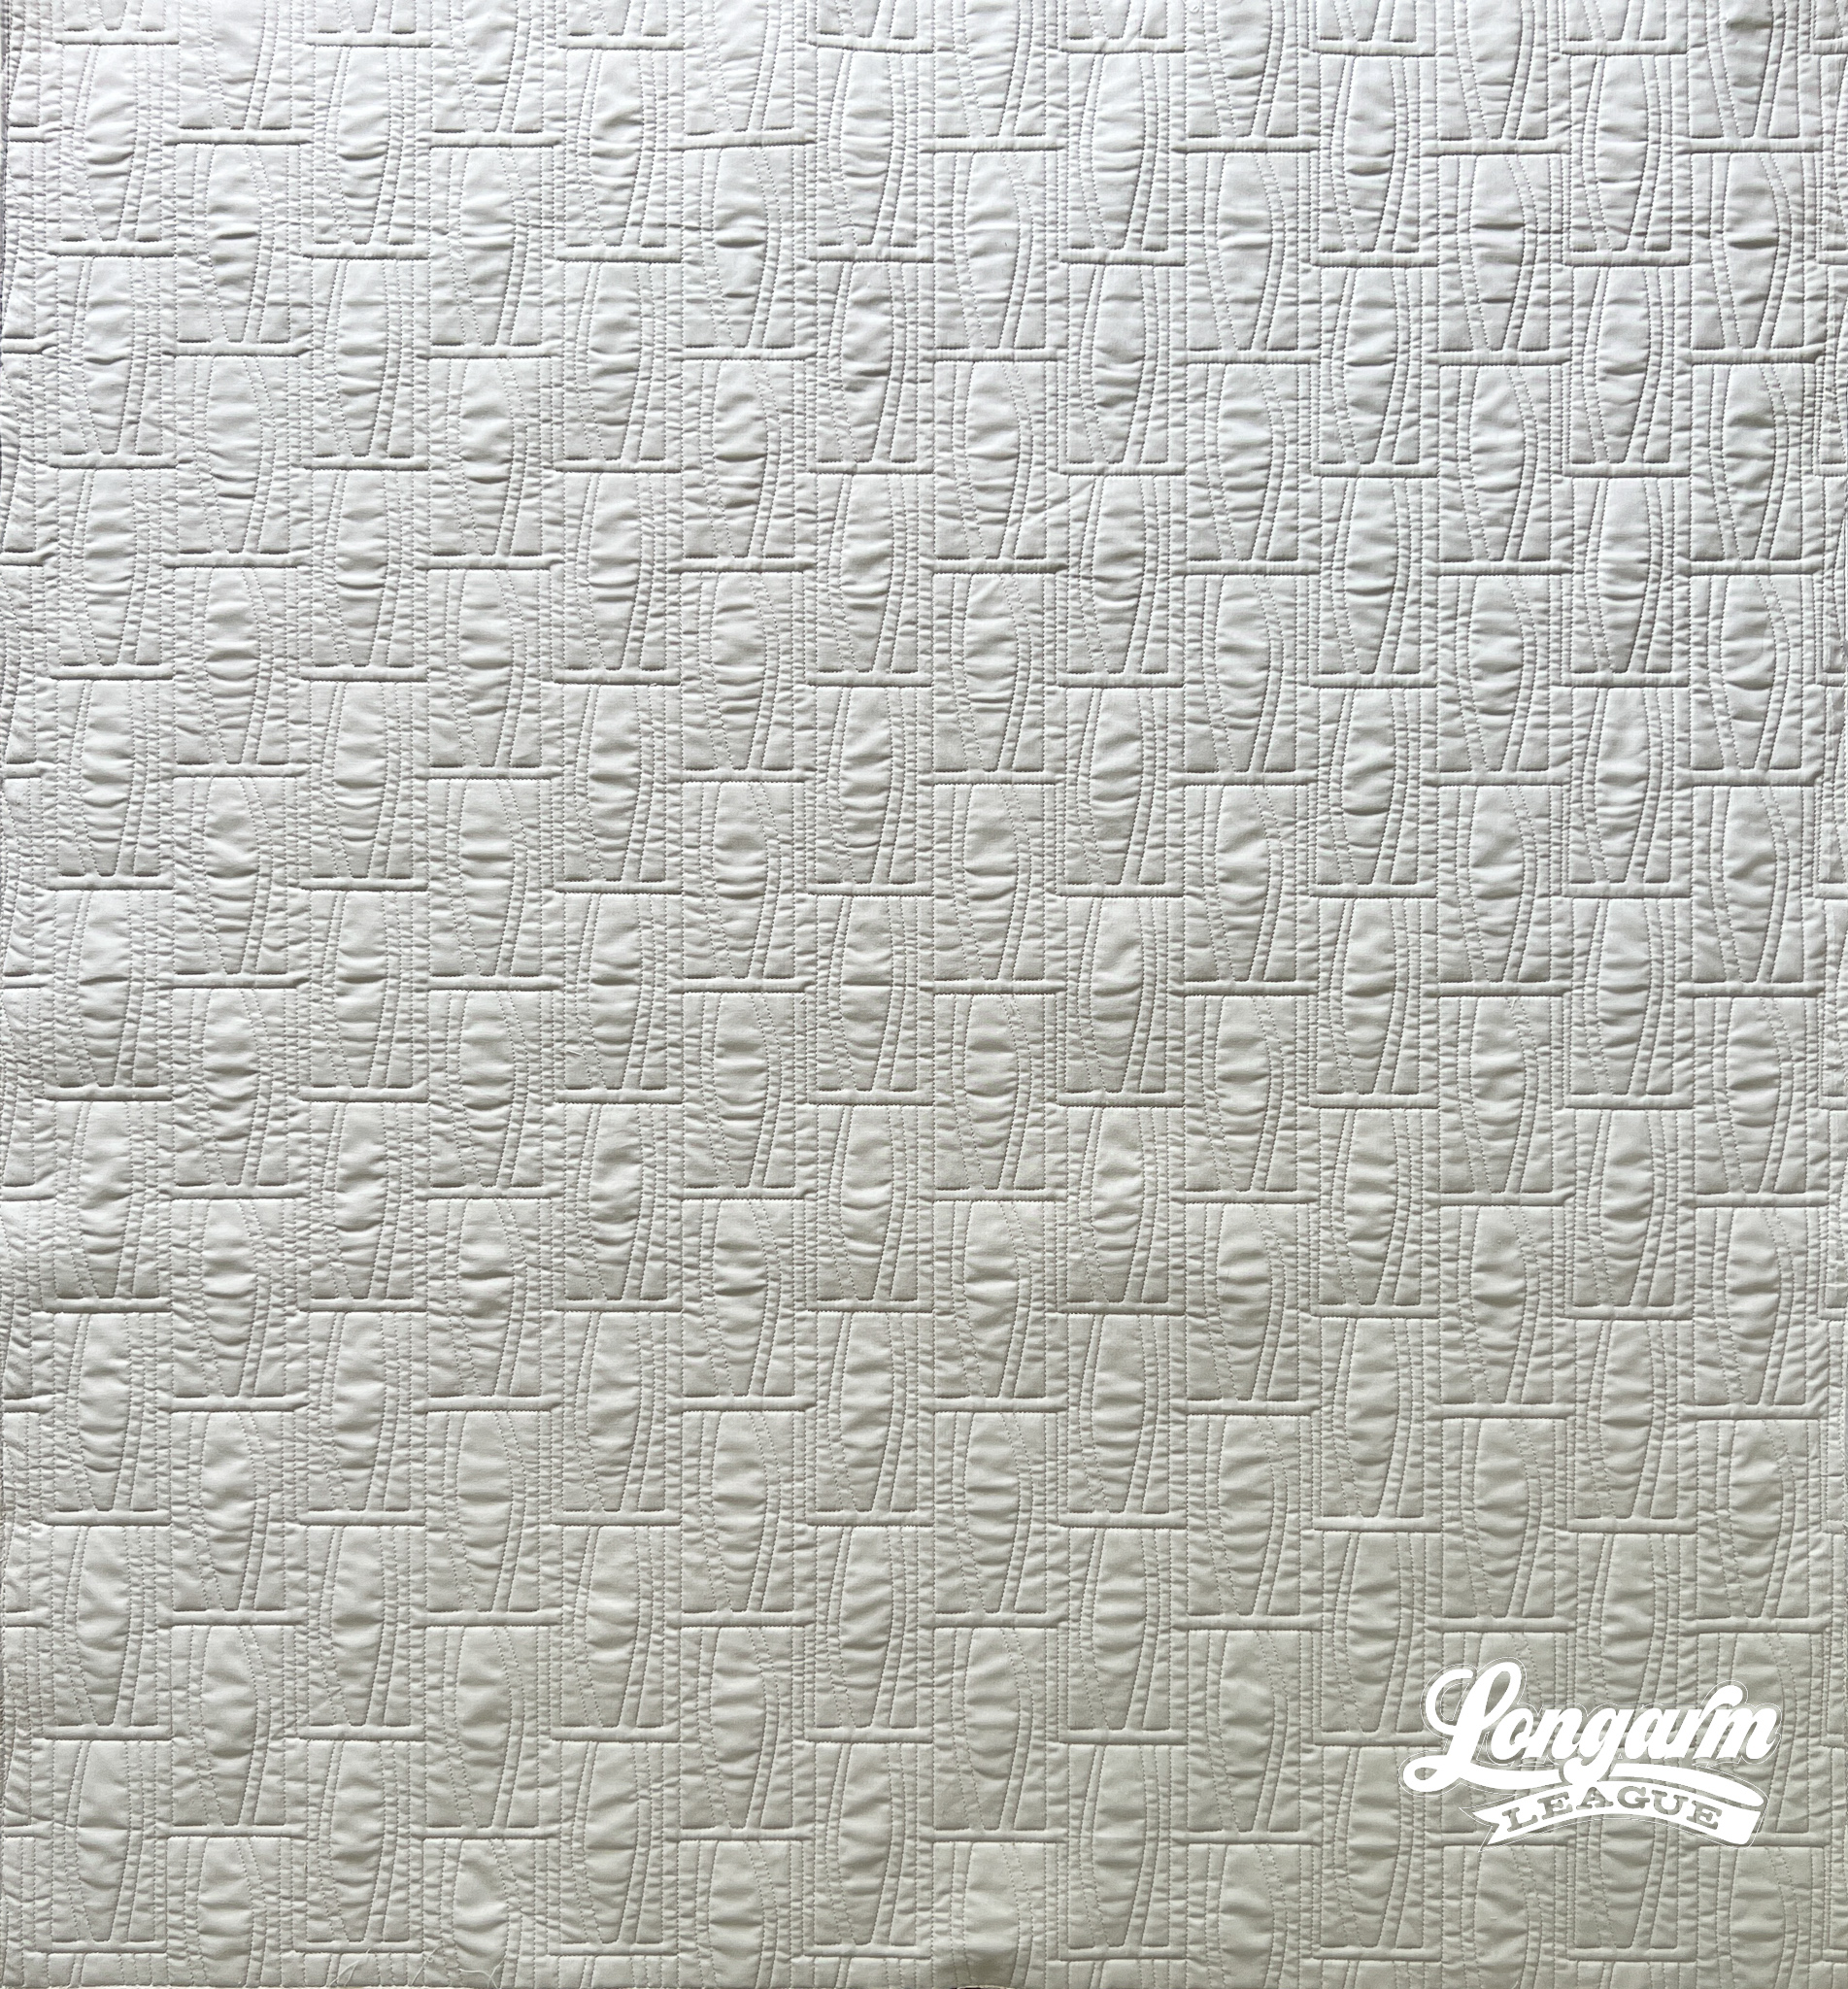
The orientation of the design is more of a vertical nature, which just doesn't seem to be as common with digital edge-to-edge options. Much like the 'positive', sometimes you want to ac-cen-tuate the vertical! 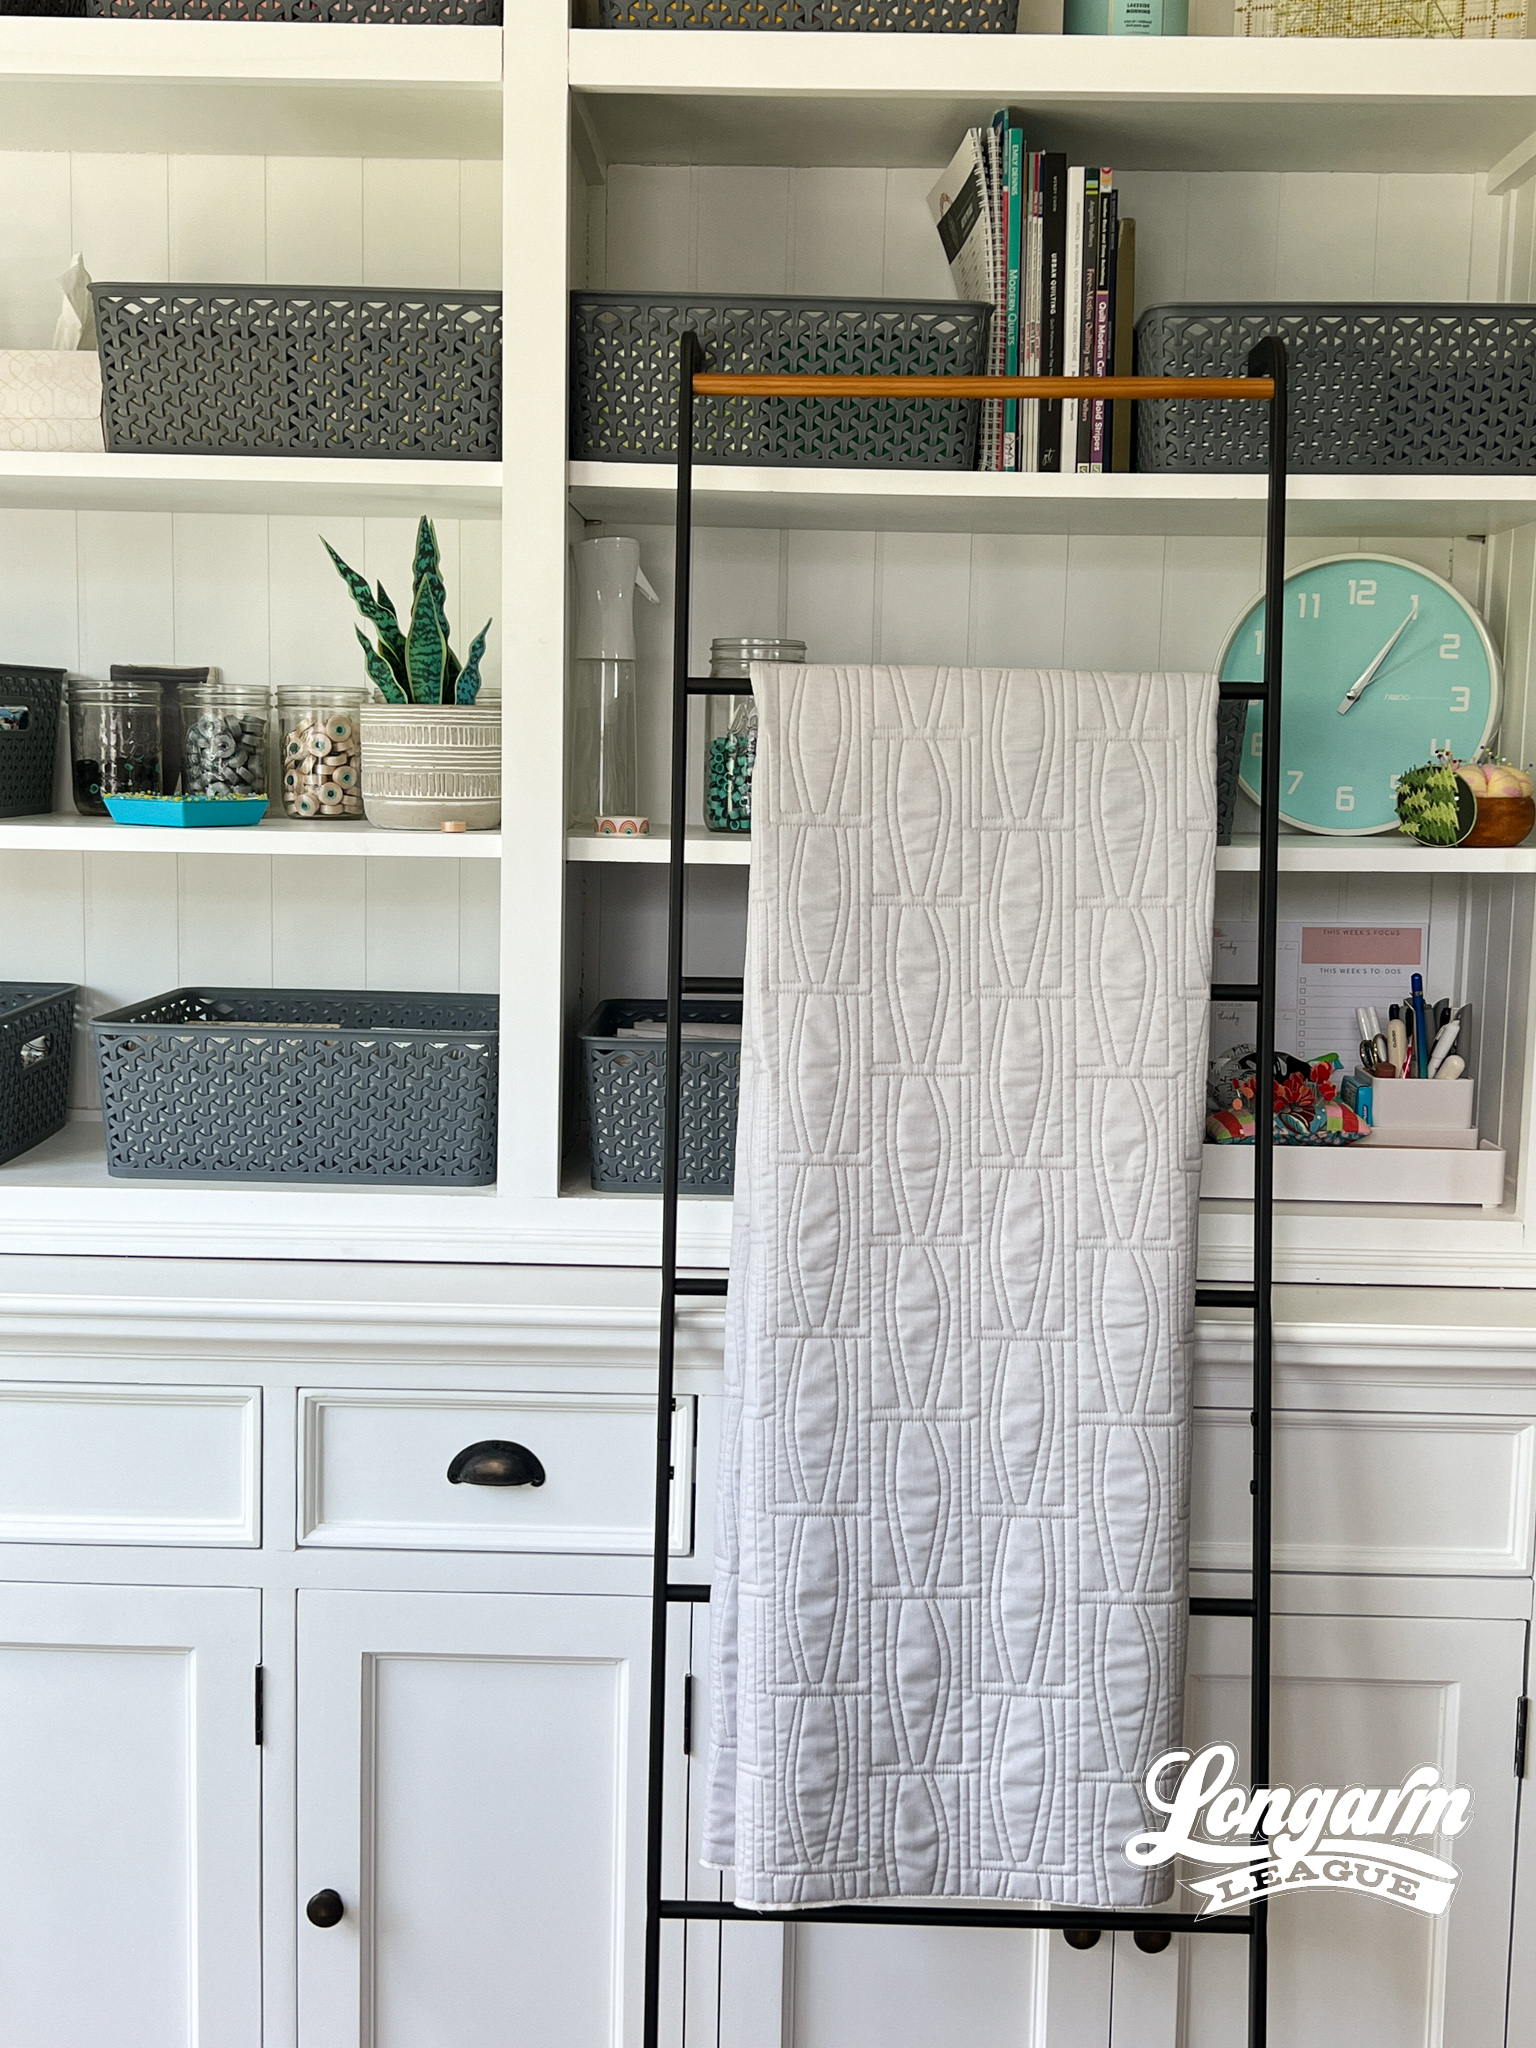
The repeated motif is staggered, meaning that when it comes to setting it up with your computerized system, you will not need to offset. Just close the gap between the rows and you'll be good-to-go. The stitch path can be viewed in the video at the top of this post. There is some backtracking, but overall it has a smooth and fluid stitch path.
This design would be great on modern quilt tops or like I mentioned ear...
Sprawl Digital Quilting Design
Quilty friends, this design is called Sprawl.
I love, love, love using echoed lines and shapes to make a textural impact. You can see that I used that technique with this design while also incorporating a small curve.

Here are my specifics using a baby-sized sample in the photos (45" x 50" quilt size):
Row height: 3"
Gap: -1.478"*
Pattern height: 4.478"
Offset: 50%
Backtracking: minimal
*Gap refers to the space I'm allowing between rows. I use an Intelliquilter for my computerized quilting, and because that measurement is quantifiable, I provide it here.
The row height PLUS the noted gap amount totals the "pattern height". If you don't use an Intelliquilter, you'll likely want to start sizing with the pattern height number and adjust the spacing between rows to your liking. You may not have a measurement available that tells you the measurement between rows, and that's okay.
We've begun adding a PDF to our zipped file so that you can print out design images and add your ...

Jess Zeigler
Longarm League Commish & Owner of Threaded Quilting Studio, LLC.


