
Boho Bulbs Edge-to-Edge Digital Pantograph for Computerized Quilting
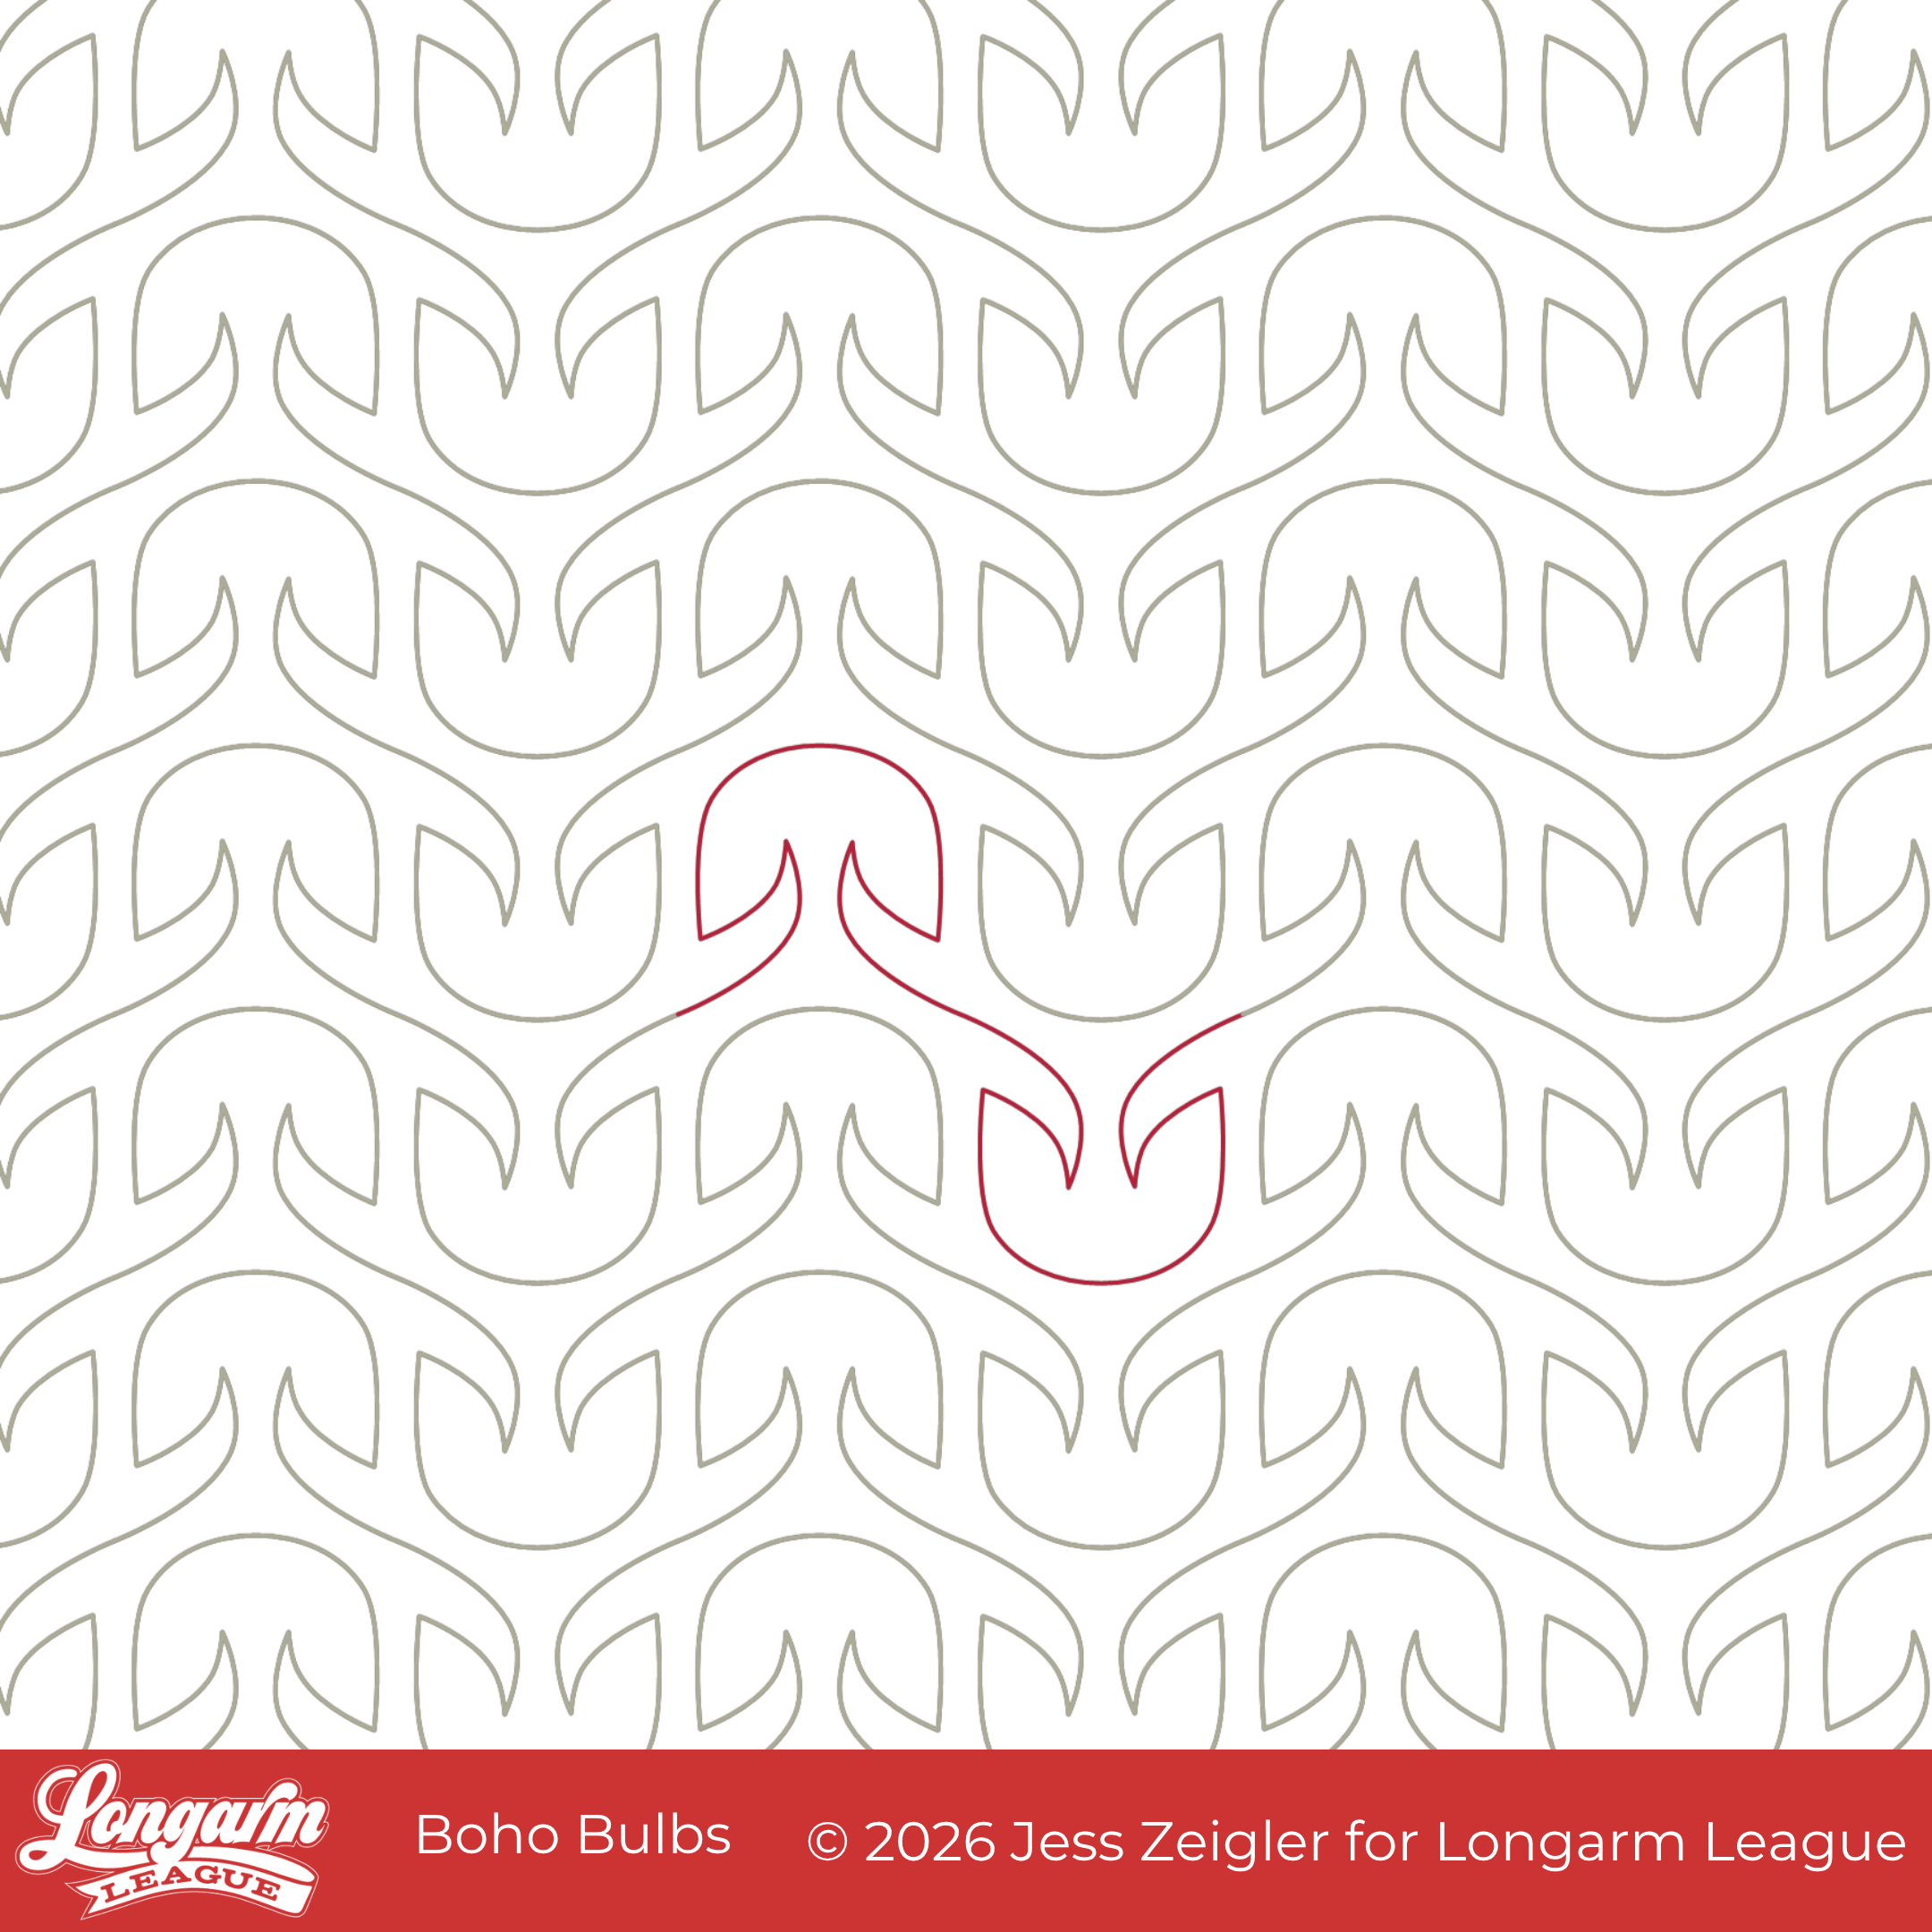
I started playing around with a version of this design in 2022. I named it Willow in my original digital sketch because it resembled more of a willow tree to me. The sides descended further, and there was greater separation between the "leaves" and the "trunk". But I knew it was never quite right, so I kept making adjustments. I played around with making some nodes sharp and pointy, and then round, and then a combination. 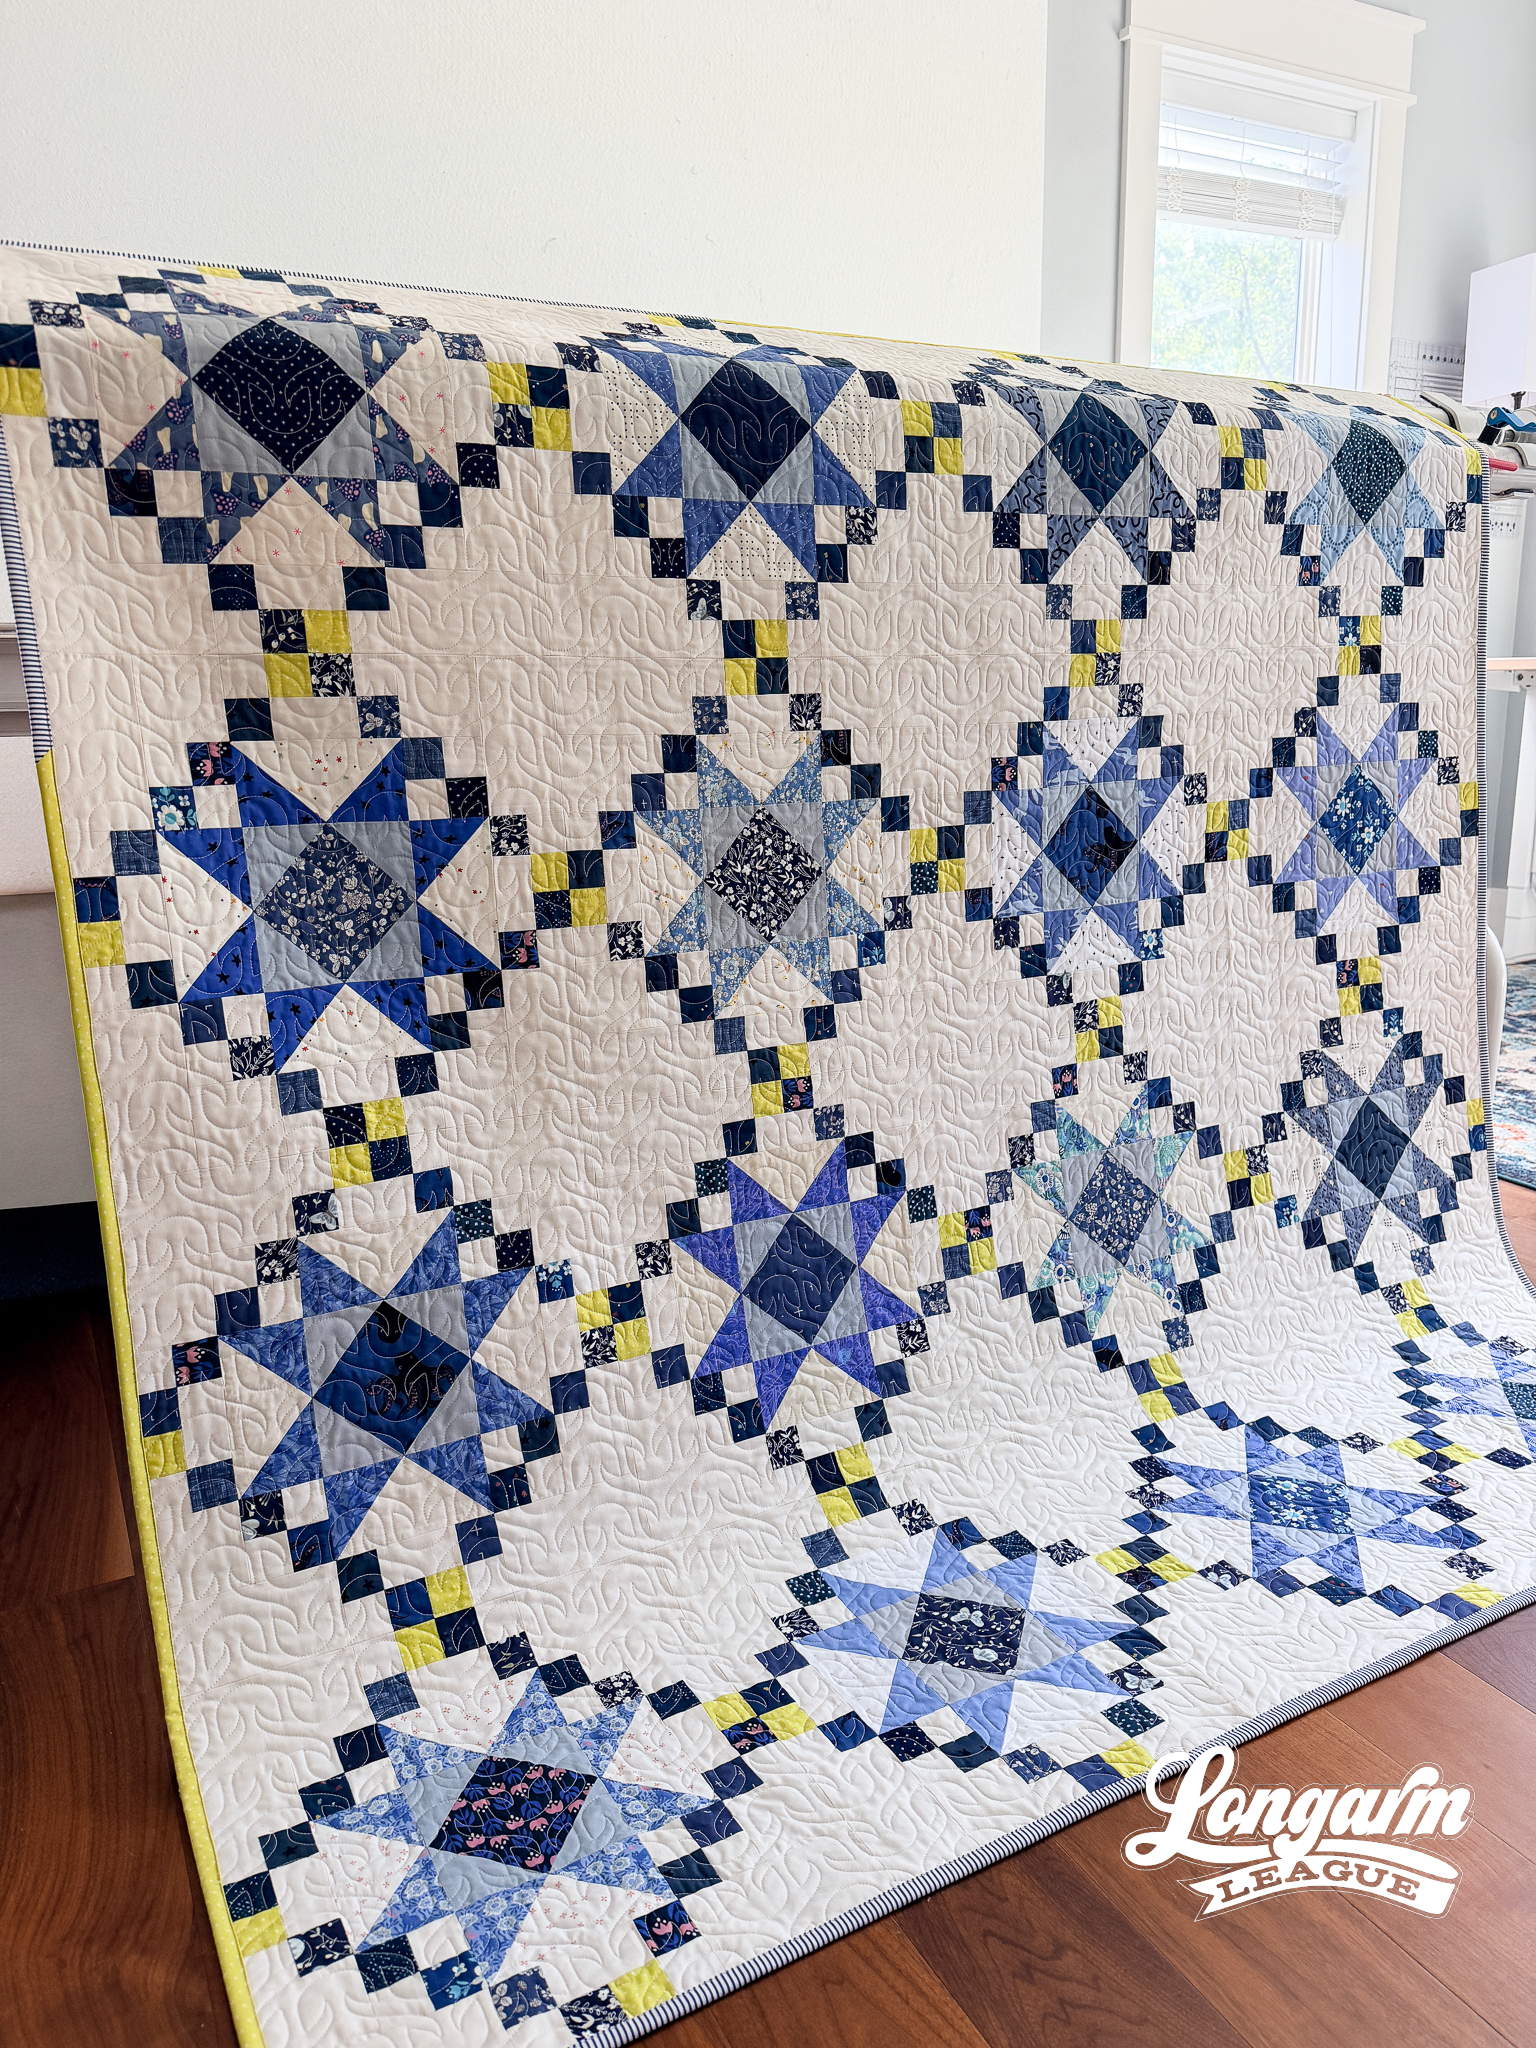
This design started working for me when I shortened up and tapered the sides, and smoothed out the top. Only, then it didn't look like a willow tree anymore, so it needed a new name.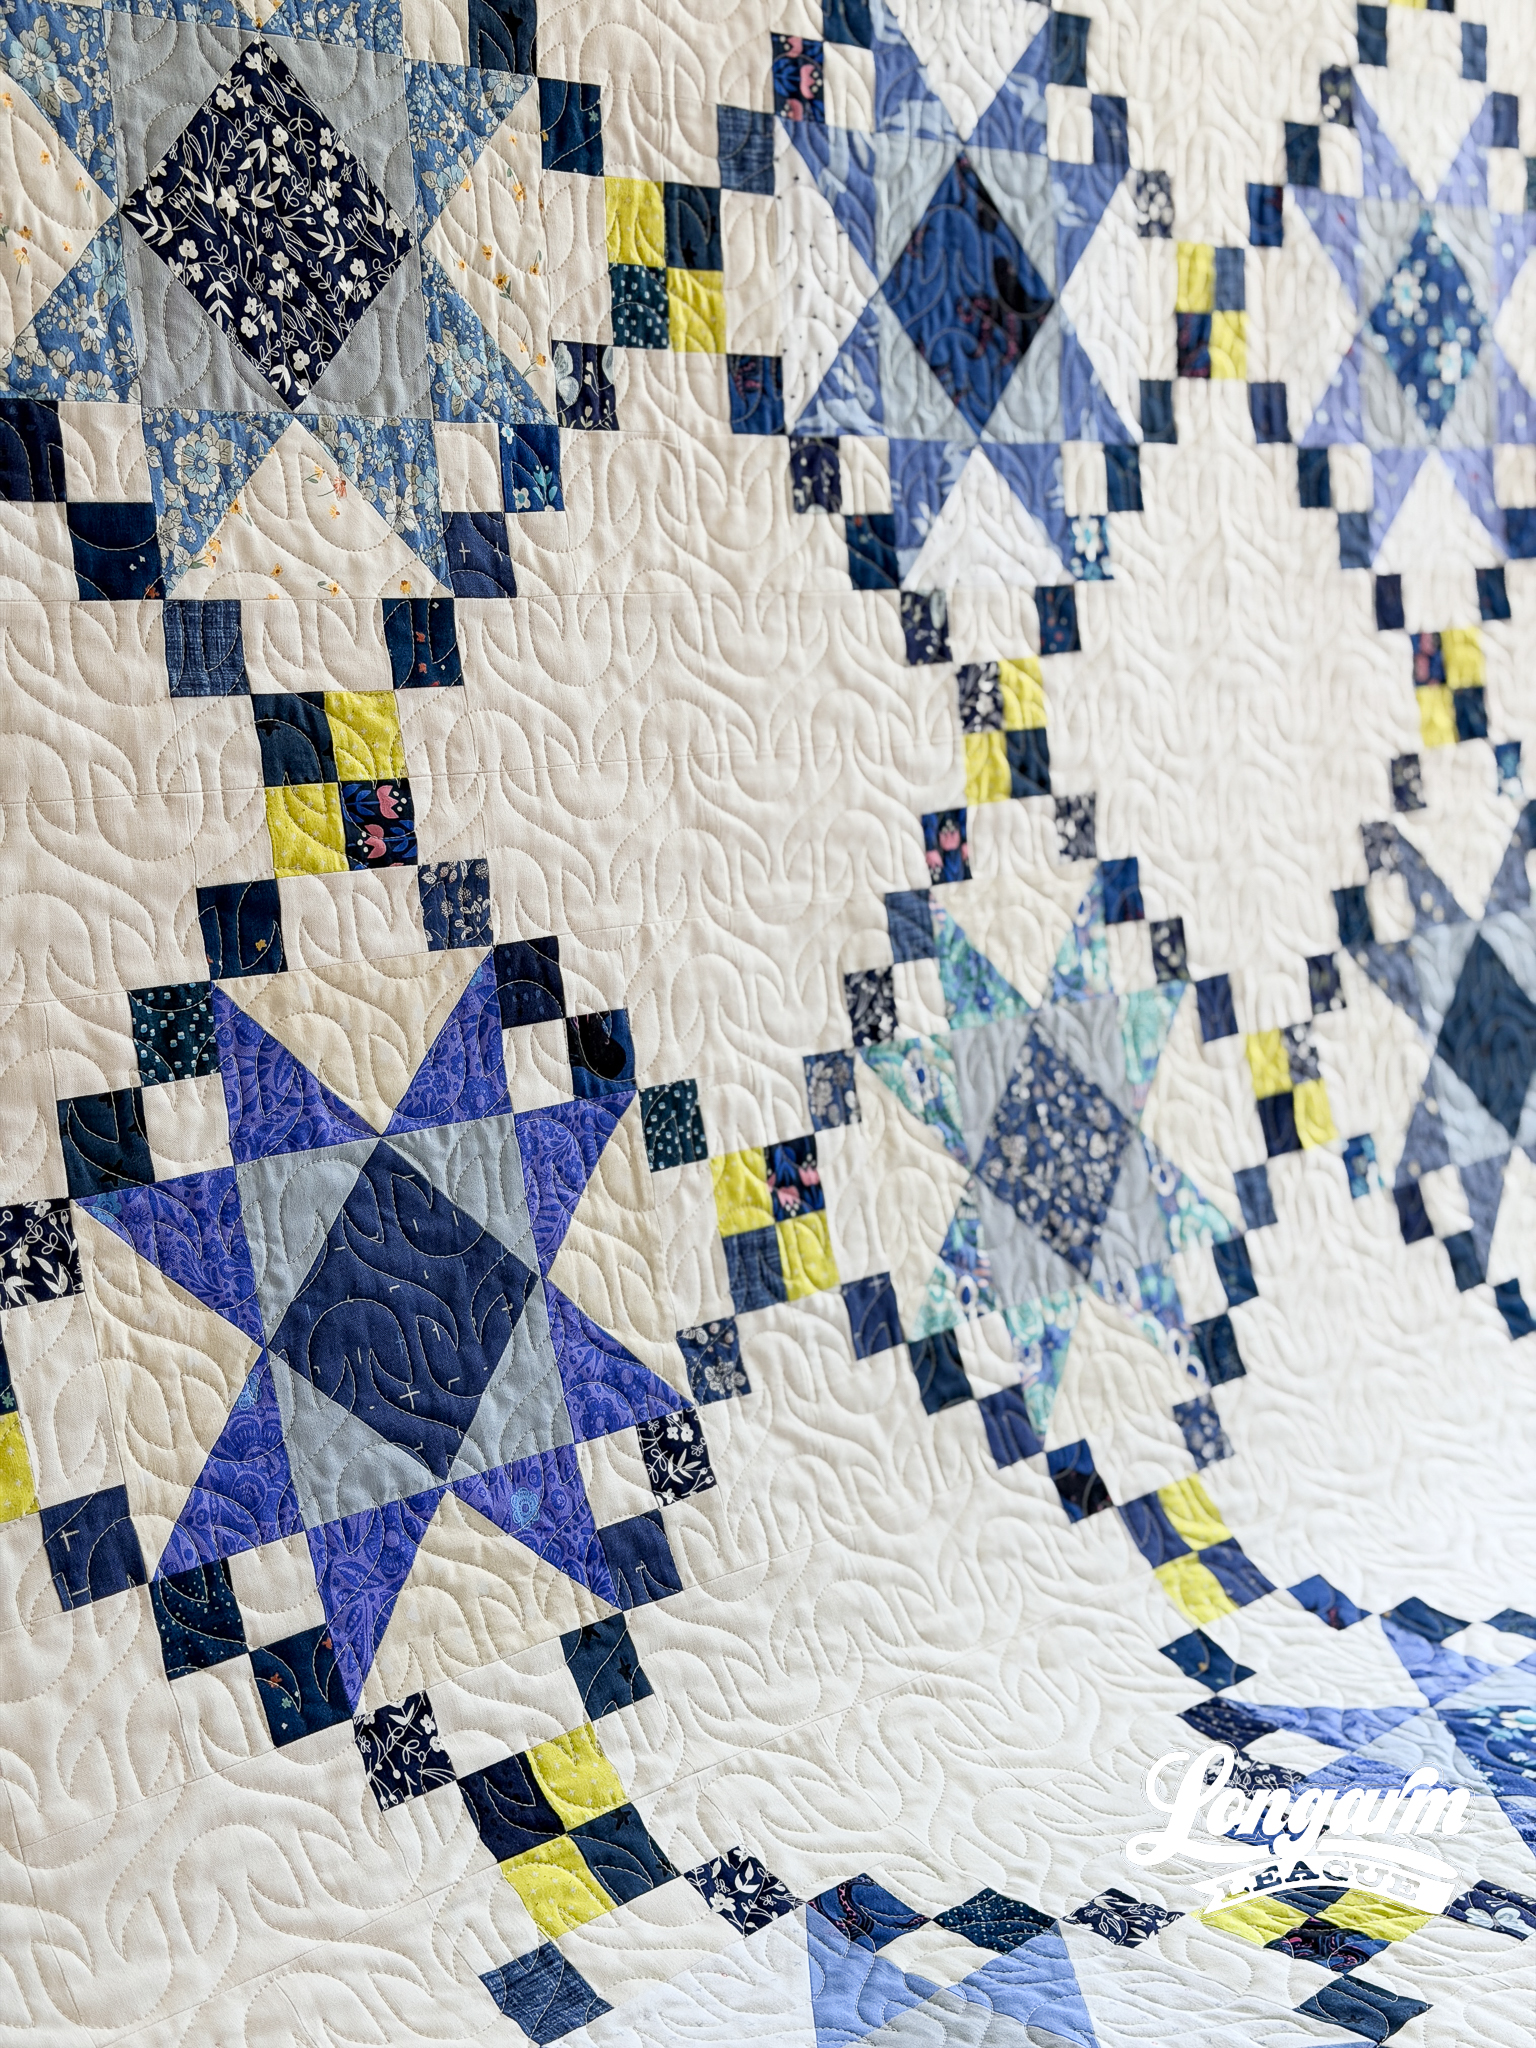
Boho Bulbs draws on a simple, symmetrical, motif both oriented vertically and then inverted to create an interlocking pair that does not need an offset. It's clean and consistent, with just enough personality to keep it from feeling rigid.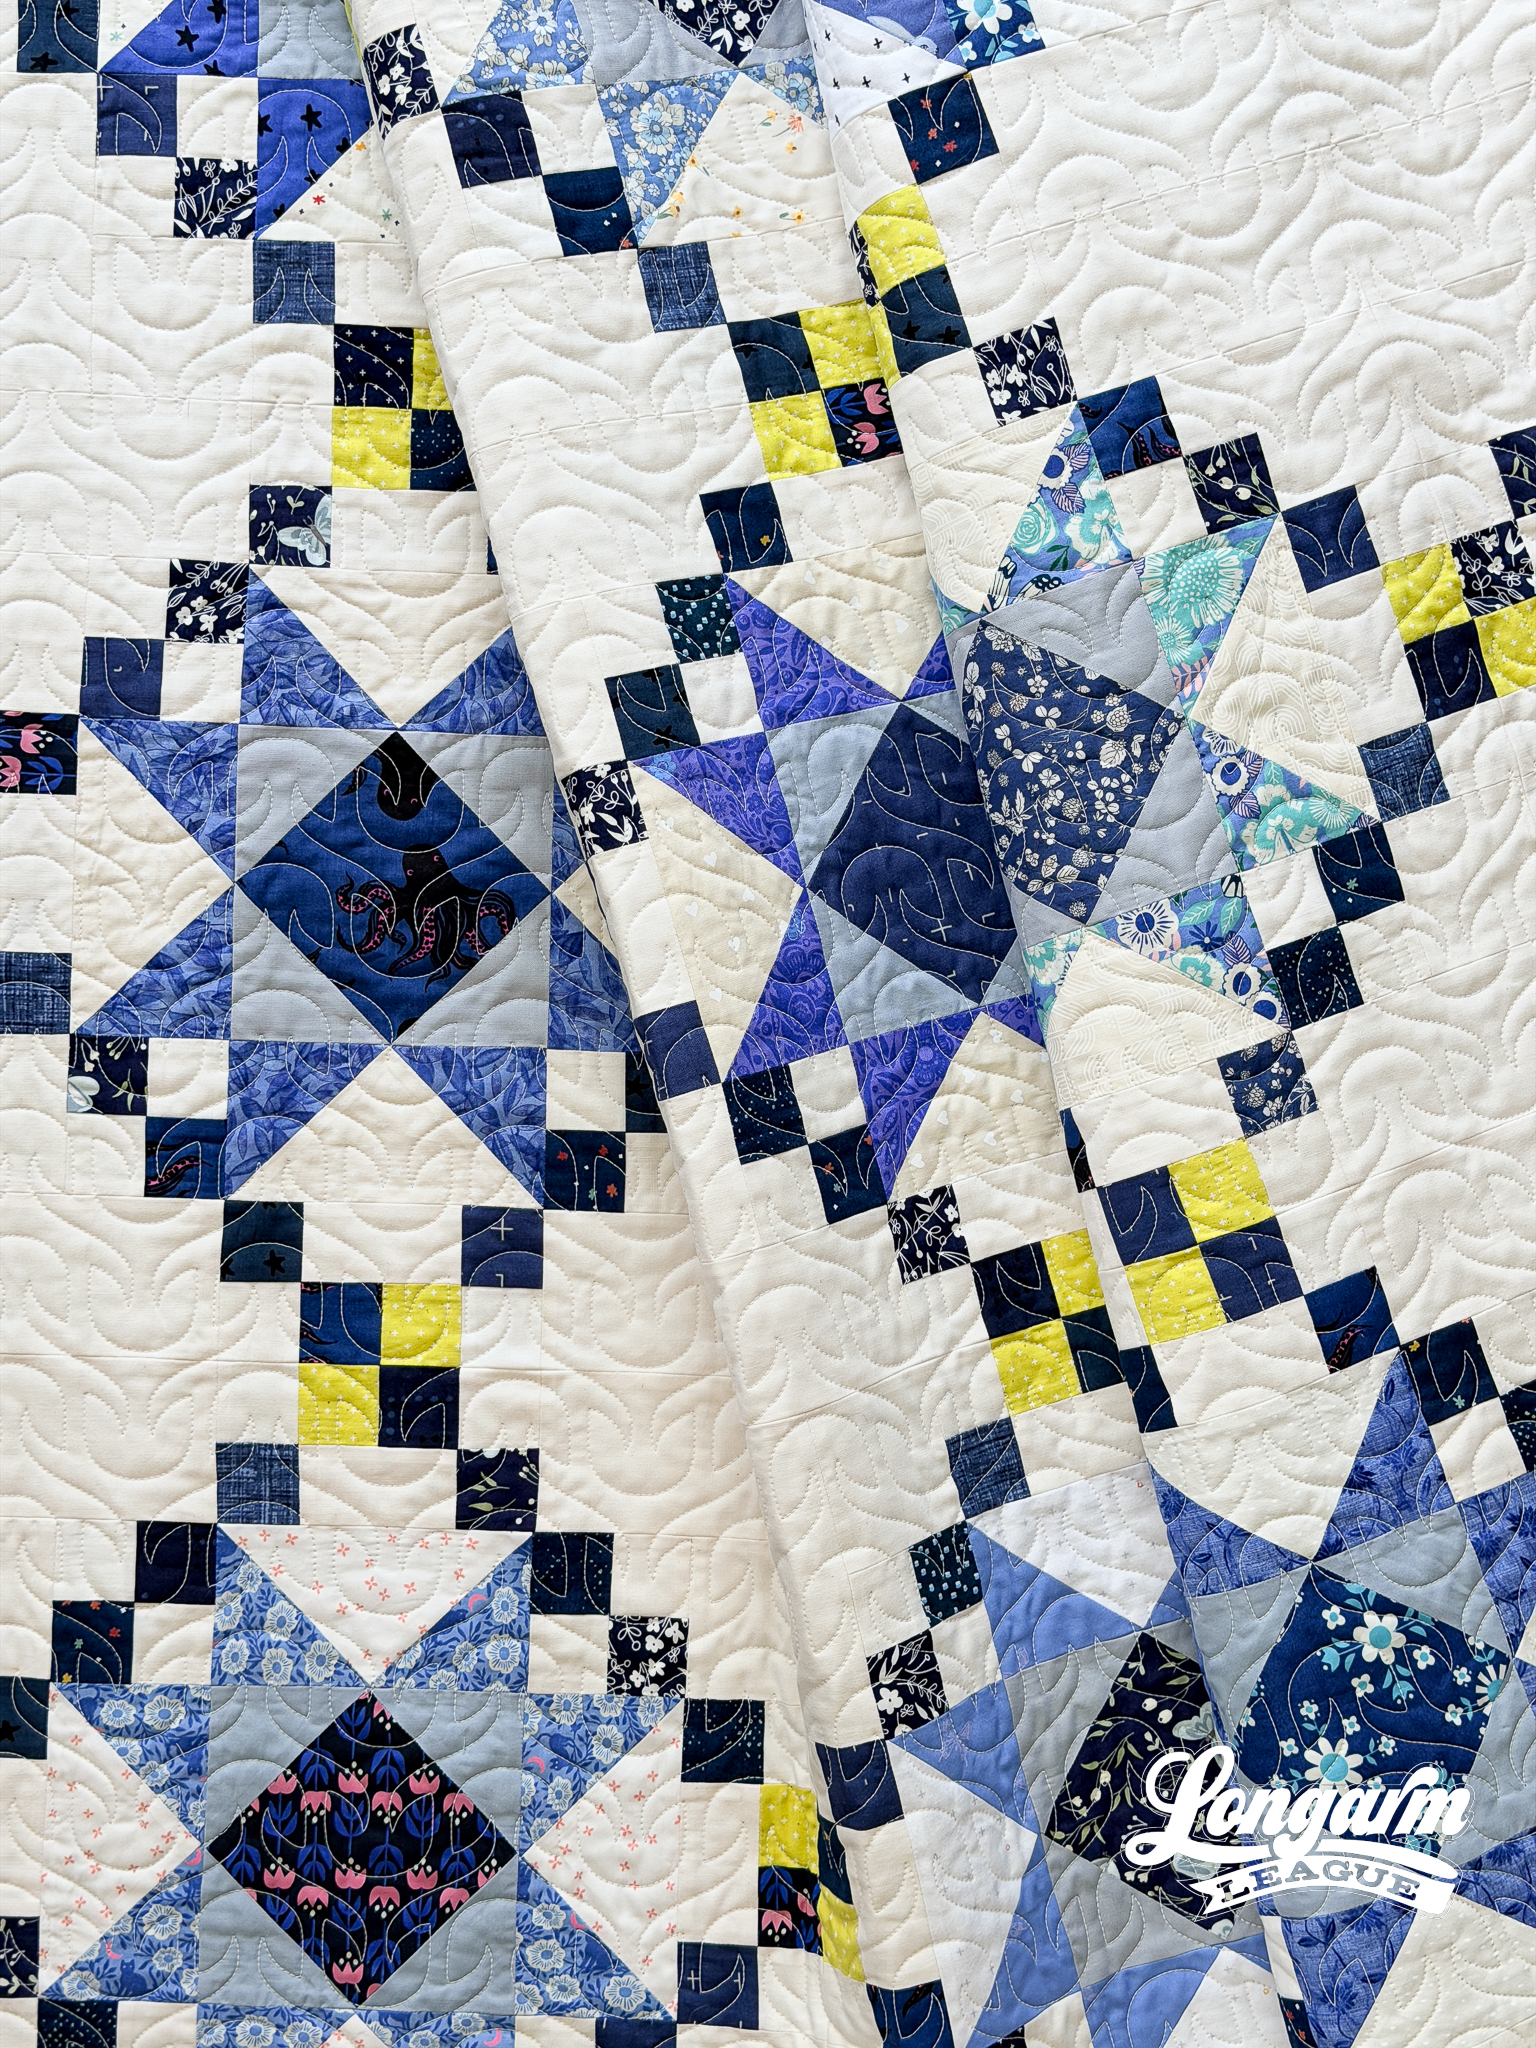
This digital edge-to-edge design is great on floral quilt tops like the one shown in here in the blog post. Its simple, geometric nature also allows it to be "interpreted" differently, and not necessarily as a floral element. The shapes would work well on a kids quilt, or even quilts with a folk art flair. 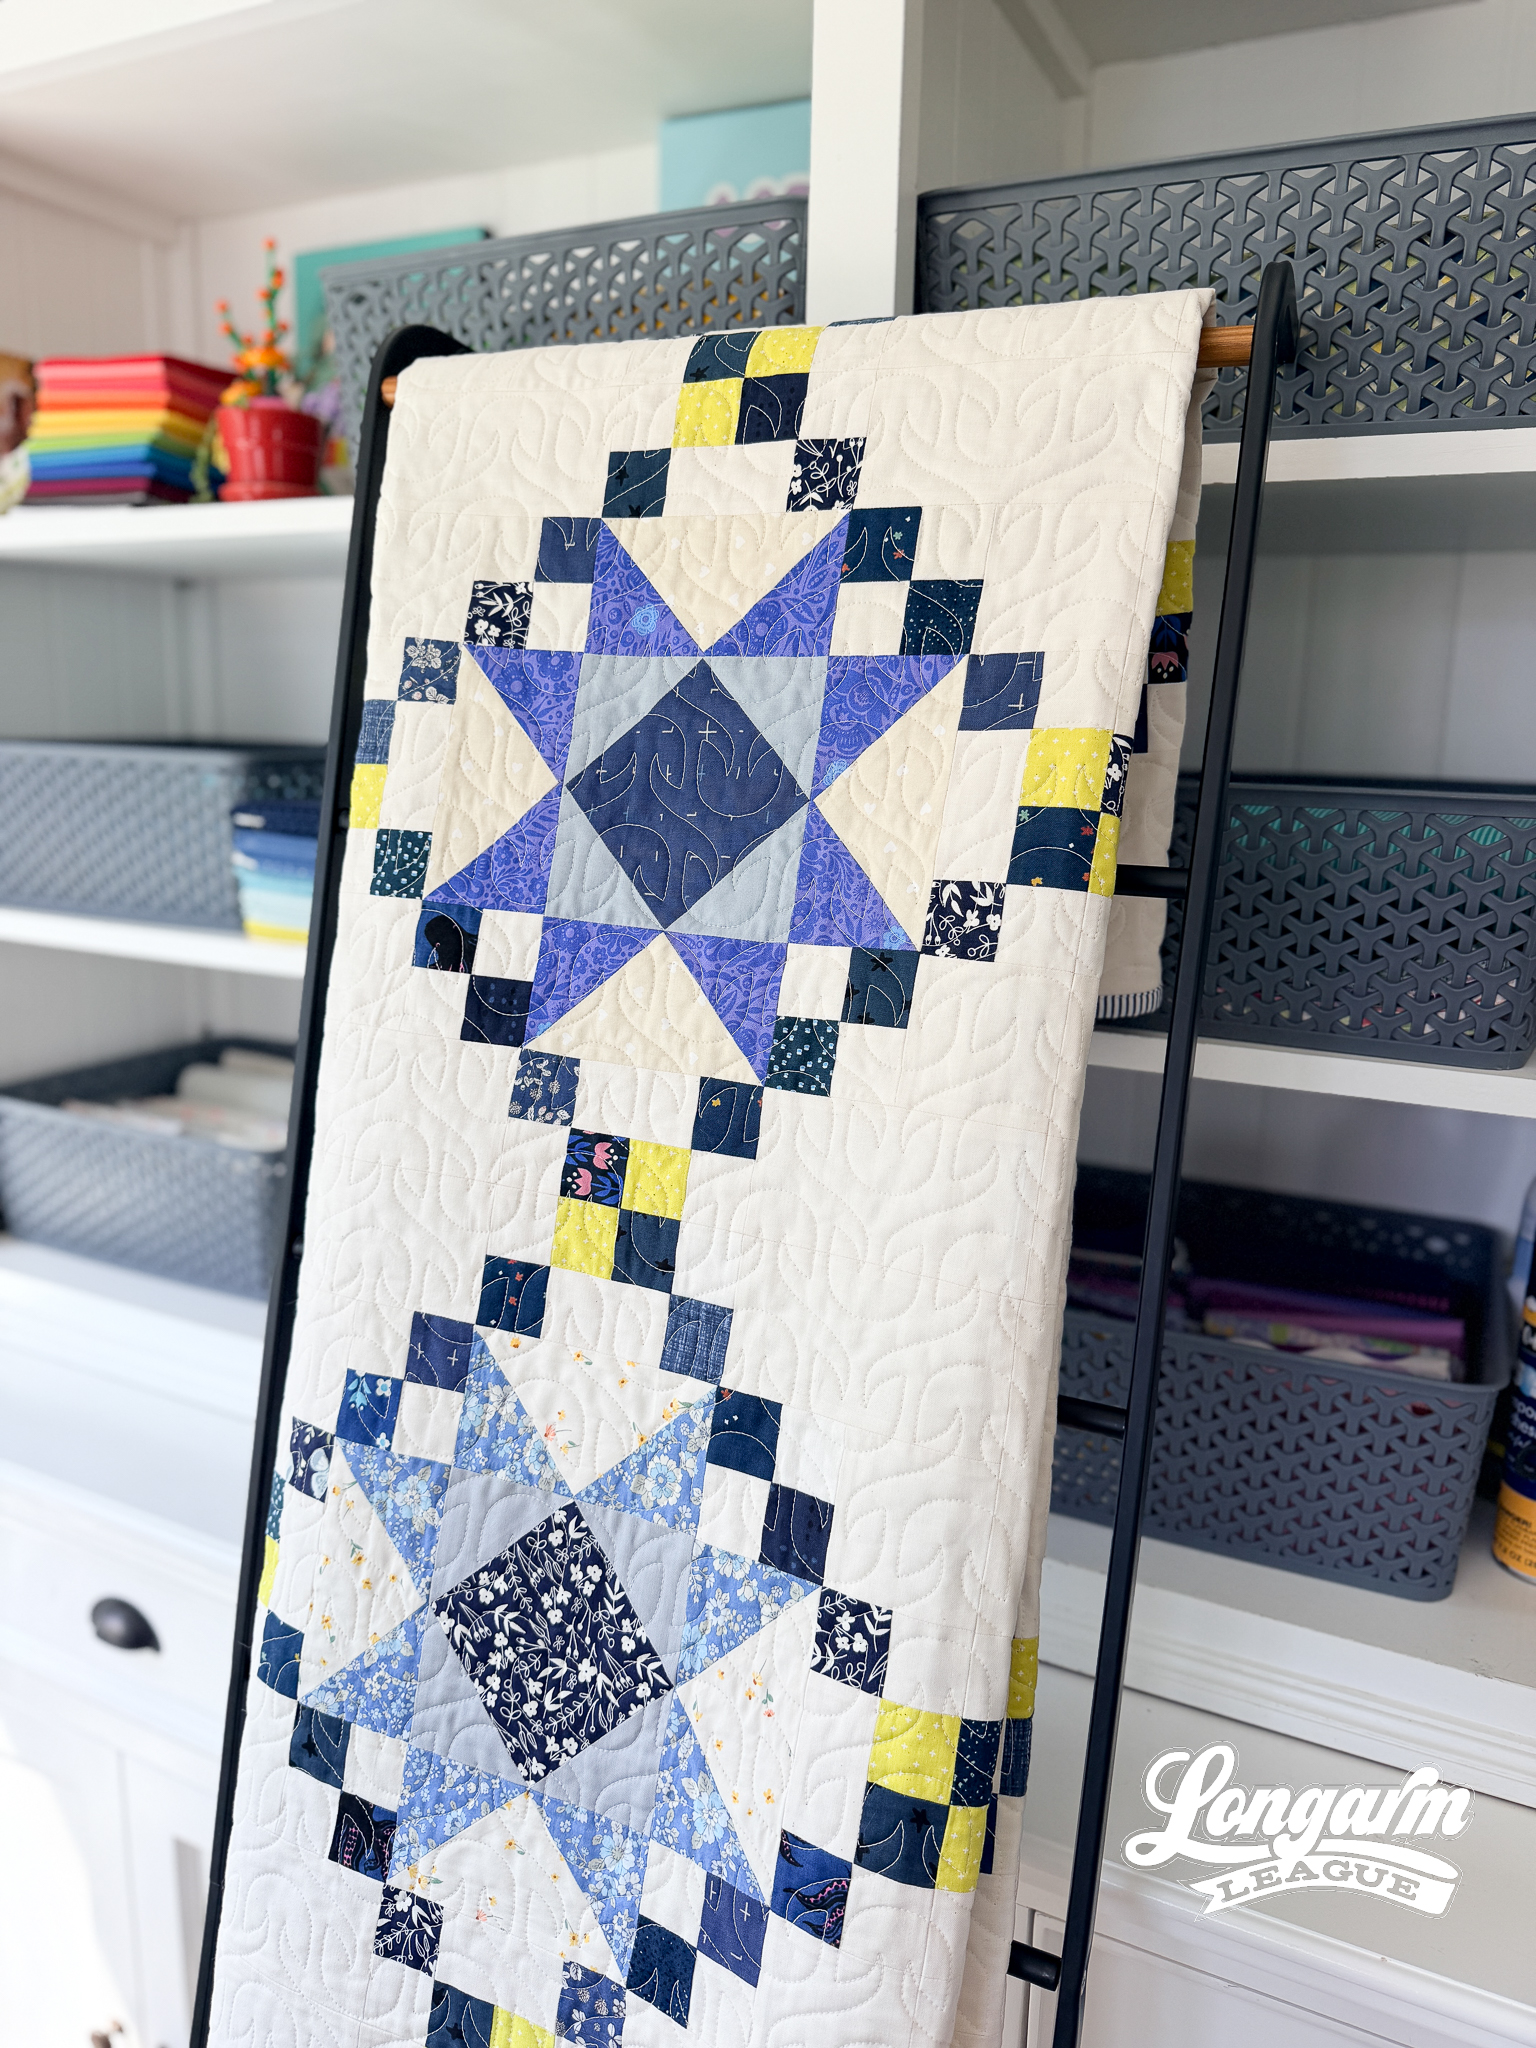
The Quilt
Quilt Pattern
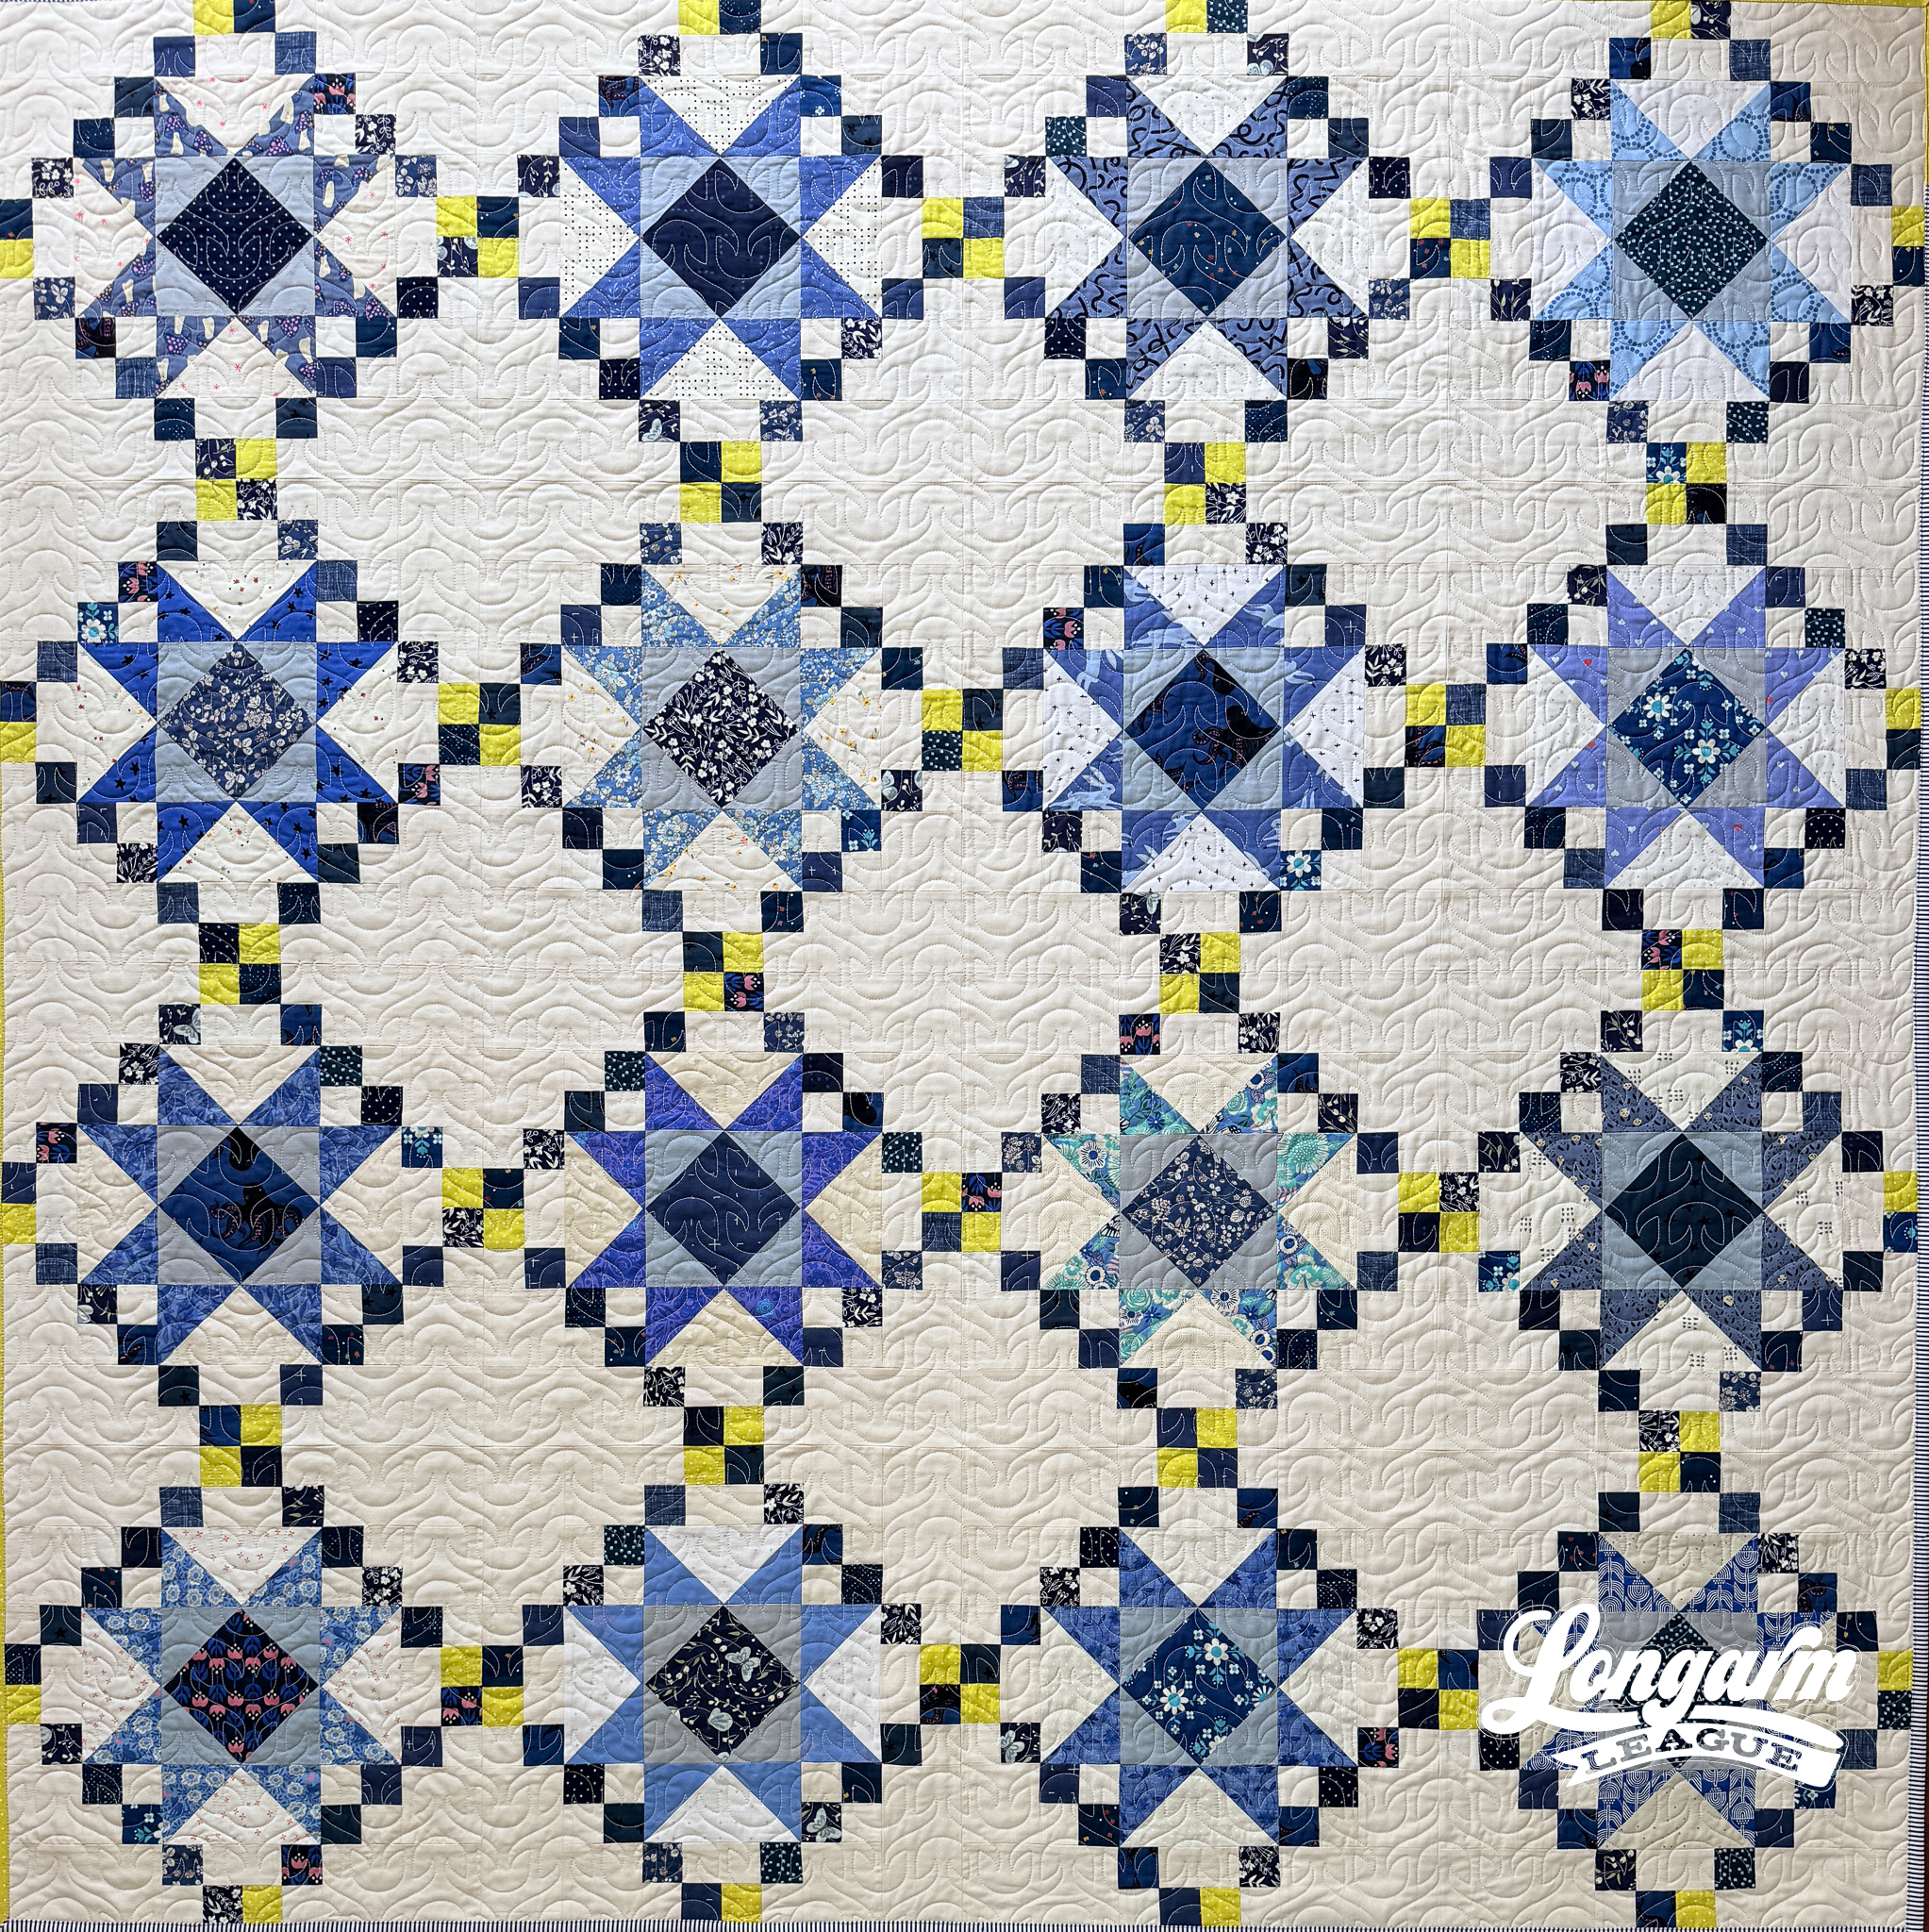
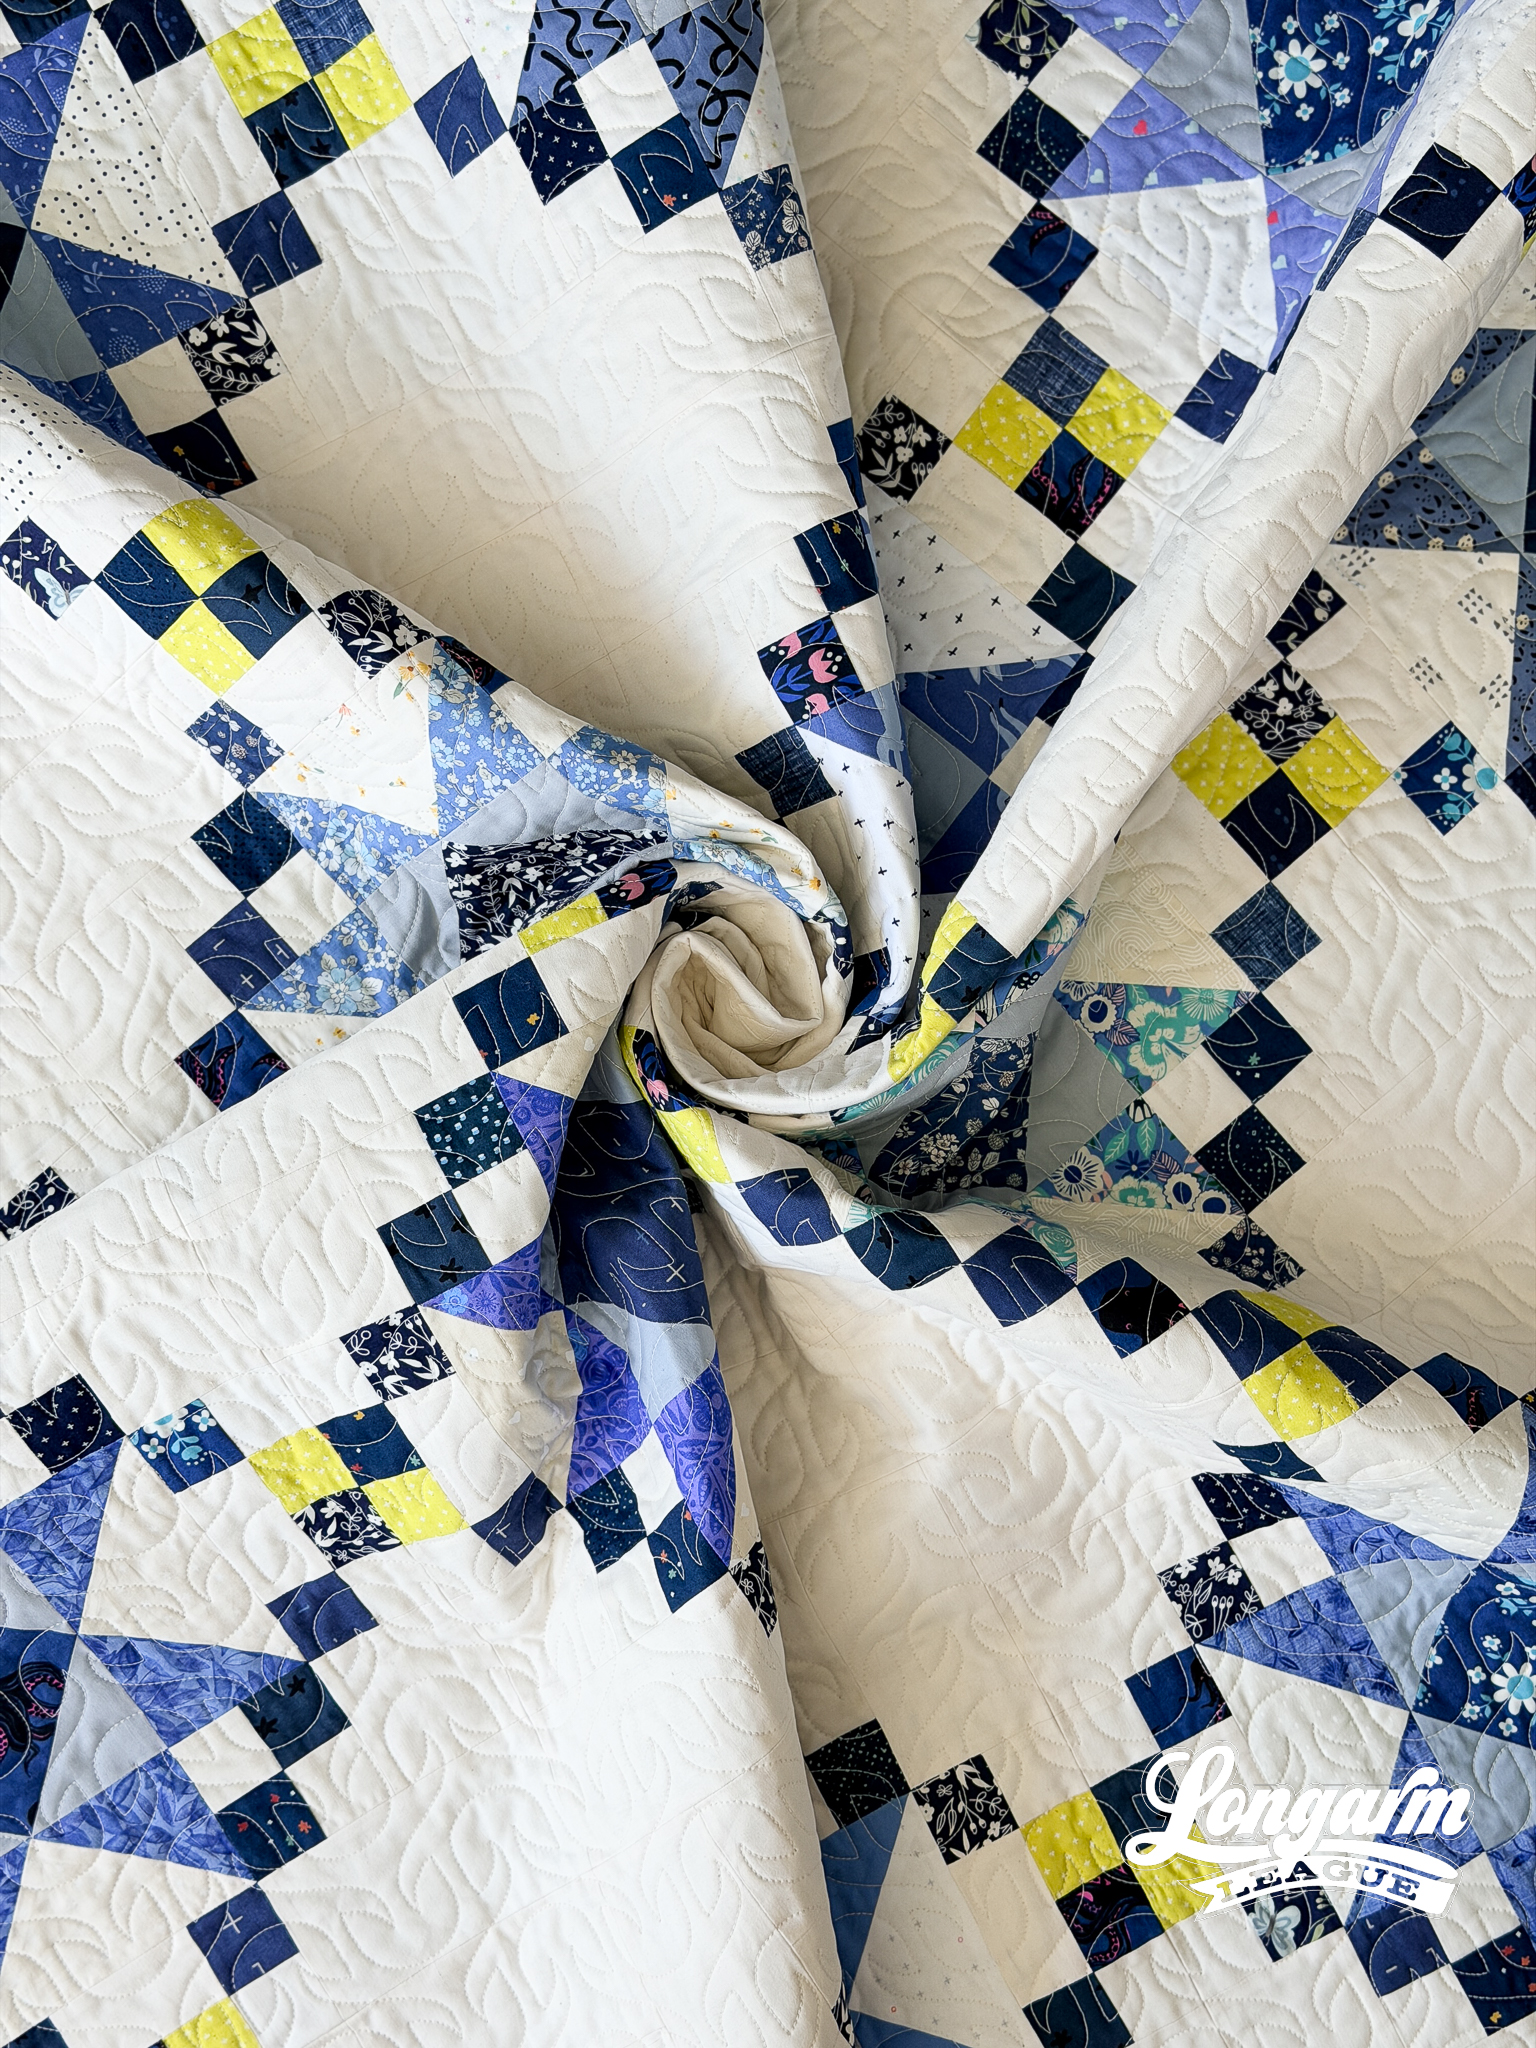
The quilt pattern featured is called the Champagne Quilt by Then Came June. I cut it out ahead of time to sew at a retreat, but I didn't quite get to it while retreating. Having a pre-cut quilt proved to be irresistable at home, so I made piles on my workspace (combo sewing and computer desk) and I chipped away at it here and there.
There are pros and cons to this way of sewing, my friends.
Pros: I was not in a rush, and I liked being able to sew a little something even when I had just a few minutes. I was able to make progress without getting bored or worn out. Each block used different fabrics but had the same construction, so once I felt comfortable with what I was doing, I could complete a block at a time and not assembly-line sew everything at once.
Cons: I had various patchwork piles on my desk for long stretches at a time which made me feel disorganized. Enough time passed between some of my sewing sessions that I forgot what was what and had to refer to the pattern more than usual to orient myself, especially in the "chain" portions of the quilt.
The pattern itself is well-written and easy to follow and I got so much enjoyment sewing it up!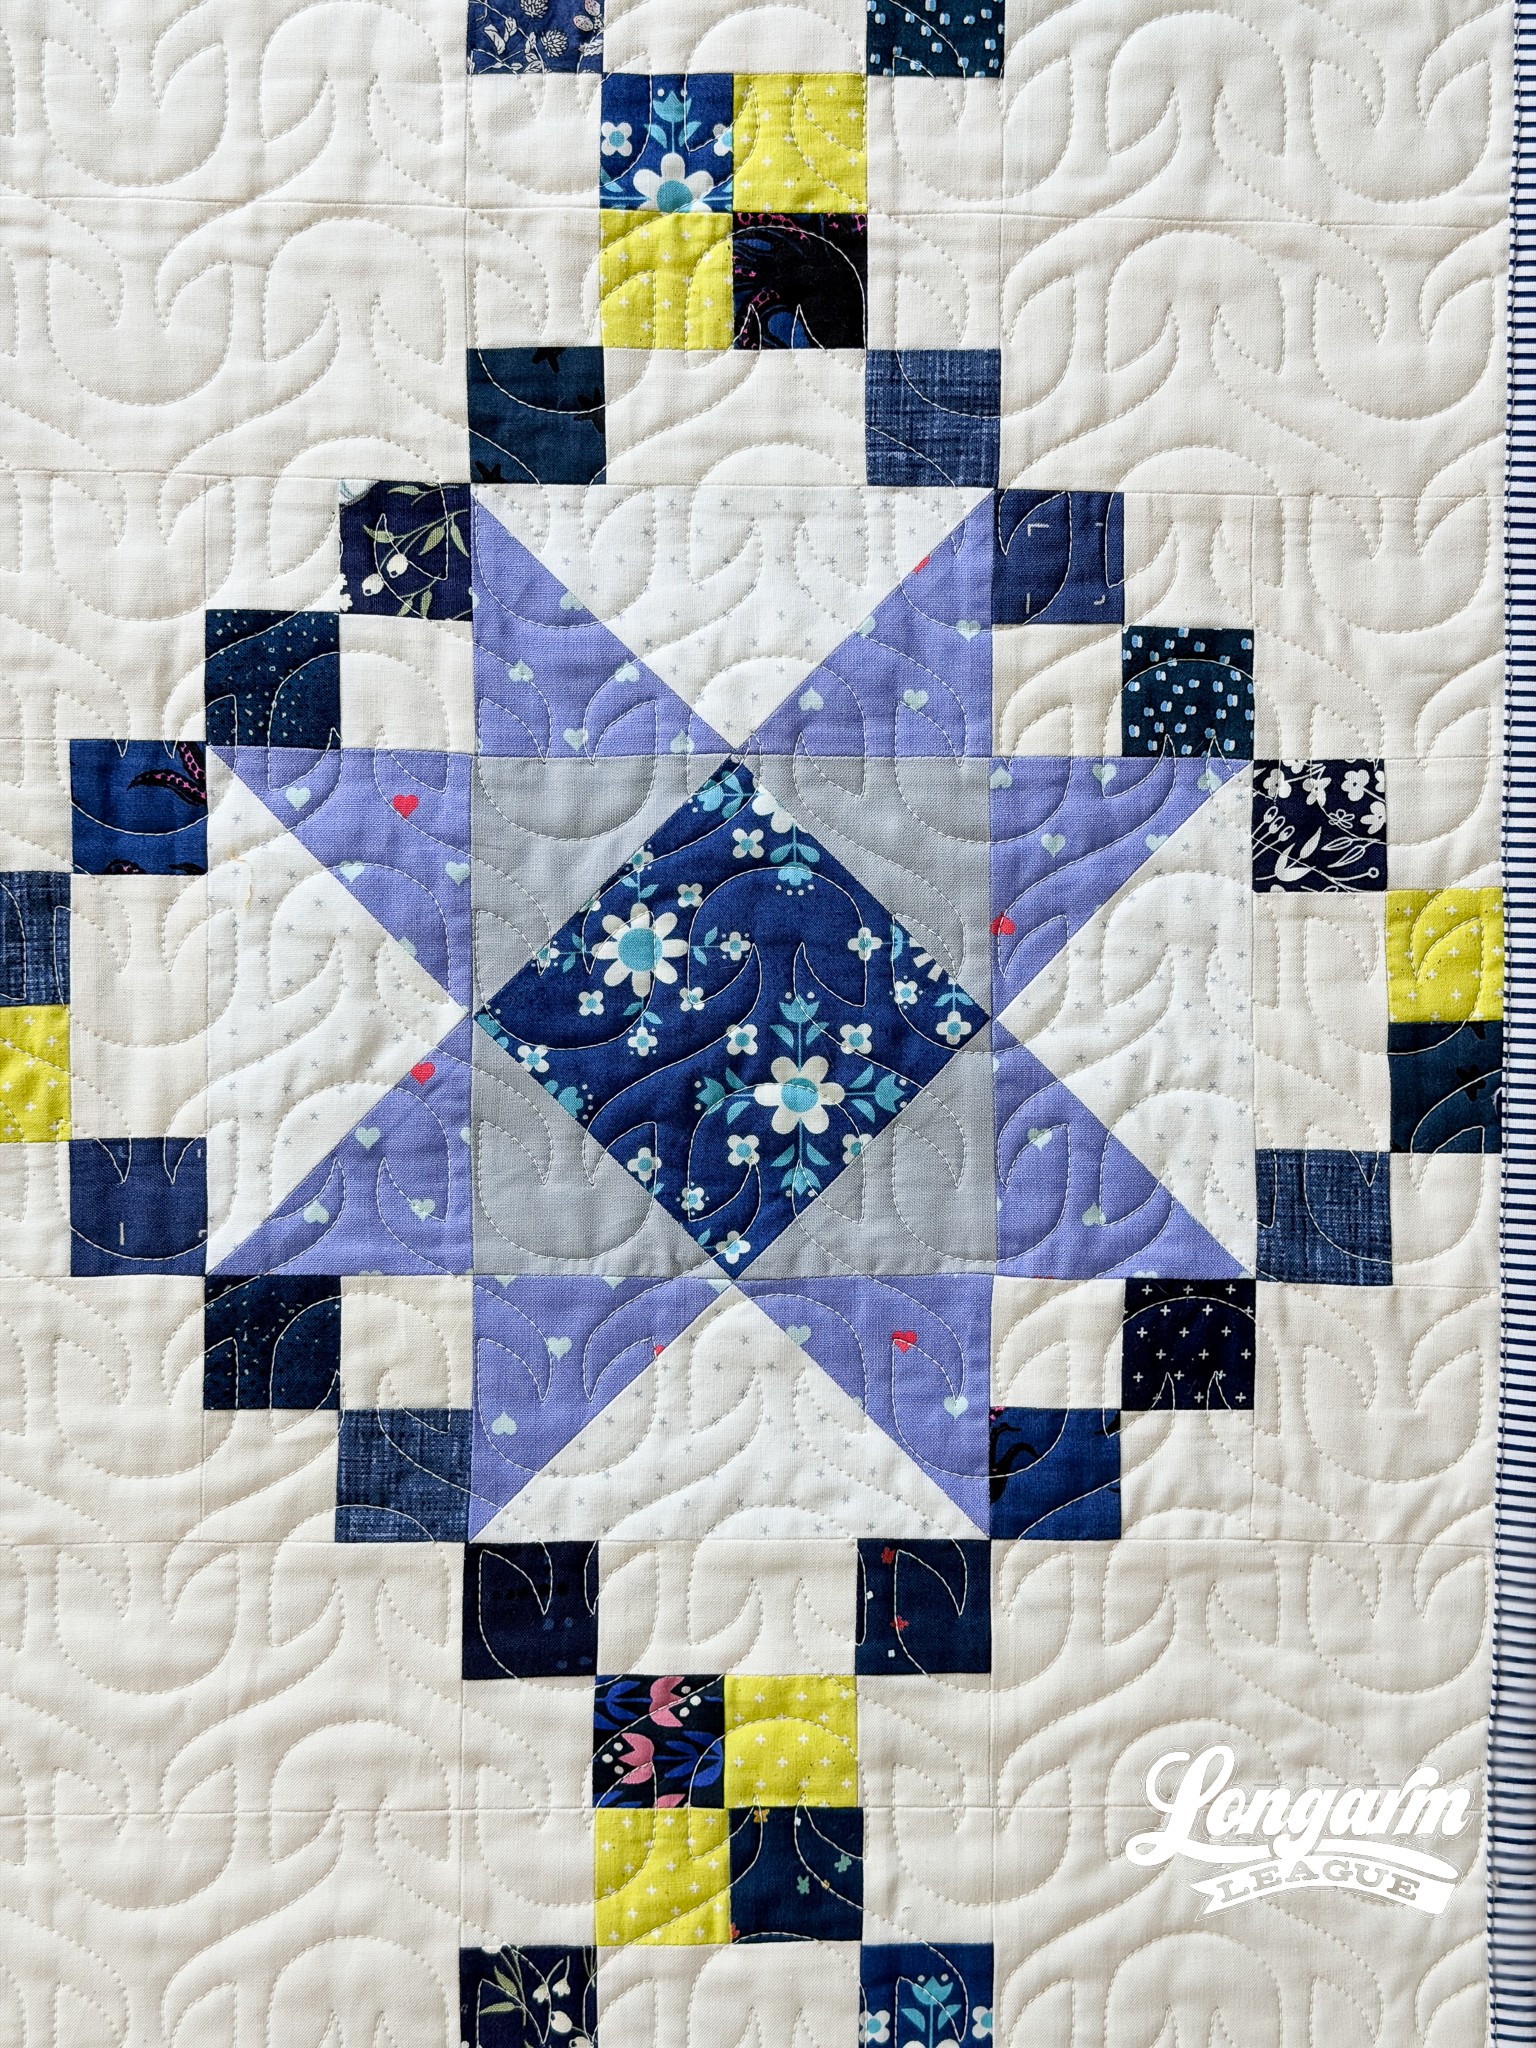
Fabrics
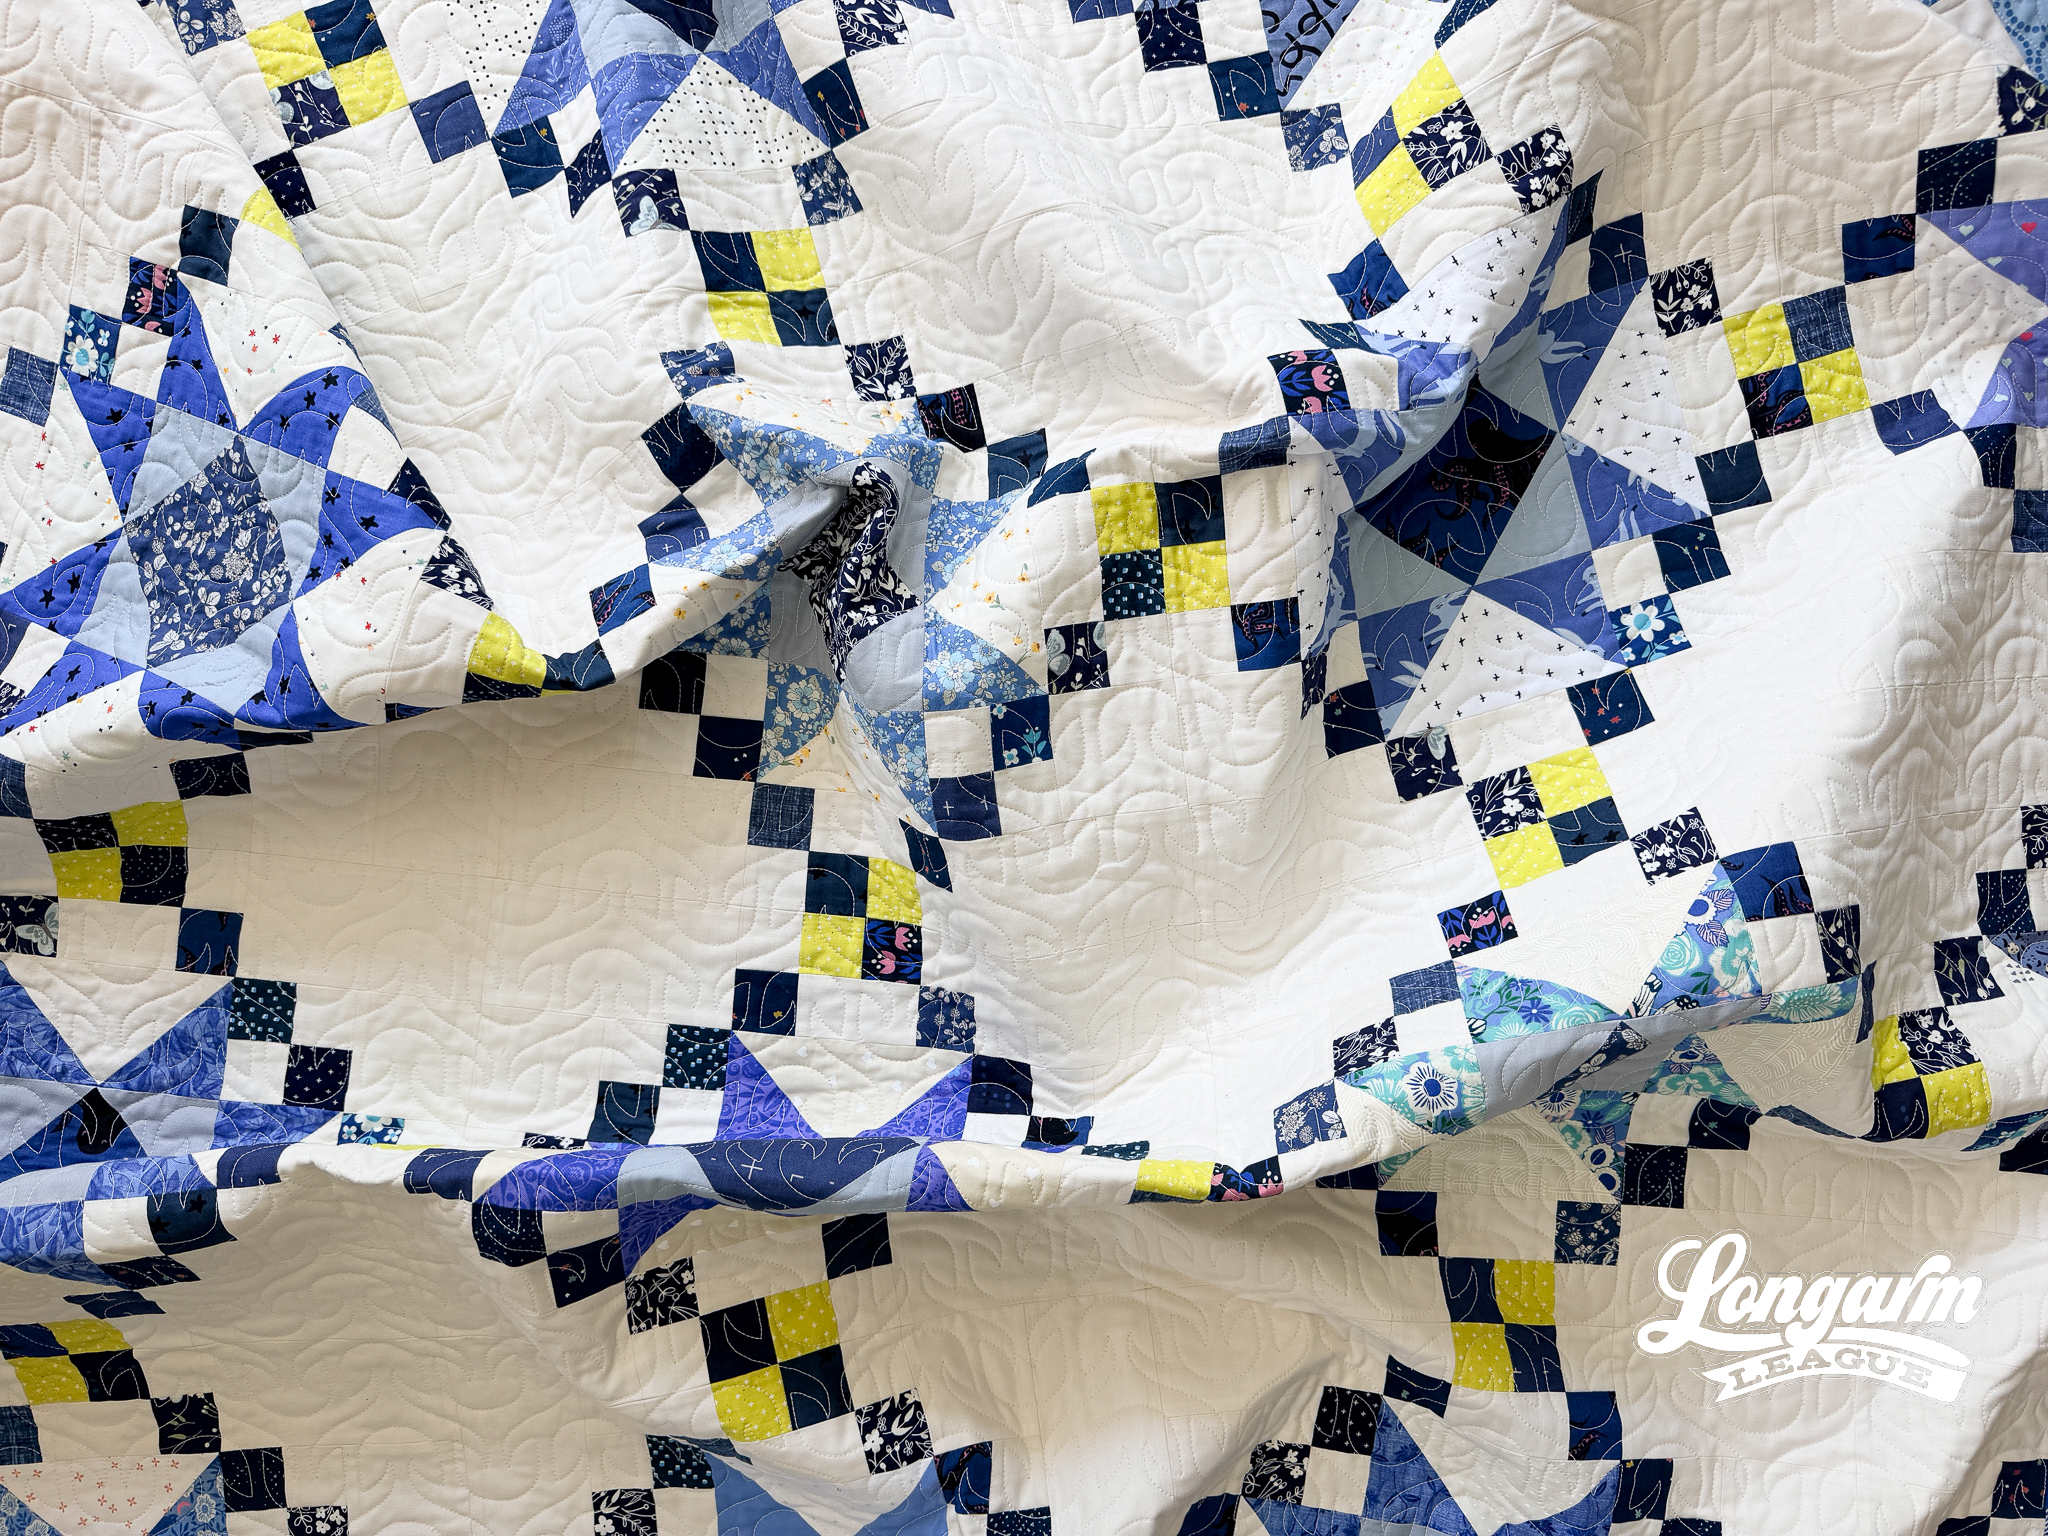
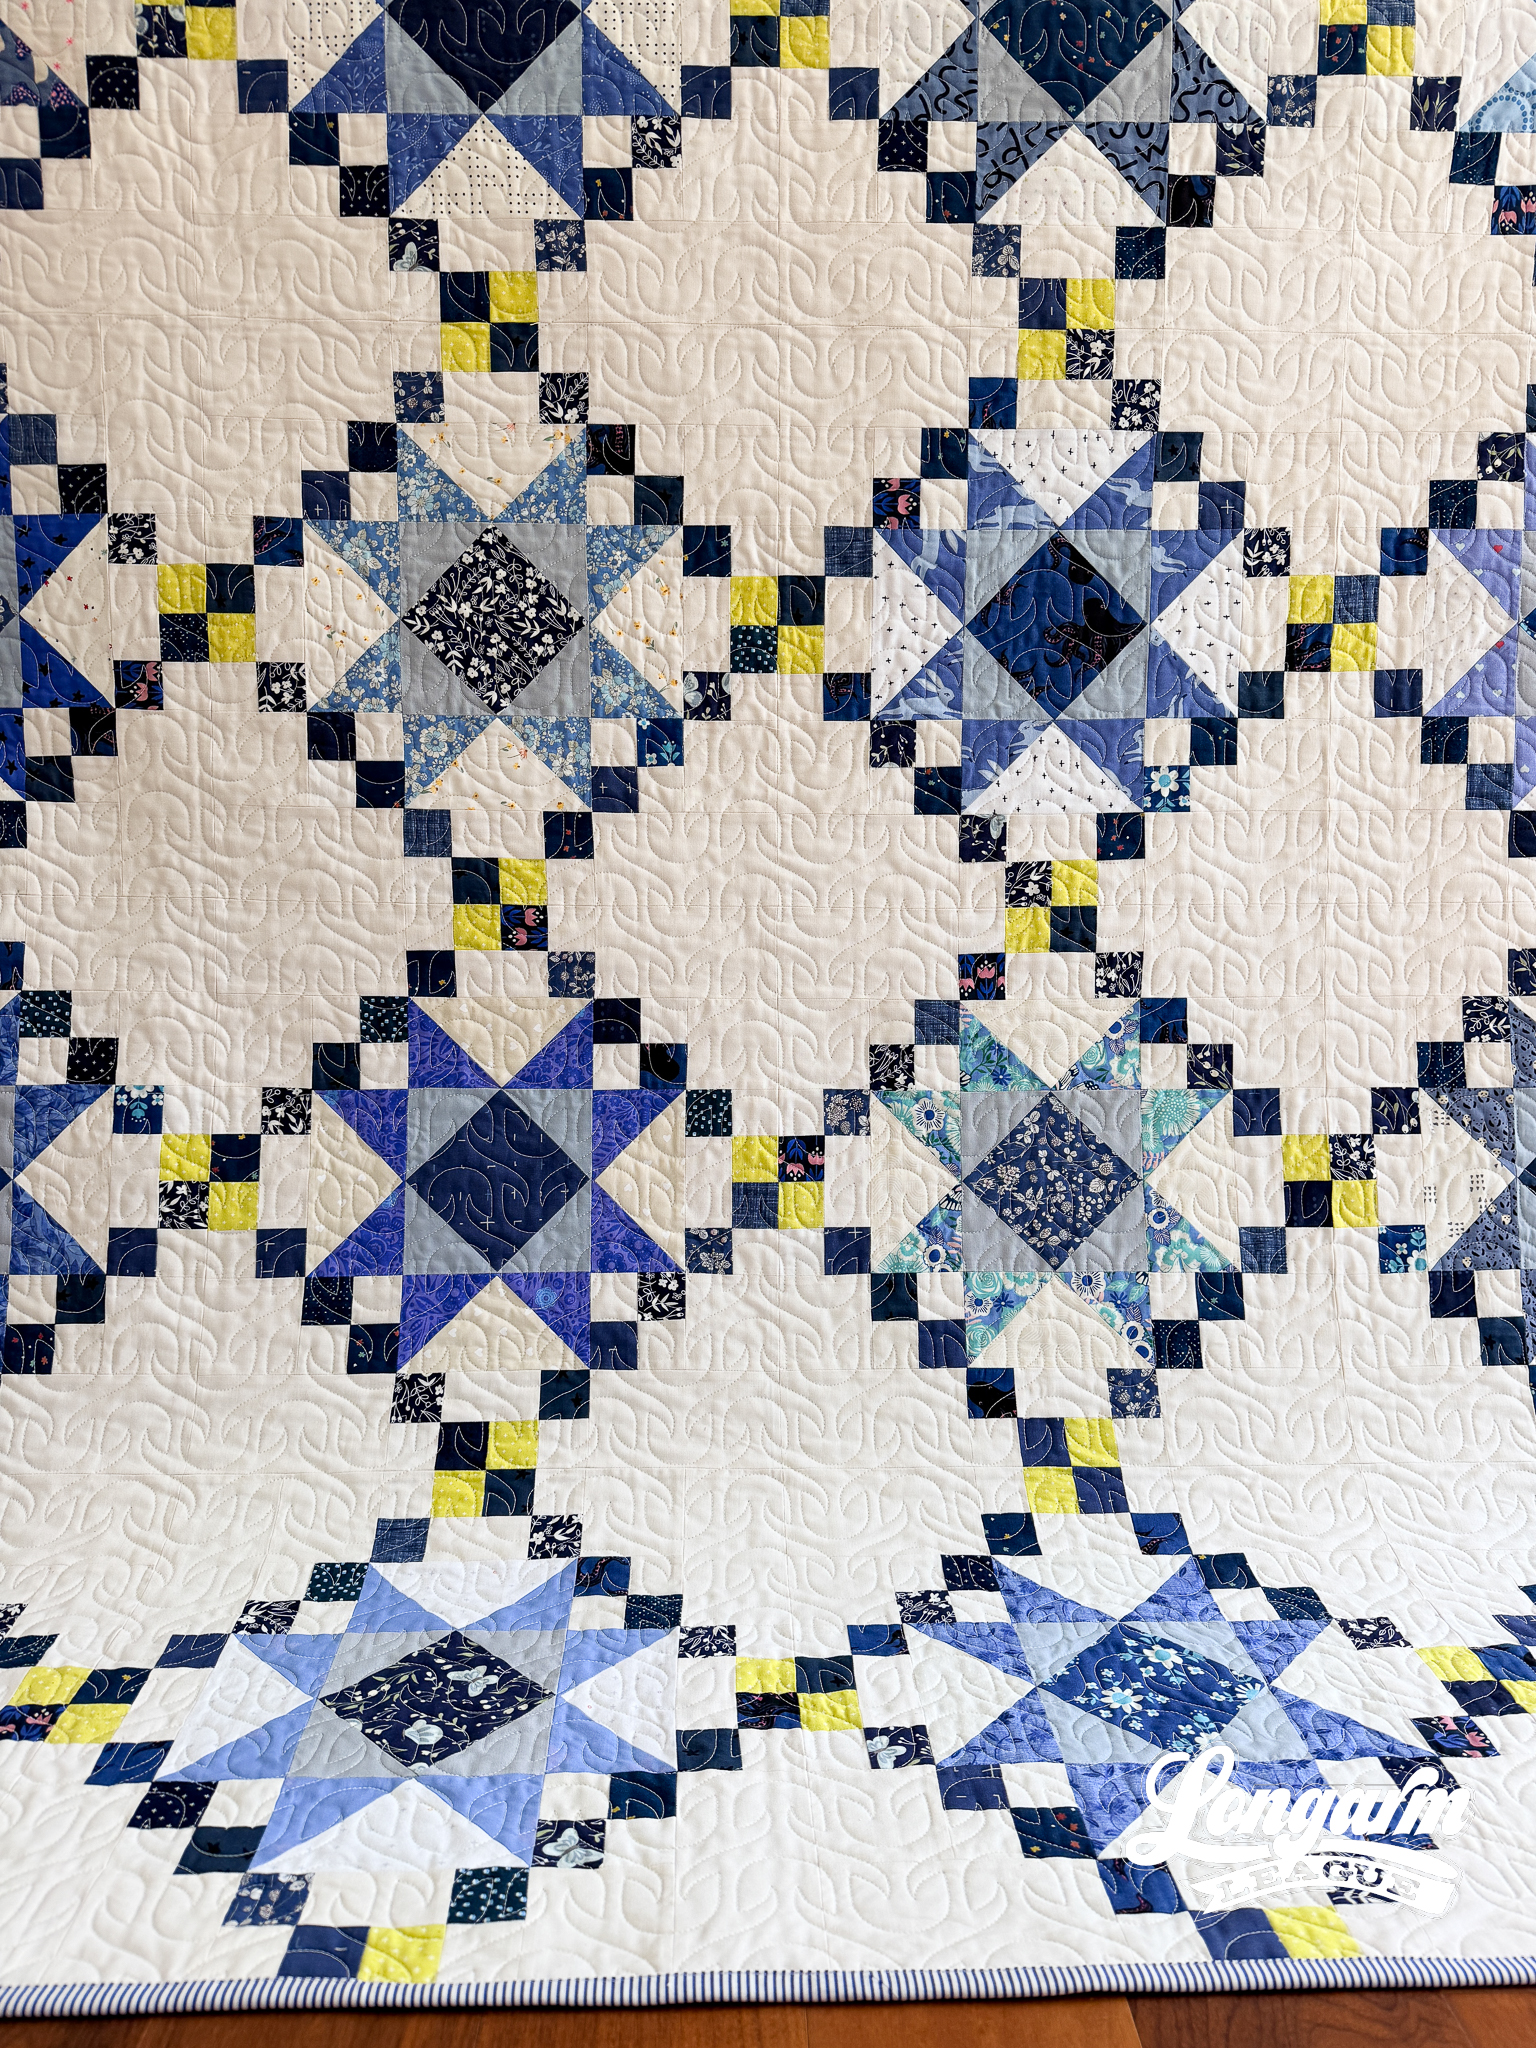
I leaned all the way into my blue scraps and loved every minute of it! The delightful, bright lime fabric is Add it Up in Citron, from Ruby Star Society.
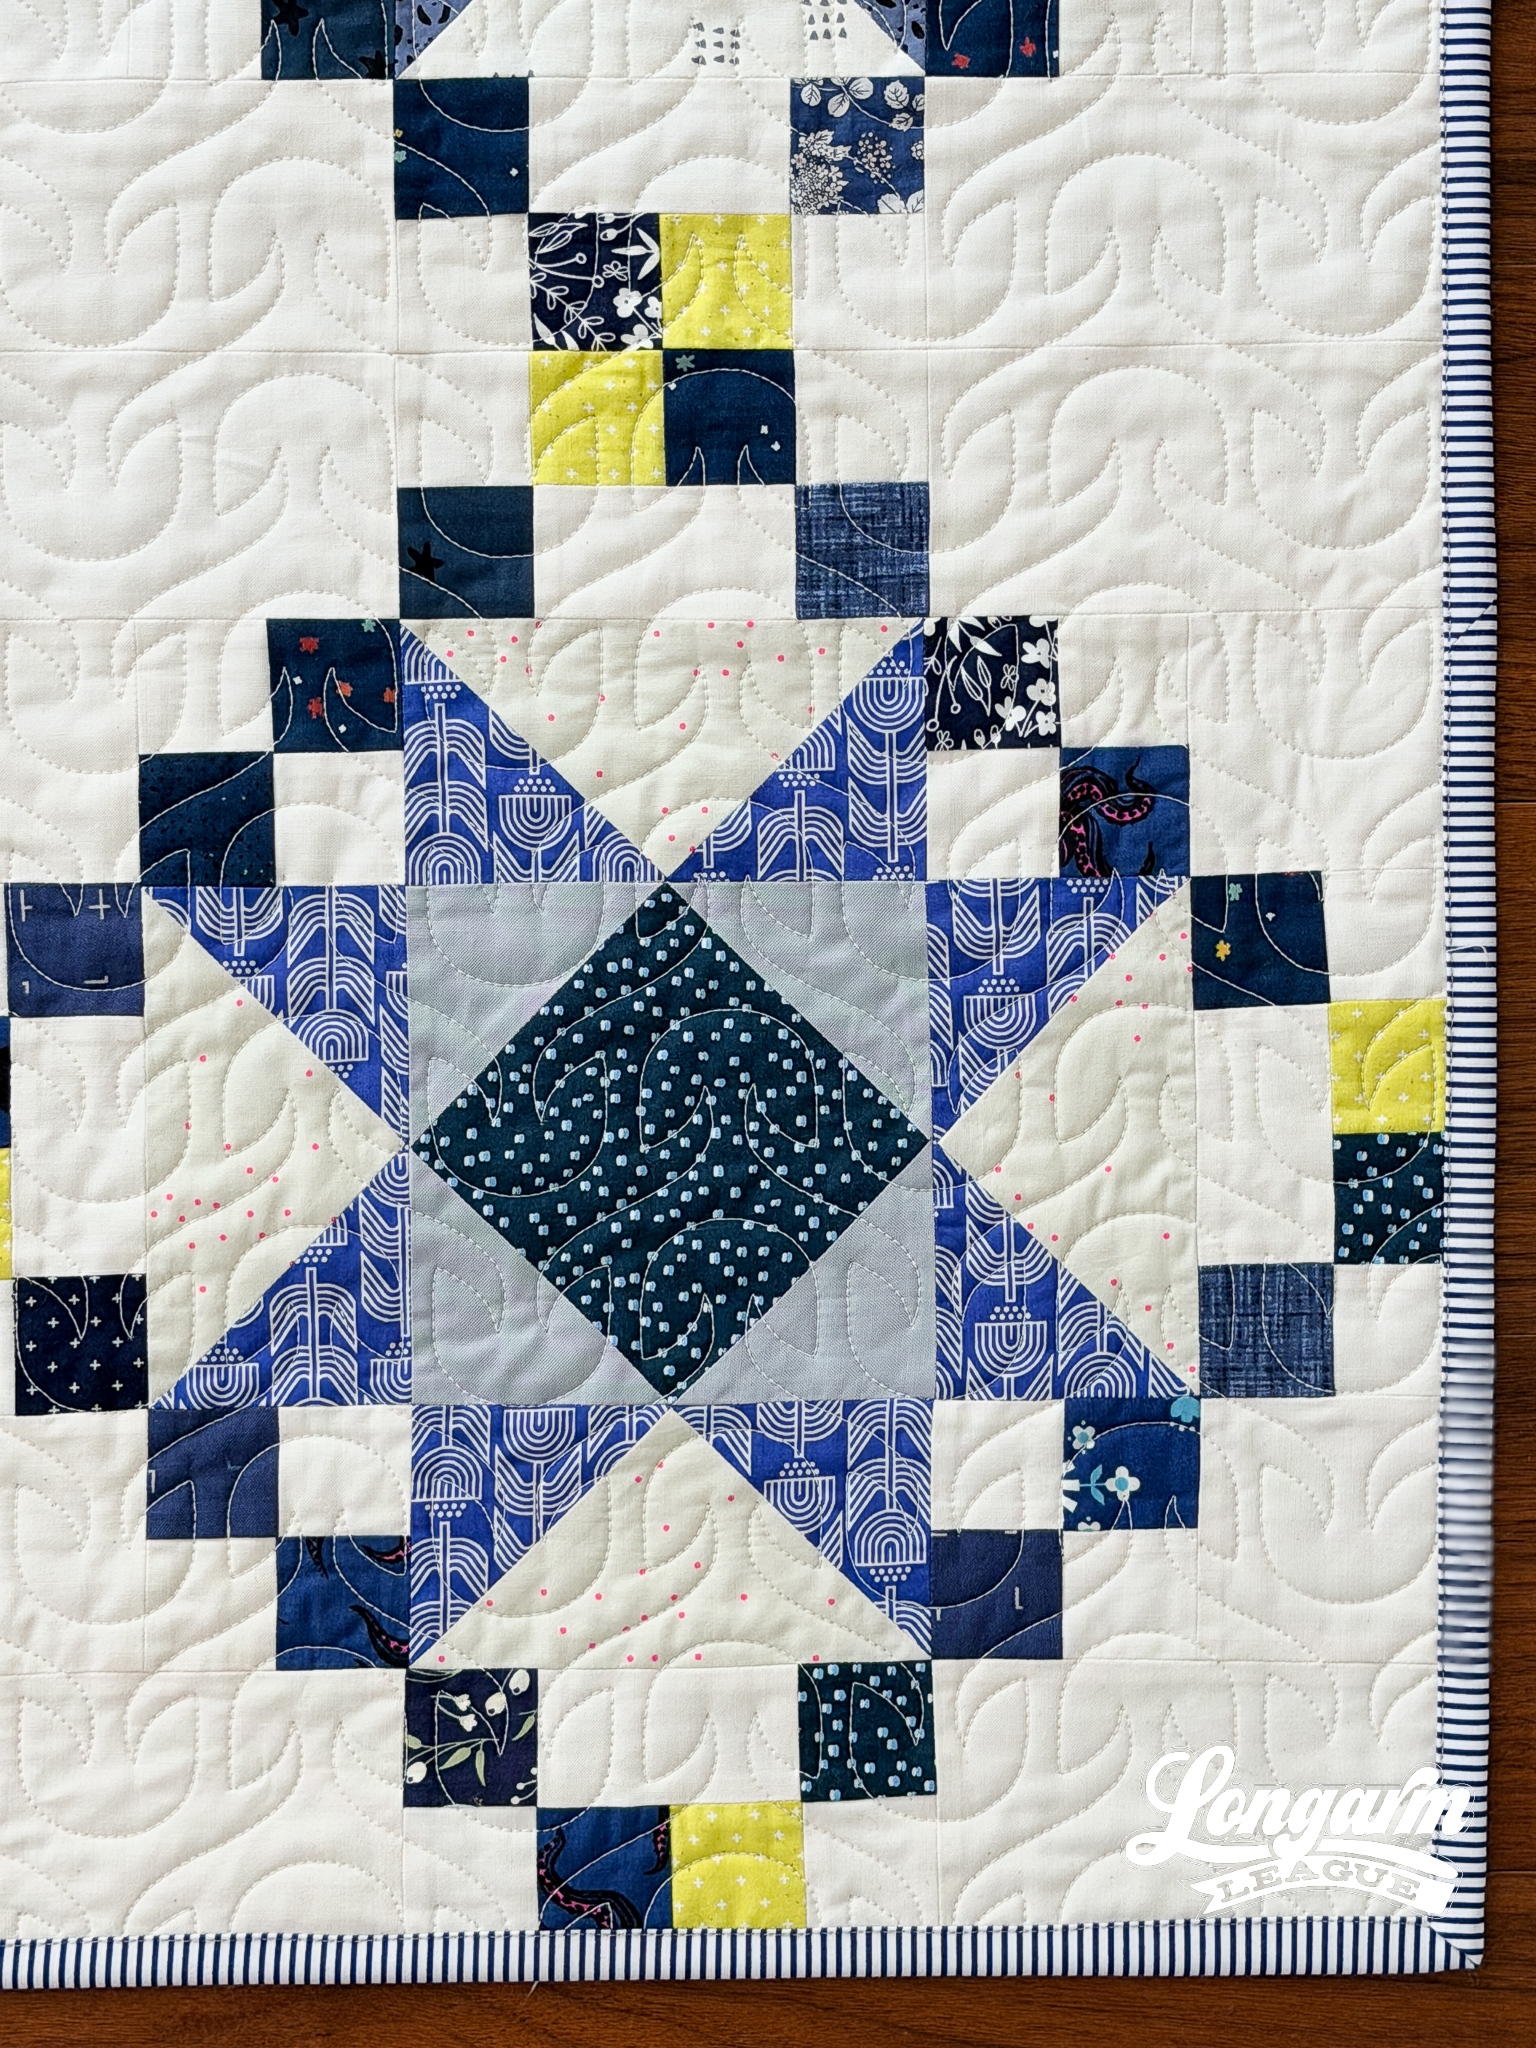
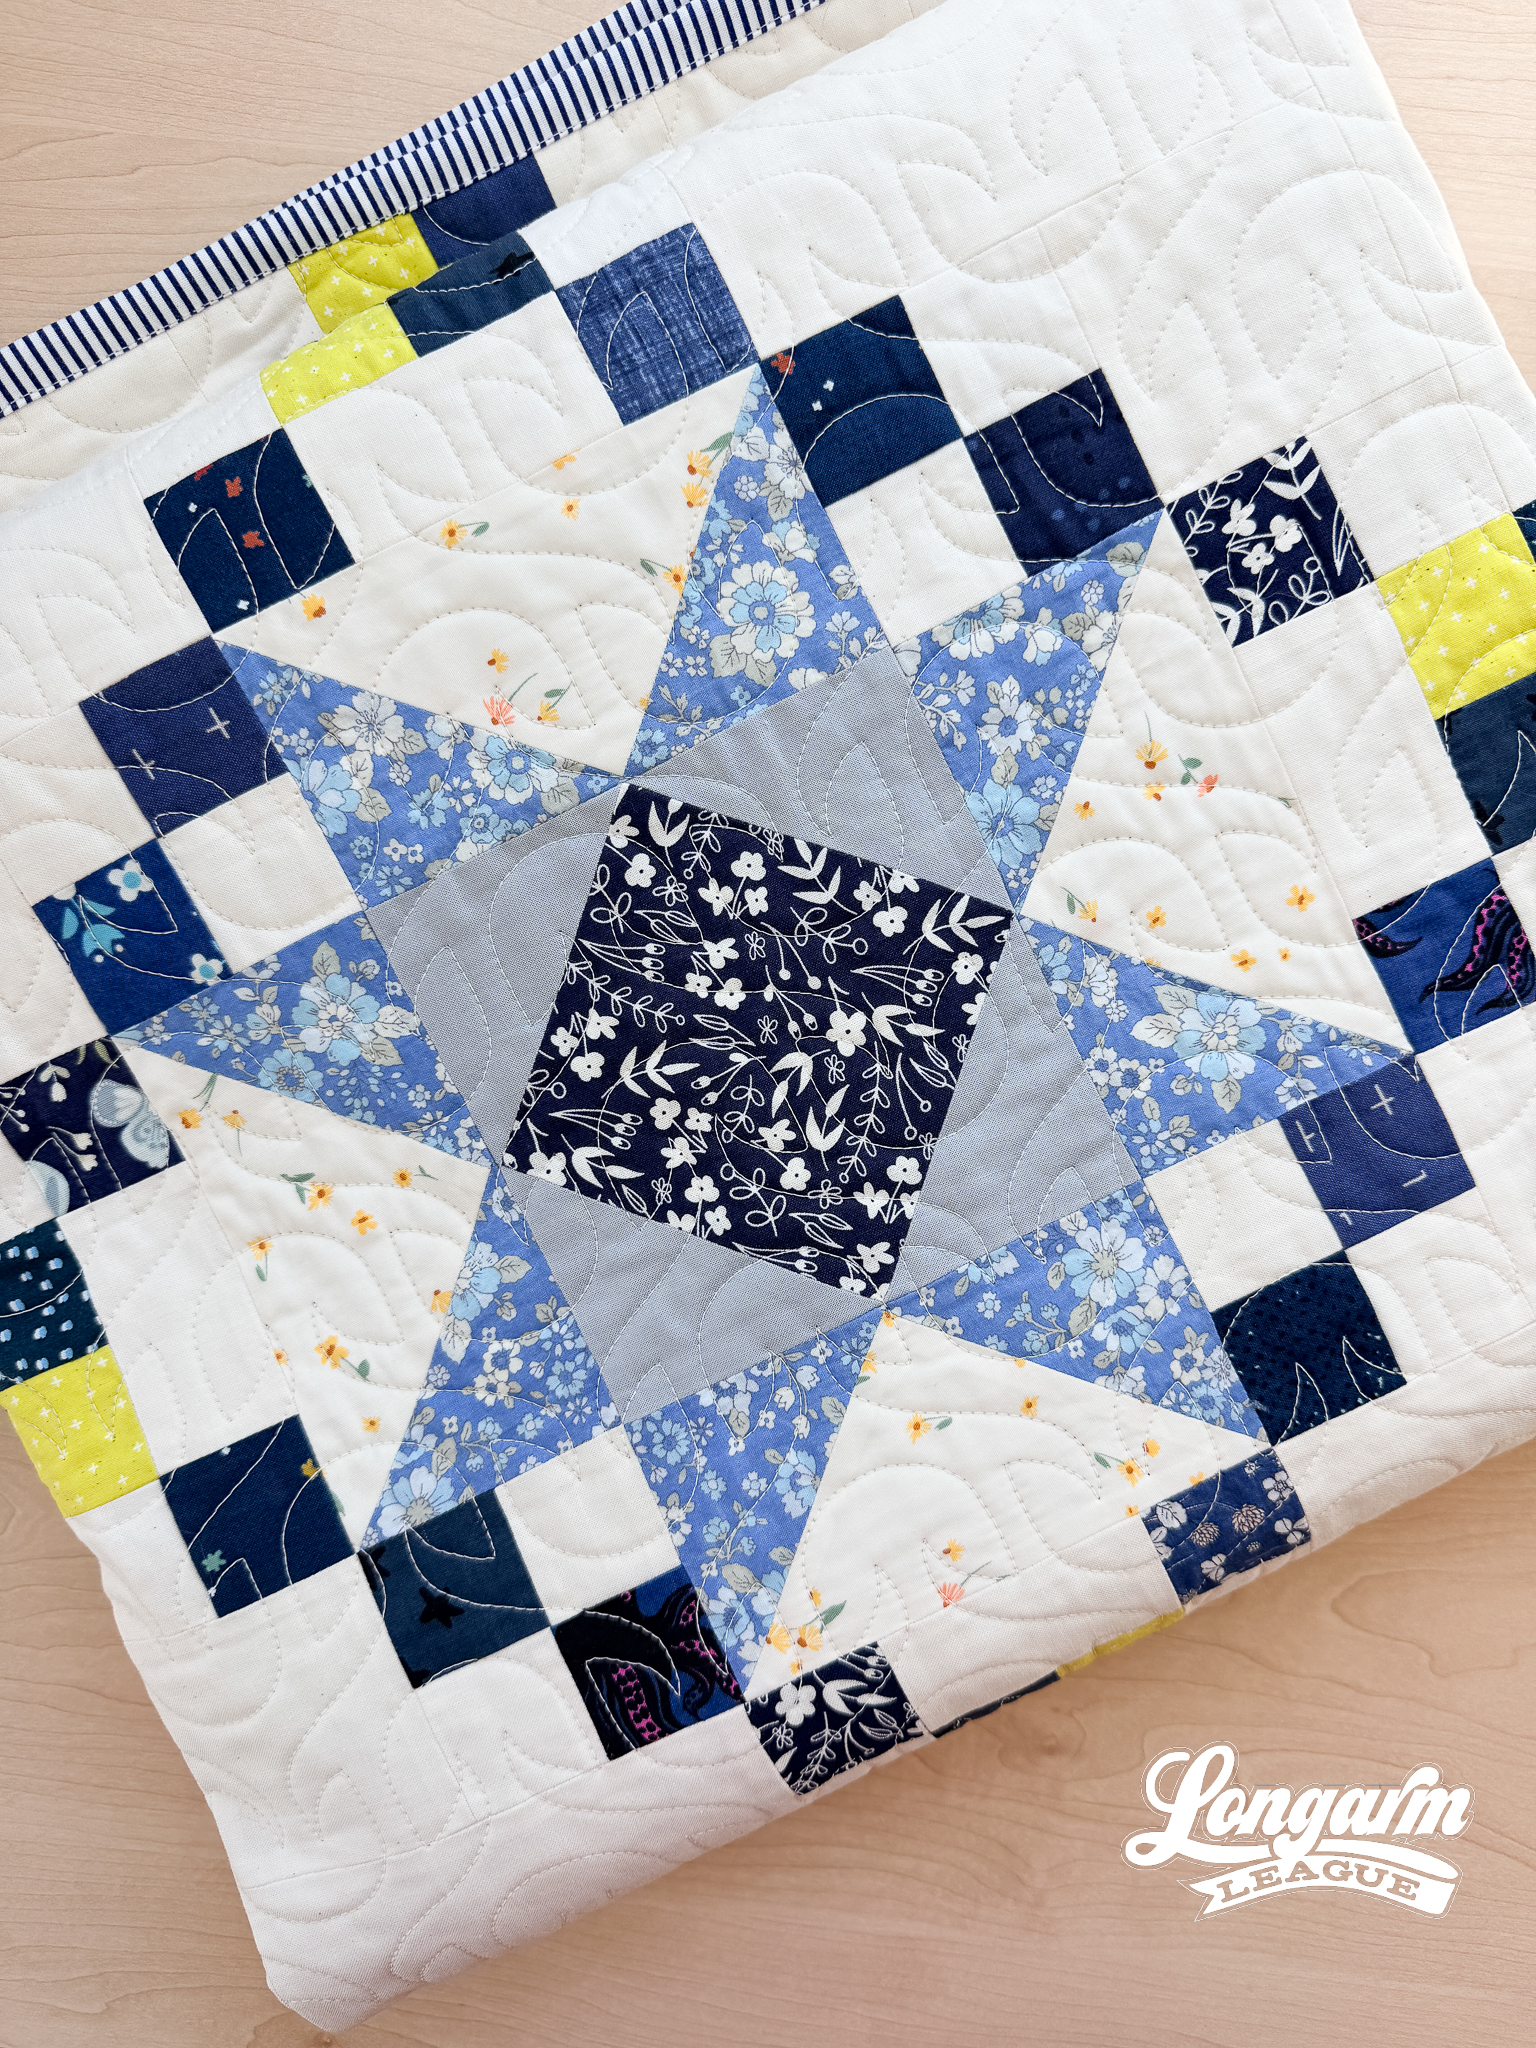
Each star features a different blue print, which both gives the quilt variety and cohesion. Having the same neutral background fabric also lends a polished look. The star centers and the Irish Chain elements are all scrappy. I am very satisfied with the overall look.
Backing & Batting Choices
Needing a speedy solution, I used a wide cut of Kona in Parchment off the bolt for the backing. I also ripped my brand new roll of Quilters Dream Bamboo open and took the easy way out instead of piecing together remnants of batting like I've been doing lately. The backing and batting scraps will still be here for another project. 😇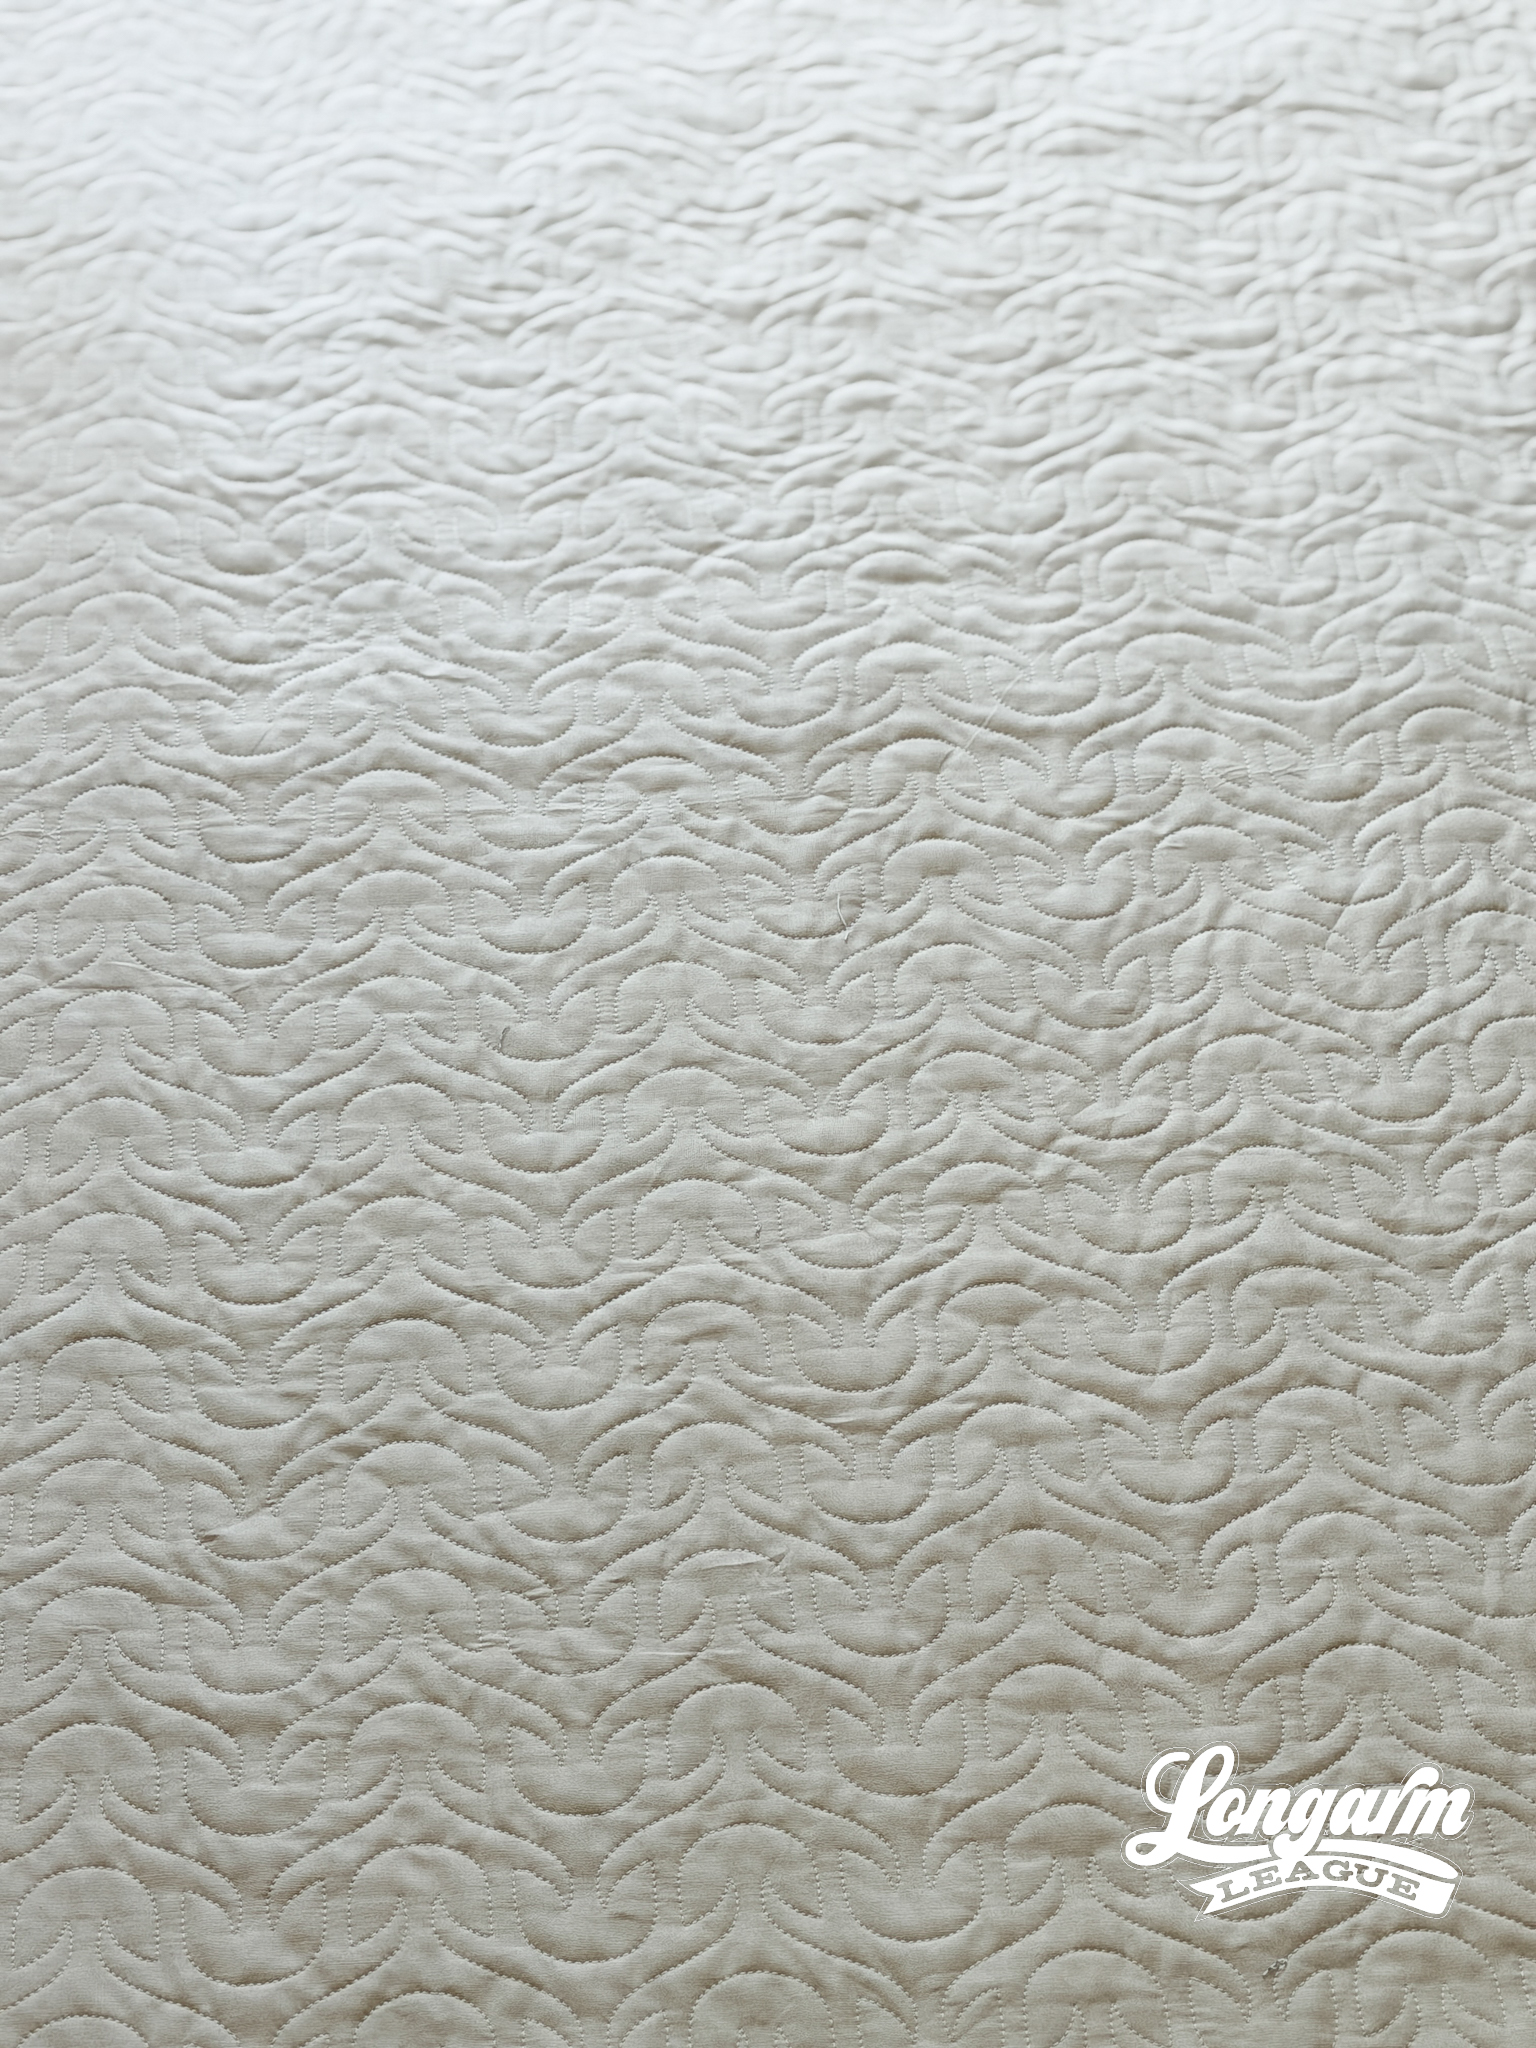
Top and Bobbin Thread
I don't normally report on what kinds of threads I use because I use pretty much the same thing for every single quilt. BUT! This time I used thread I purchased when I visited H+H Americas in May this year (2026). I used Wonderfil's new Polymatte thread for the top (PM201), which is a 40 weight, 2-ply matte polyester thread, paired with Wonderfil's 80-weight DecoBob (DB112) bobbin thread.
Both were... Wonder-ful! Will use again! I found the stitches to be extremely consistent from start to finish.
The Quilting Details
Difficulty Level: Easy
There's really nothing to report here as far as difficulty. There's no offsetting, no backtracking, and alignment is easy.
If you'd like to view the stitch path, a short video is available at the top of the blog post.
Scale
I scaled the design down from the default size. At this scale (see specifics below), the bulb "heads" are roughly 1 5/8" across and 1 1/4" tall. I wish that I would have closed the gap a little bit more when quilting it! It's a very minor difference, but I think the thumbnail image of the design has just a tad more geometric appeal to me. That's a preference thing on my part. I think it works and looks good either way.
Here are the sizing specifications for how I set up this quilt using my Intelliquilter (60" x 60" quilt size):
Row height: 2"
Gap: -1.774"
Pattern height: 3.774" (measurement from top to bottom of the repeat)
Offset: none
Backtracking: none
Here's a look at the included PDF: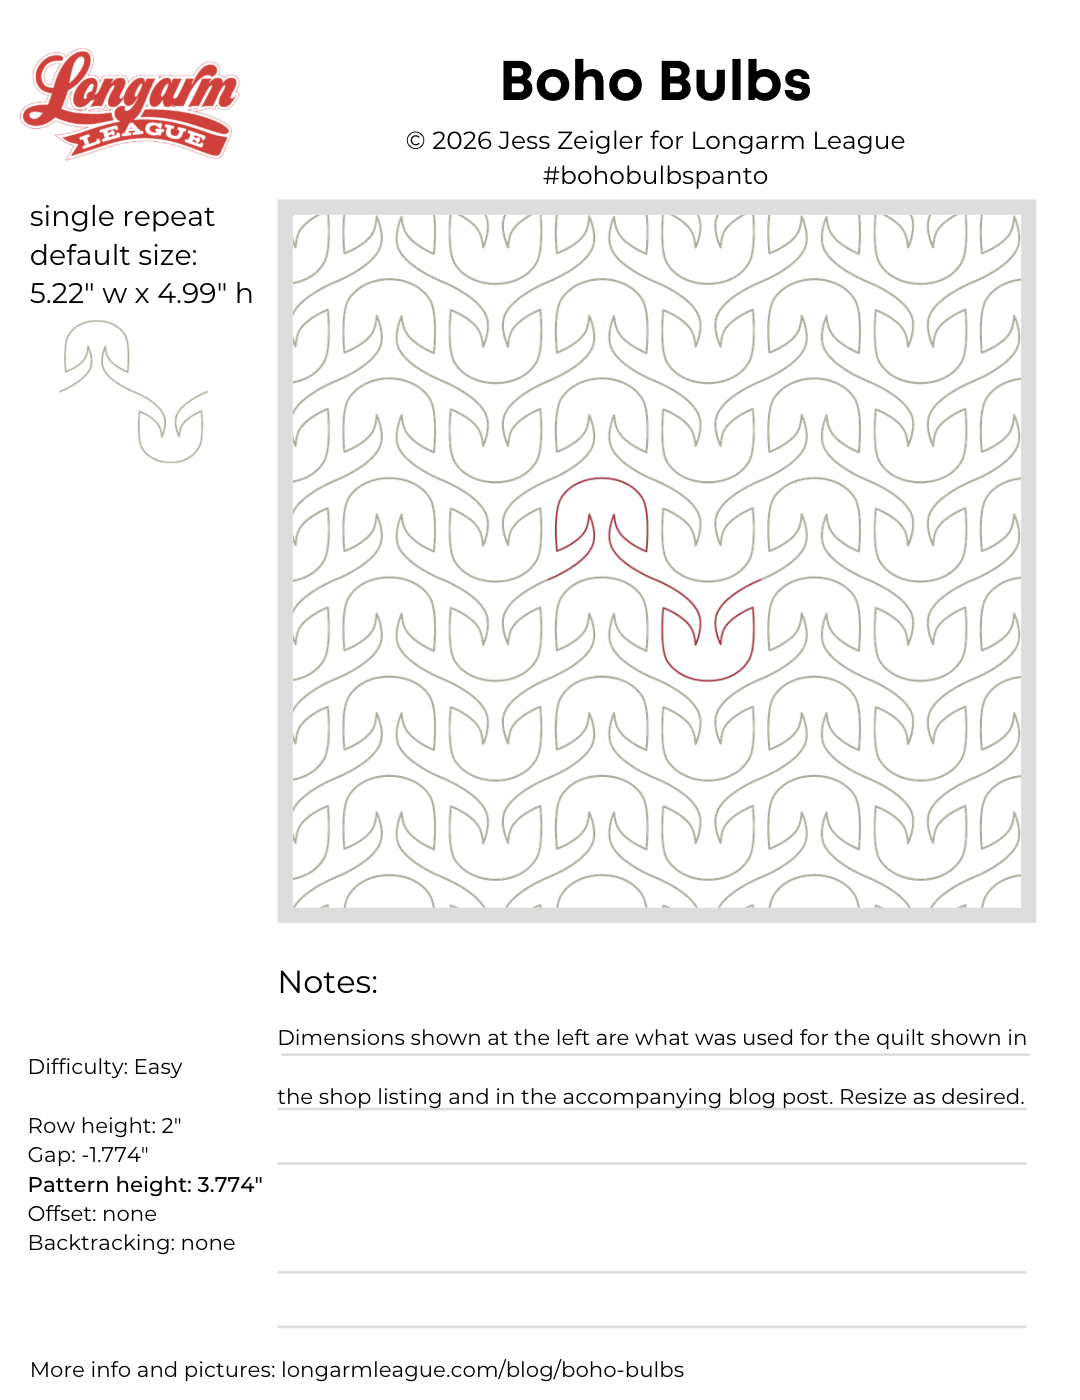
Interested in getting new digital pantograph designs like this one on the day they're released (and at a deep discount)? Sign up for our Digital Panto Club and get them delivered directly to your inbox on the first Wednesday of each new month.

Jess Zeigler
Longarm League Commish & Owner of Threaded Quilting Studio, LLC.


