
Camber E2E Digital Quilting Design
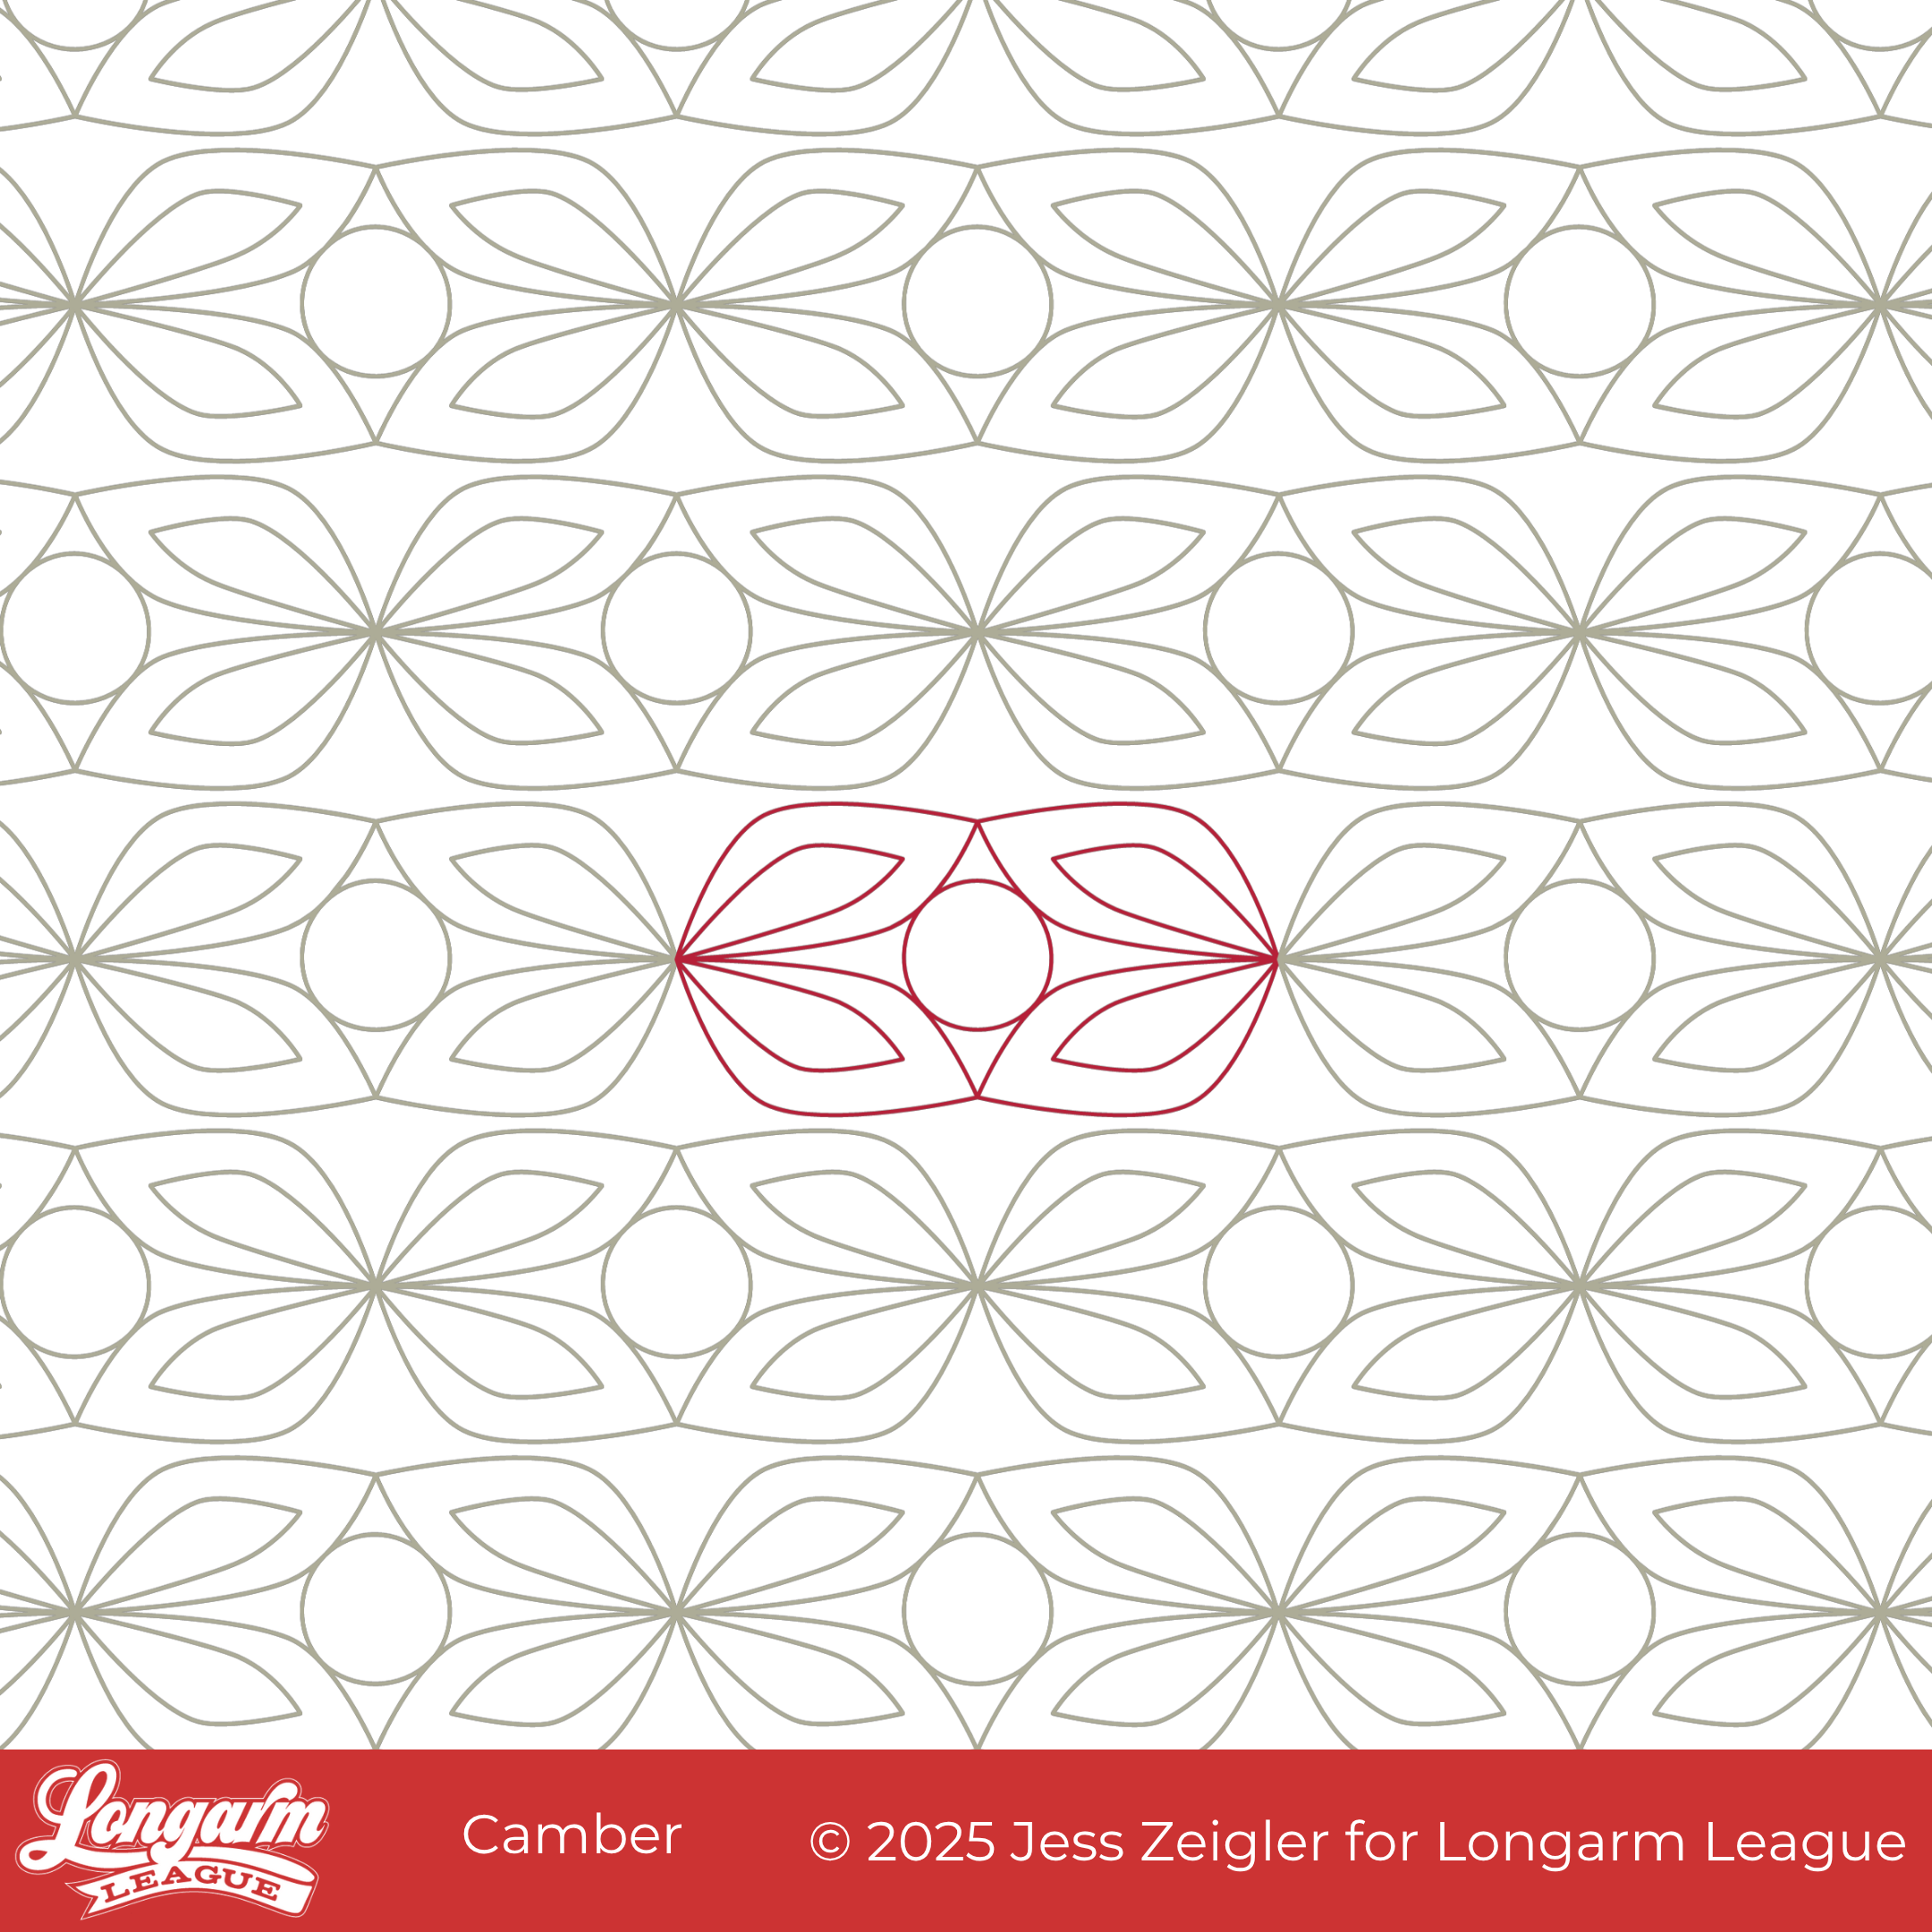
Camber features repeating floral-inspired motifs with petals radiating from a center circle — a clean pattern that feels classic without feeling fussy.
Many of the new pantographs I've designed over the last several months (Modra, Wifi, Bloomlet, and Smokescreen) have had a "freestyle" or a handguided feel to them. In contrast, Camber feels geometric and structured.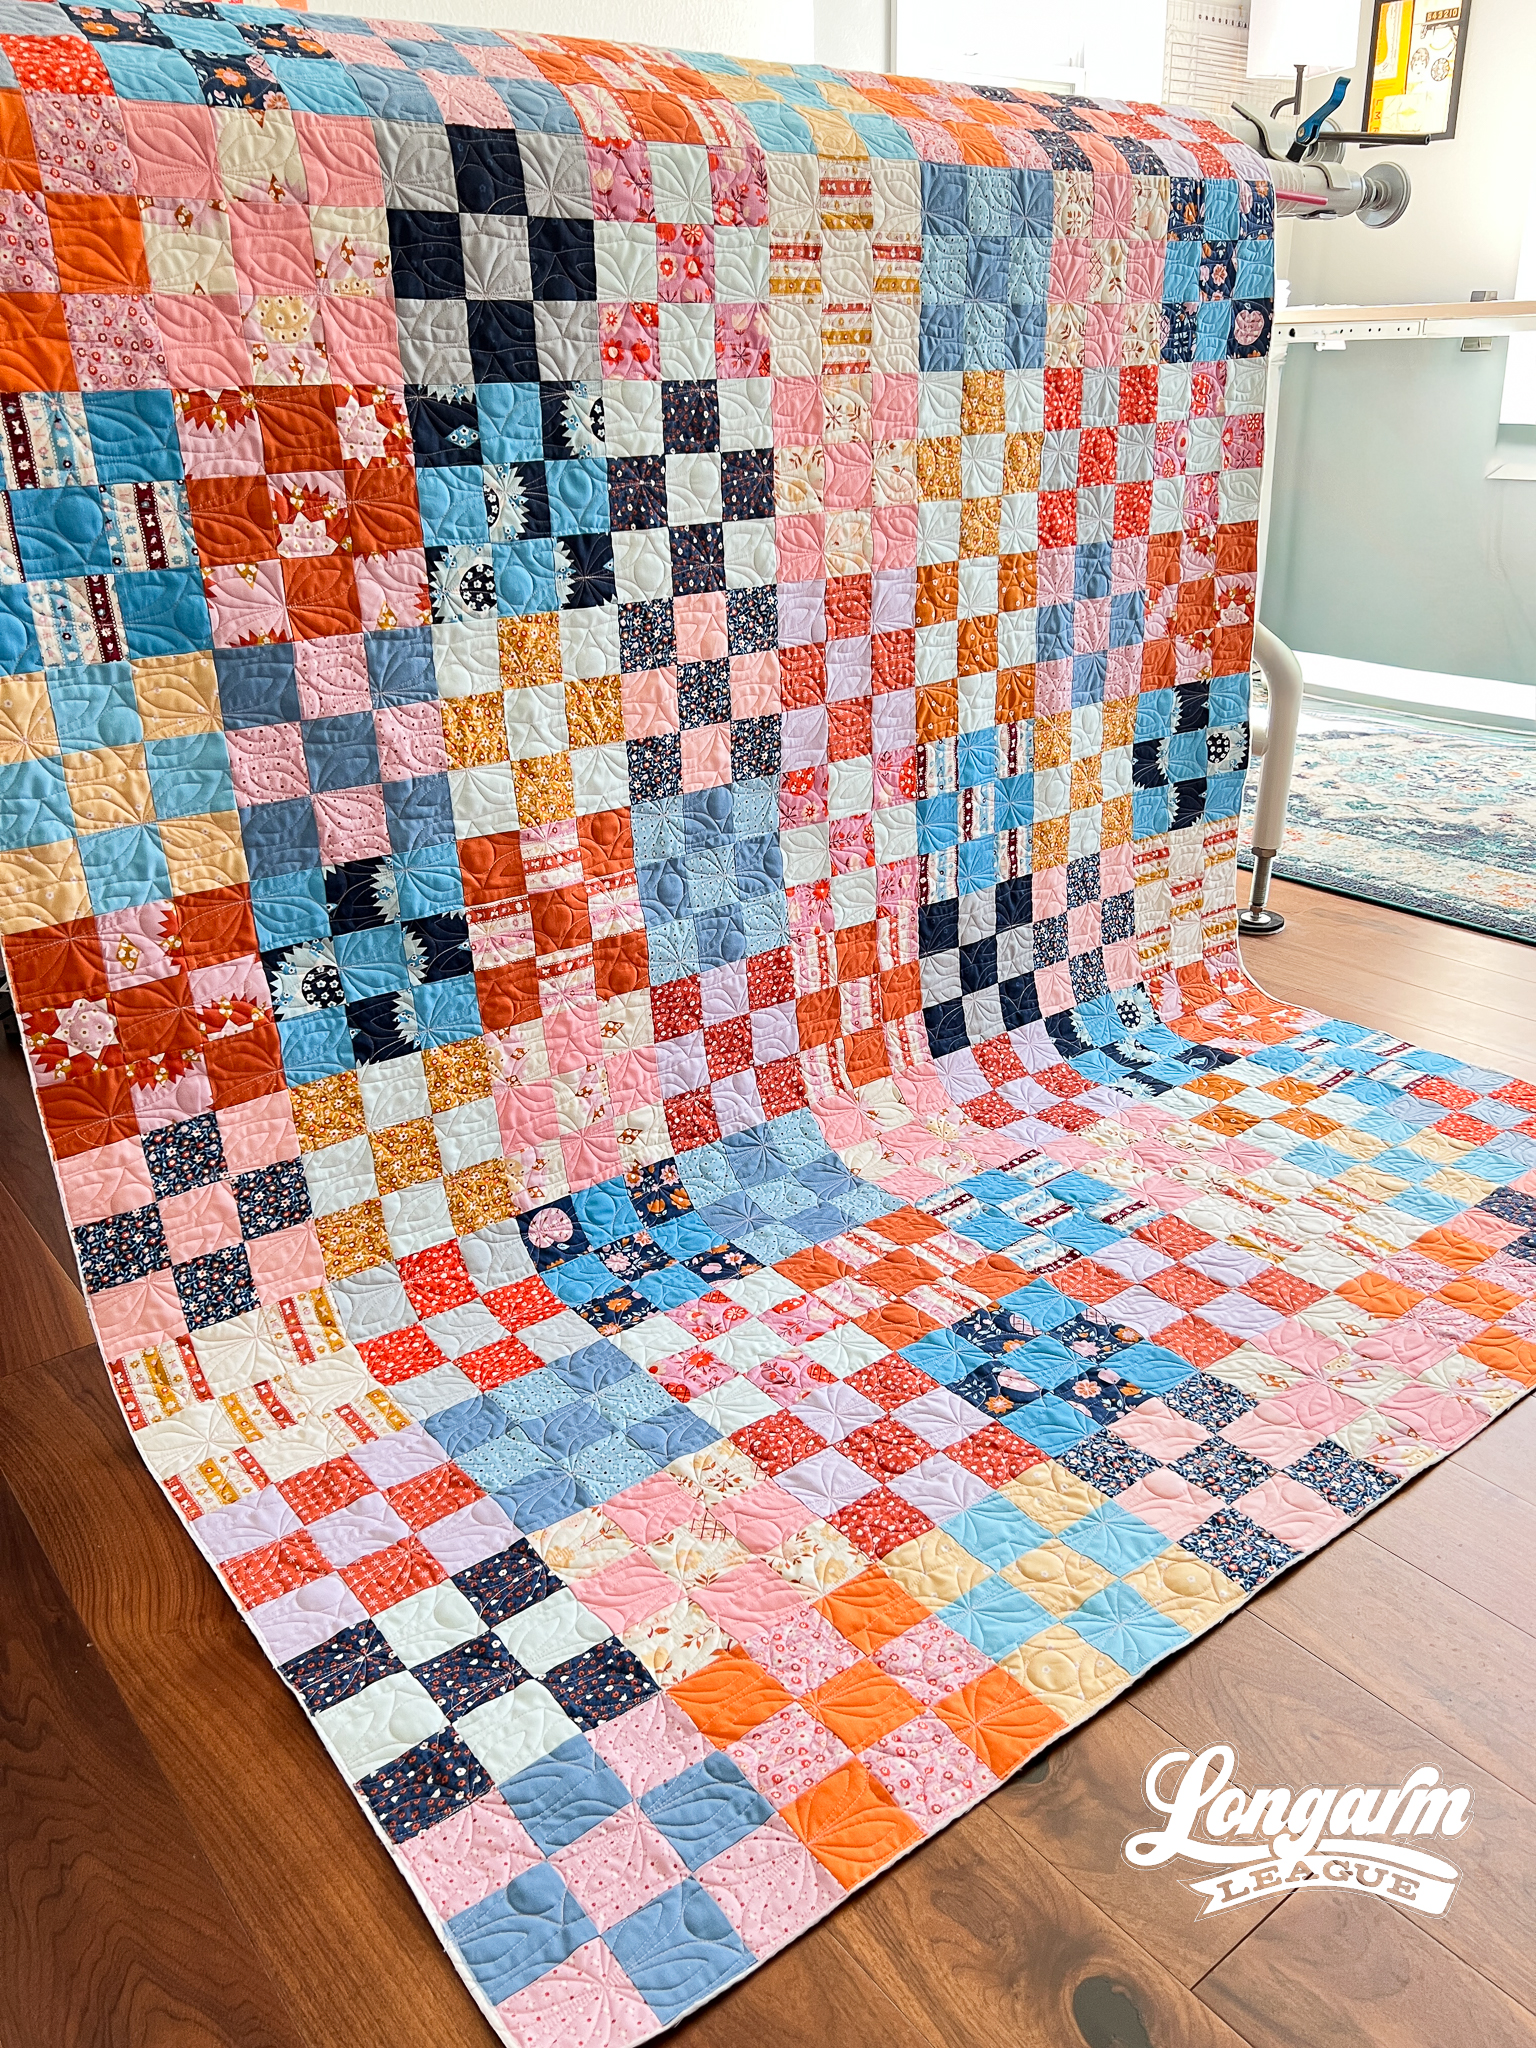
Camber also bridges traditional and modern—my favorite way to live life! ☺️ The echoed line within each petal reminds me of Orange Dream, which is my take on a traditional orange peel. Except this design is a lot easier to use because precision alignment between rows is not required.
The slight curvature between rows creates a gentle wave effect that adds dimension. The word camber means the slightly convex or arched shape of a road or other horizontal surface. It’s a nod to movement—a tiny architectural nudge that softens the repeat and keeps the eye moving. Plus, I love the little triangle shapes that emerge as a secondary pattern between rows.
This design is perfect for quilts where you want a sophisticated finish that's polished but not stiff.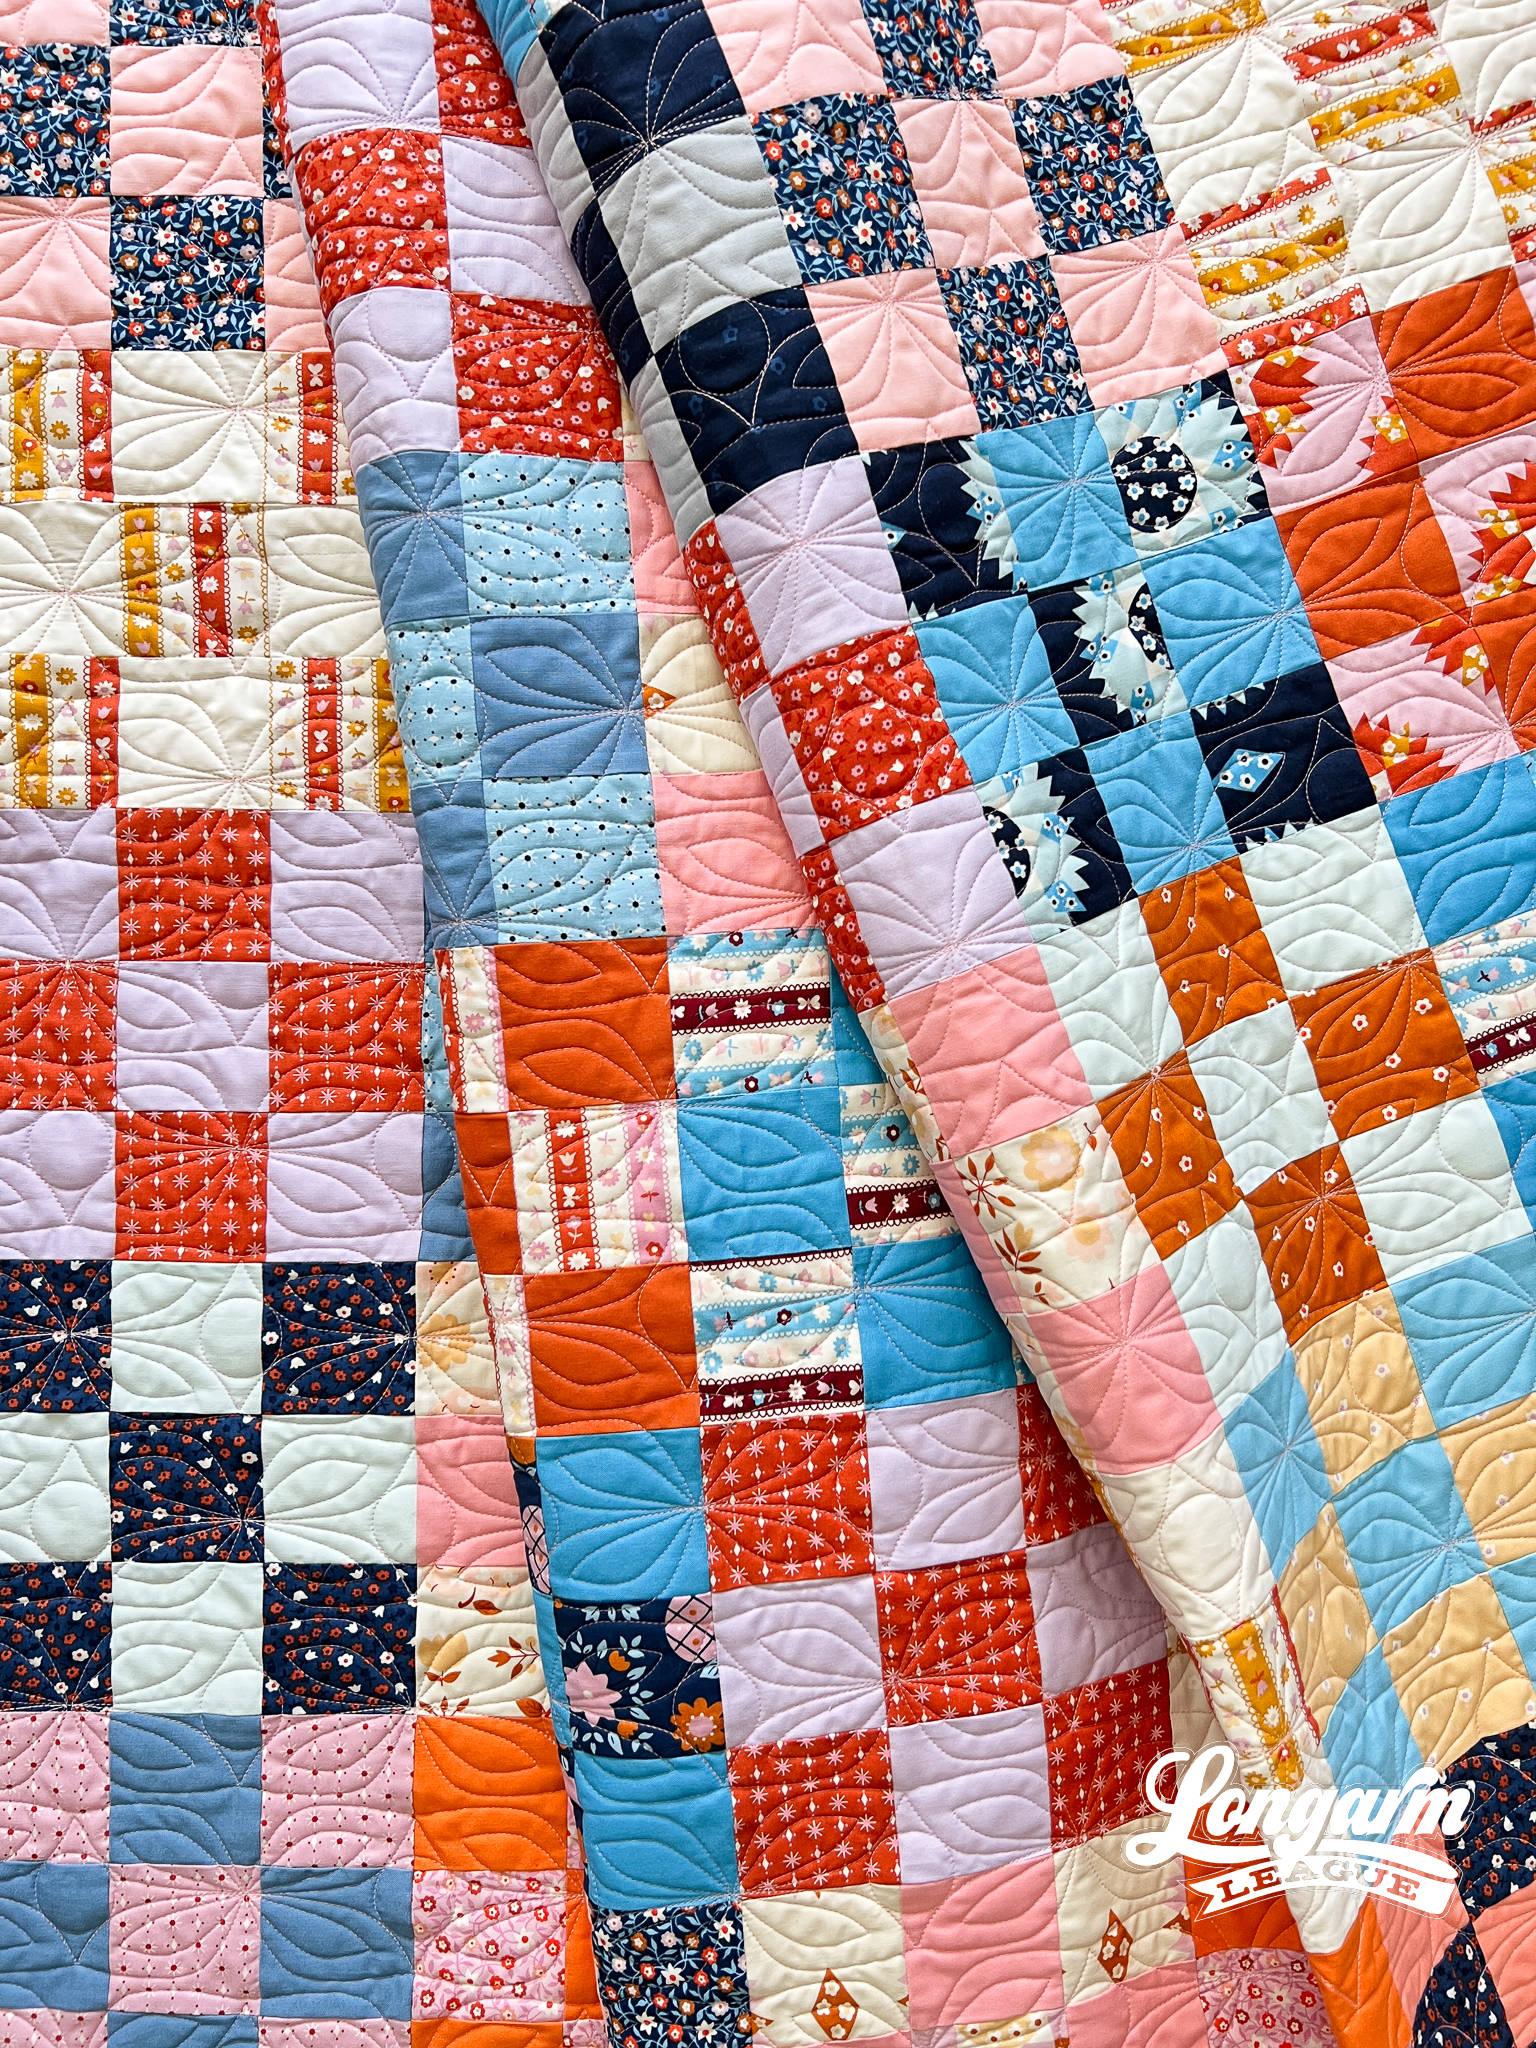
Camber would work well for botanical quilts if you don't want a floral explosion or amorphous texture. It didn't occur to me during the design or quilting process, but when I look at these photos, I can see a bow-like quality, so take that for what it's worth. And lastly, as I mentioned before, this would serve as an easy alternative to orange peel quilting because the rows don't have to line up exactly.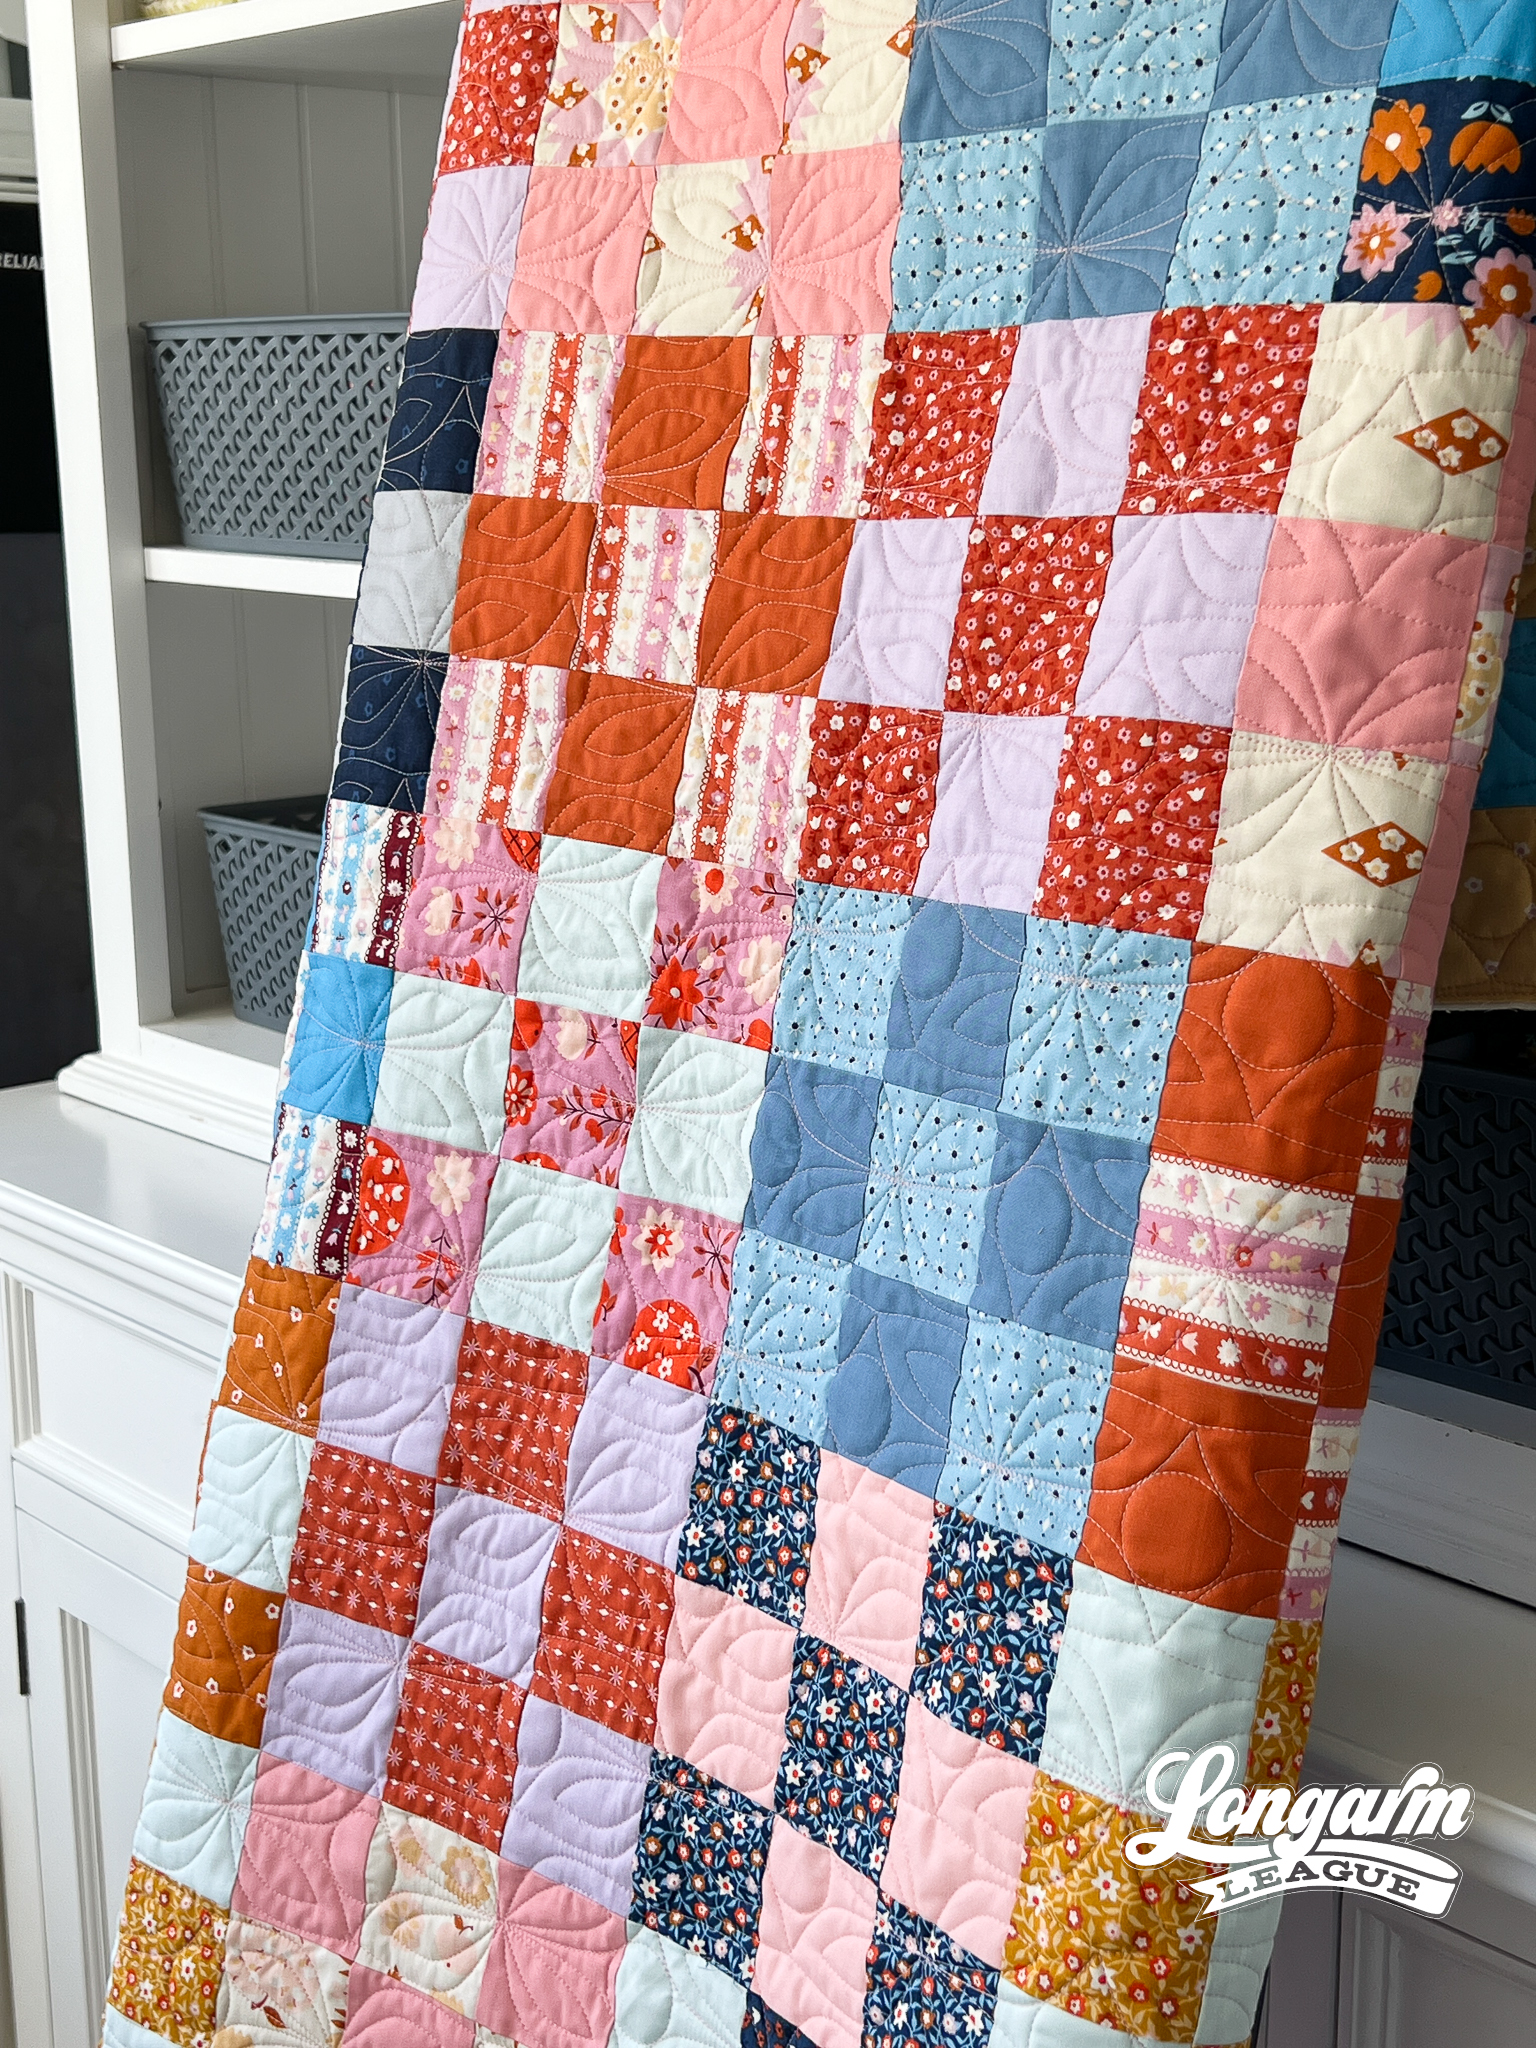
The Quilt
Quilt Pattern
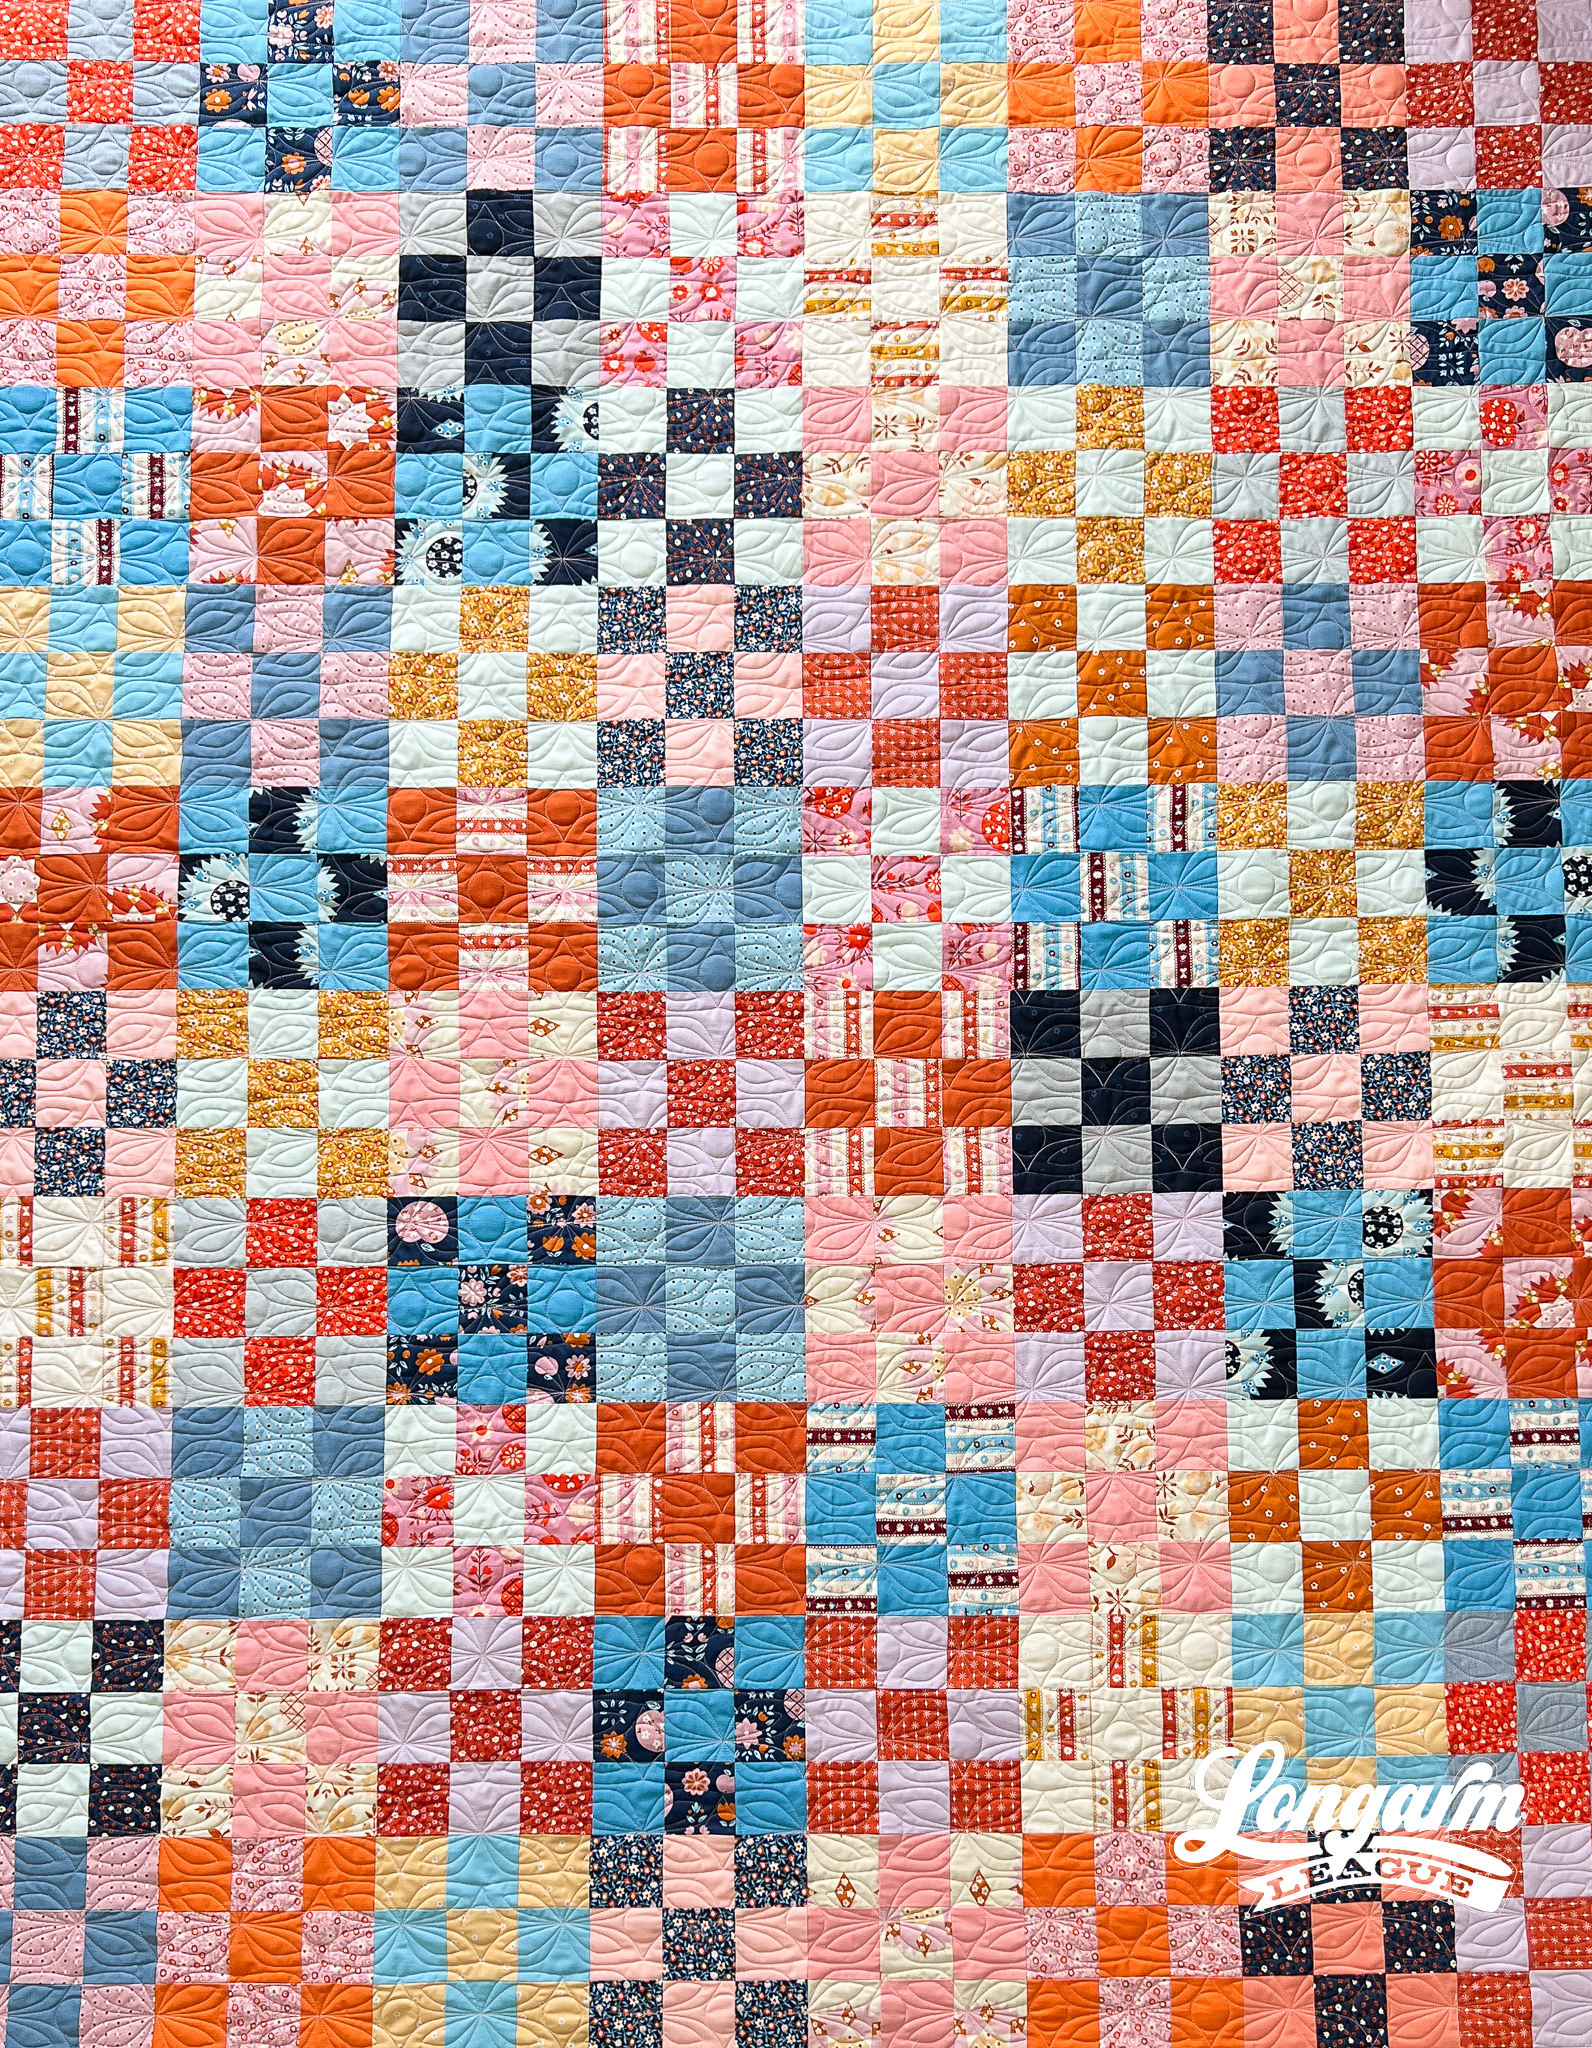
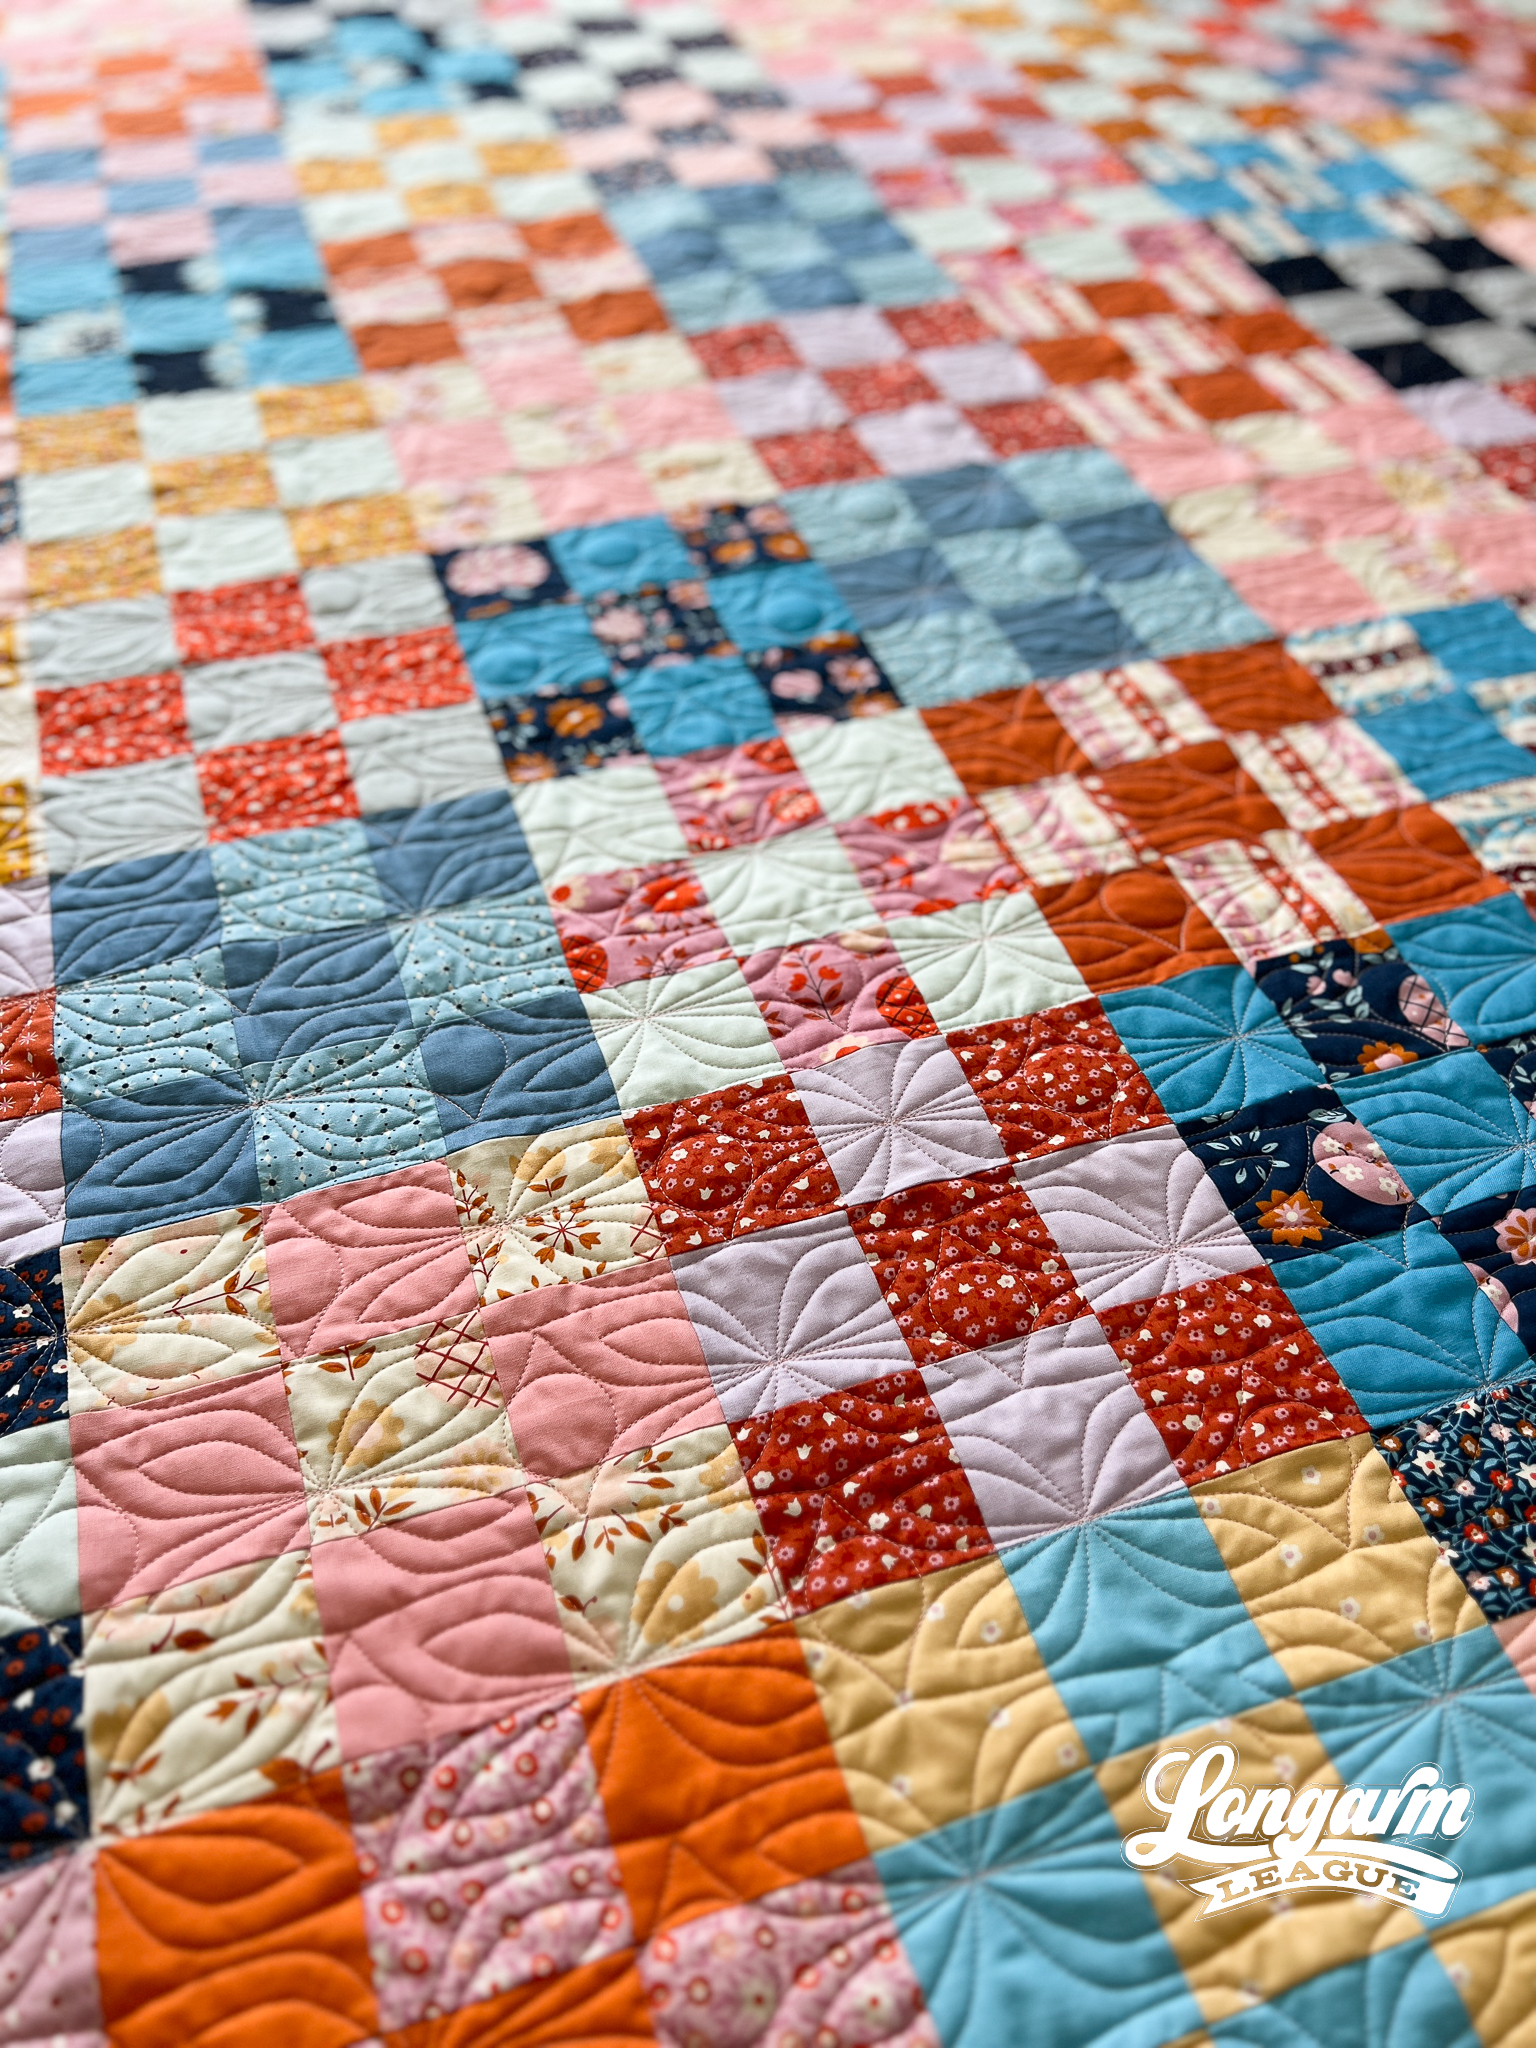
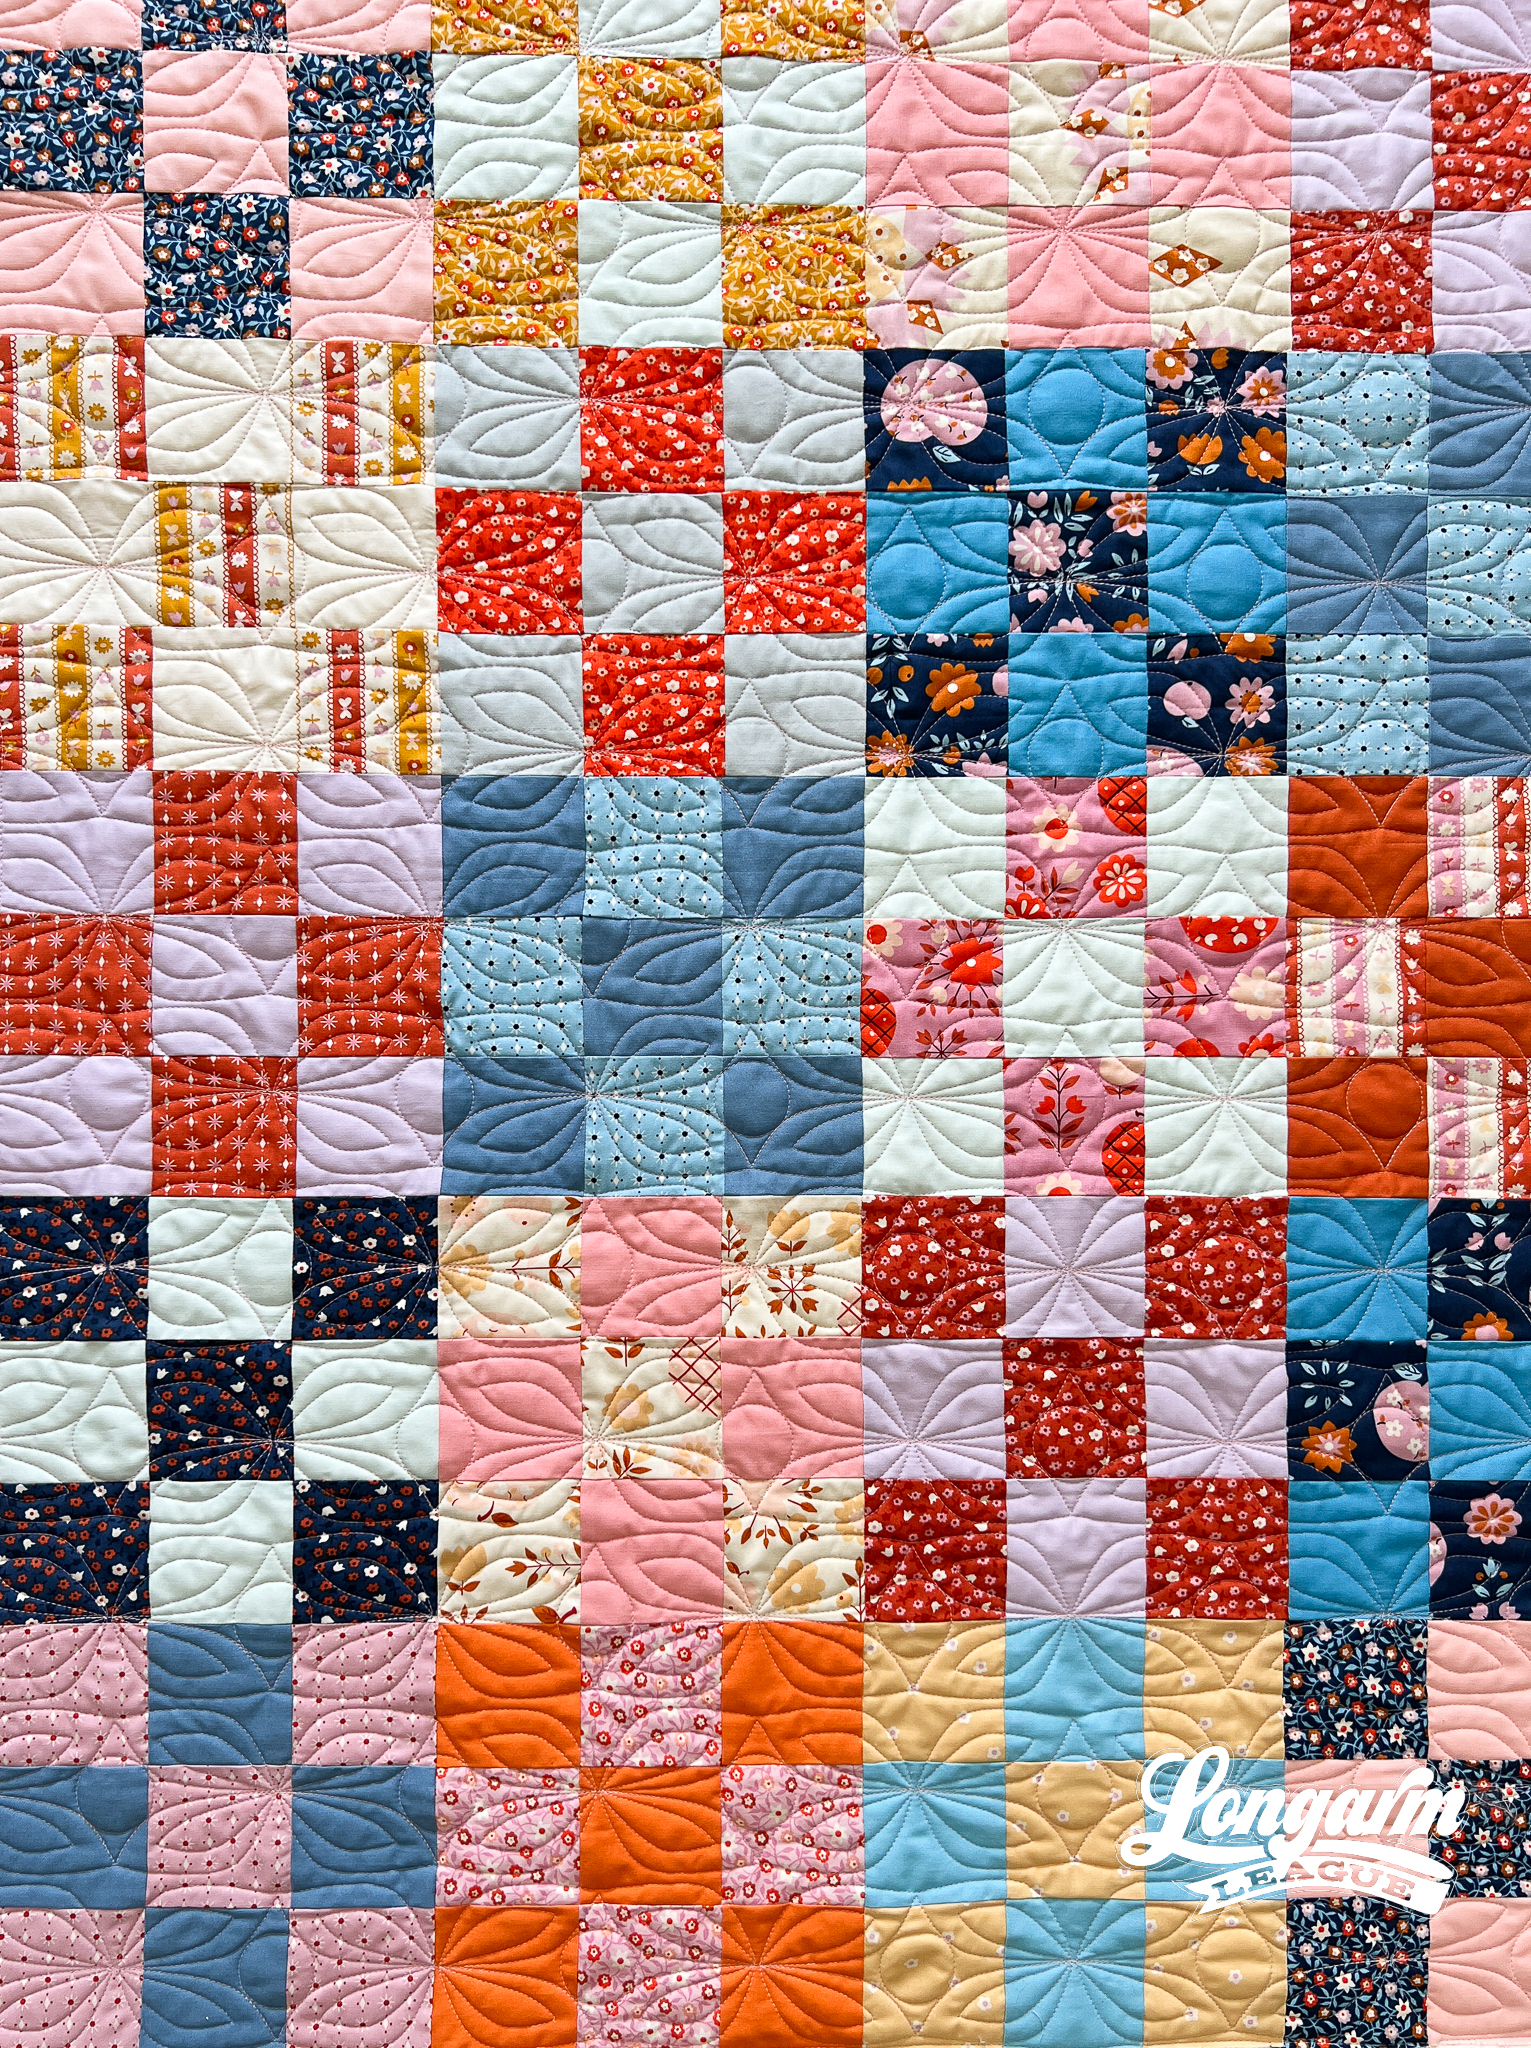
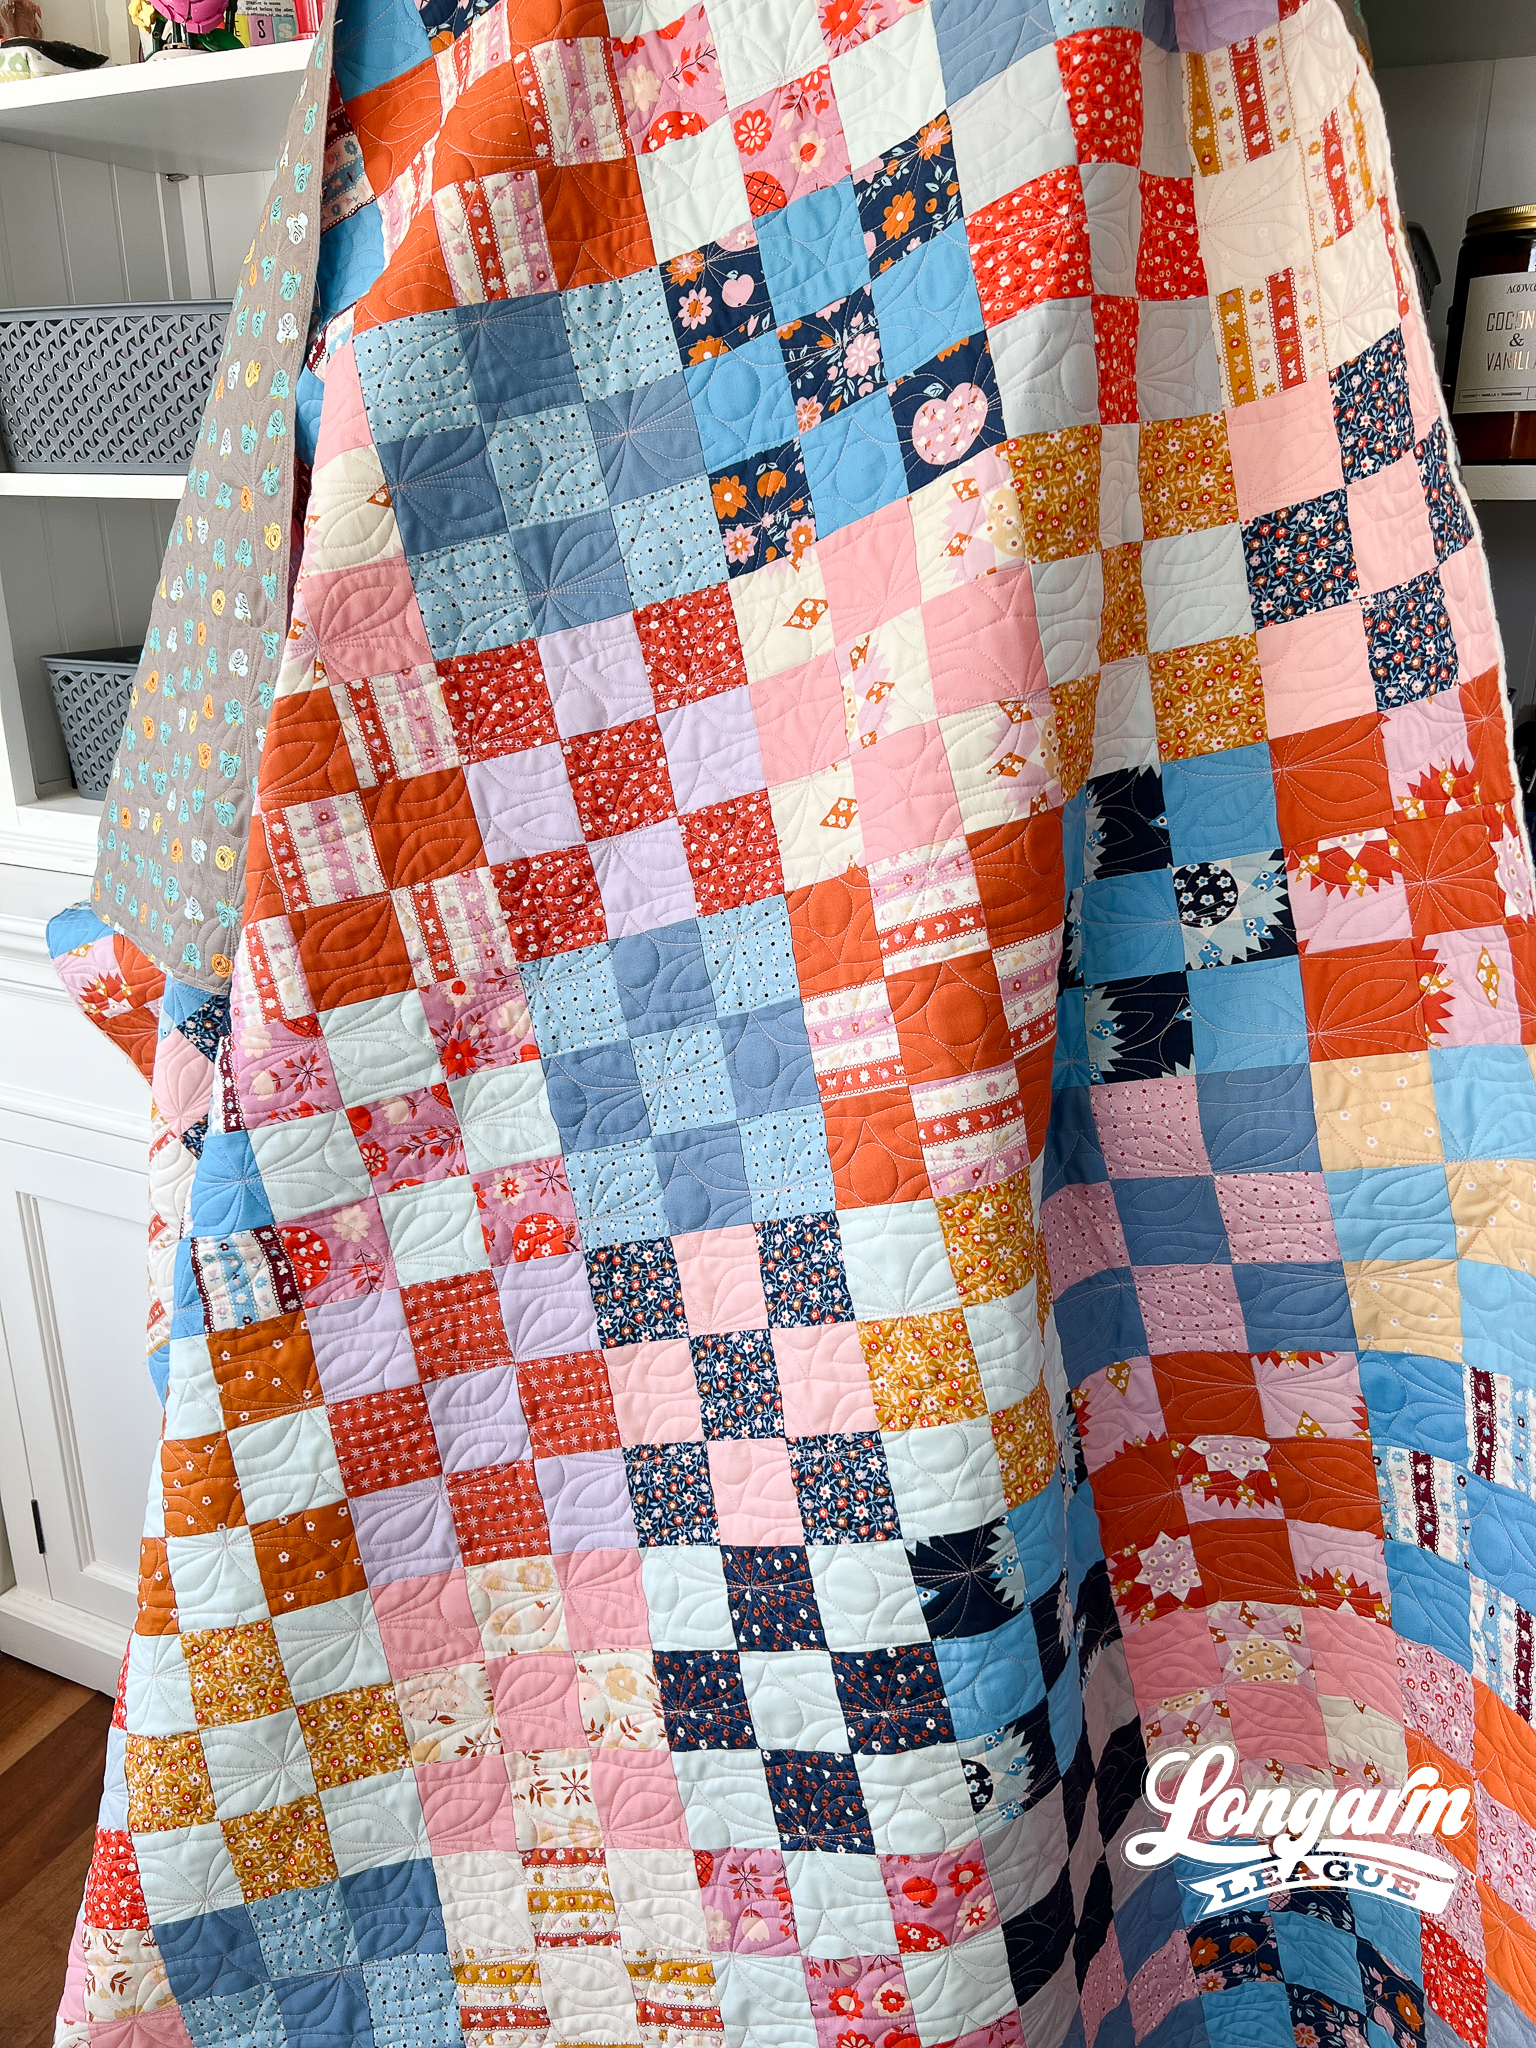
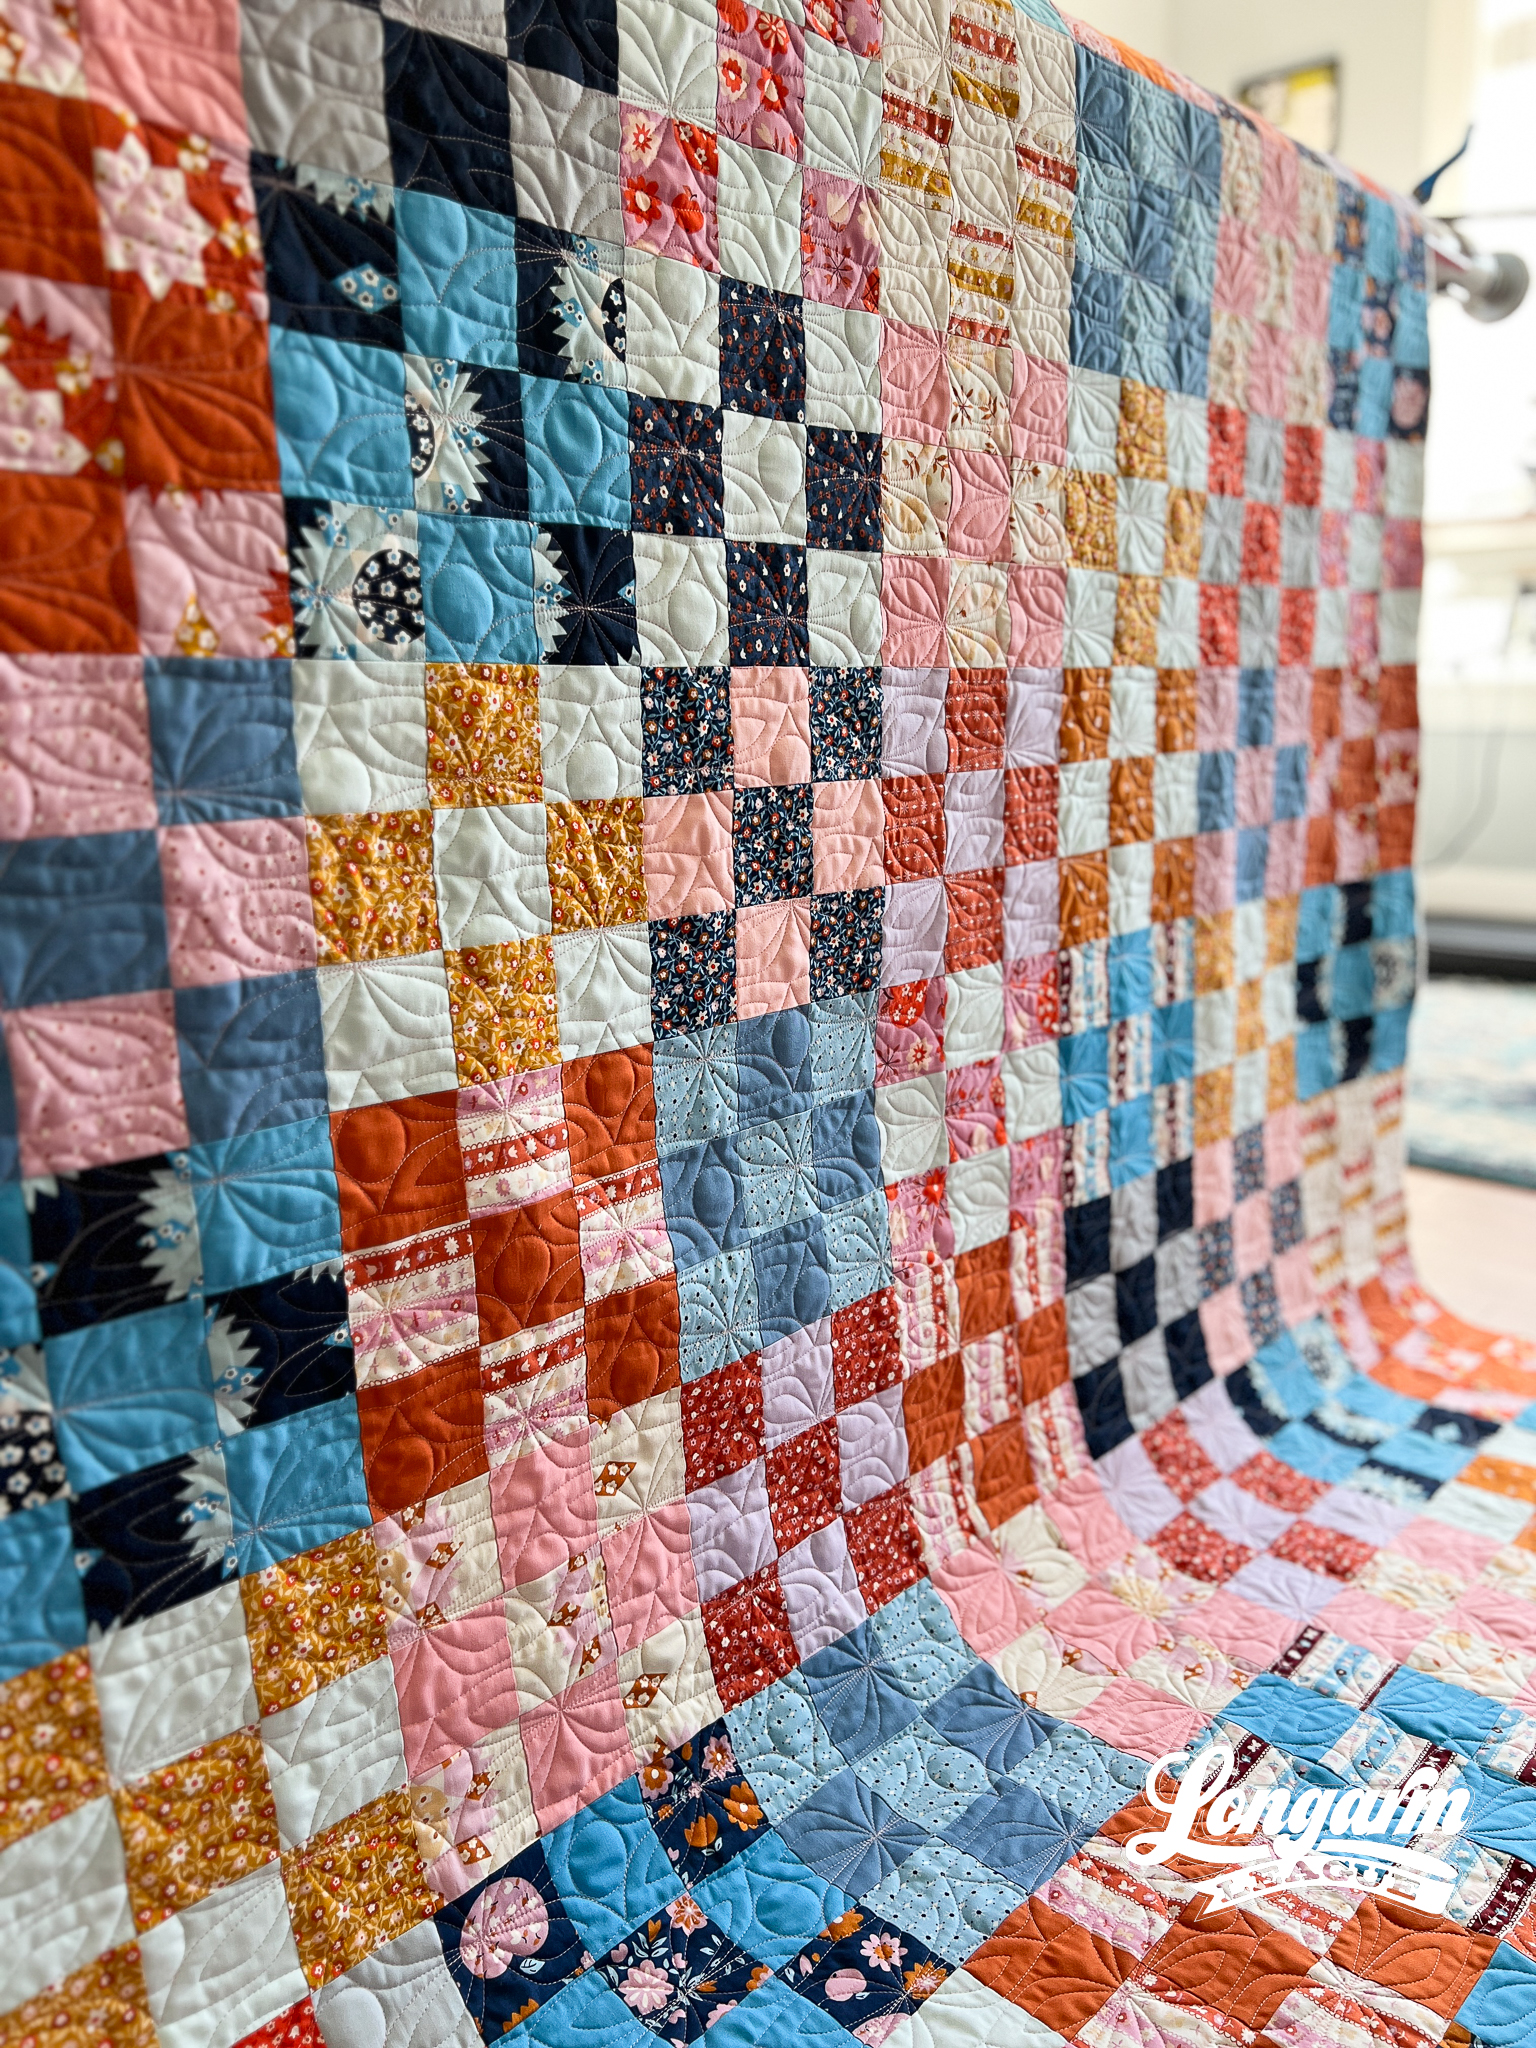
While I didn't use a pattern per se, the inspiration for this quilt came from Ma Tante Quilting's YouTube tutorial, which demonstrates how to make two-at-a-time nine-patch blocks. Shelly shows how to use fat quarters to make the blocks in the video, but I happened to have a layer cake (10" squares) that I thought would be perfect for the scrappy, vintage look I was aiming for.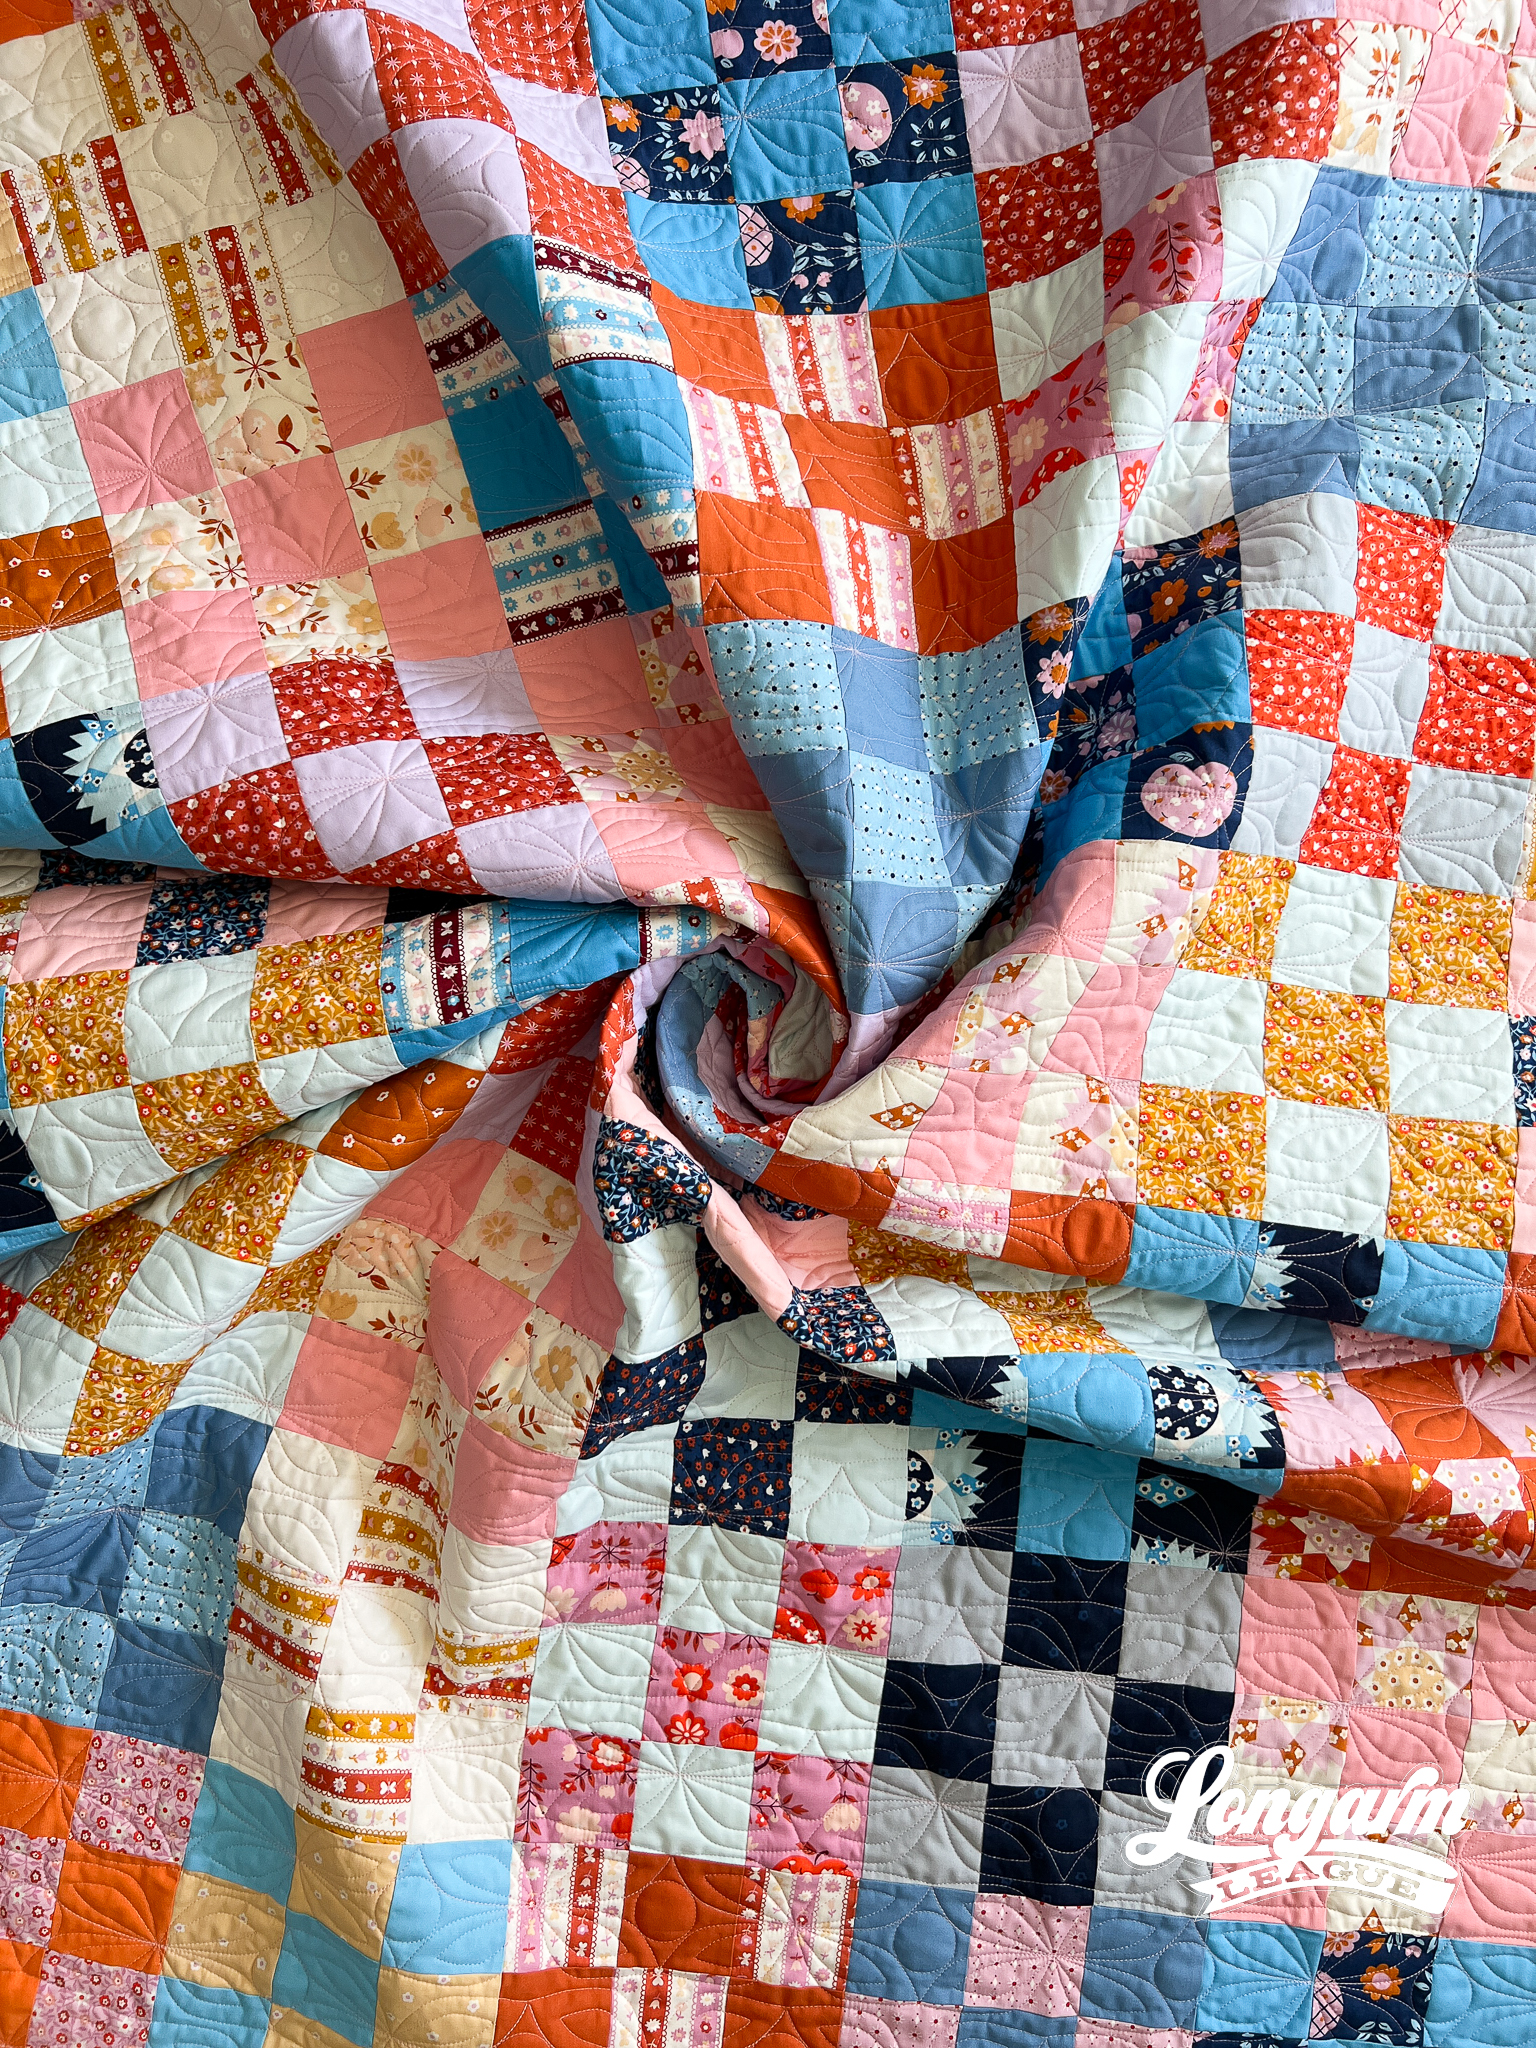
Instead of cutting 2.5" strips, I cut my strips at 3" to maximize the layer cake. These dimensions result in blocks that finish at 7.5" square.
I arranged my blocks in the quilt 8 wide by 10 long, giving me a finished size of 60" x 75".
Fabrics
The layer cake mentioned above is from the line called Lil, designed by Kim Kight for Ruby Star Society. I bought it without a plan in mind, and when I saw Shelly's tutorial, I thought it was the perfect time to pull it out. I decided to pair each print of the line with a solid fabric from my stash. I found the fabrics didn't have to coordinate perfectly to look like they belonged together. That's the beauty of going for a vintage look—anything goes!
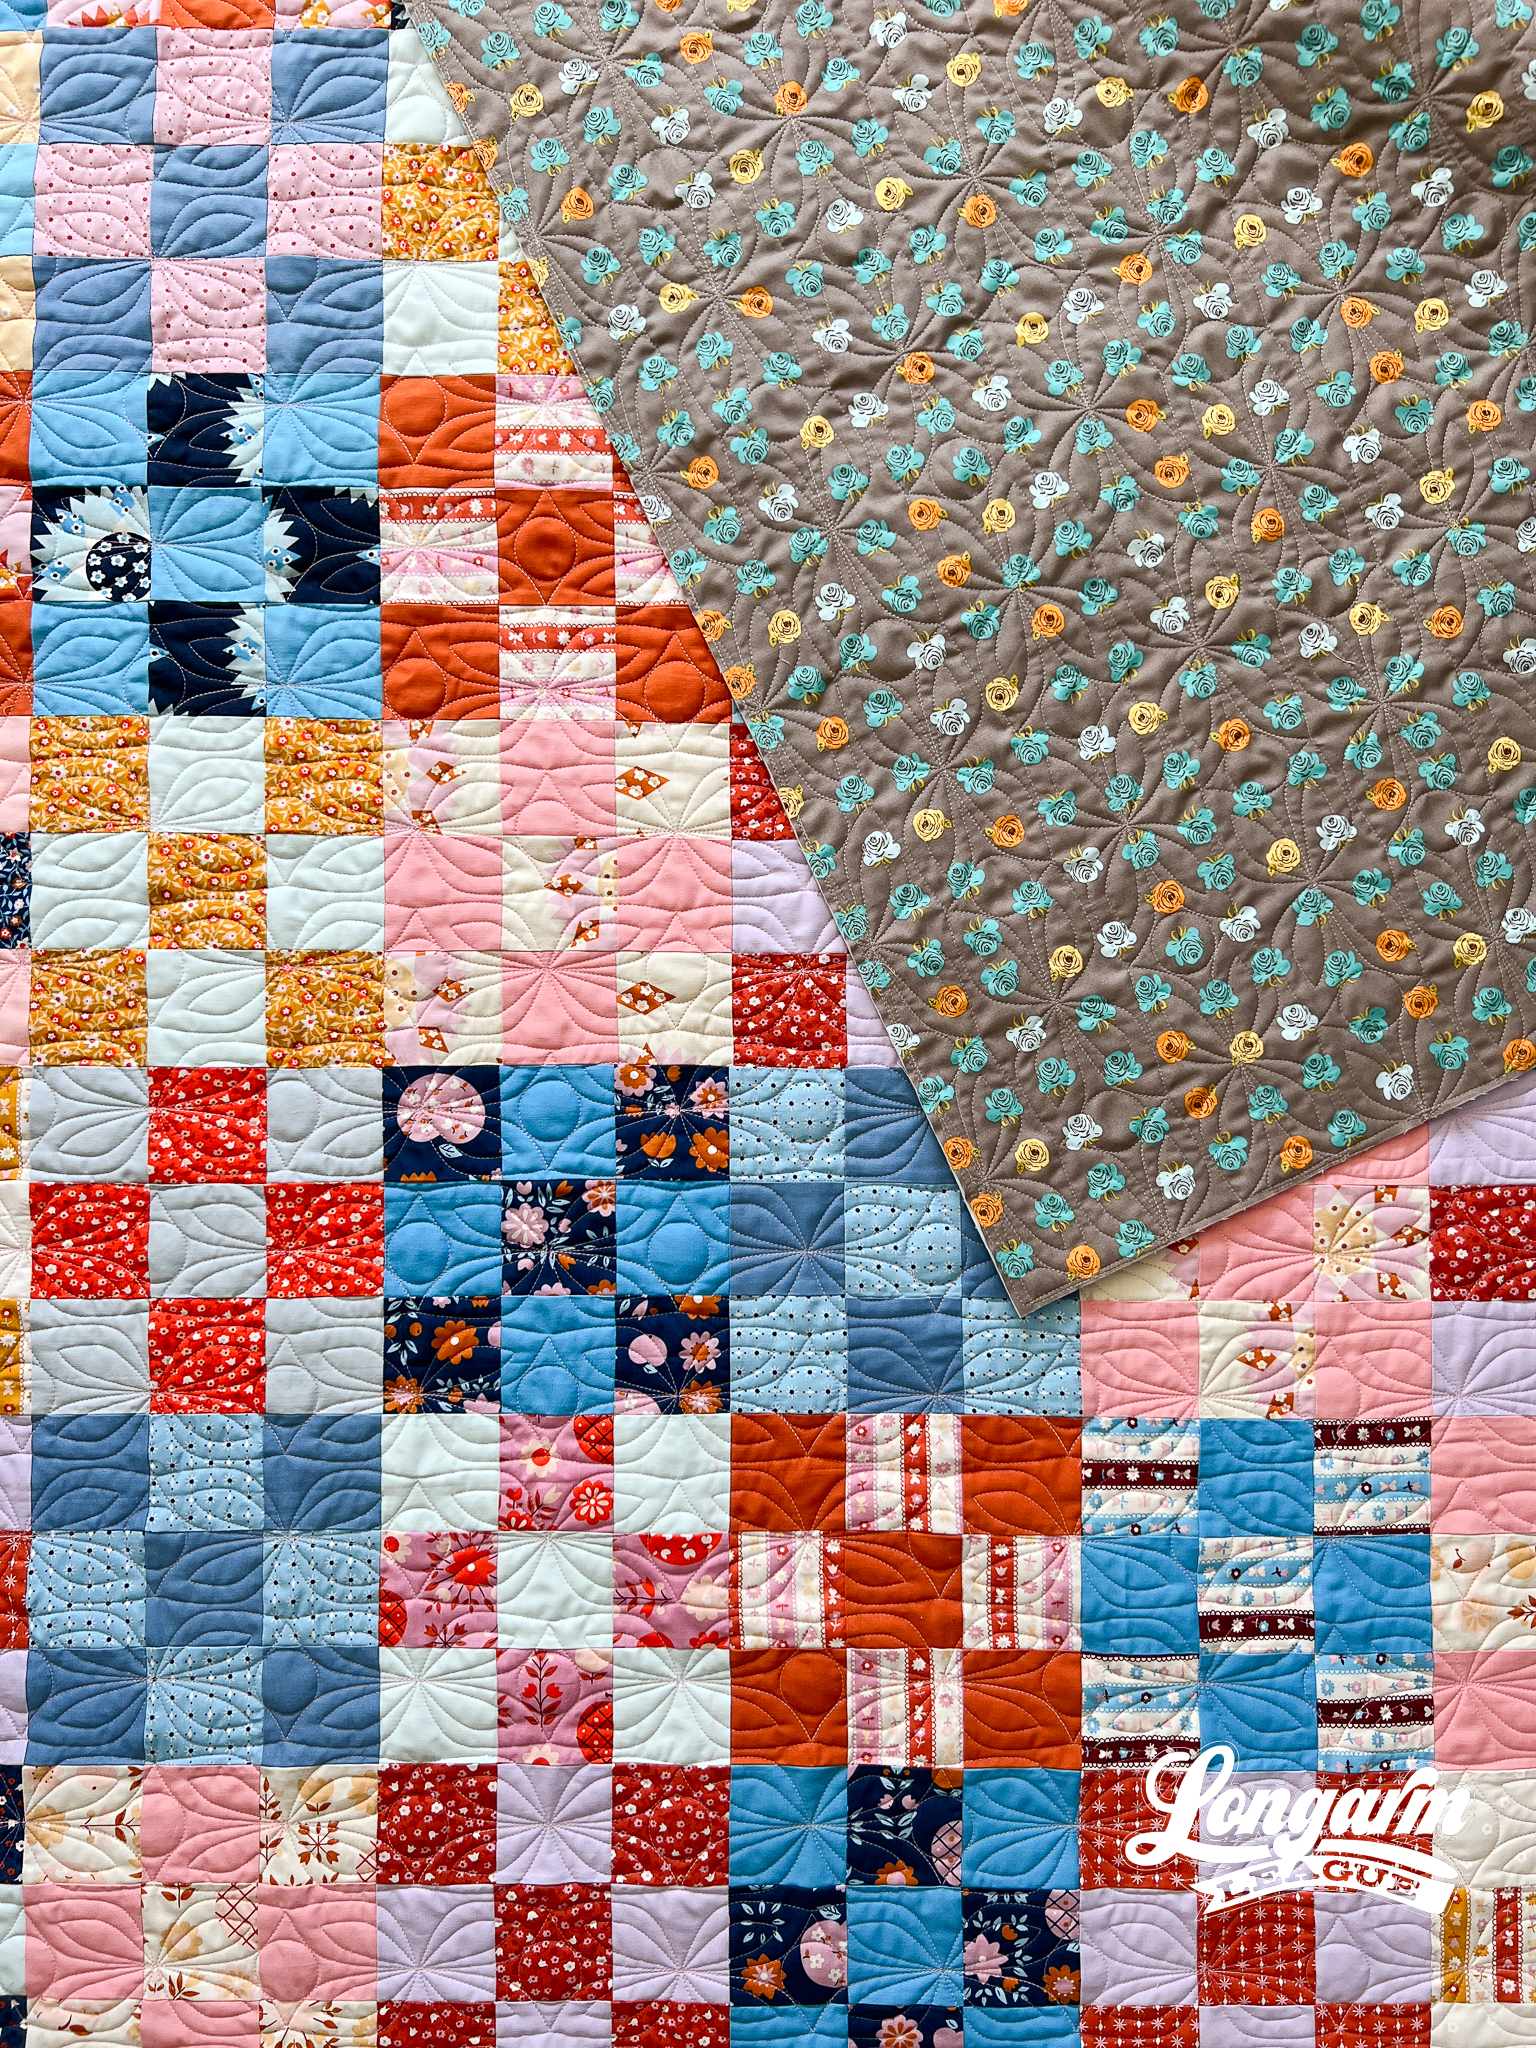
Backing
This is where I'm thankful once again for having retreat friends who were willing to give away fabric they no longer wanted. I received continuous YARDS of this cute print designed by Heather Ross for Windham Fabrics (the Far Far Away 2 line). I was more than happy to sew one seam to turn it into a large backing that coordinated with my top! 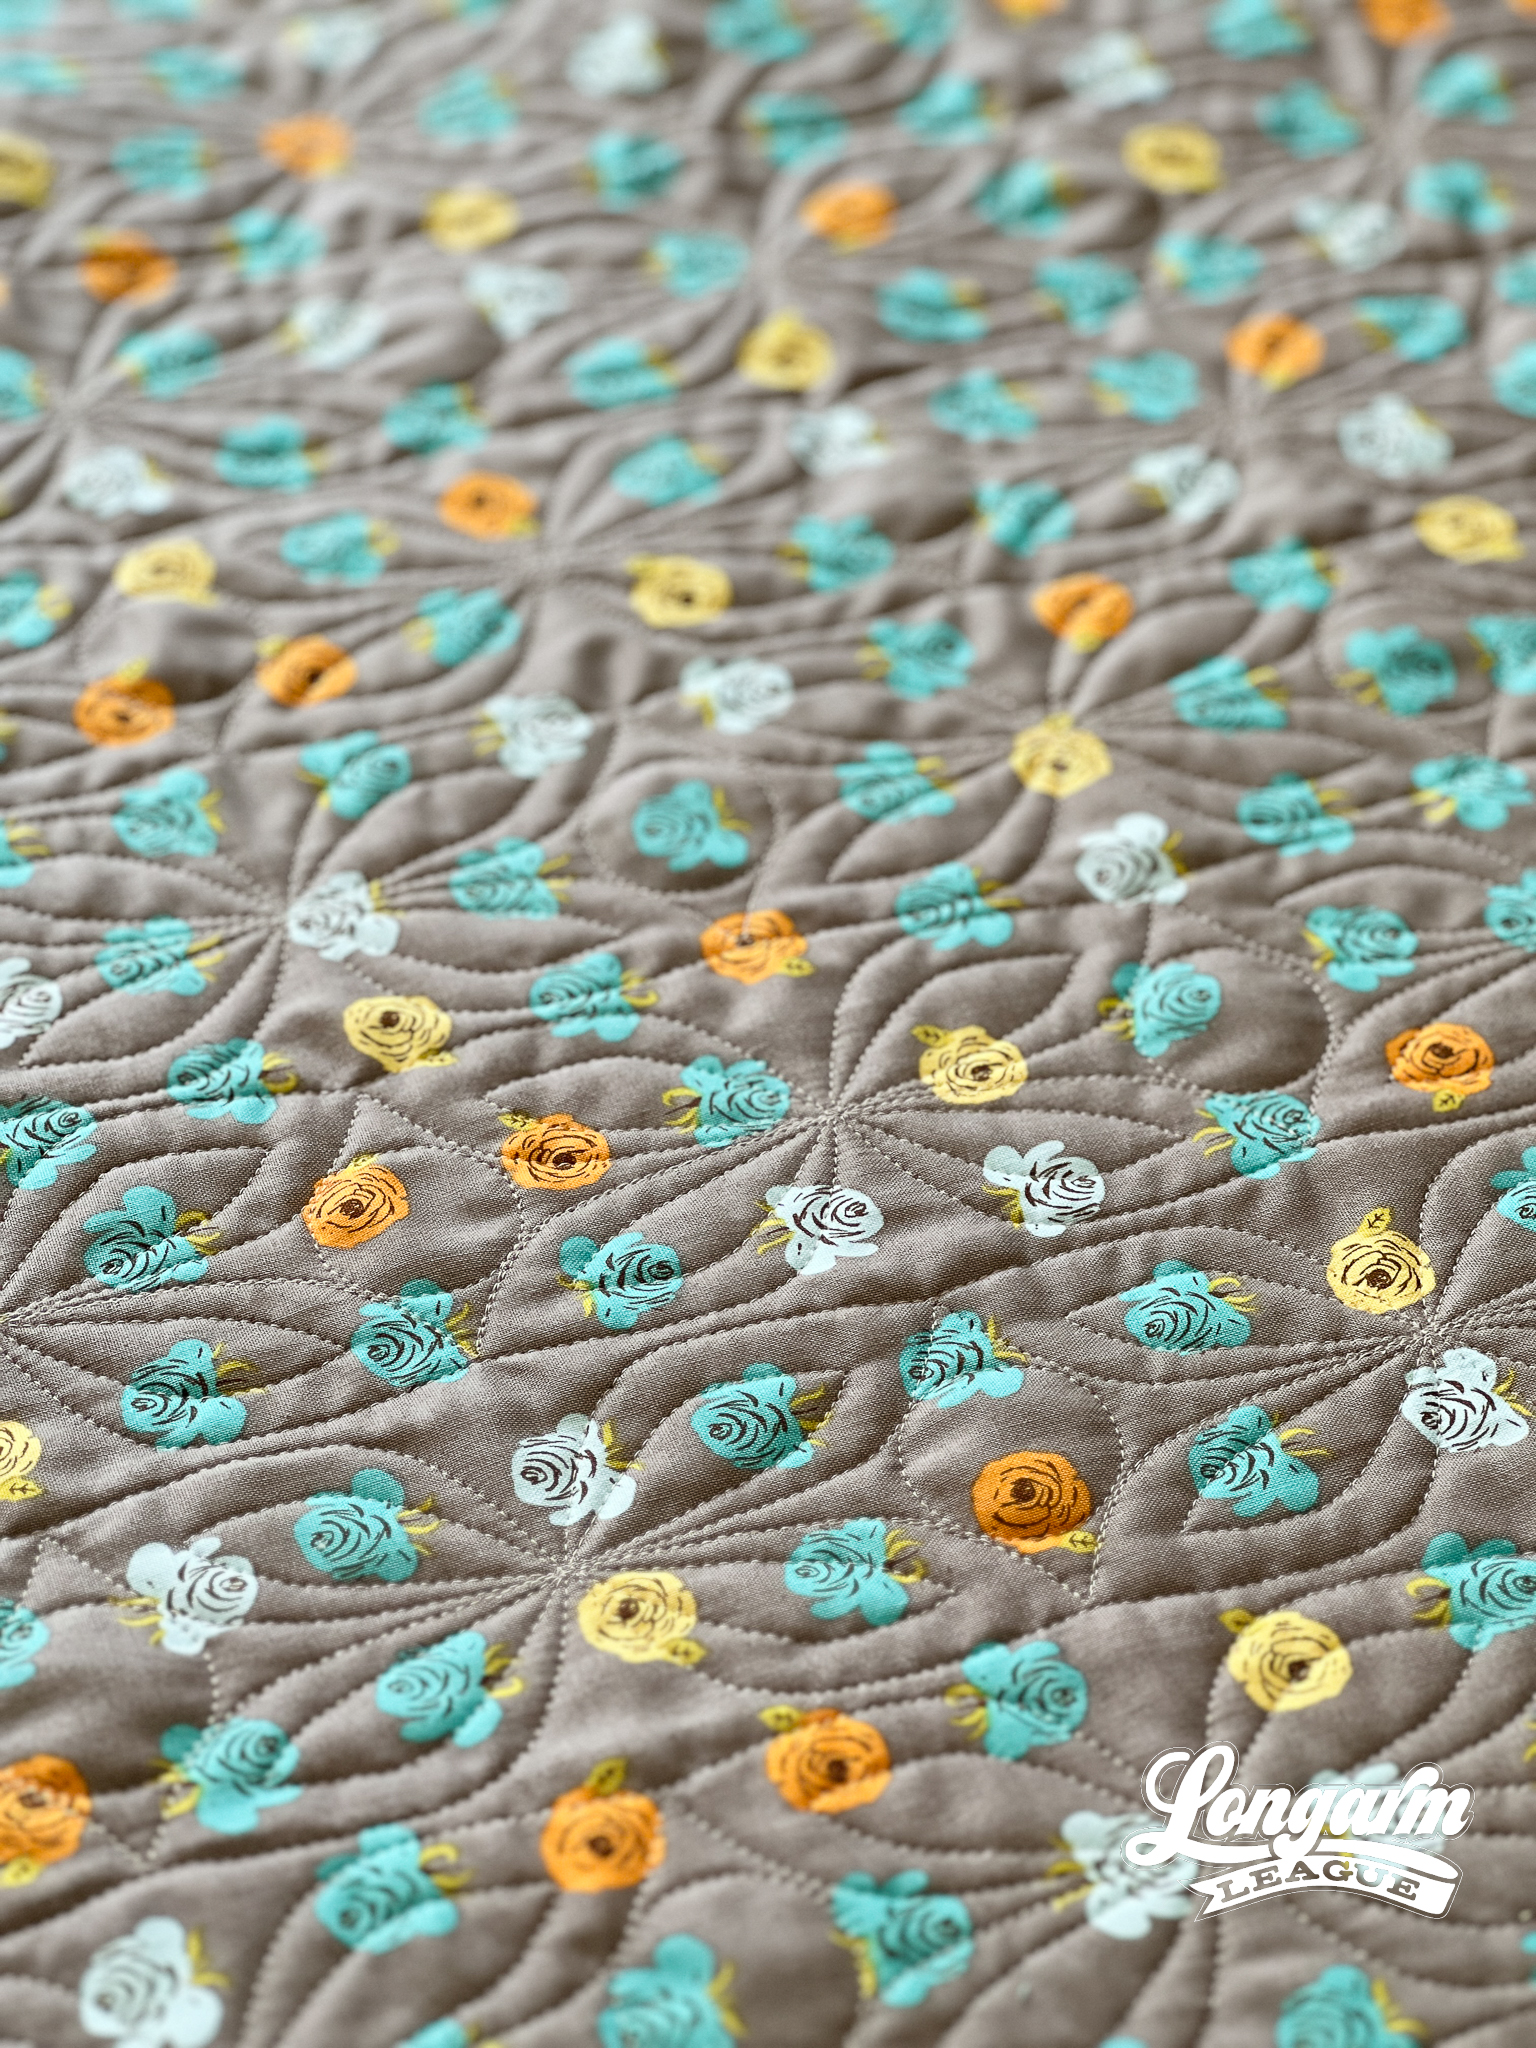
Batting
I didn't have time to piece batting scraps together for this quilt, so I cut the batting off the roll. It's Quilter's Dream Bamboo; it's the one blend I buy rolls of these days. I'm not giving up on my quest to reconstitute batting from leftover remnants. I should really make a bunch ahead of time so I'm not scrambling for a solution while loading. That would make a lot of sense.
The Quilting Details
Difficulty Level
I gave this design an "easy" rating in terms of difficulty to use, even though it does require offsetting at 50% and involves backtracking. Offsetting means that every other row is staggered—in this case by 50%—so that the same motifs or design elements are not vertically aligned when stitched. Most computerized software will have a button to push that will automatically stagger or offset the rows. All in all, these factors should not affect your ability to stitch it out as designed.
I used So Fine thread in a pale pink color (#418) for the quilting. I intentionally chose a thin thread (50 weight) because of the backtracking. I highly recommend selecting a thin thread when you know a design has backtracking, so that the double-stitched lines do not stand out too much.
If you'd like to view the stitch path, a short video is available at the top of the blog post.
Scale
I scaled this design down so that the rows would not be the same size as the squares of the quilt. As stitched, the circles are about 1.25" in diameter, and each petal (one quadrant of the design) is roughly 2.75" wide by 1.5" tall.
Here are the sizing specifications for how I set up this quilt using my Intelliquilter (60" x 75" quilt size):
Row height: 3"
Gap: +0.196"
Pattern height: 2.804" (measurement from top to bottom of the repeat)
Offset: 50%
Backtracking: some
Here's a look at the included PDF: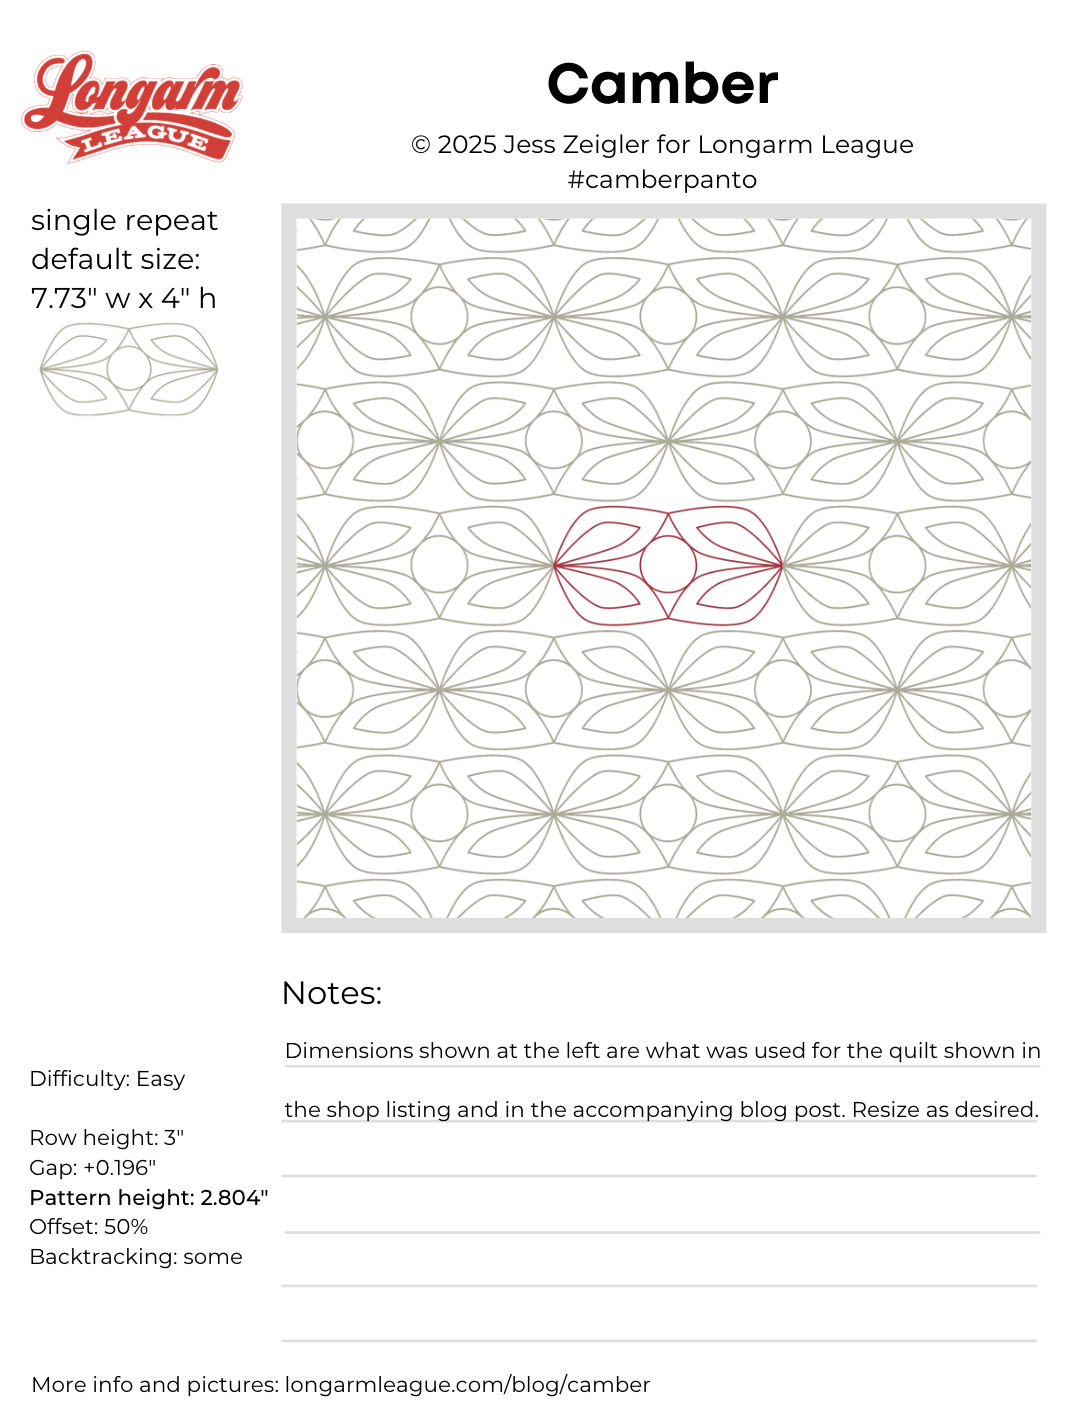
Interested in getting new digital pantograph designs like this one on the day they're released (and at a deep discount)? Sign up for our Digital Panto Club and get them delivered directly to your inbox on the first Wednesday of each new month. 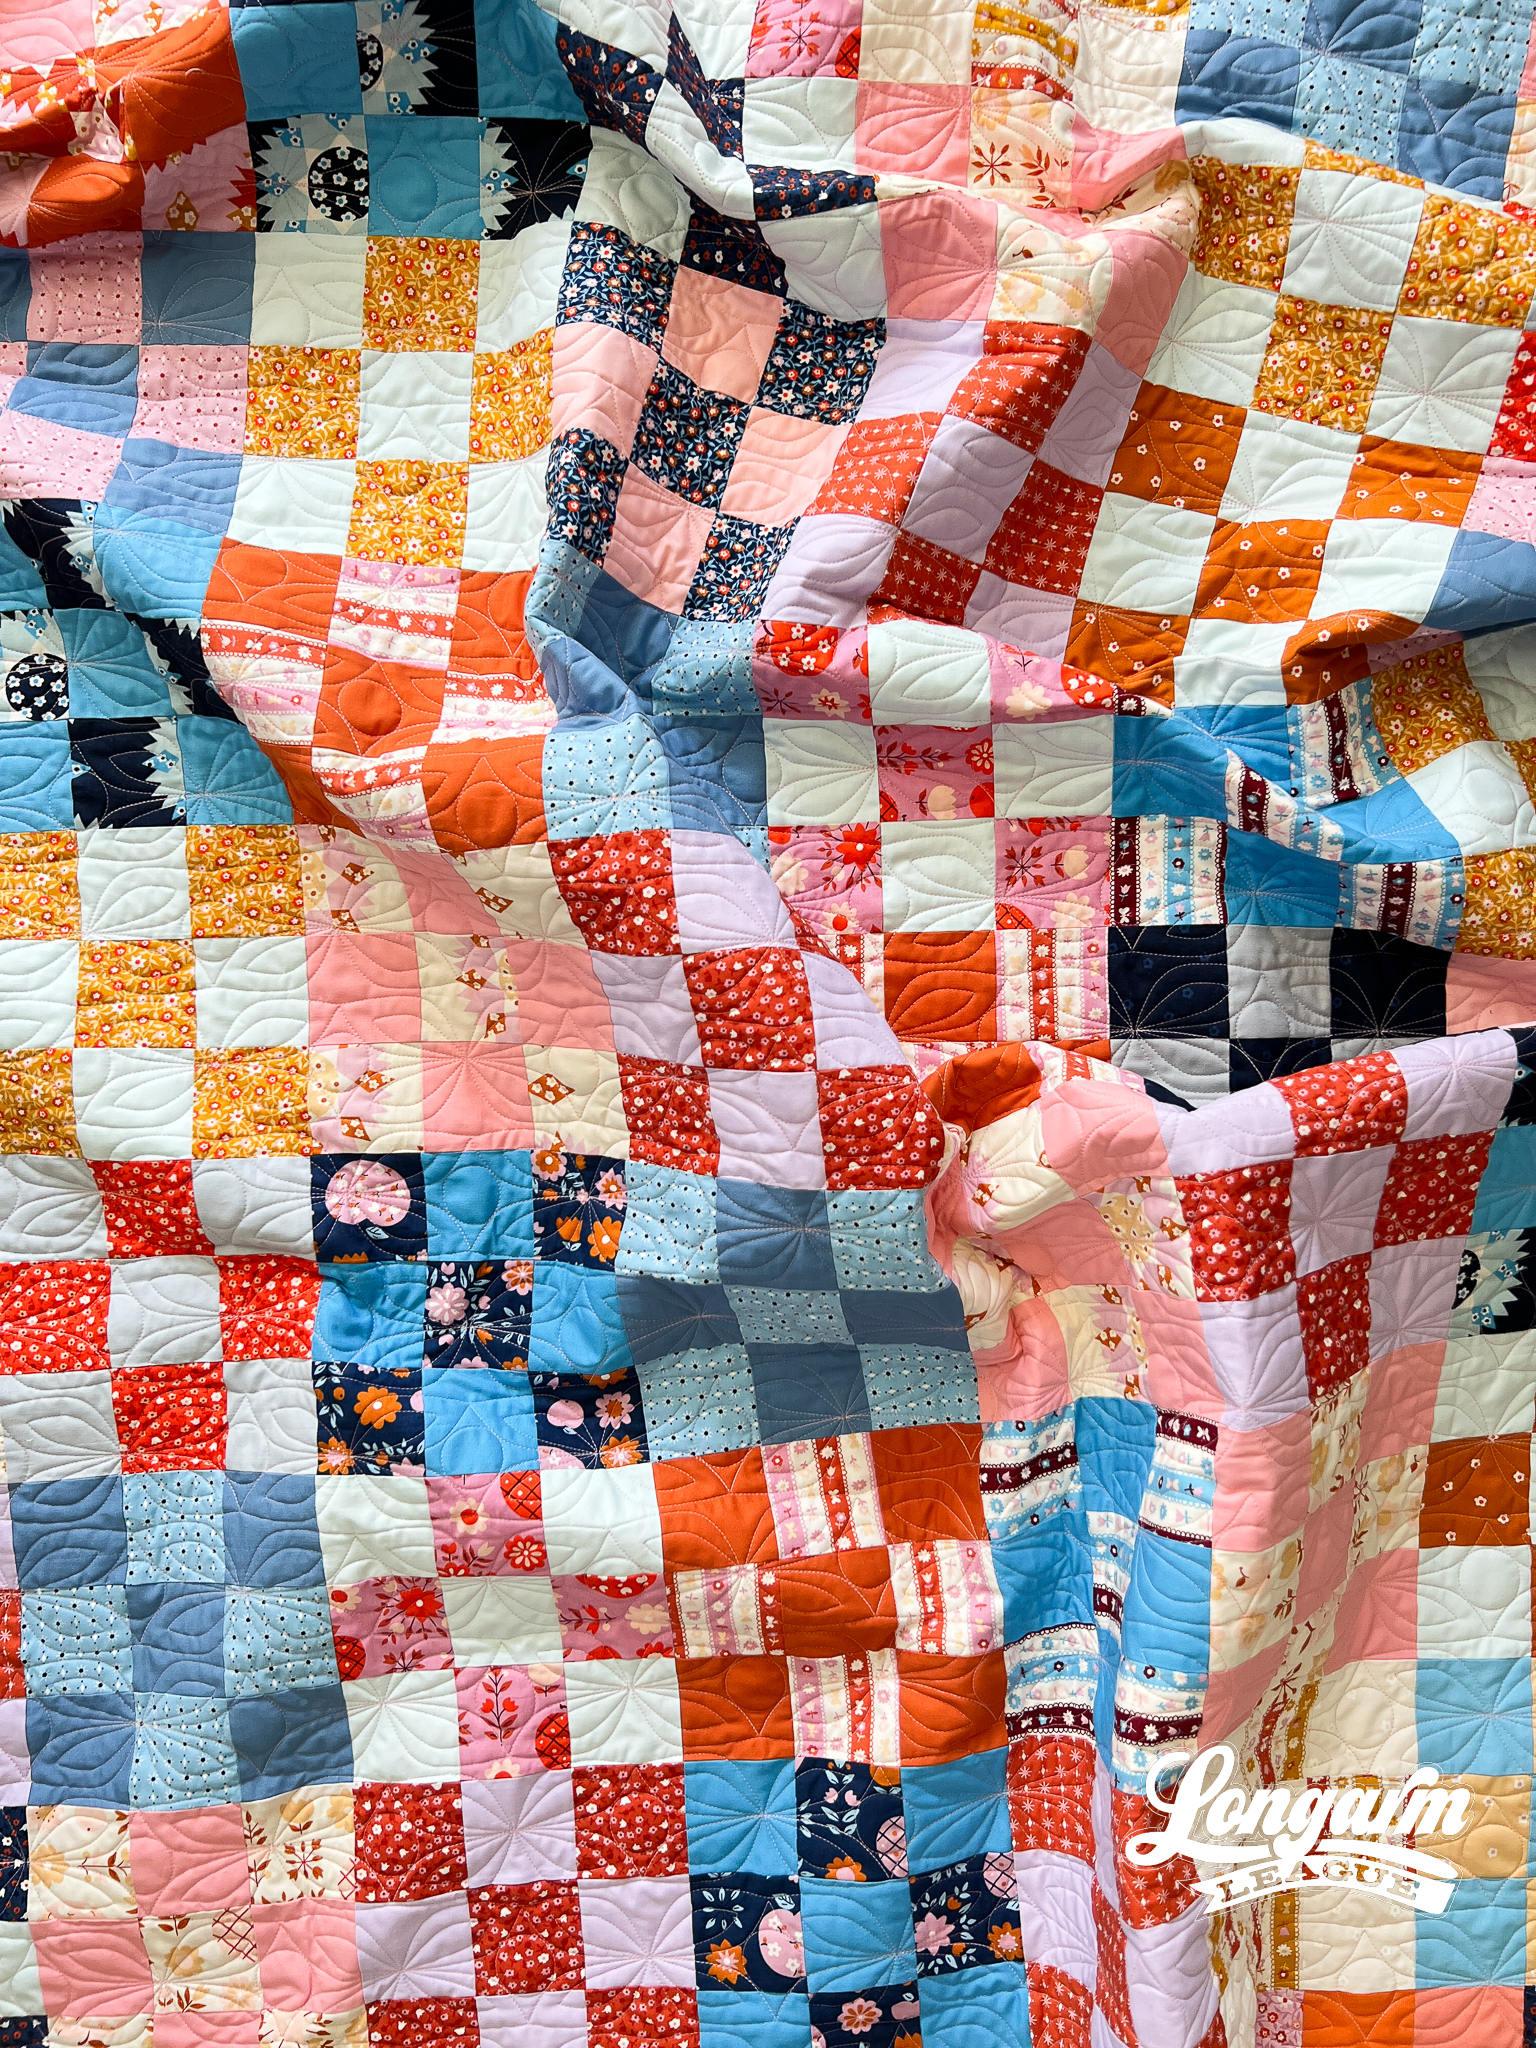

Jess Zeigler
Longarm League Commish & Owner of Threaded Quilting Studio, LLC.


