
Echoed Circles Edge-to-Edge Computerized Quilting Design
This is the third—and possibly last?—design of my "Echoed" series of designs. Originally, I created Echoed Swirls, based on a design I used to freemotion before I added computerization for my longarm. In 2024, I created Echoed Curves because it was the most descriptive name I could come up with and I liked how it fit with Echoed Swirls.
This time, I started with the Echoed Circles concept to complete the trifecta, and the design followed the name. That's not usually how I work, but this was a fun change of pace!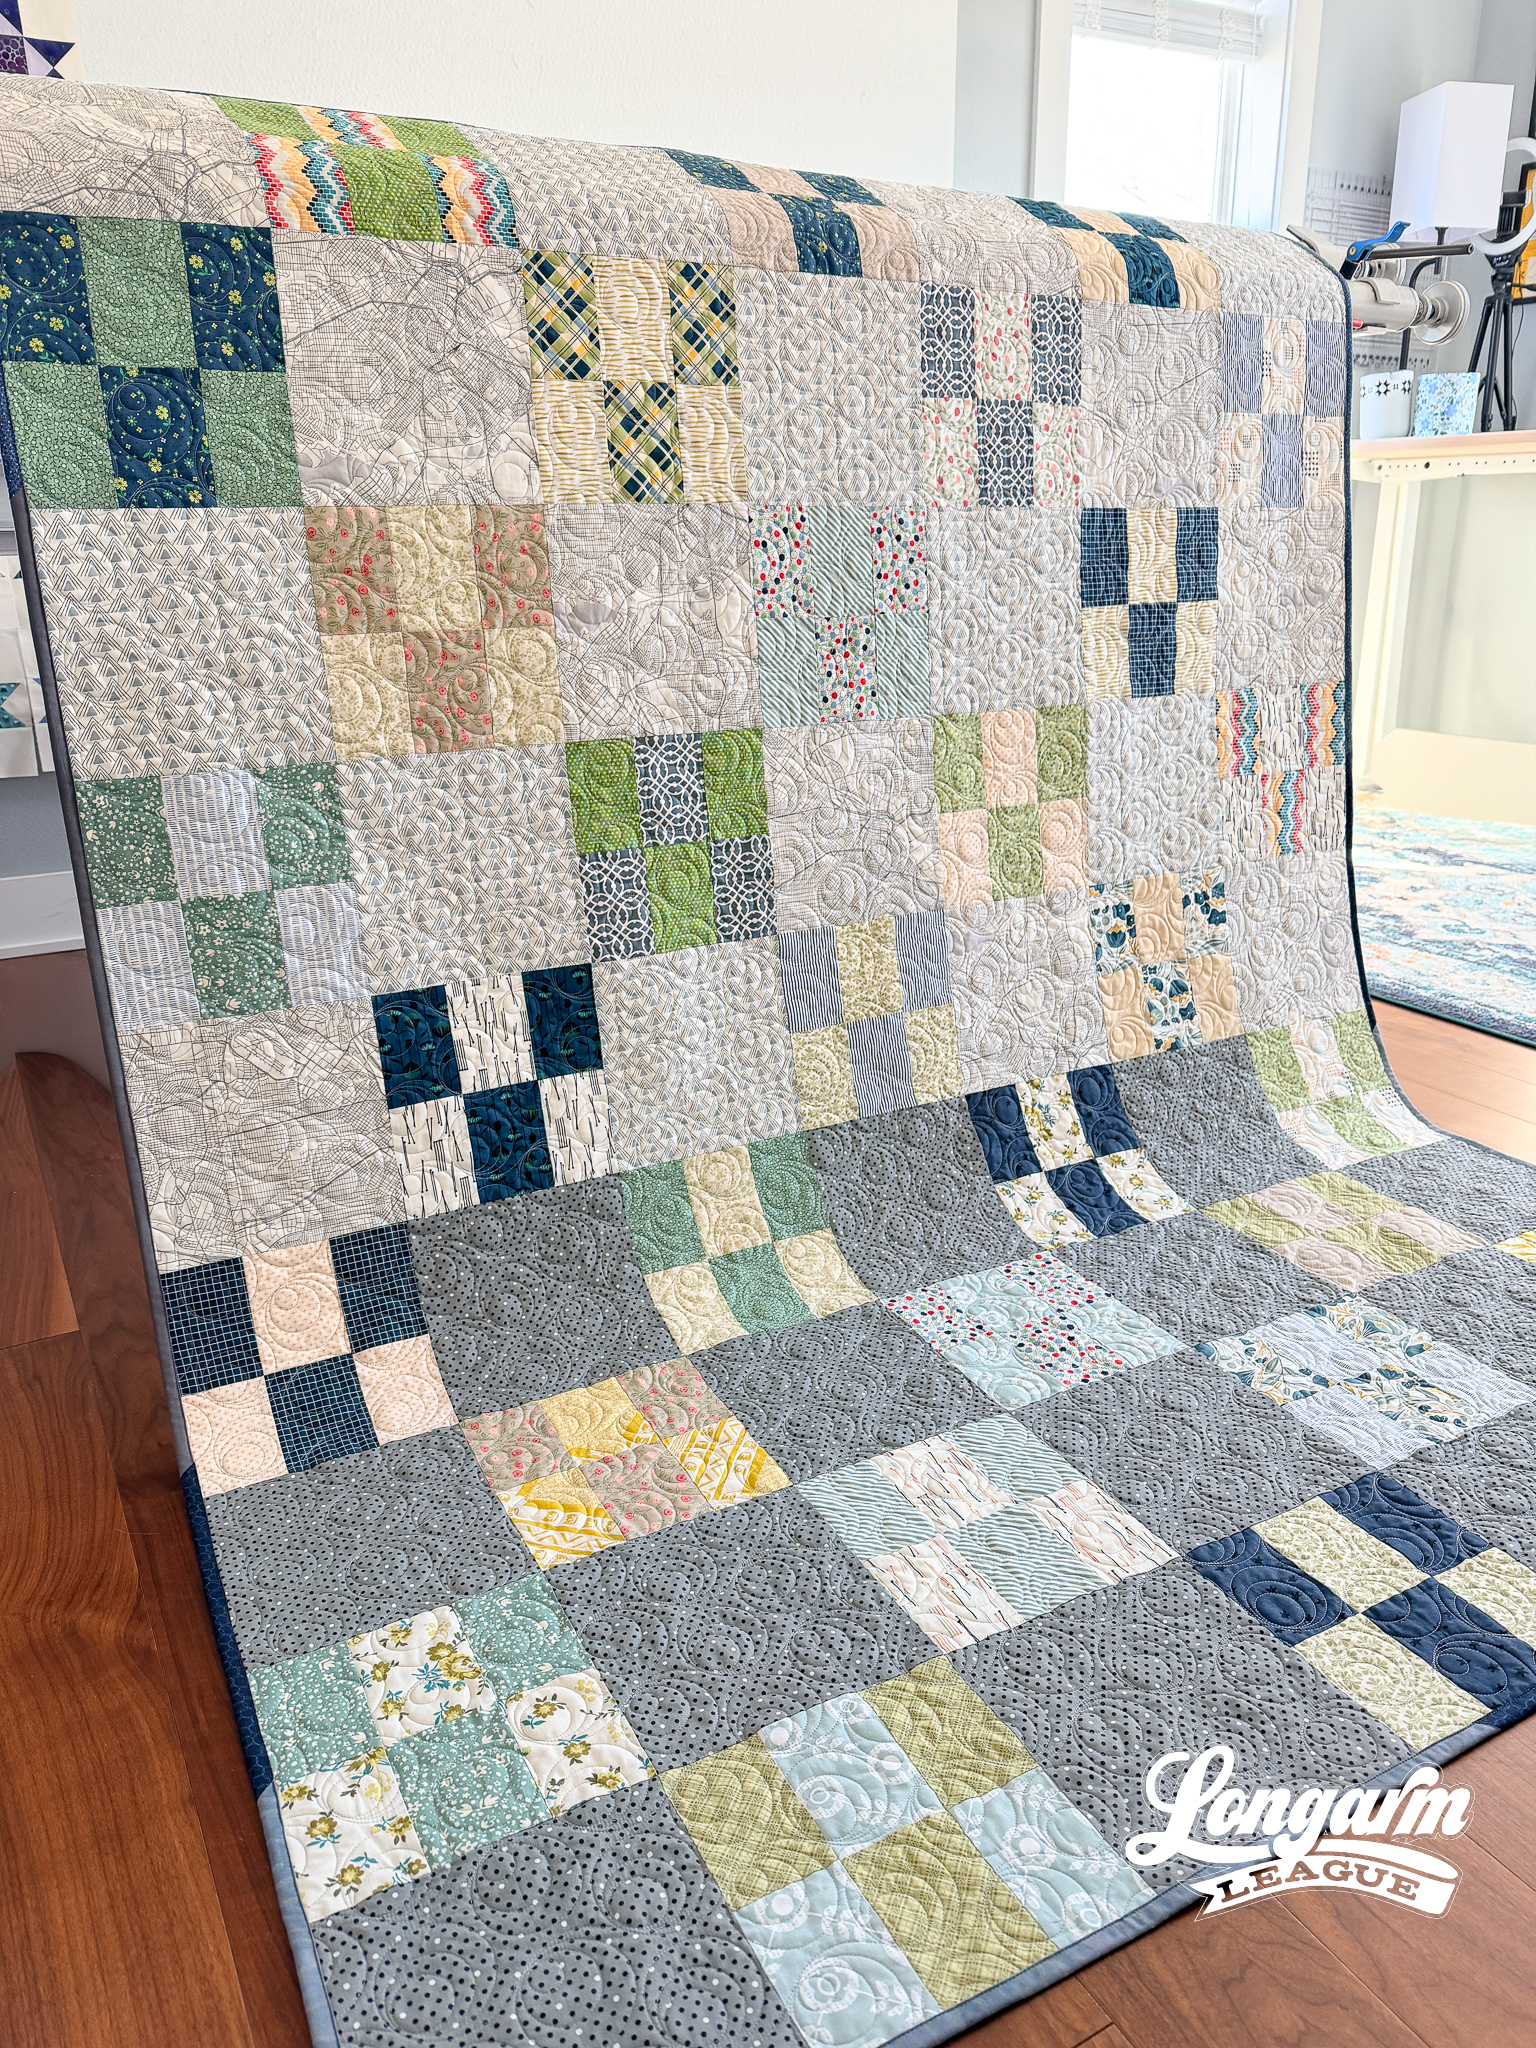
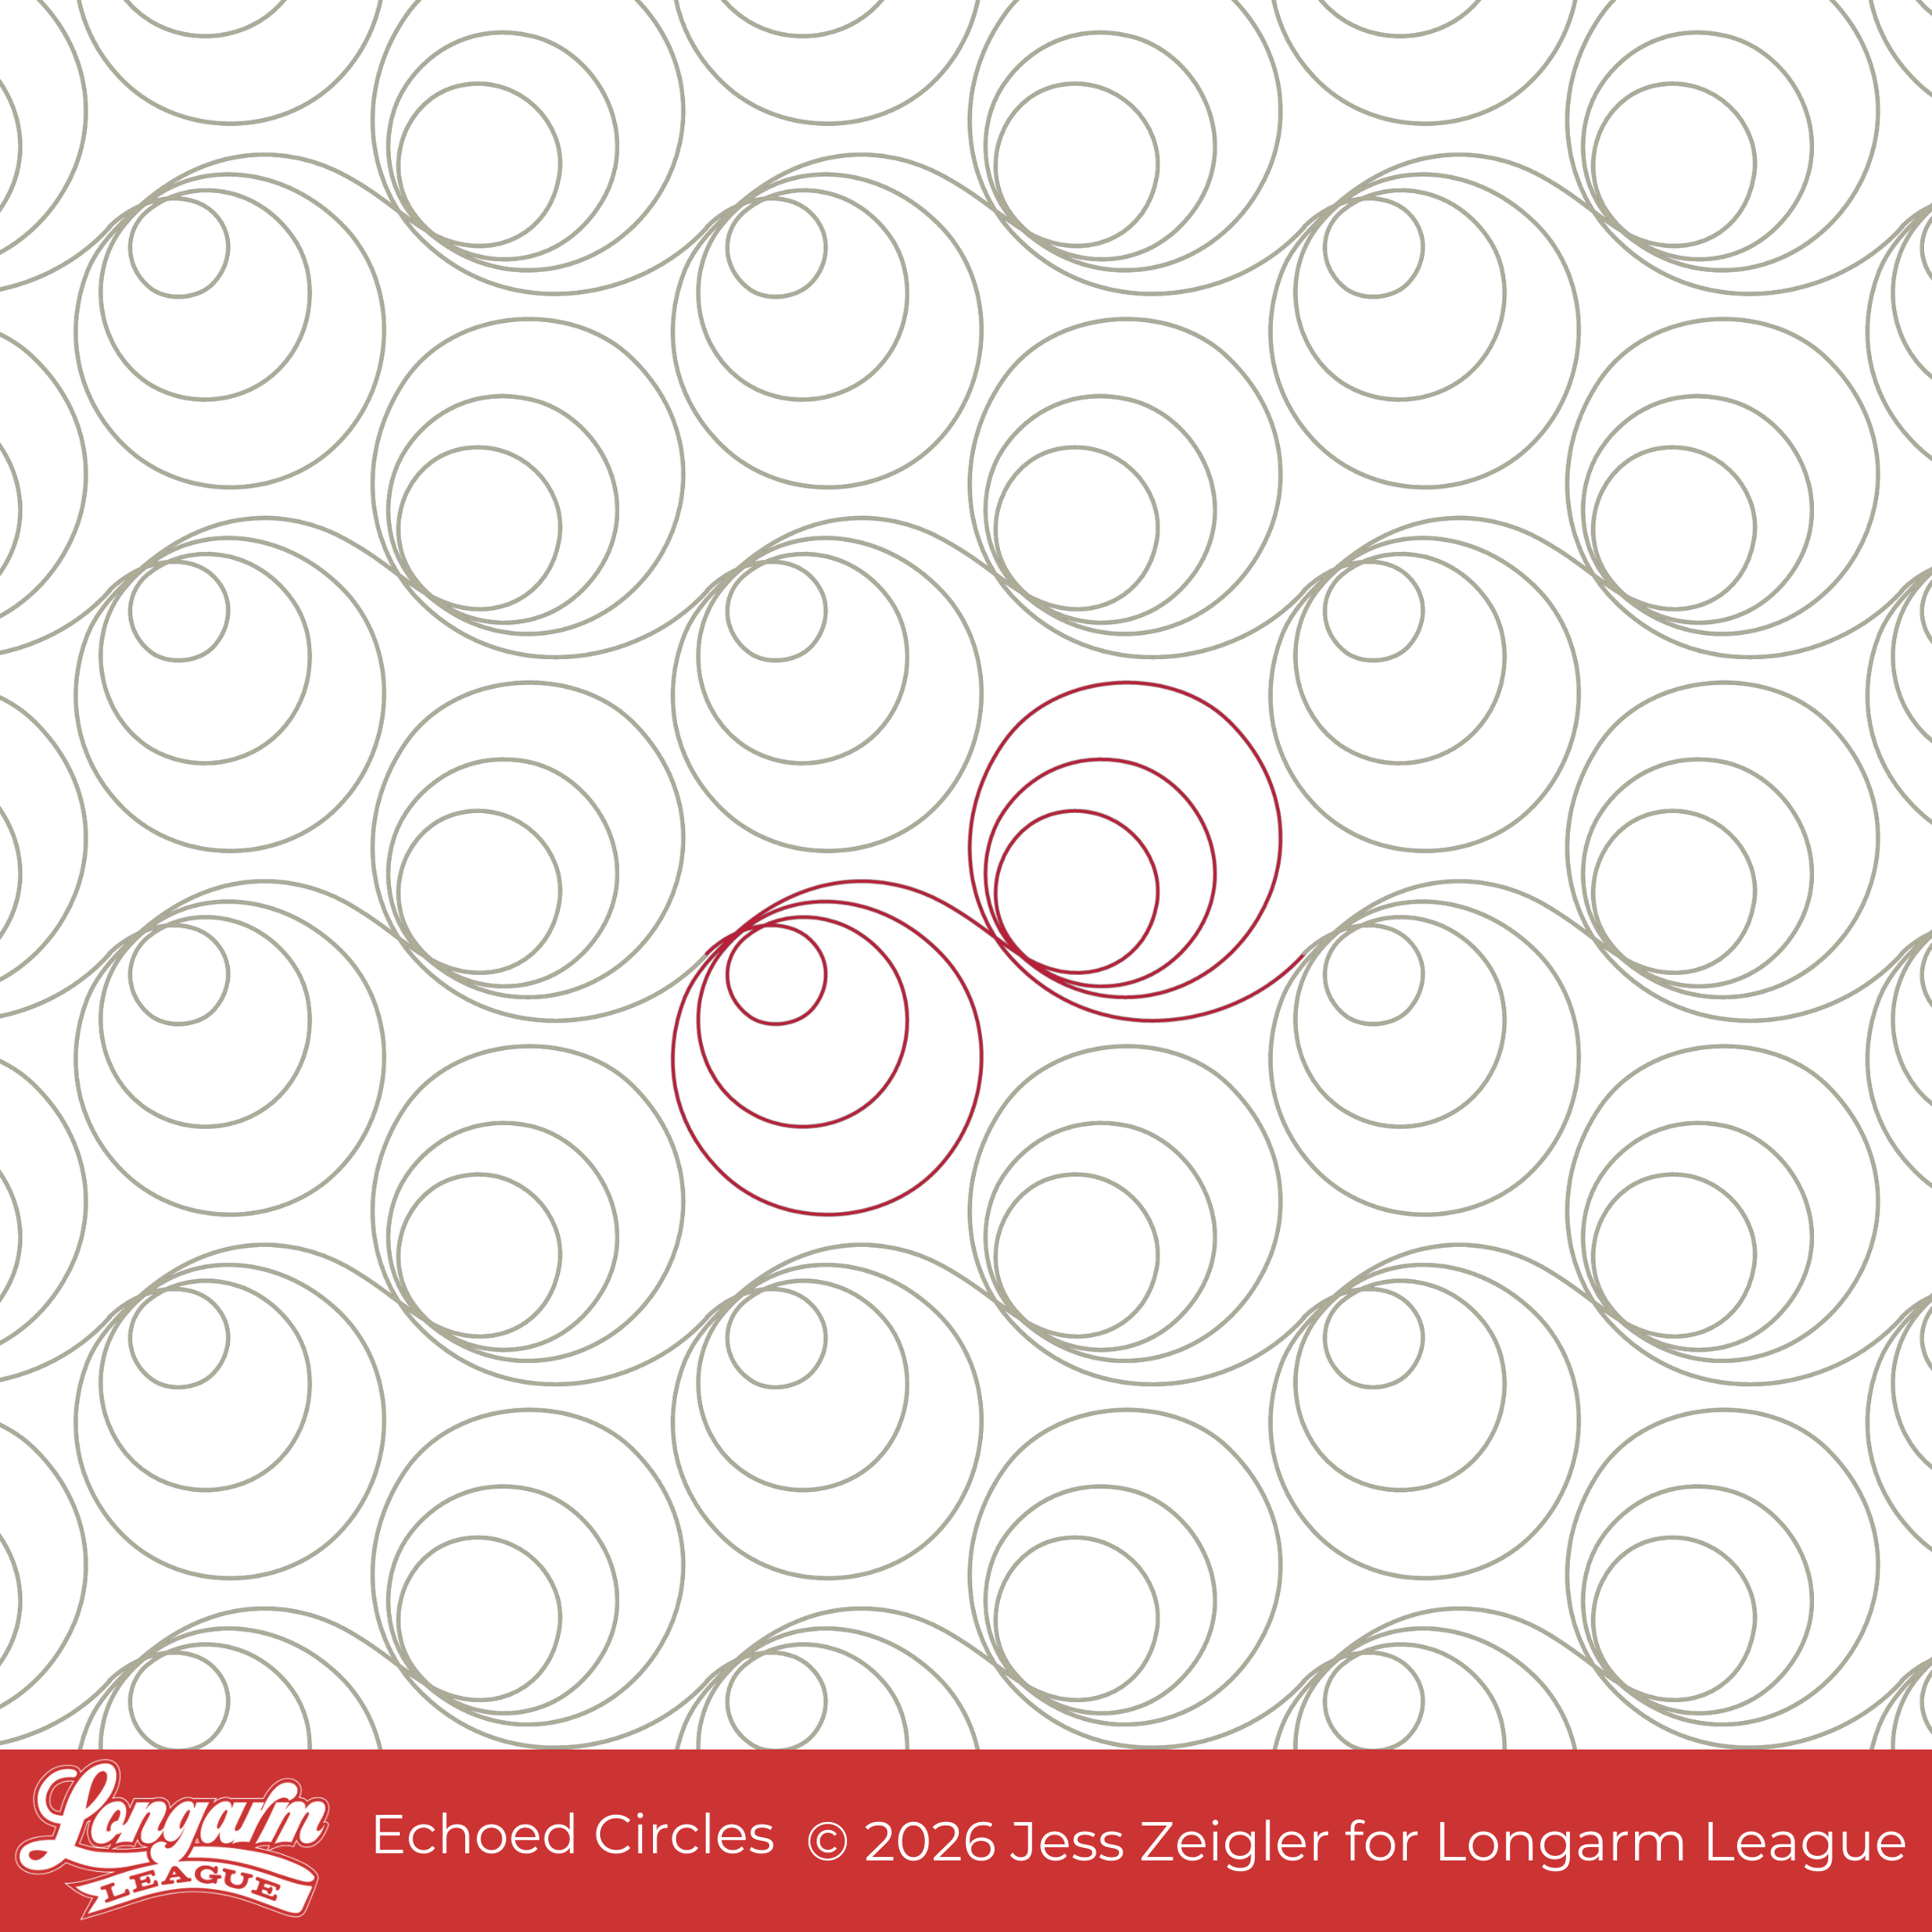
I had some criteria in mind as I set out to create Echoed Circles. I wanted the circles to remain circles and not morph into ovals. I wanted size variation and a sense of movement. Lastly, I didn't want any pivot points, so the needle could move fluidly throughout the entire design.
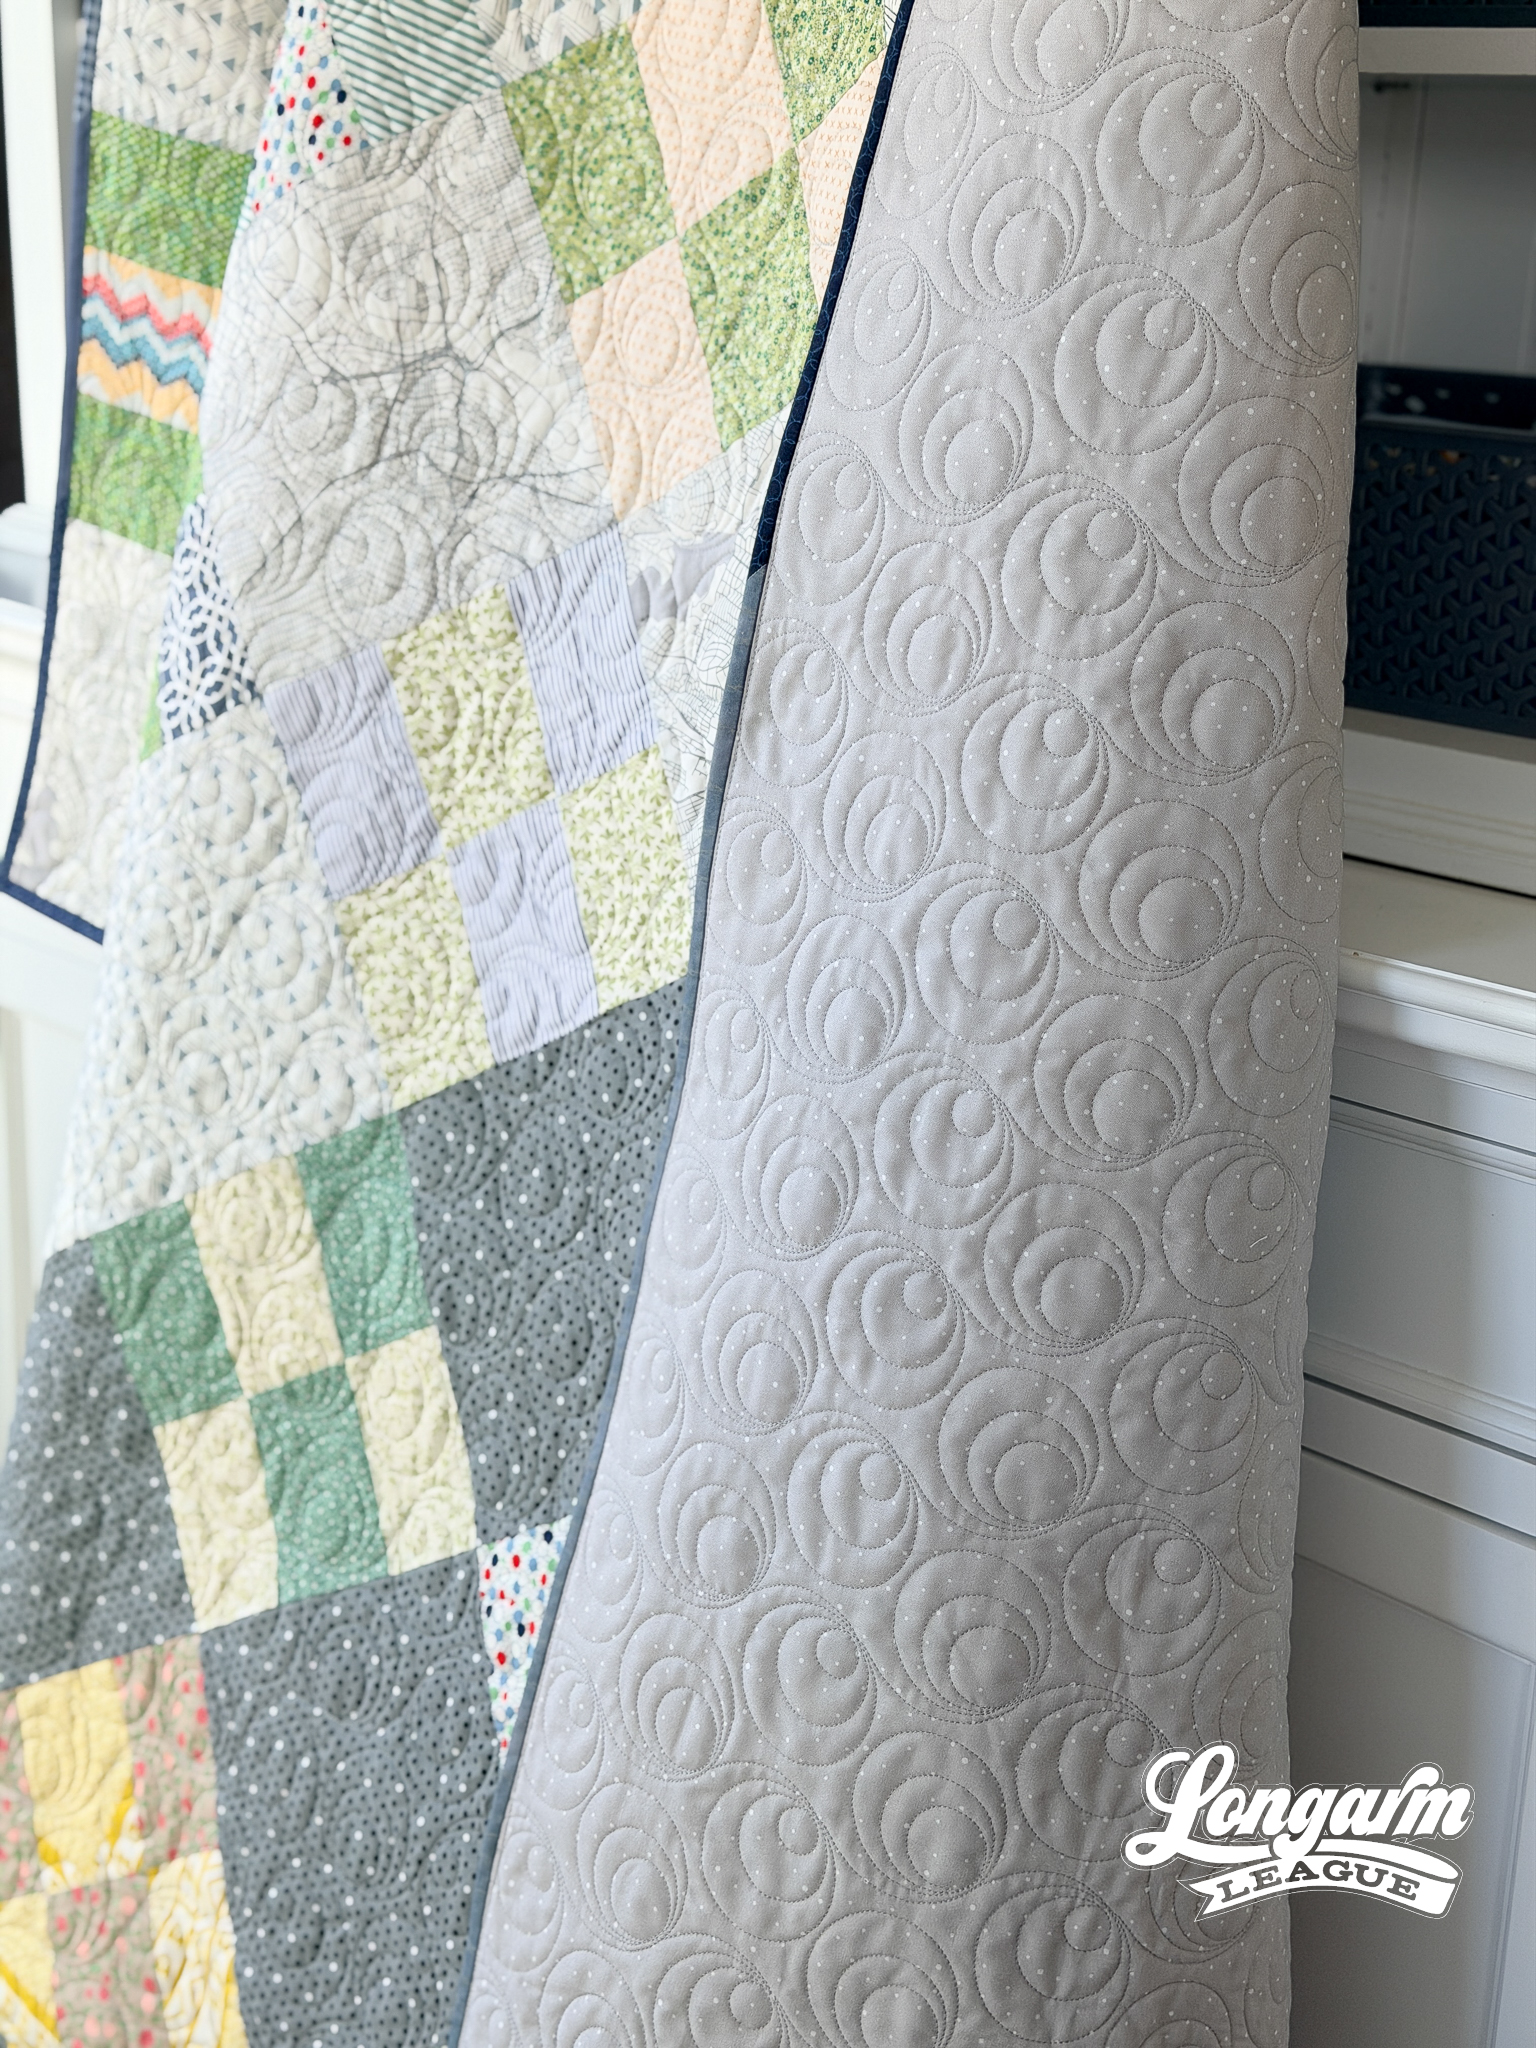
In the final design, we have two main outer circles within the repeat, both the same size. I designed it this way to ensure equal spacing between rows when nested.
To add the 'variety' criterion, I made the inner circle sizes different, adjusted the spacing between the nested circles so they weren't the same, and oriented the echoes away from the center circle in different directions between the pair.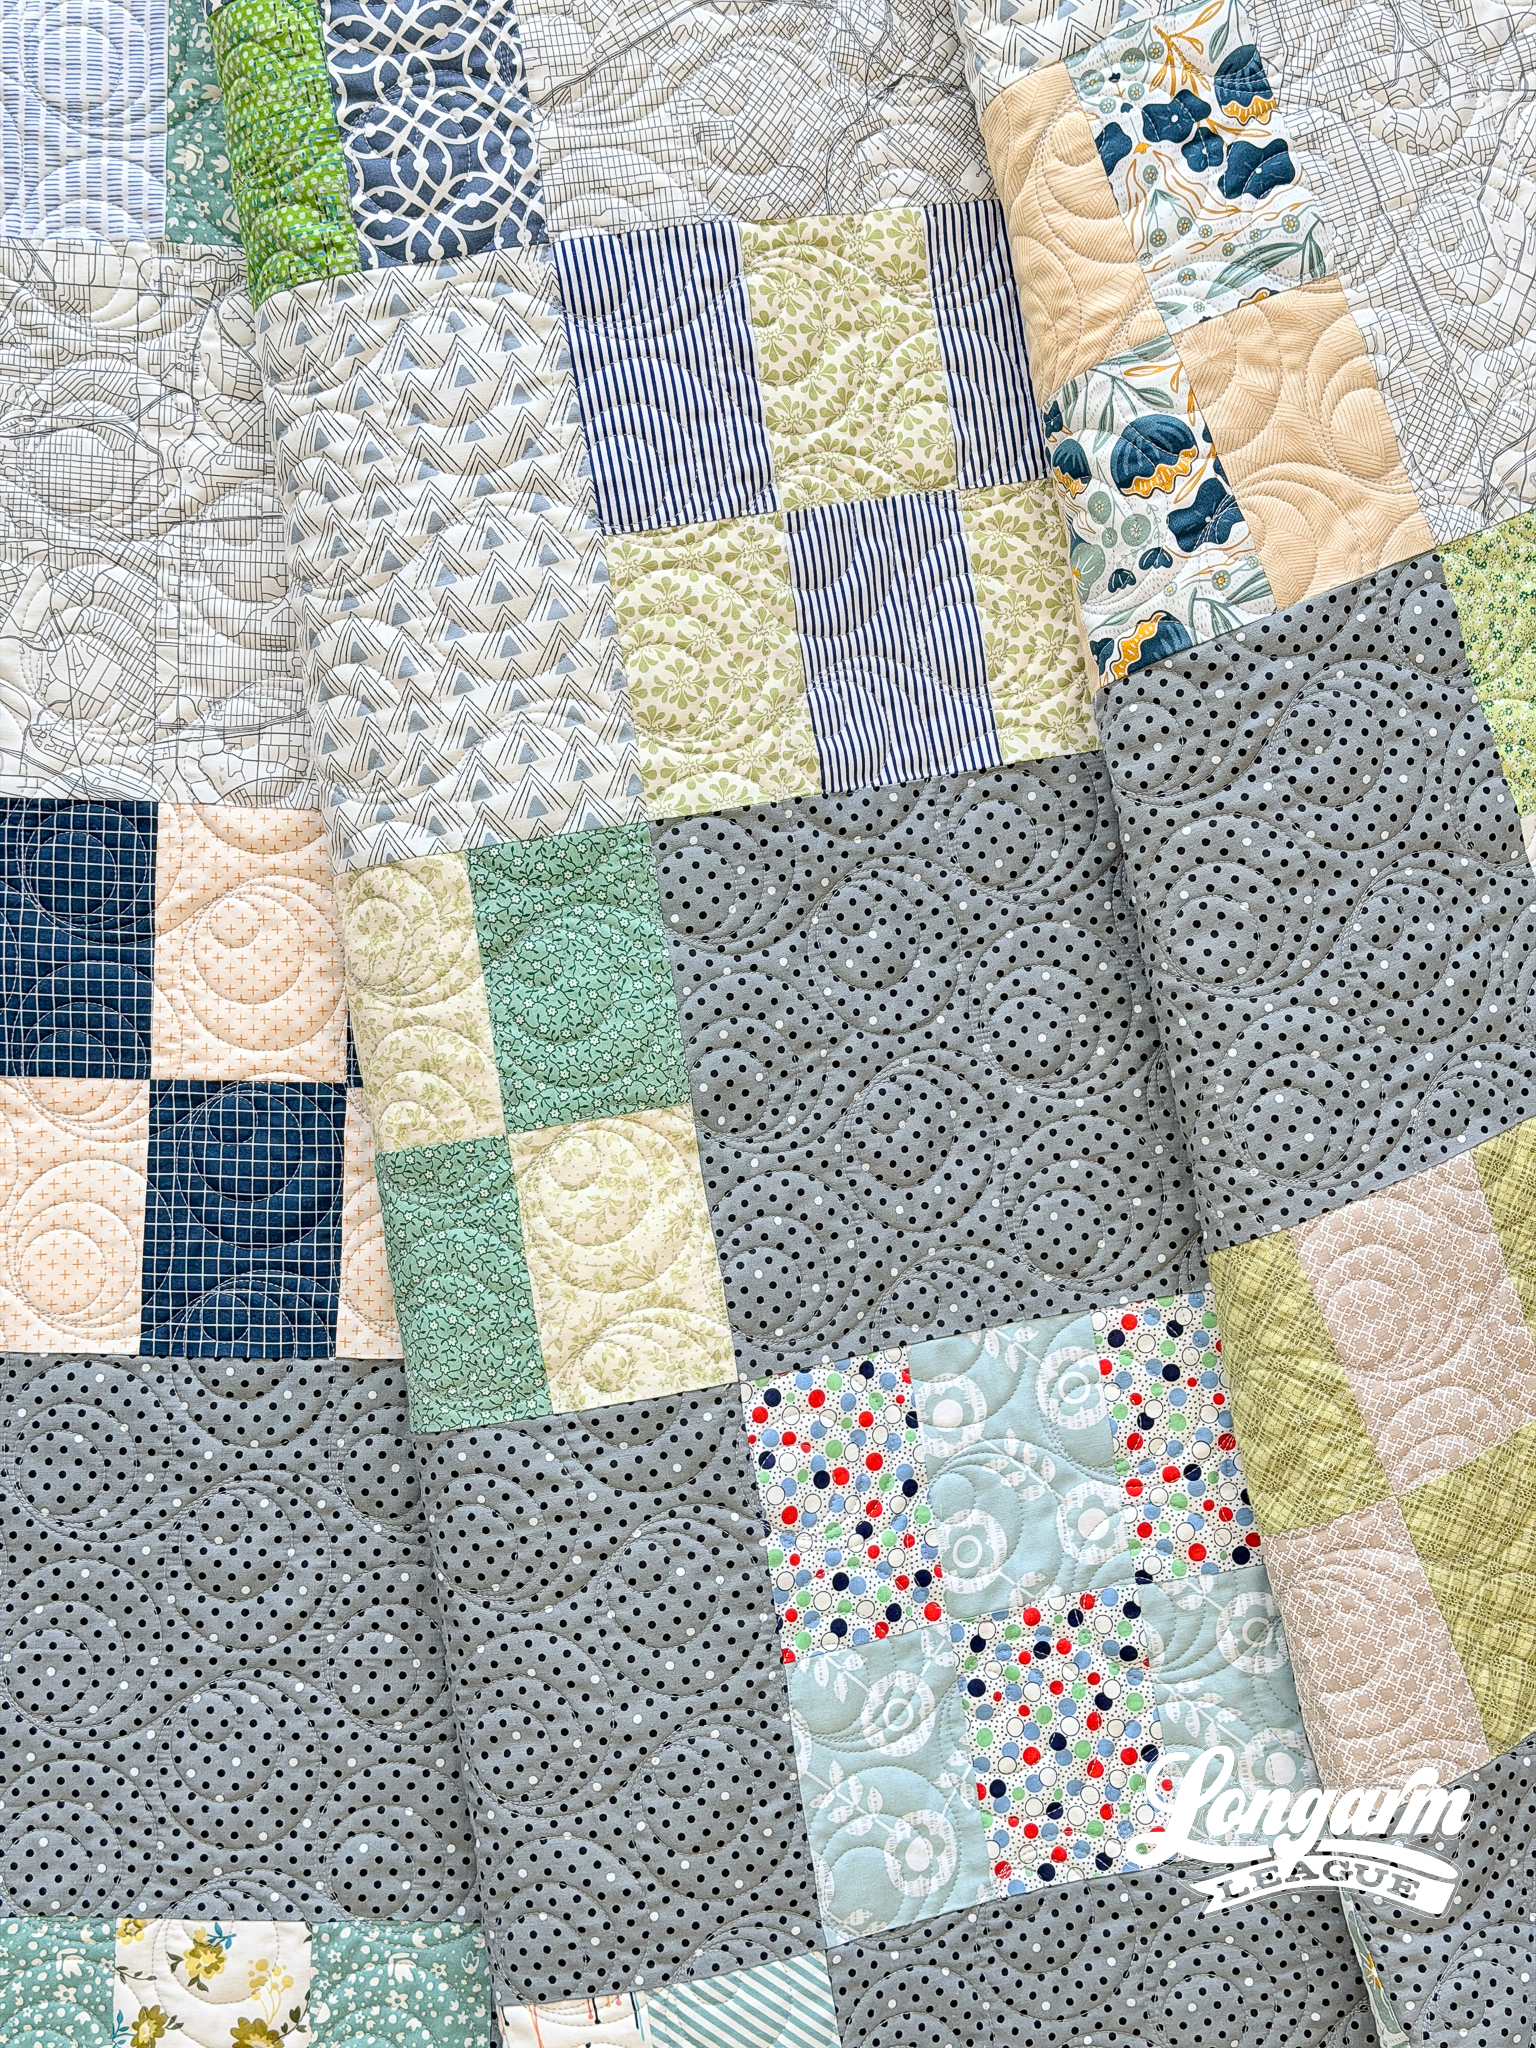
I like how there is an evenness to the design, but also some quirkiness. I think the differences in line spacing enhance the texture and draw the viewer's eye in. 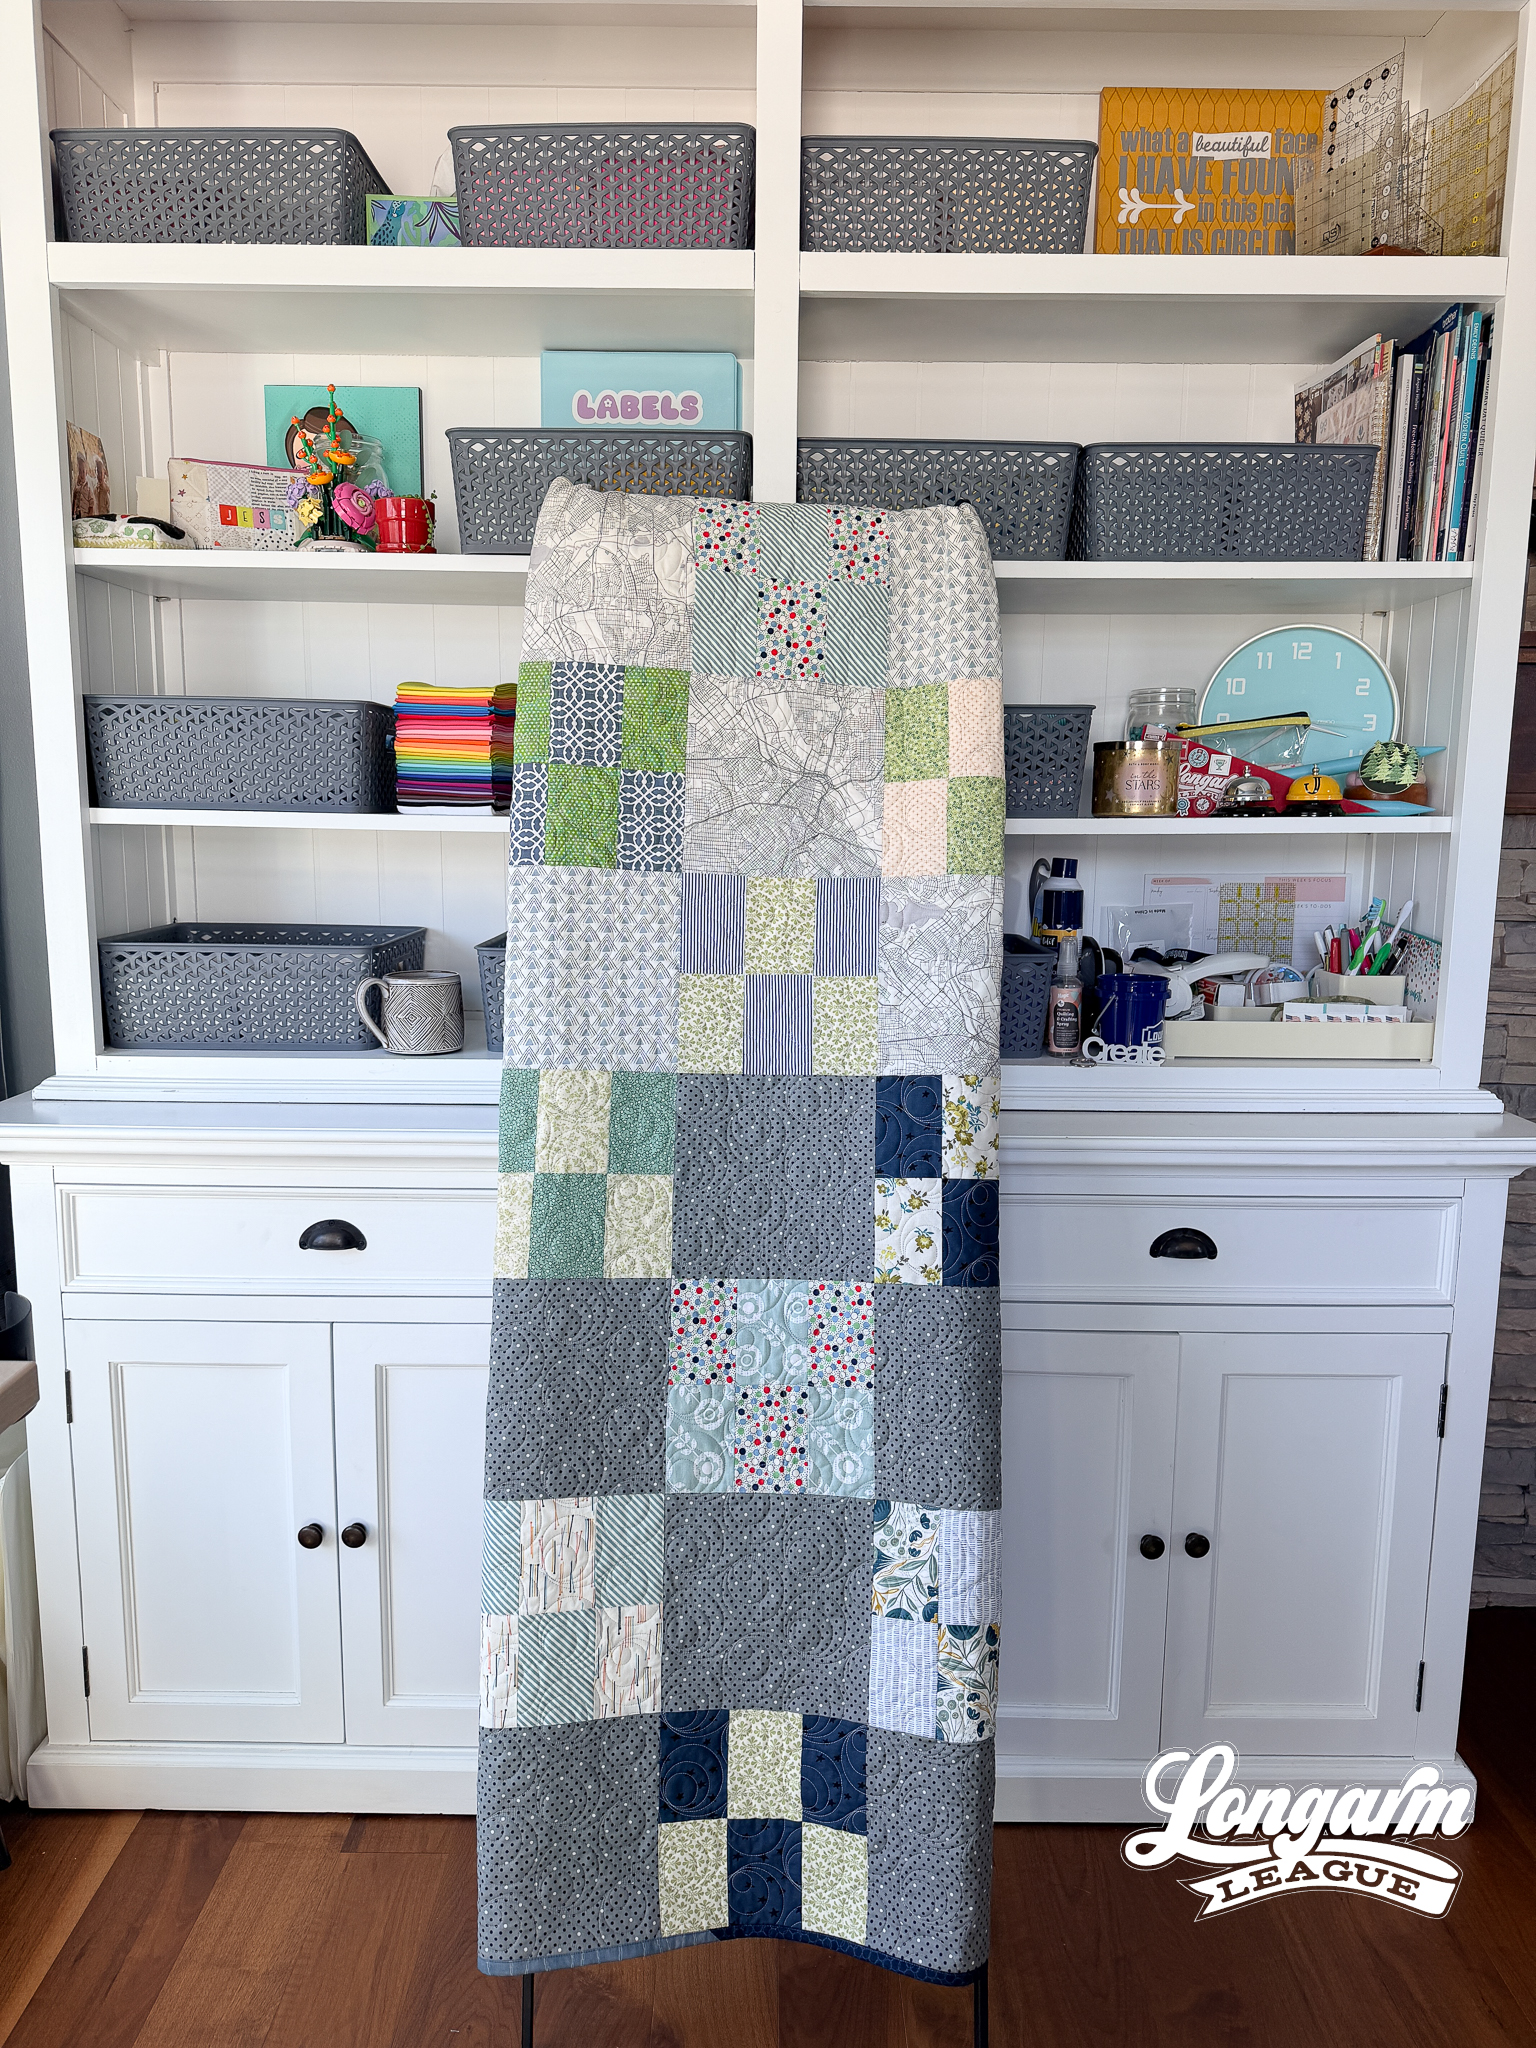
I was able to run my machine at a faster speed than I normally do, thanks to the fluidity of the stitch path. I didn't have any trouble whatsoever with row alignment.
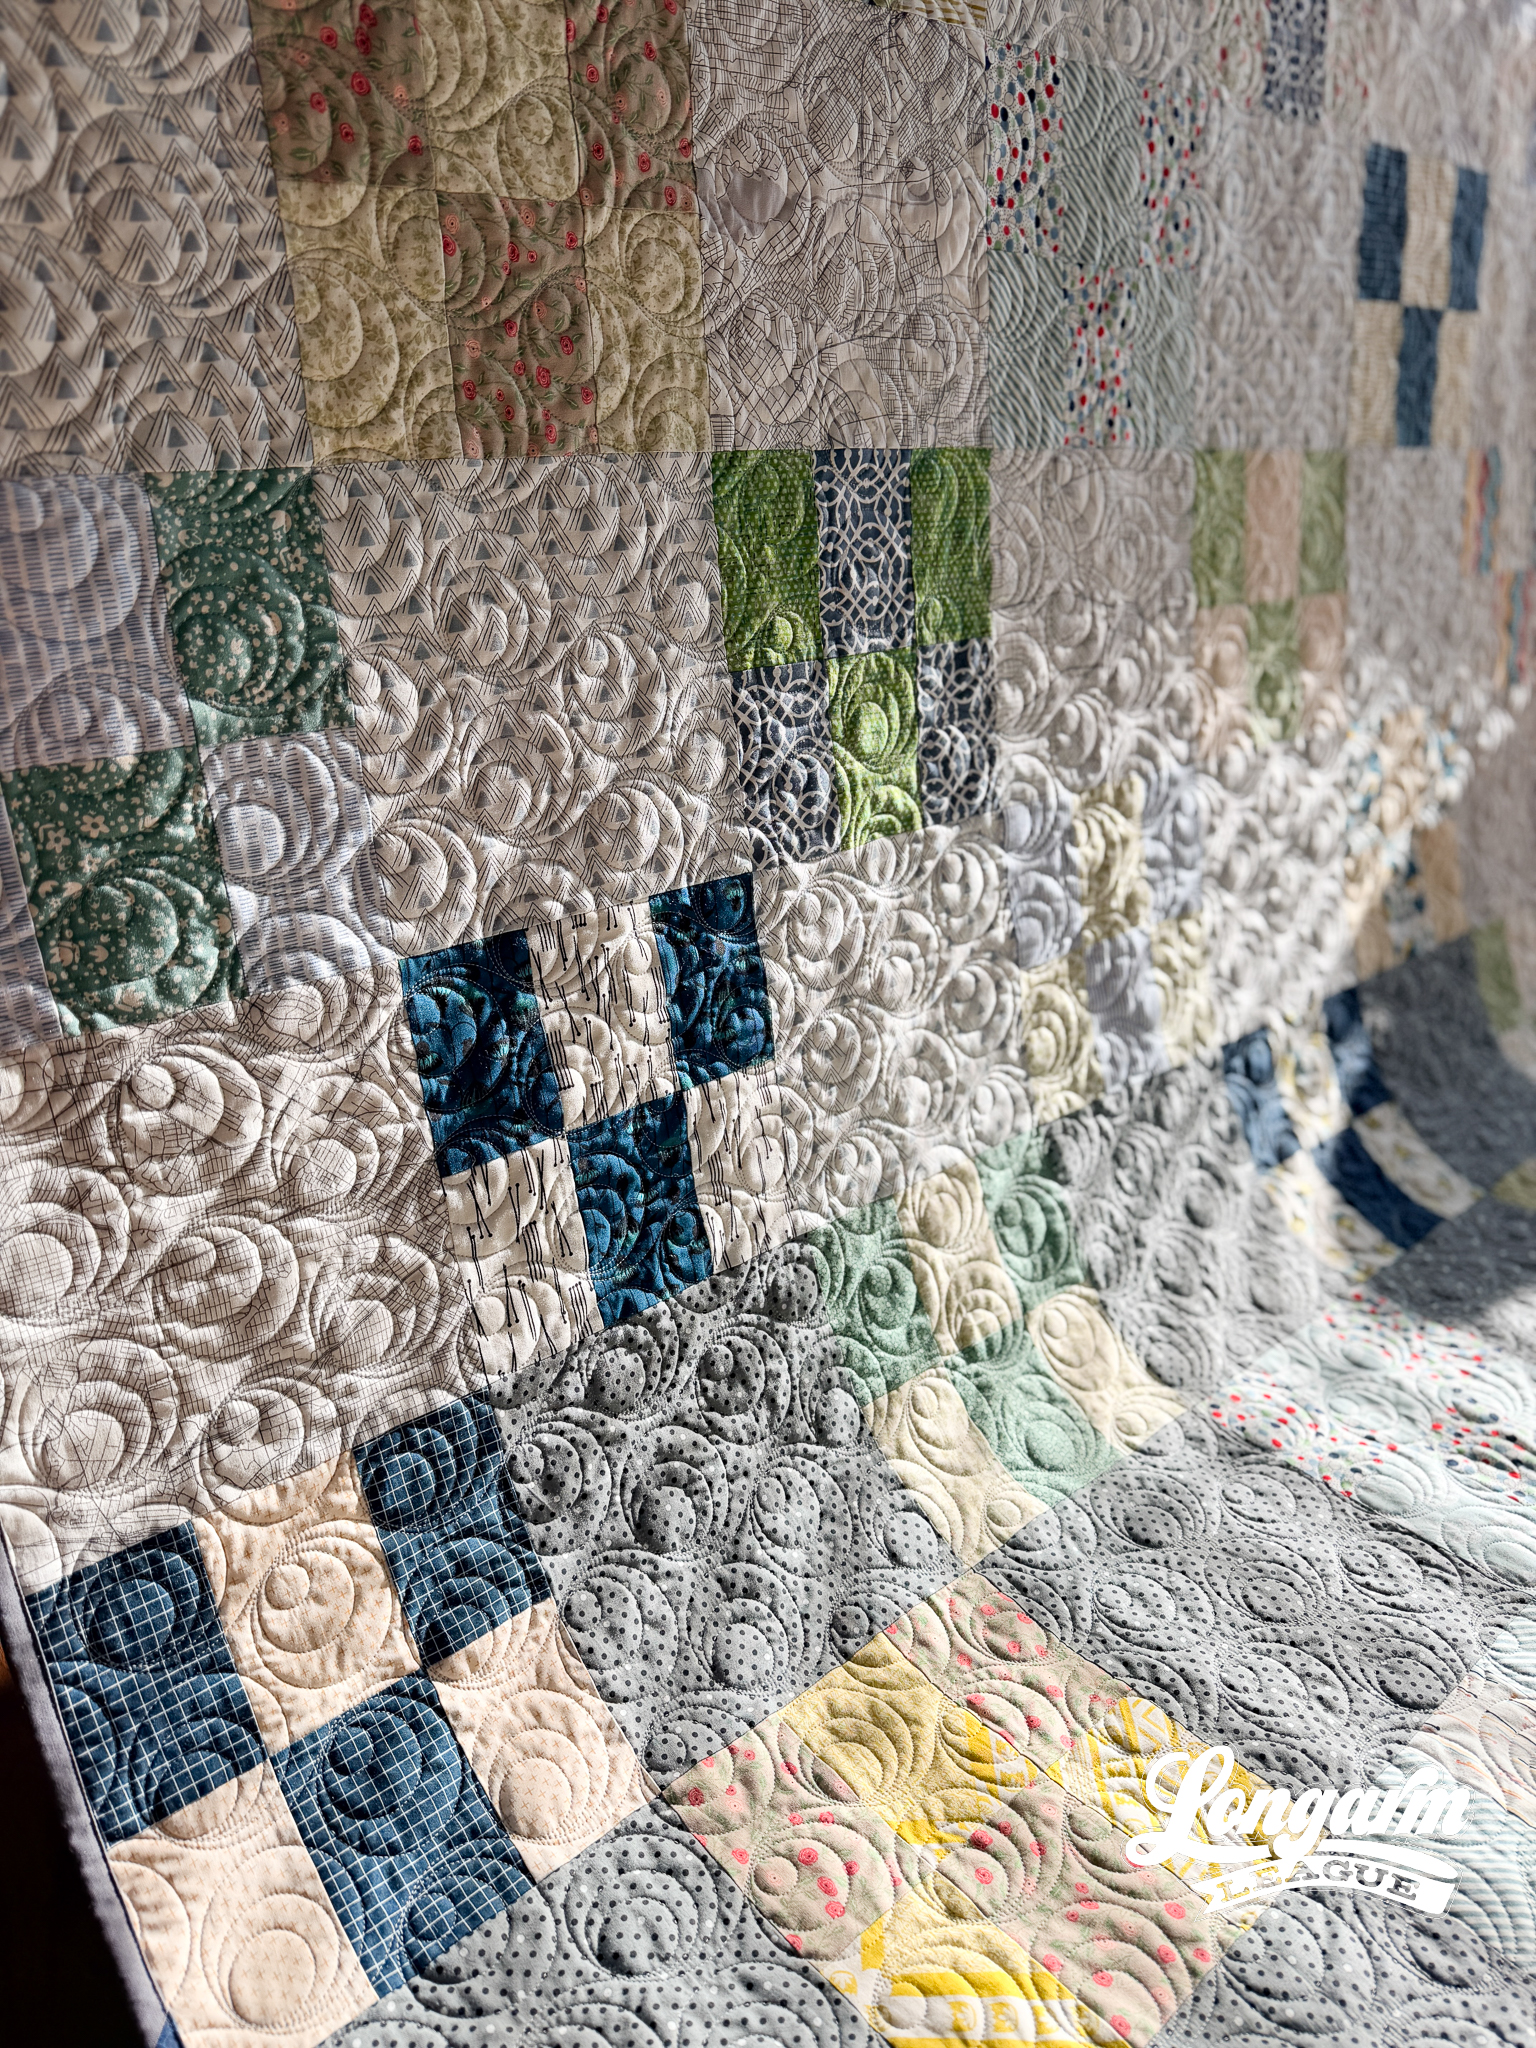
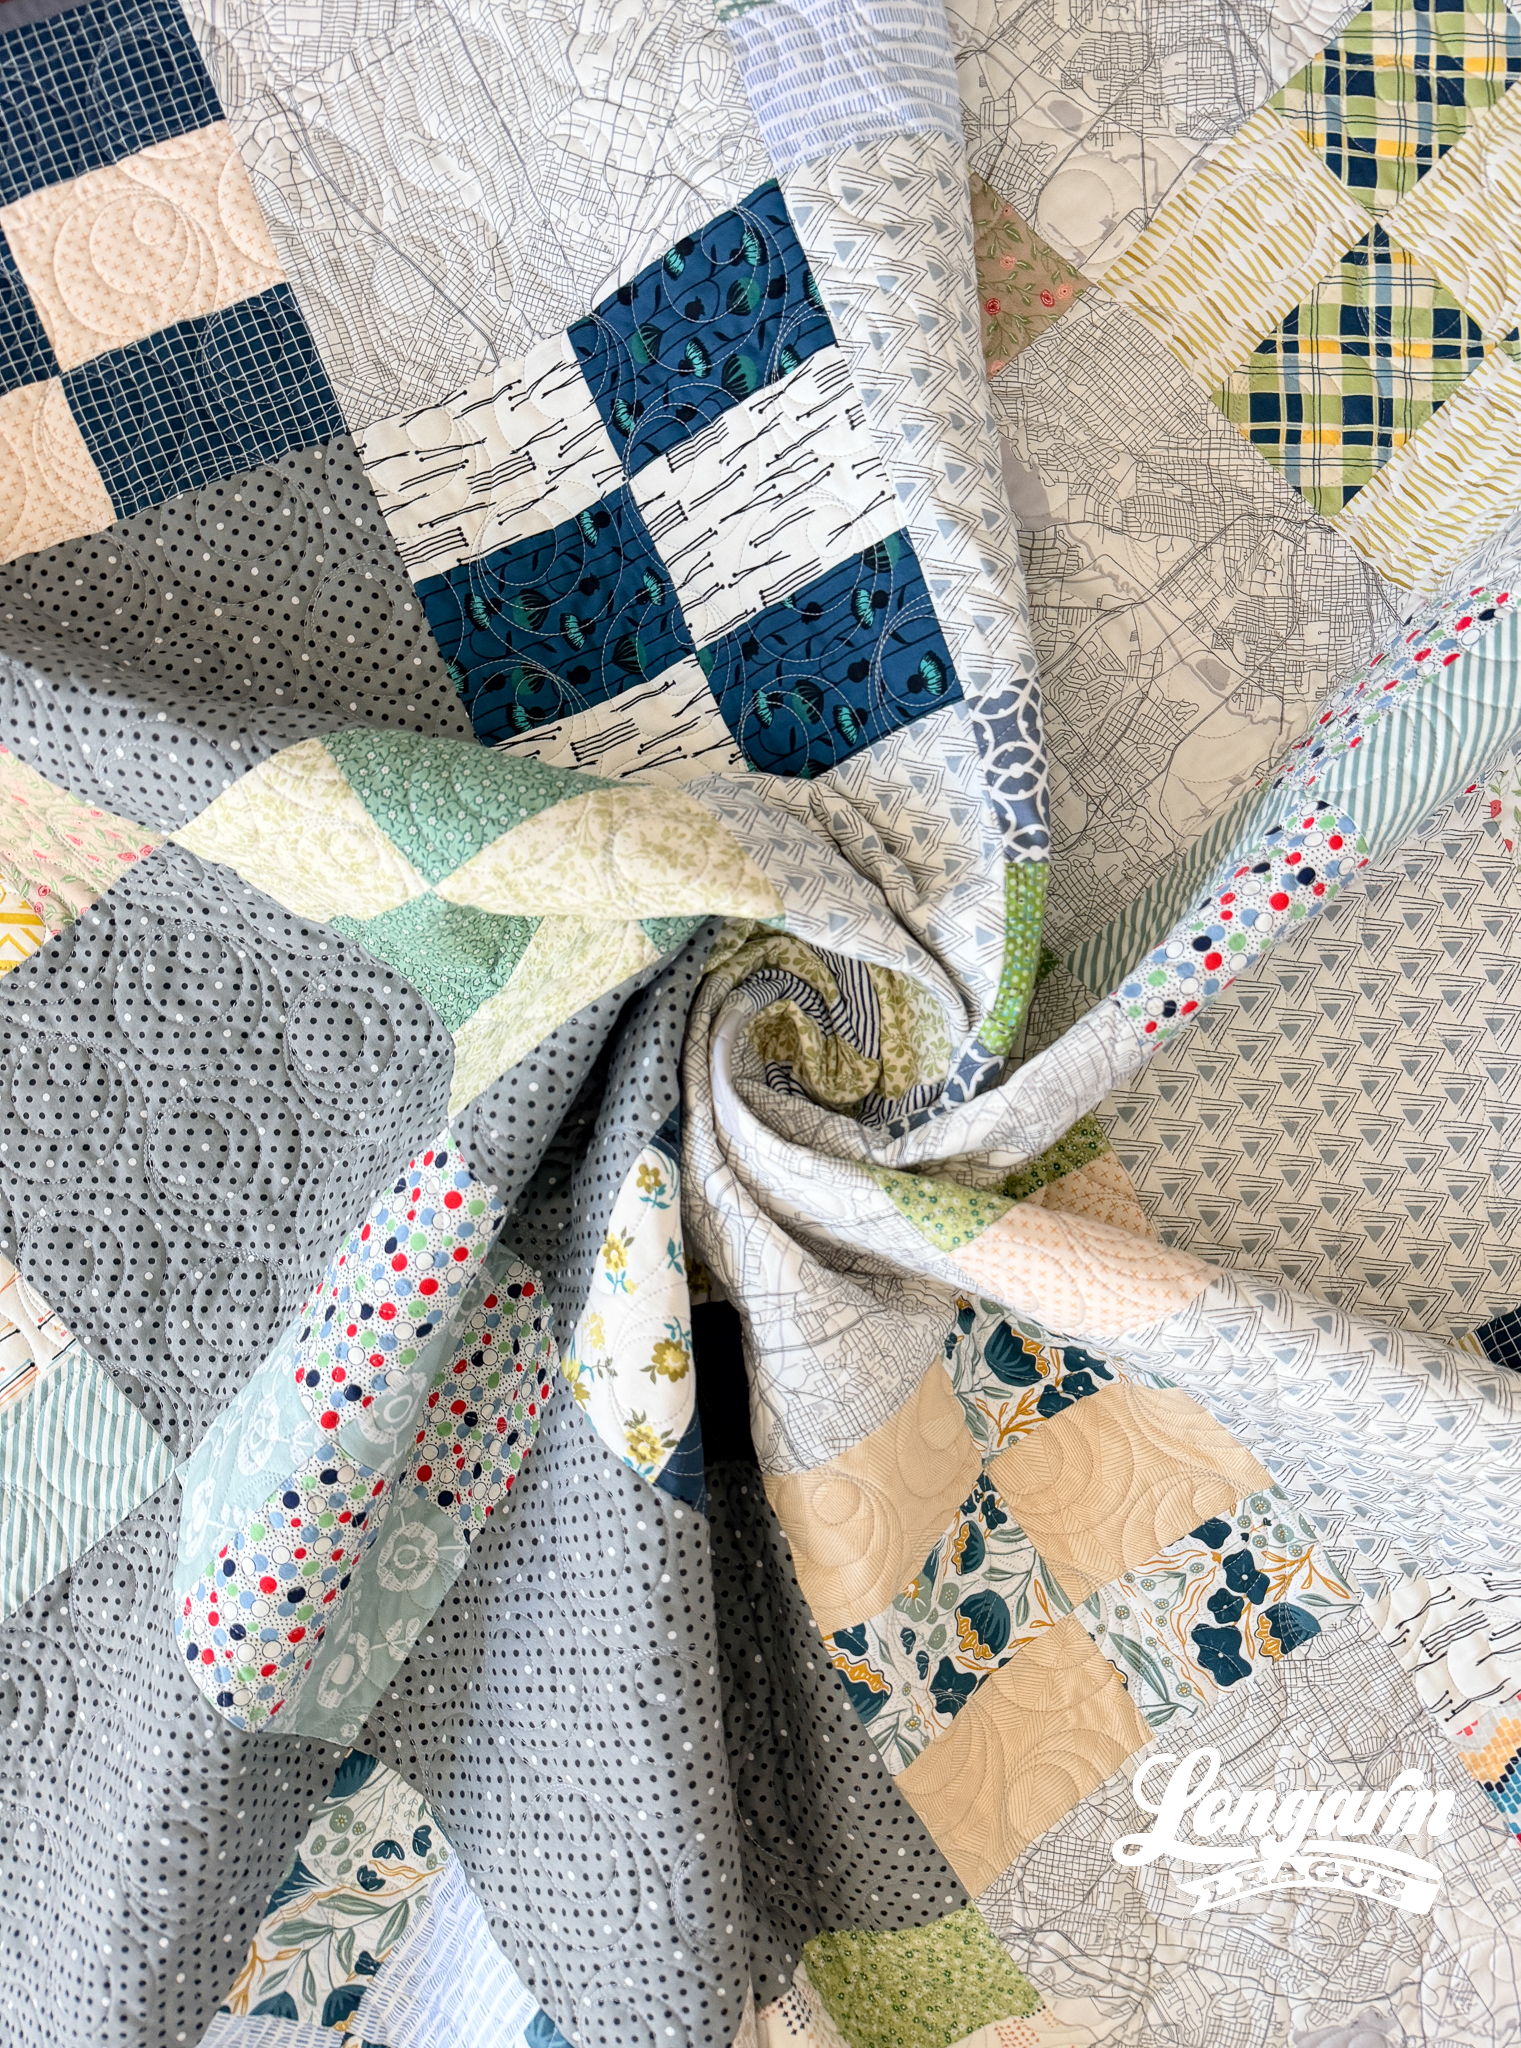
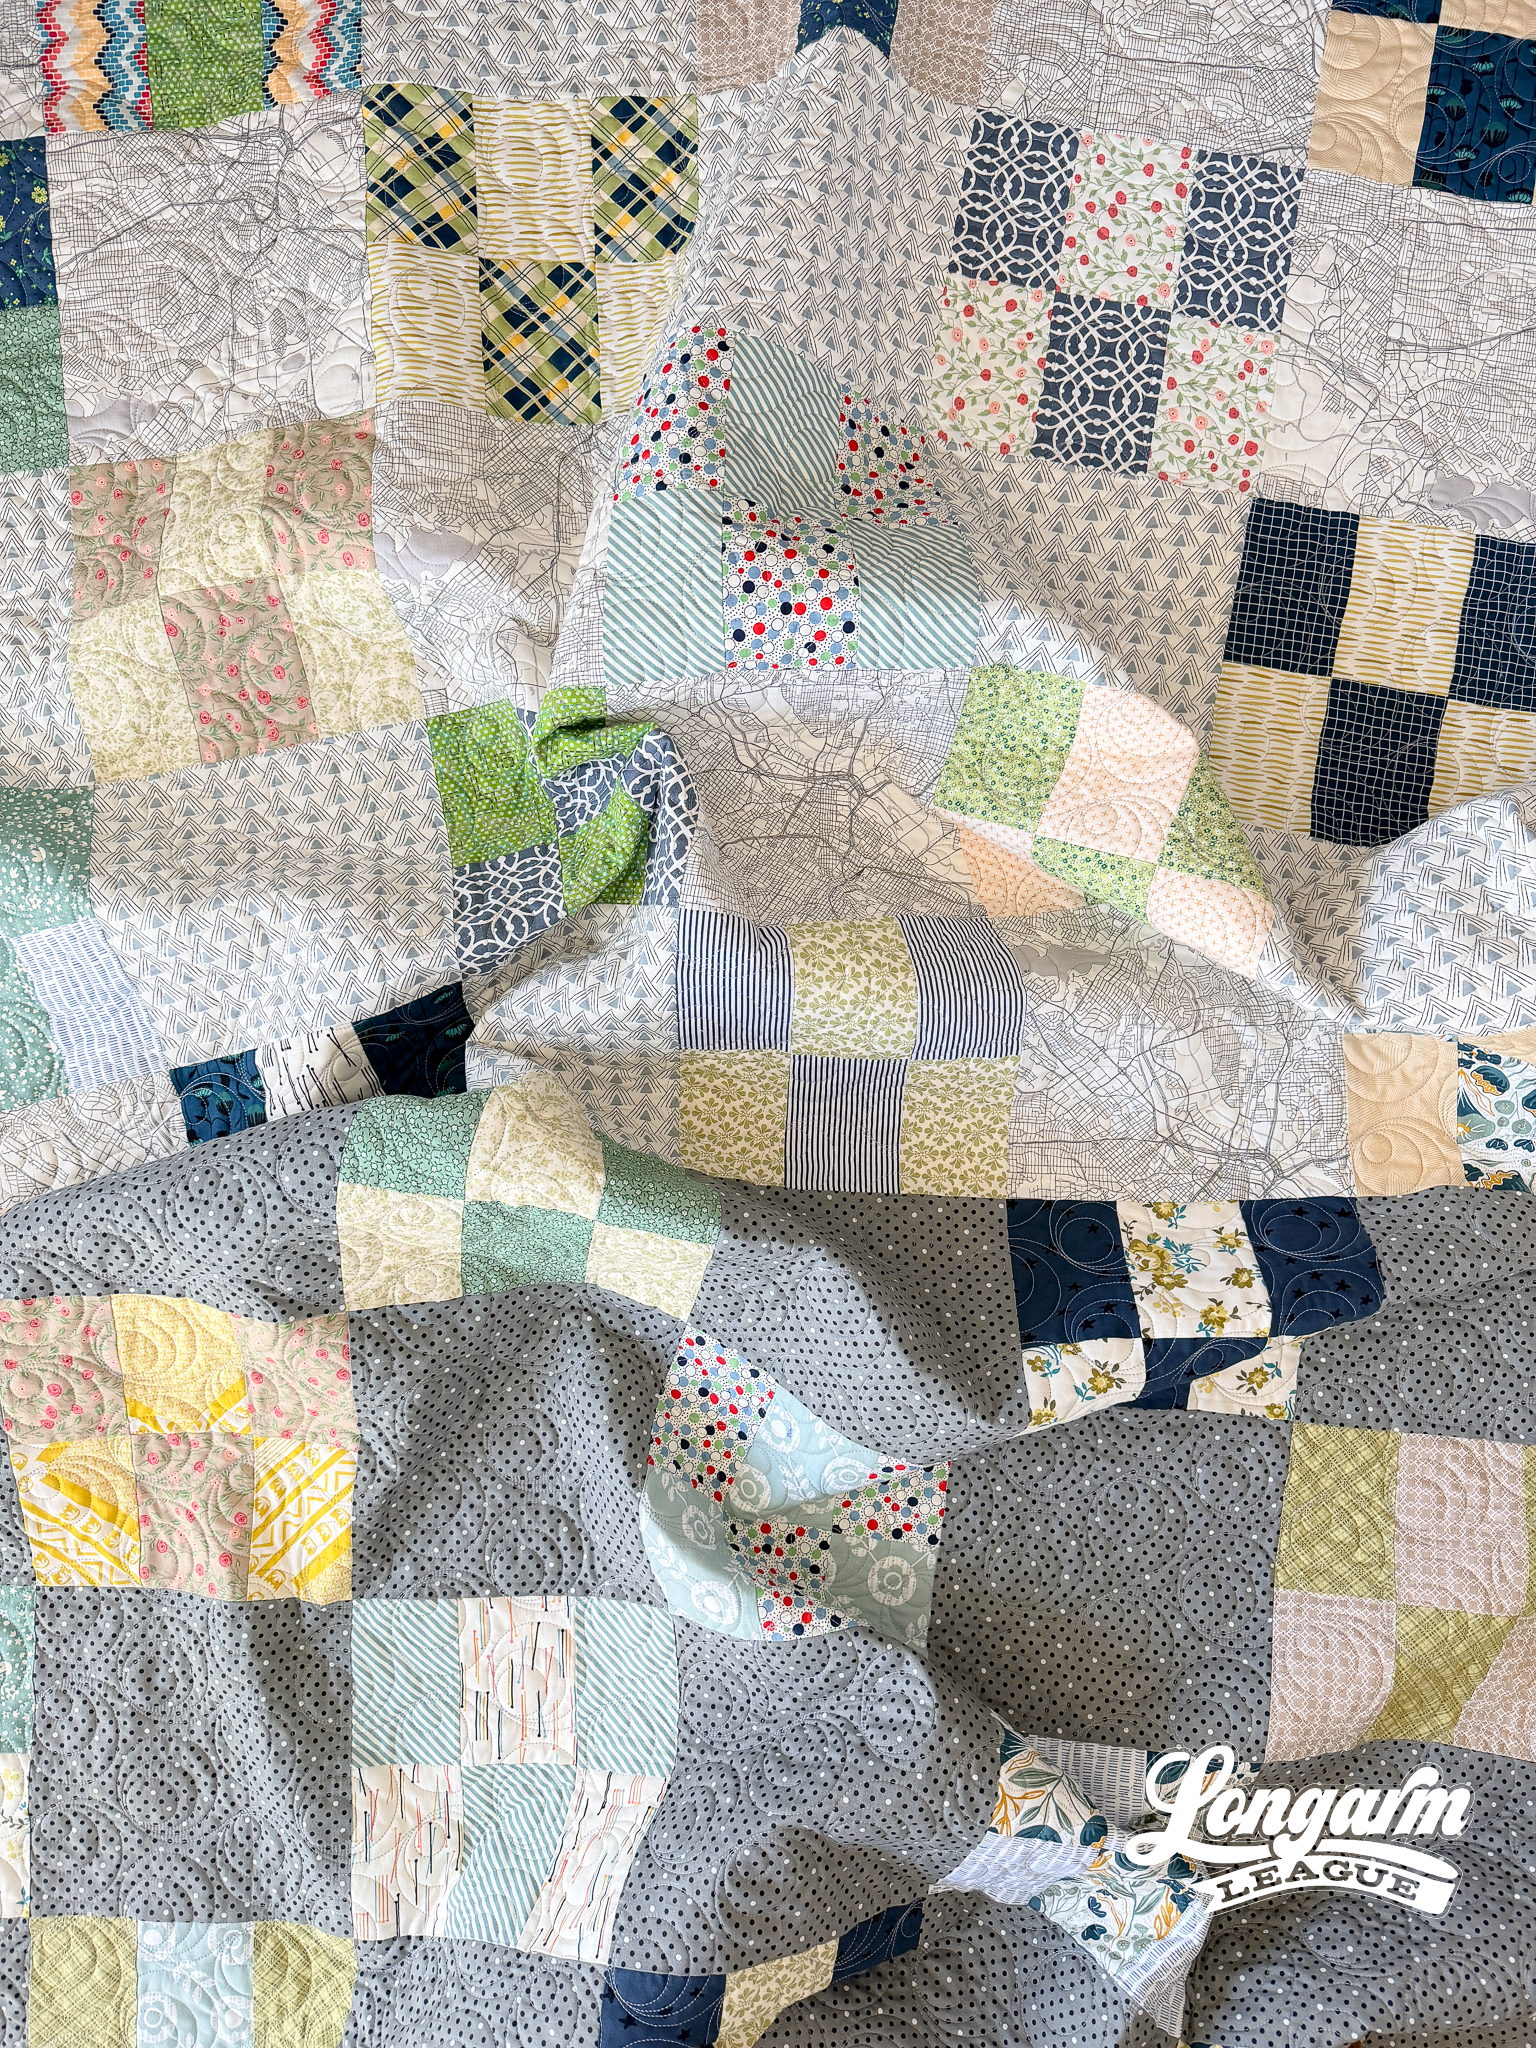
You may notice in some of these pictures that the quilting is tough to see because of the busy prints I used throughout the quilt. For quilts like this that don't have any true solid fabrics that let the quilting shine, I appreciate the structured texture of this E2E design that adds depth, and also that it's fast and easy to stitch.
The Quilt
Quilt Pattern

Shout-out to my friend Kait from Knot & Thread Design, who wrote this pattern called Norma's Patchwork (PDF version). It was inspired by a quilt found in her grandmother Norma's home.
The picture above is of me finishing the top at our Longarm League retreat (October 2025). The simple construction made it an ideal pattern for a retreat. I could easily chat and sew, get interrupted (by the snack table), and pick right up where I left off without any issue.
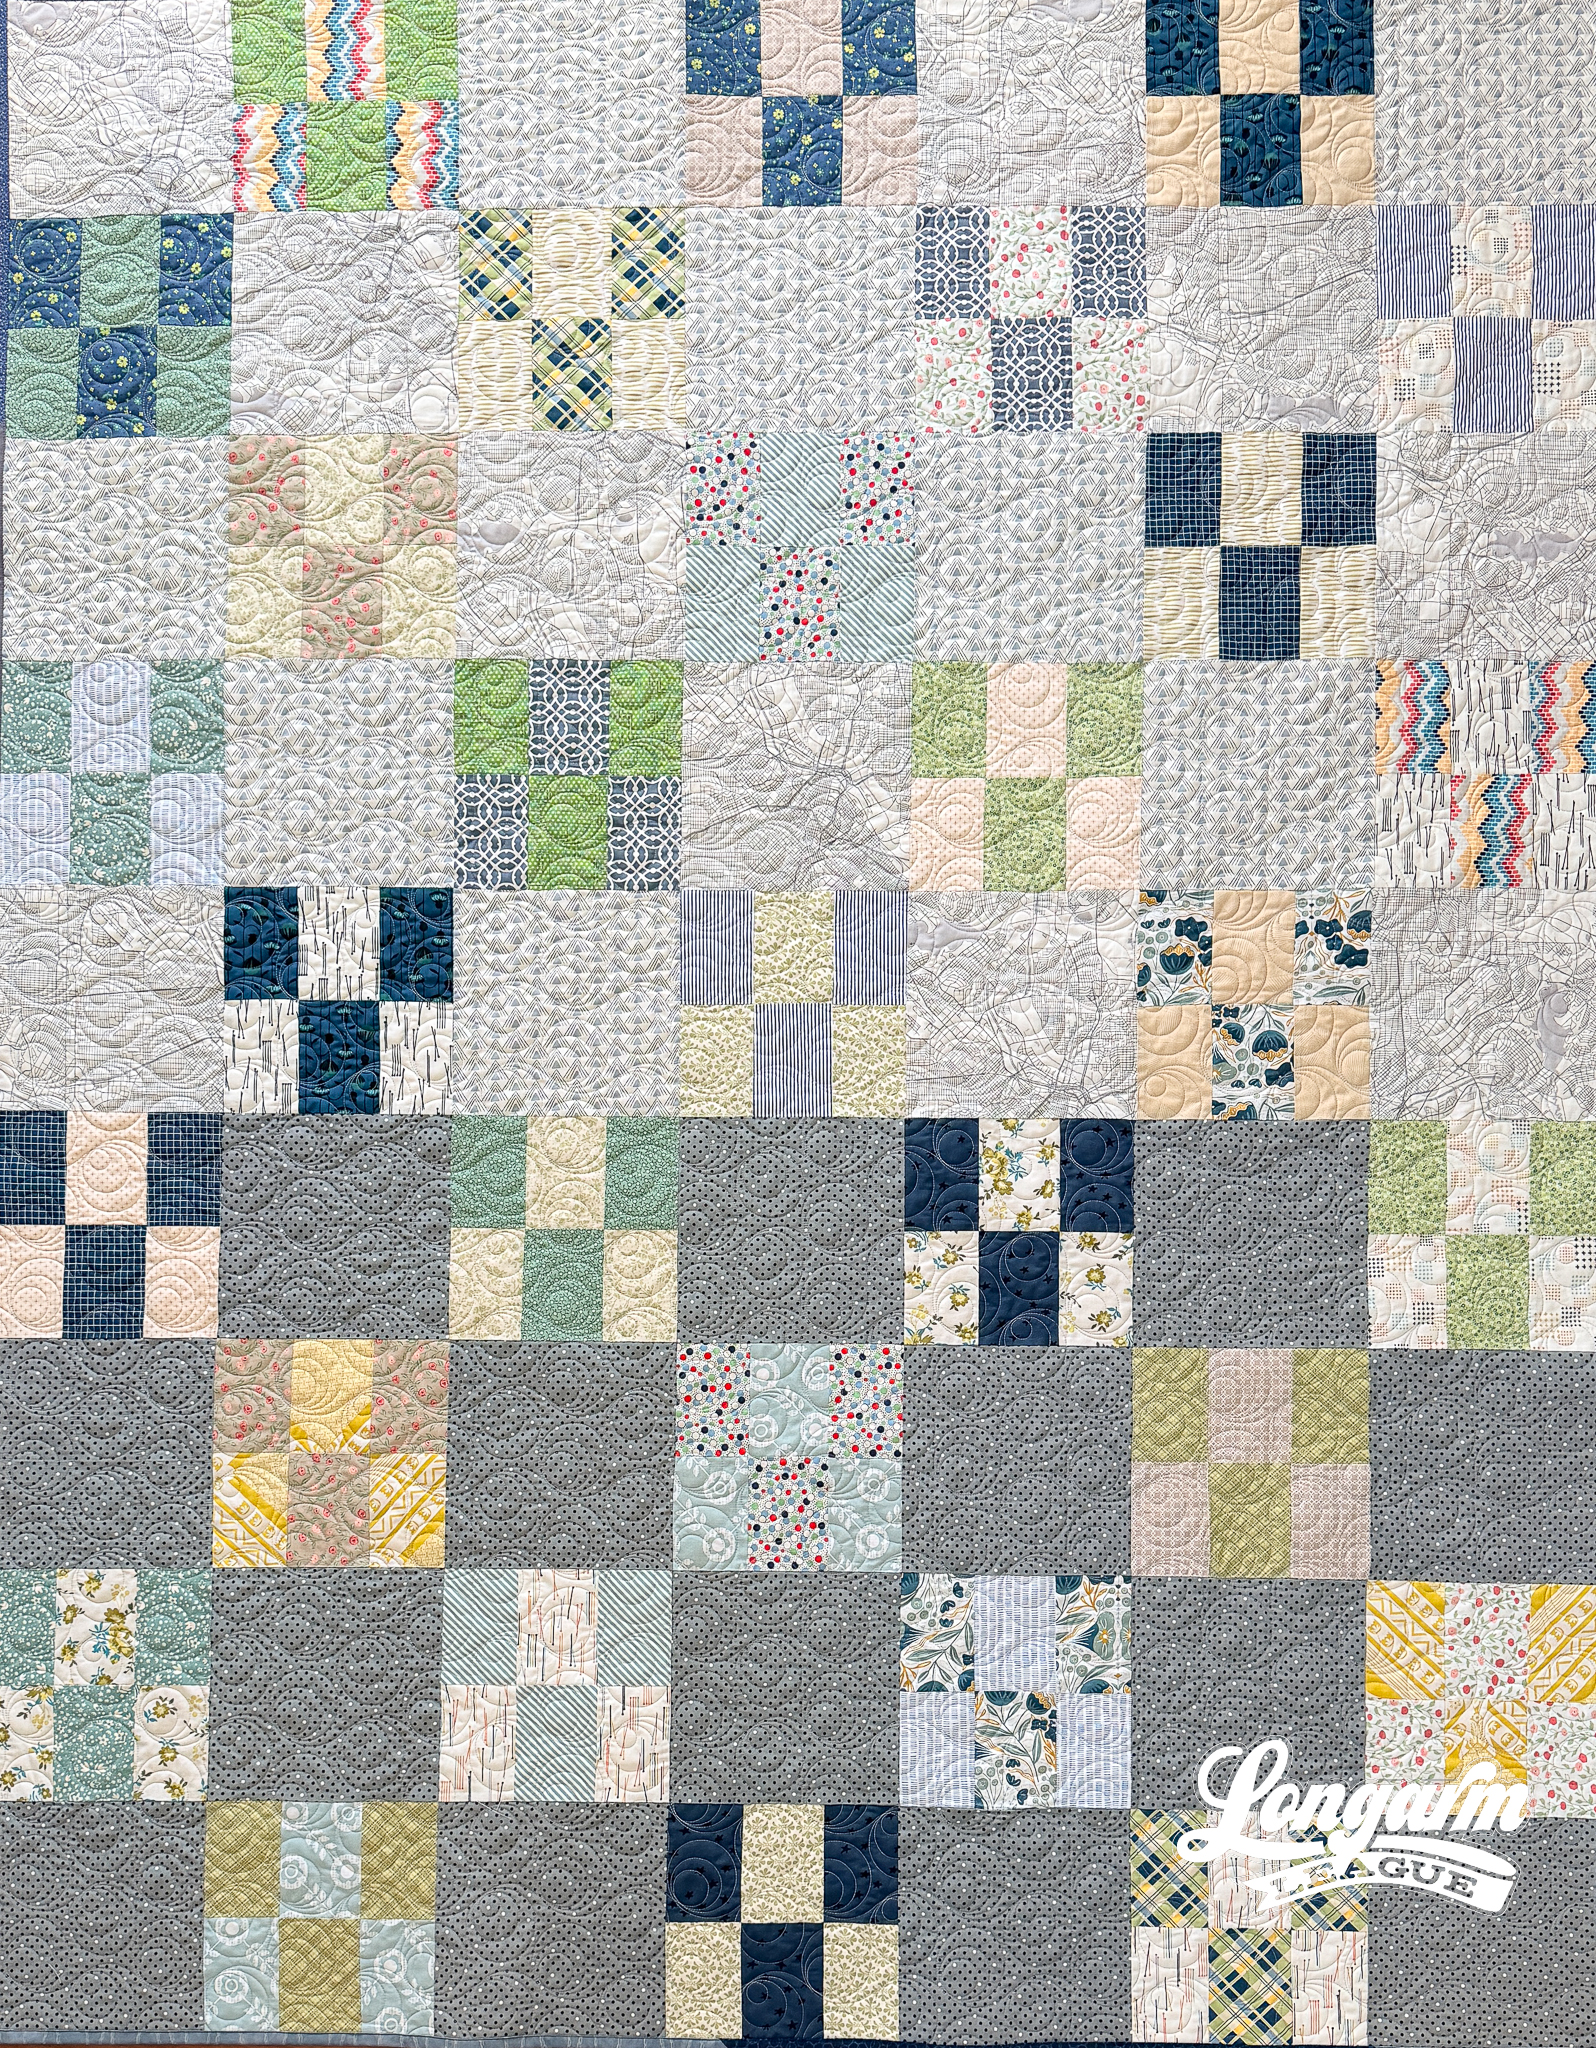
The pattern is perfect for layer cakes (10" squares) and is beginner-friendly. Kait has a clever and time-saving method for pairing the 6-patch units that I found most enjoyable.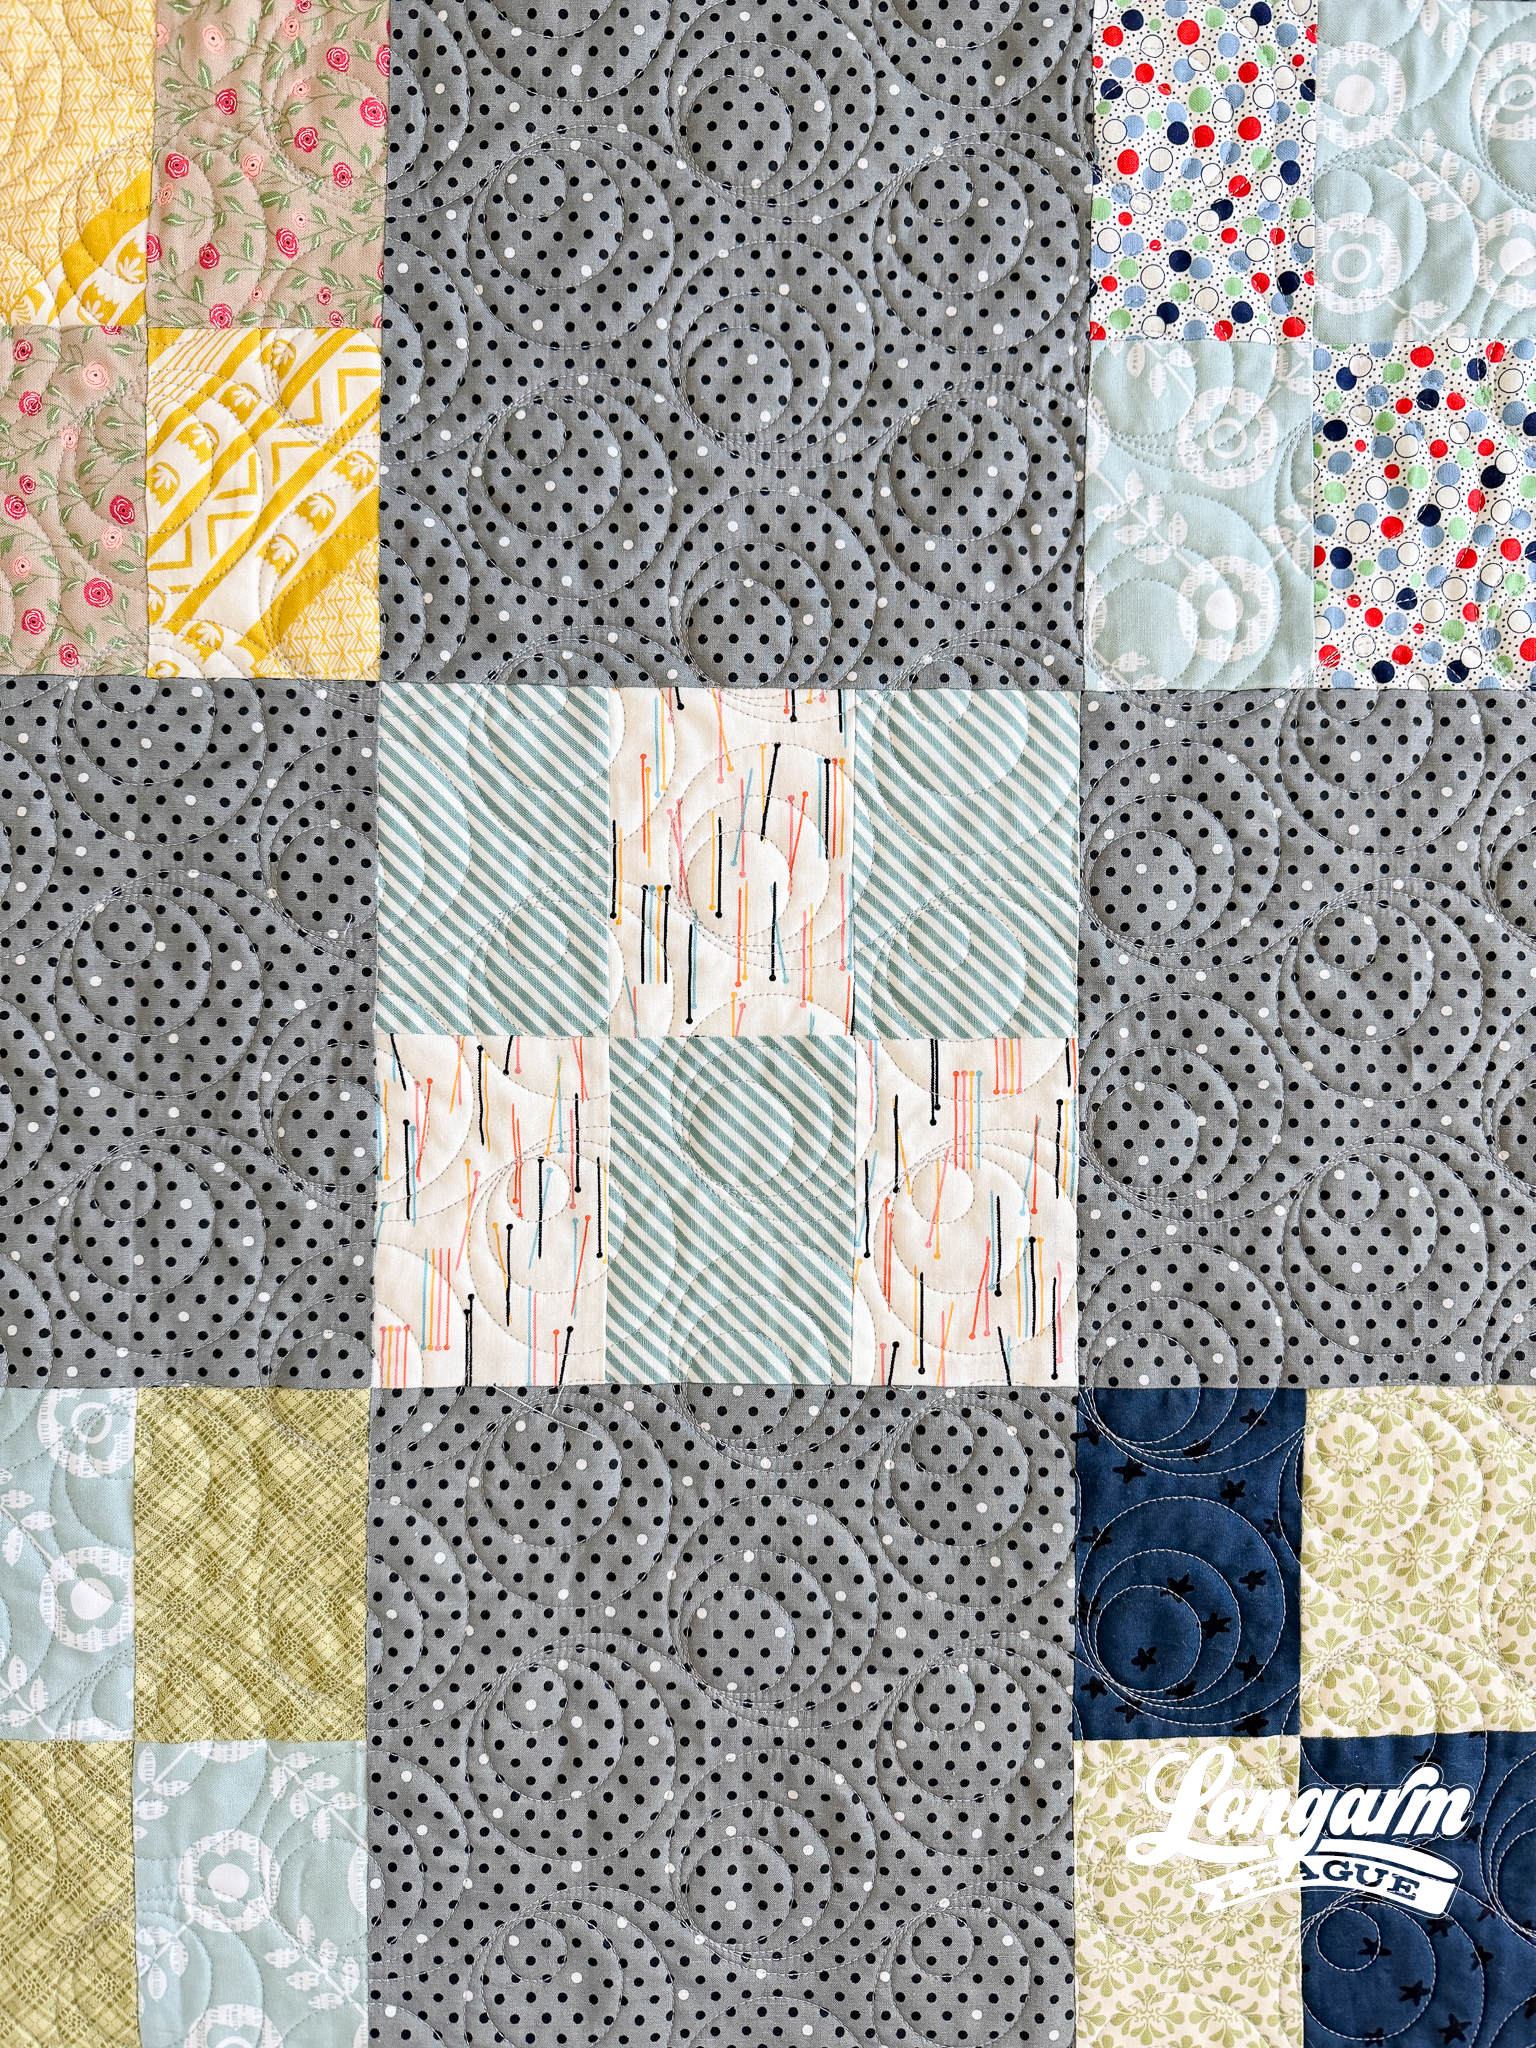
Fabrics
I leaned into the spirit of vintage, utilitarian quilts in a few ways. I didn't buy any new fabrics for this quilt, and wasn't too concerned with everything coordinating perfectly. Some of the coolest quilts have personality, after all! I'd chosen the fabrics at different stages of my quilting life, but for some reason, I found them challenging to use, so they stagnated on my shelf. Not in my scrap bins, on my actual shelf. For this quilt, I called them up to the big "leagues" and put them together even if they weren't matchy-matchy.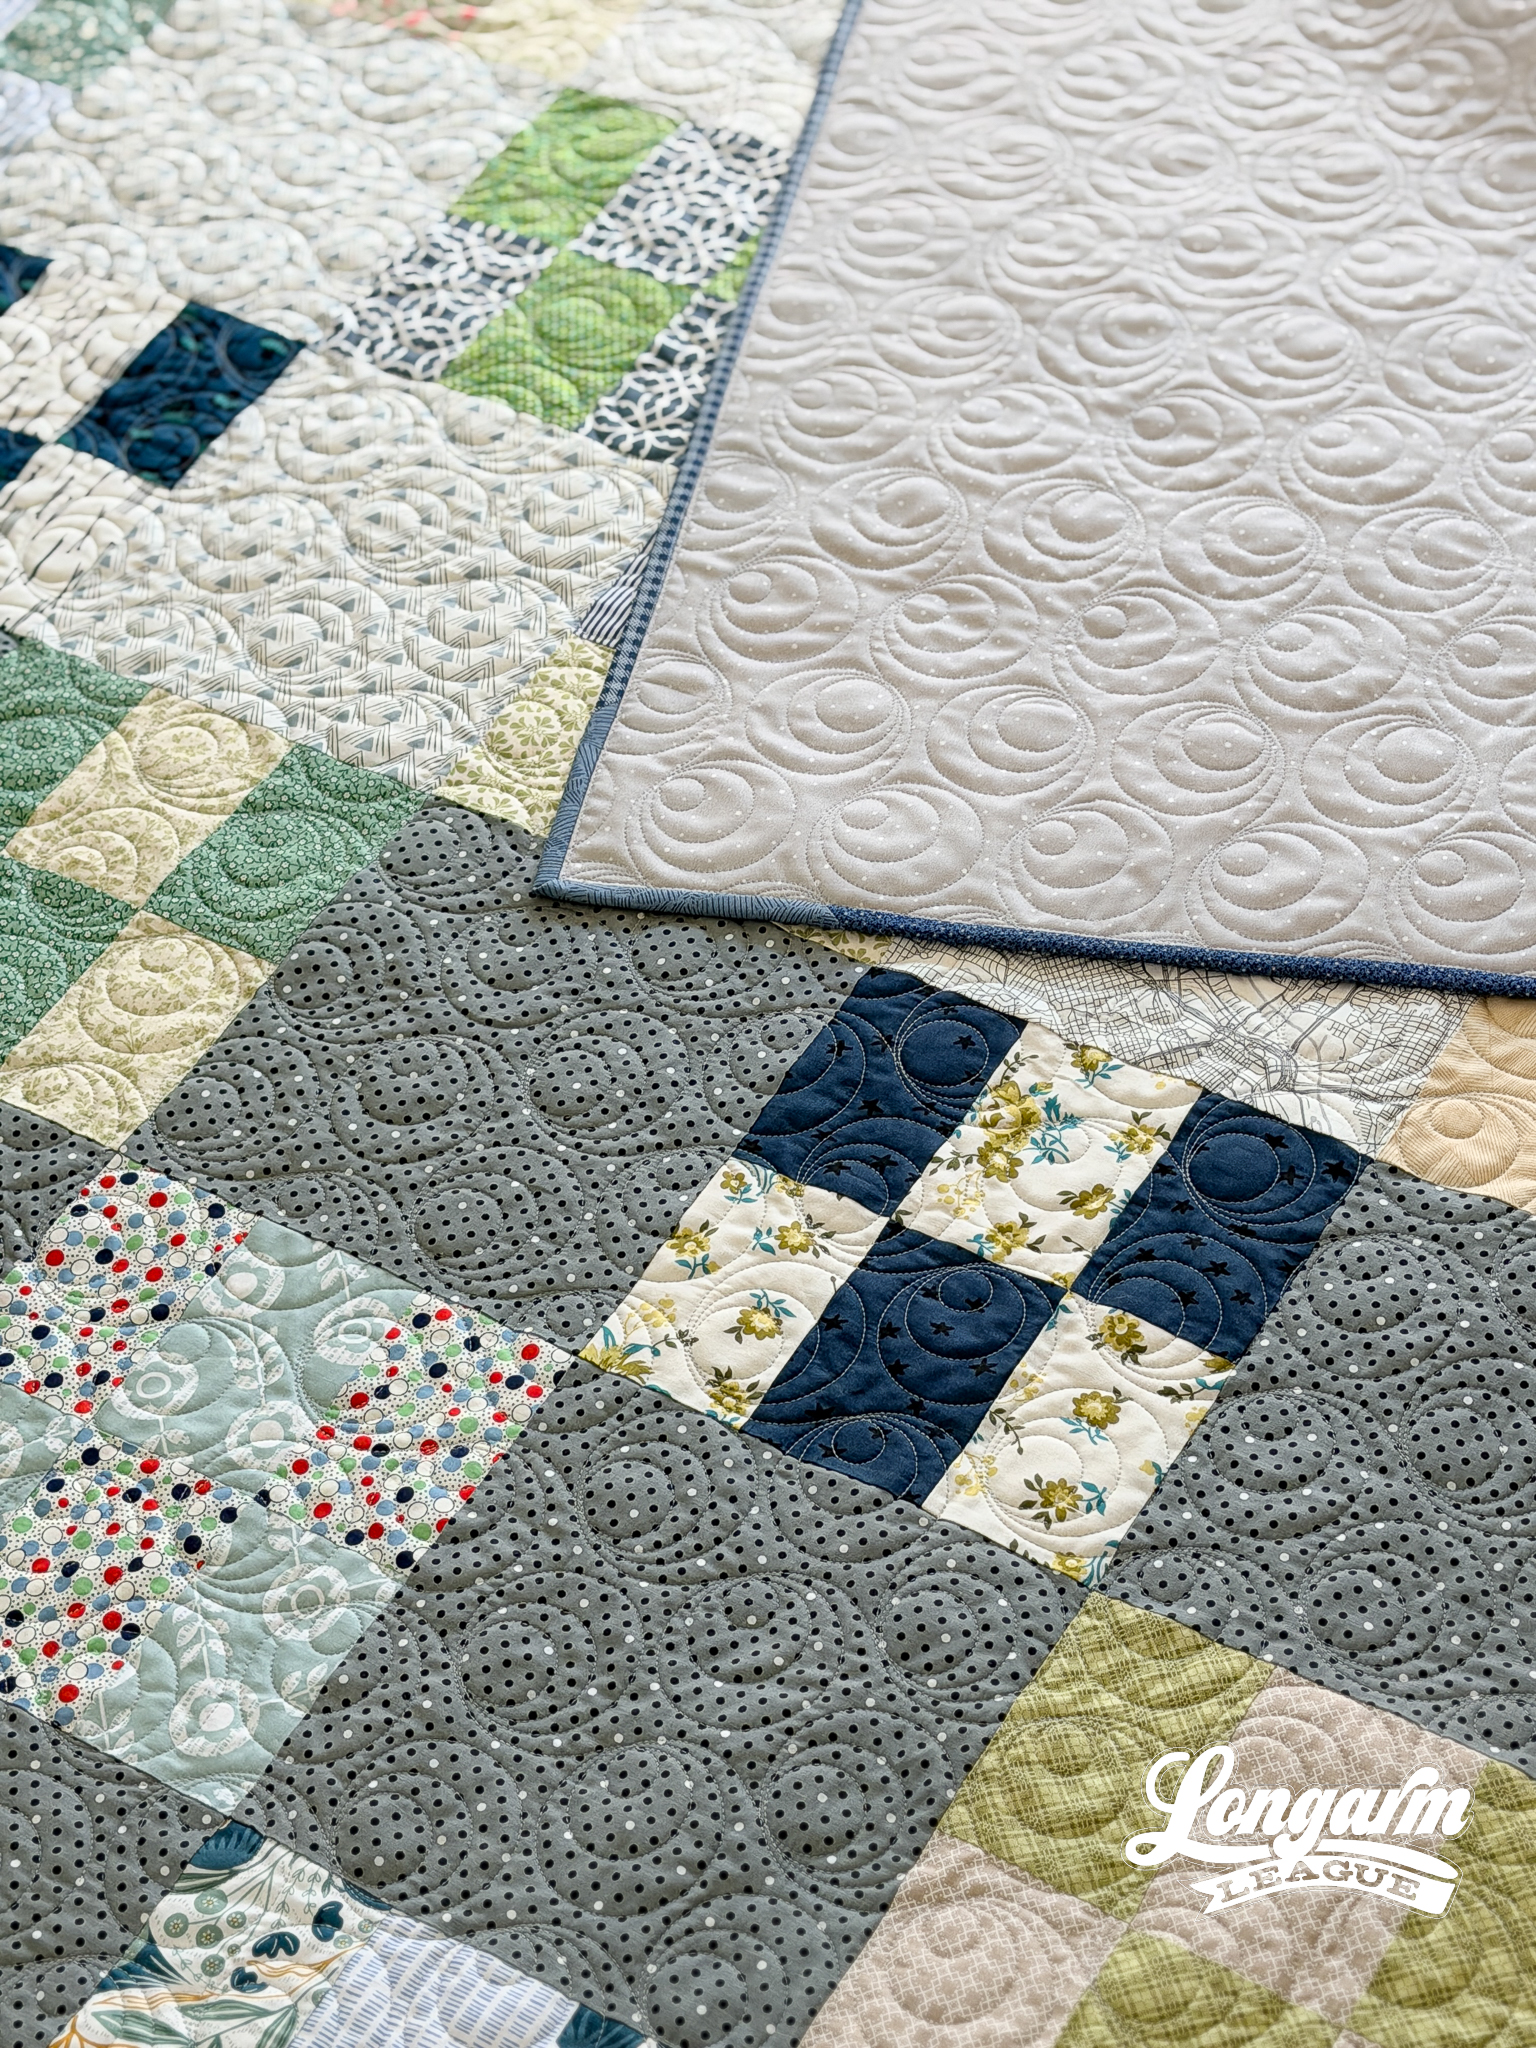
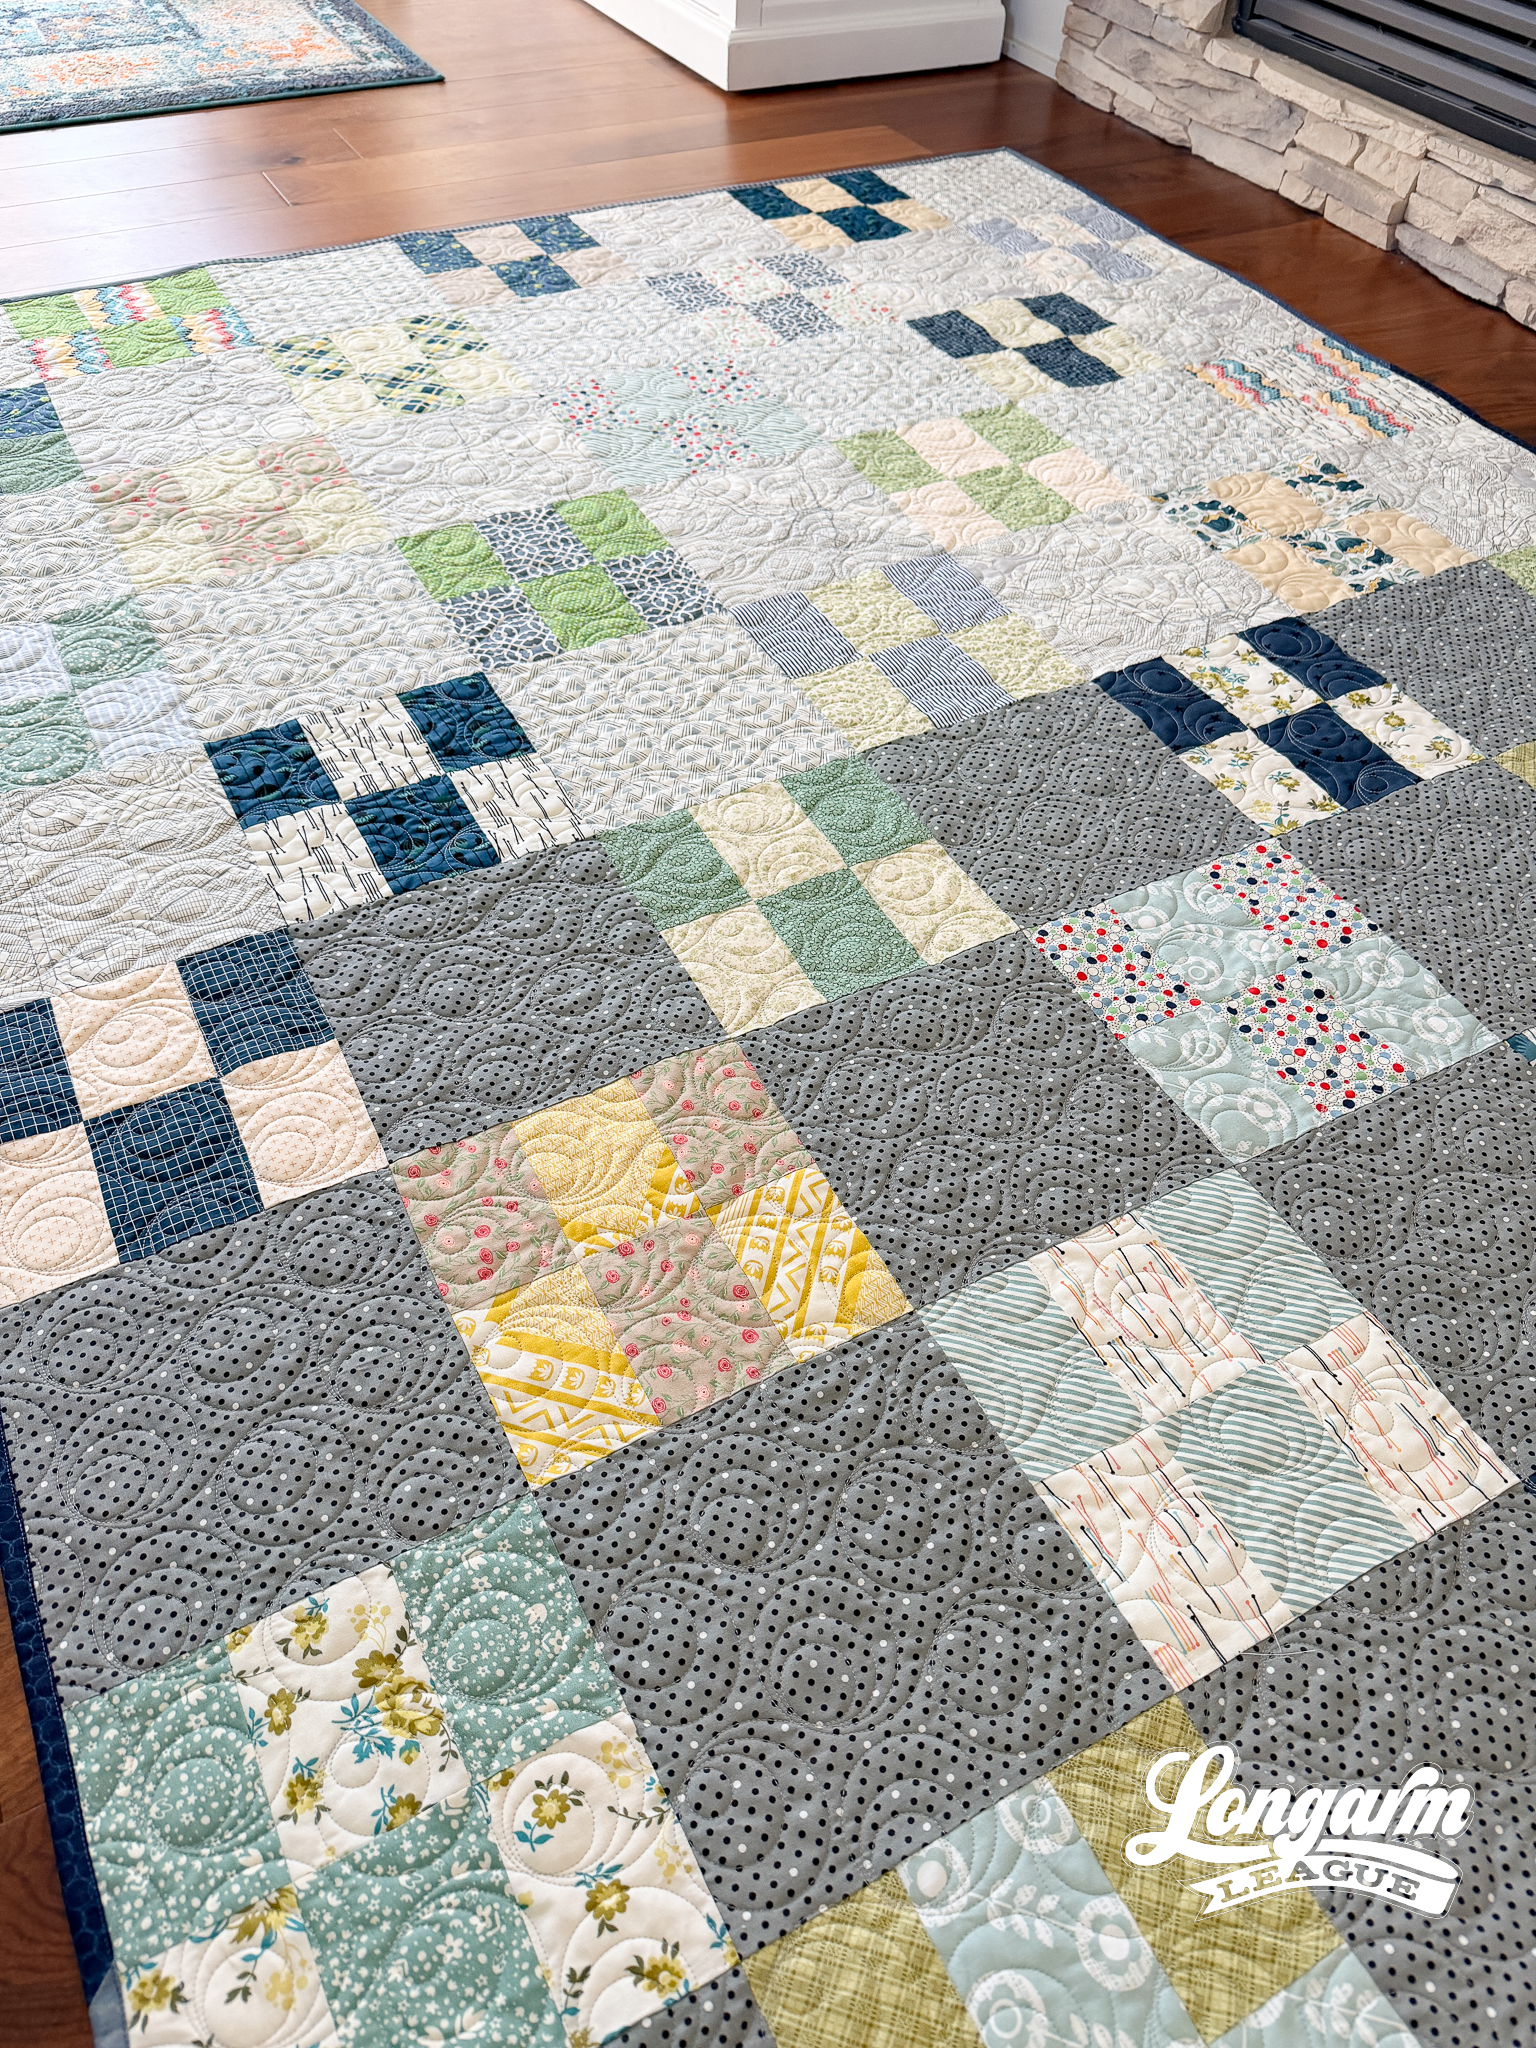
I love the quilt's unique layout, with light background squares at the top and dark background squares at the bottom. This fits perfectly with the fact that I'm apparently not a huge buyer of yardage anymore (as I struggle to find fabrics larger than a fat quarter on my shelves). Honestly, I let the amount of yardage I had influence my choice for the background squares.
I love how it turned out! It's funny how it all seems to work once all the fabrics are sewn together, and especially after it's quilted.
Backing
Silver Dapple Dots by Riley Blake for the win, AGAIN! I happily cut this off the roll purely for speed and efficiency. I love having a bolt of wide fabric that's so versatile. 
The Quilting Details
Difficulty Level
This design is easy to use. There is no offsetting, no backtracking, and it is easy to align. I intentionally didn't have the lines touch where the circles make laps around the center circle, but they are close enough together so it doesn't look too distracting.
If you'd like to view the stitch path, a short video is available at the top of the blog post.
Scale
You could go smaller or larger than what's shown on this quilt. I'm quite happy with the scale I selected for this quilt's size, which is bigger than a lap, smaller than a twin. The outer circles are about 2.5" in diameter at the scale I used. This makes the larger inner circle about 1.25" in diameter, and the largest space between "rings" is 7/8" apart.
Here are the sizing specifications for how I set up this quilt using my Intelliquilter (60" x 77" quilt size):
Row height: 3"
Gap: -1.348"
Pattern height: 4.348" (measurement from top to bottom of the repeat)
Offset: none
Backtracking: none
Here's a look at the included PDF: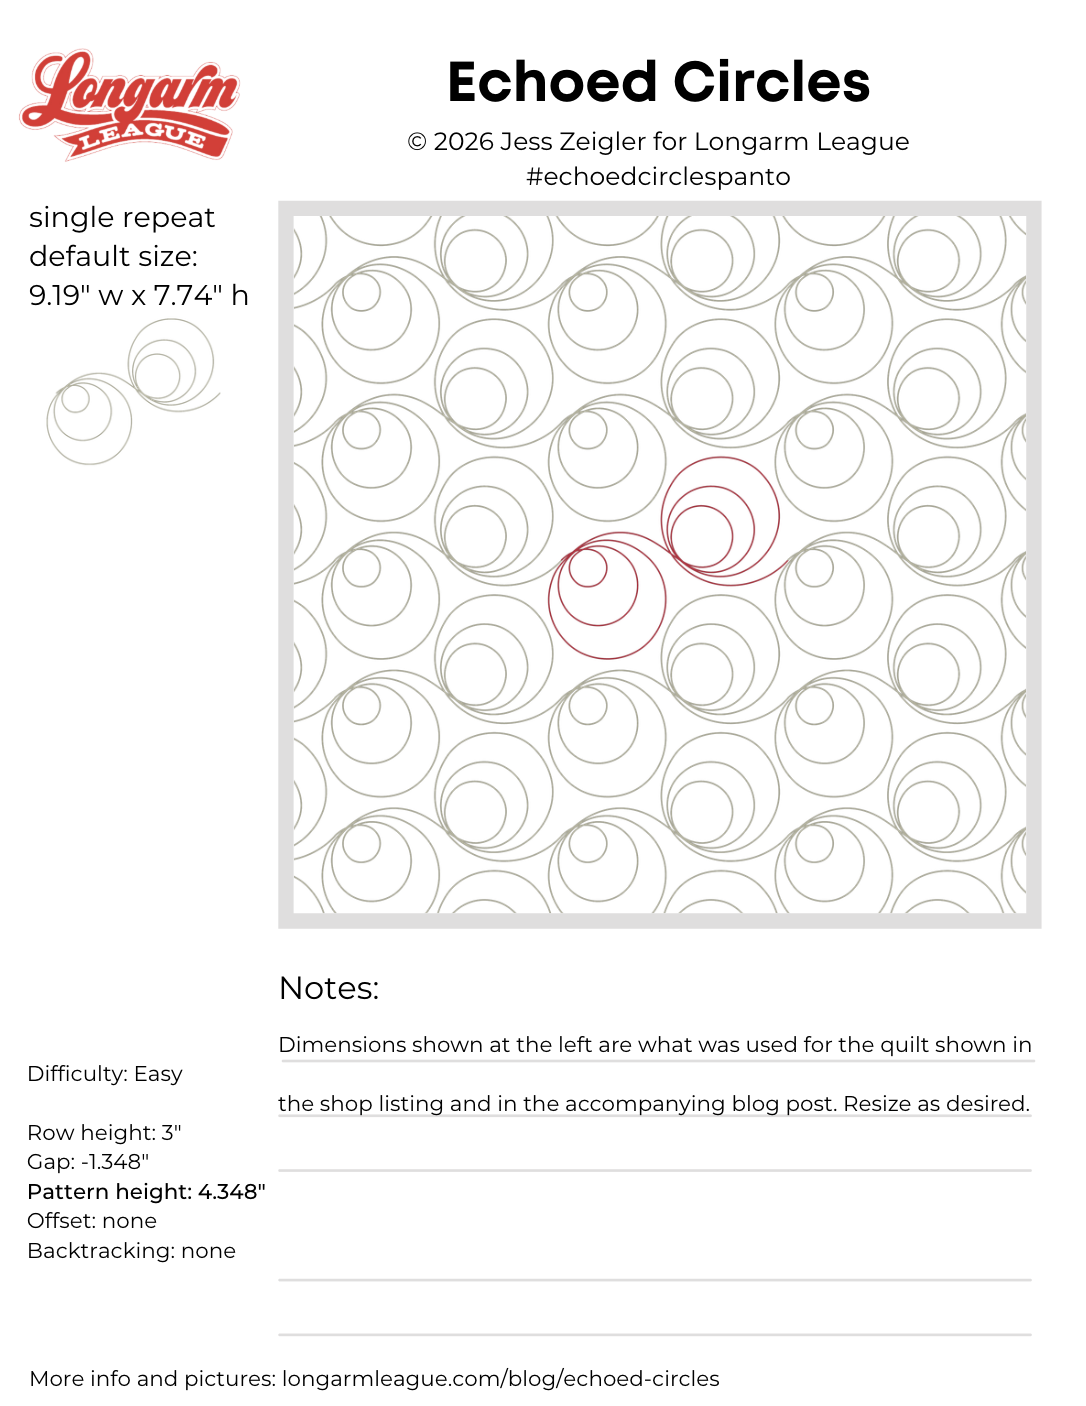
Interested in getting new digital pantograph designs like this one on the day they're released (and at a deep discount)? Sign up for our Digital Panto Club and get them delivered directly to your inbox on the first Wednesday of each new month.

Jess Zeigler
Longarm League Commish & Owner of Threaded Quilting Studio, LLC.


