
ESL Digital Pantograph Design for Edge-to-Edge Quilting
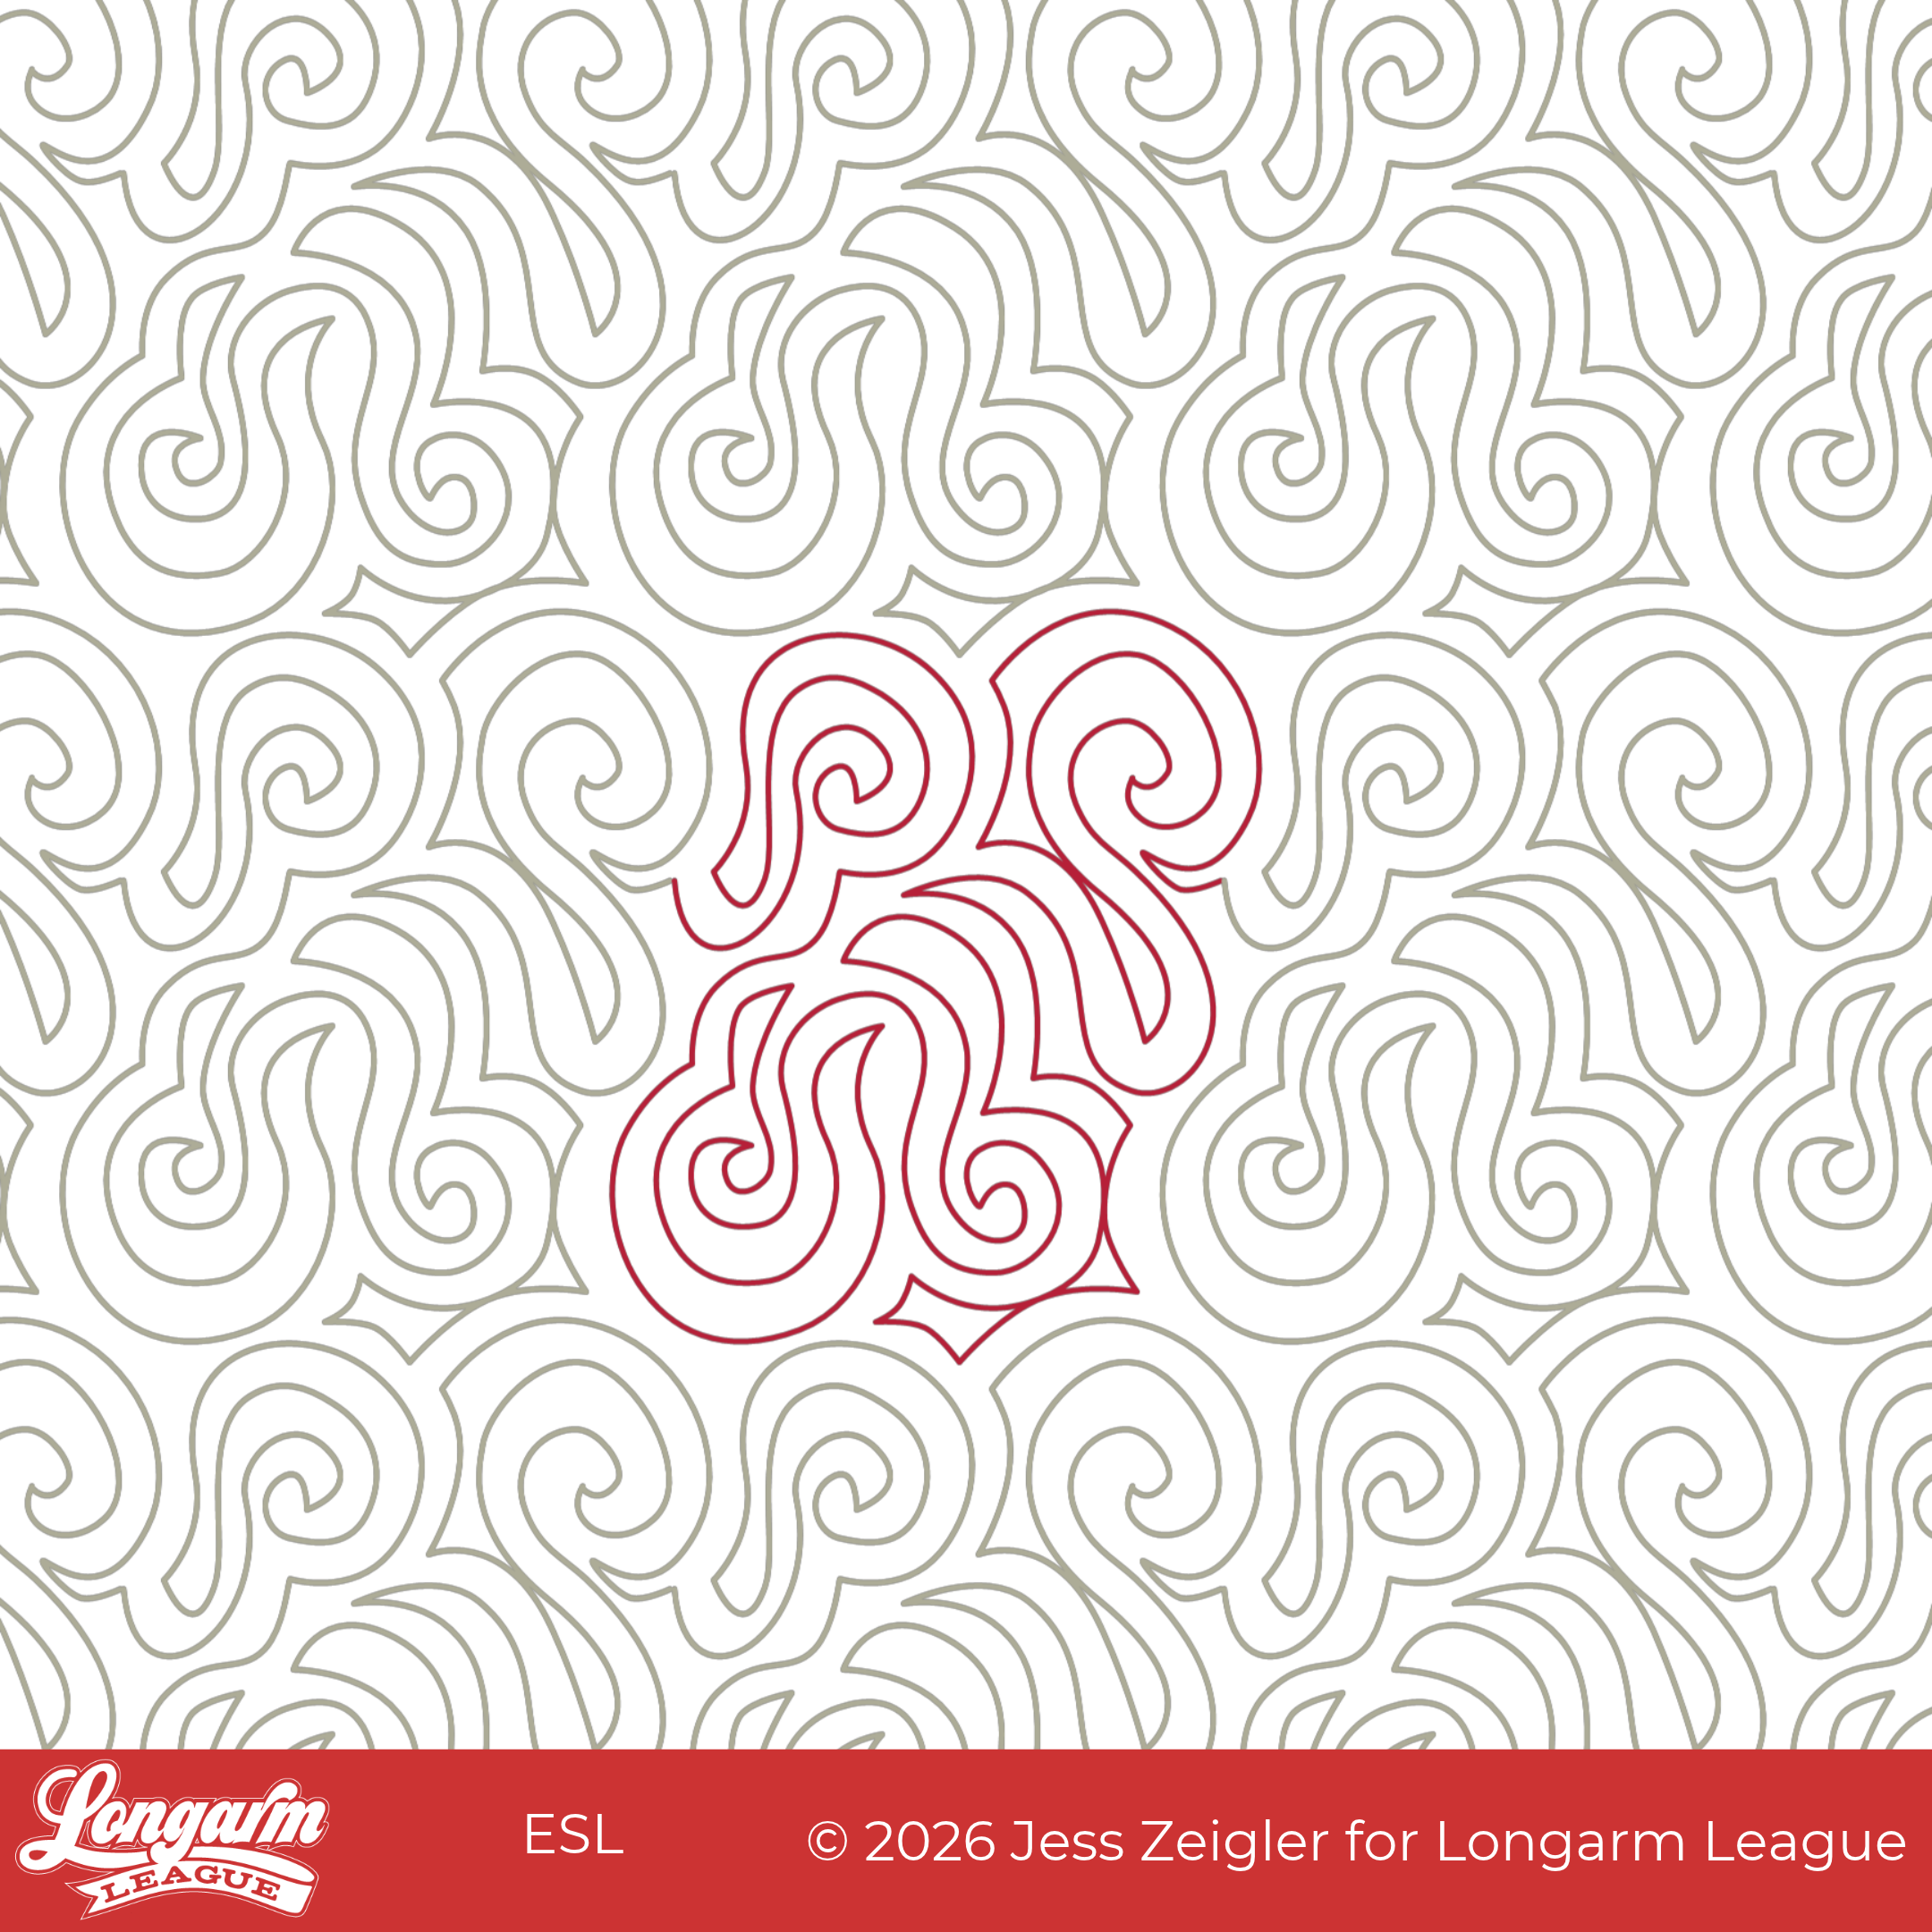
ESL is the whole name for this design, but between you and me, it stands for Echoed Swirls Lite. This quilt represents so much joy; I can't wait to tell you about it!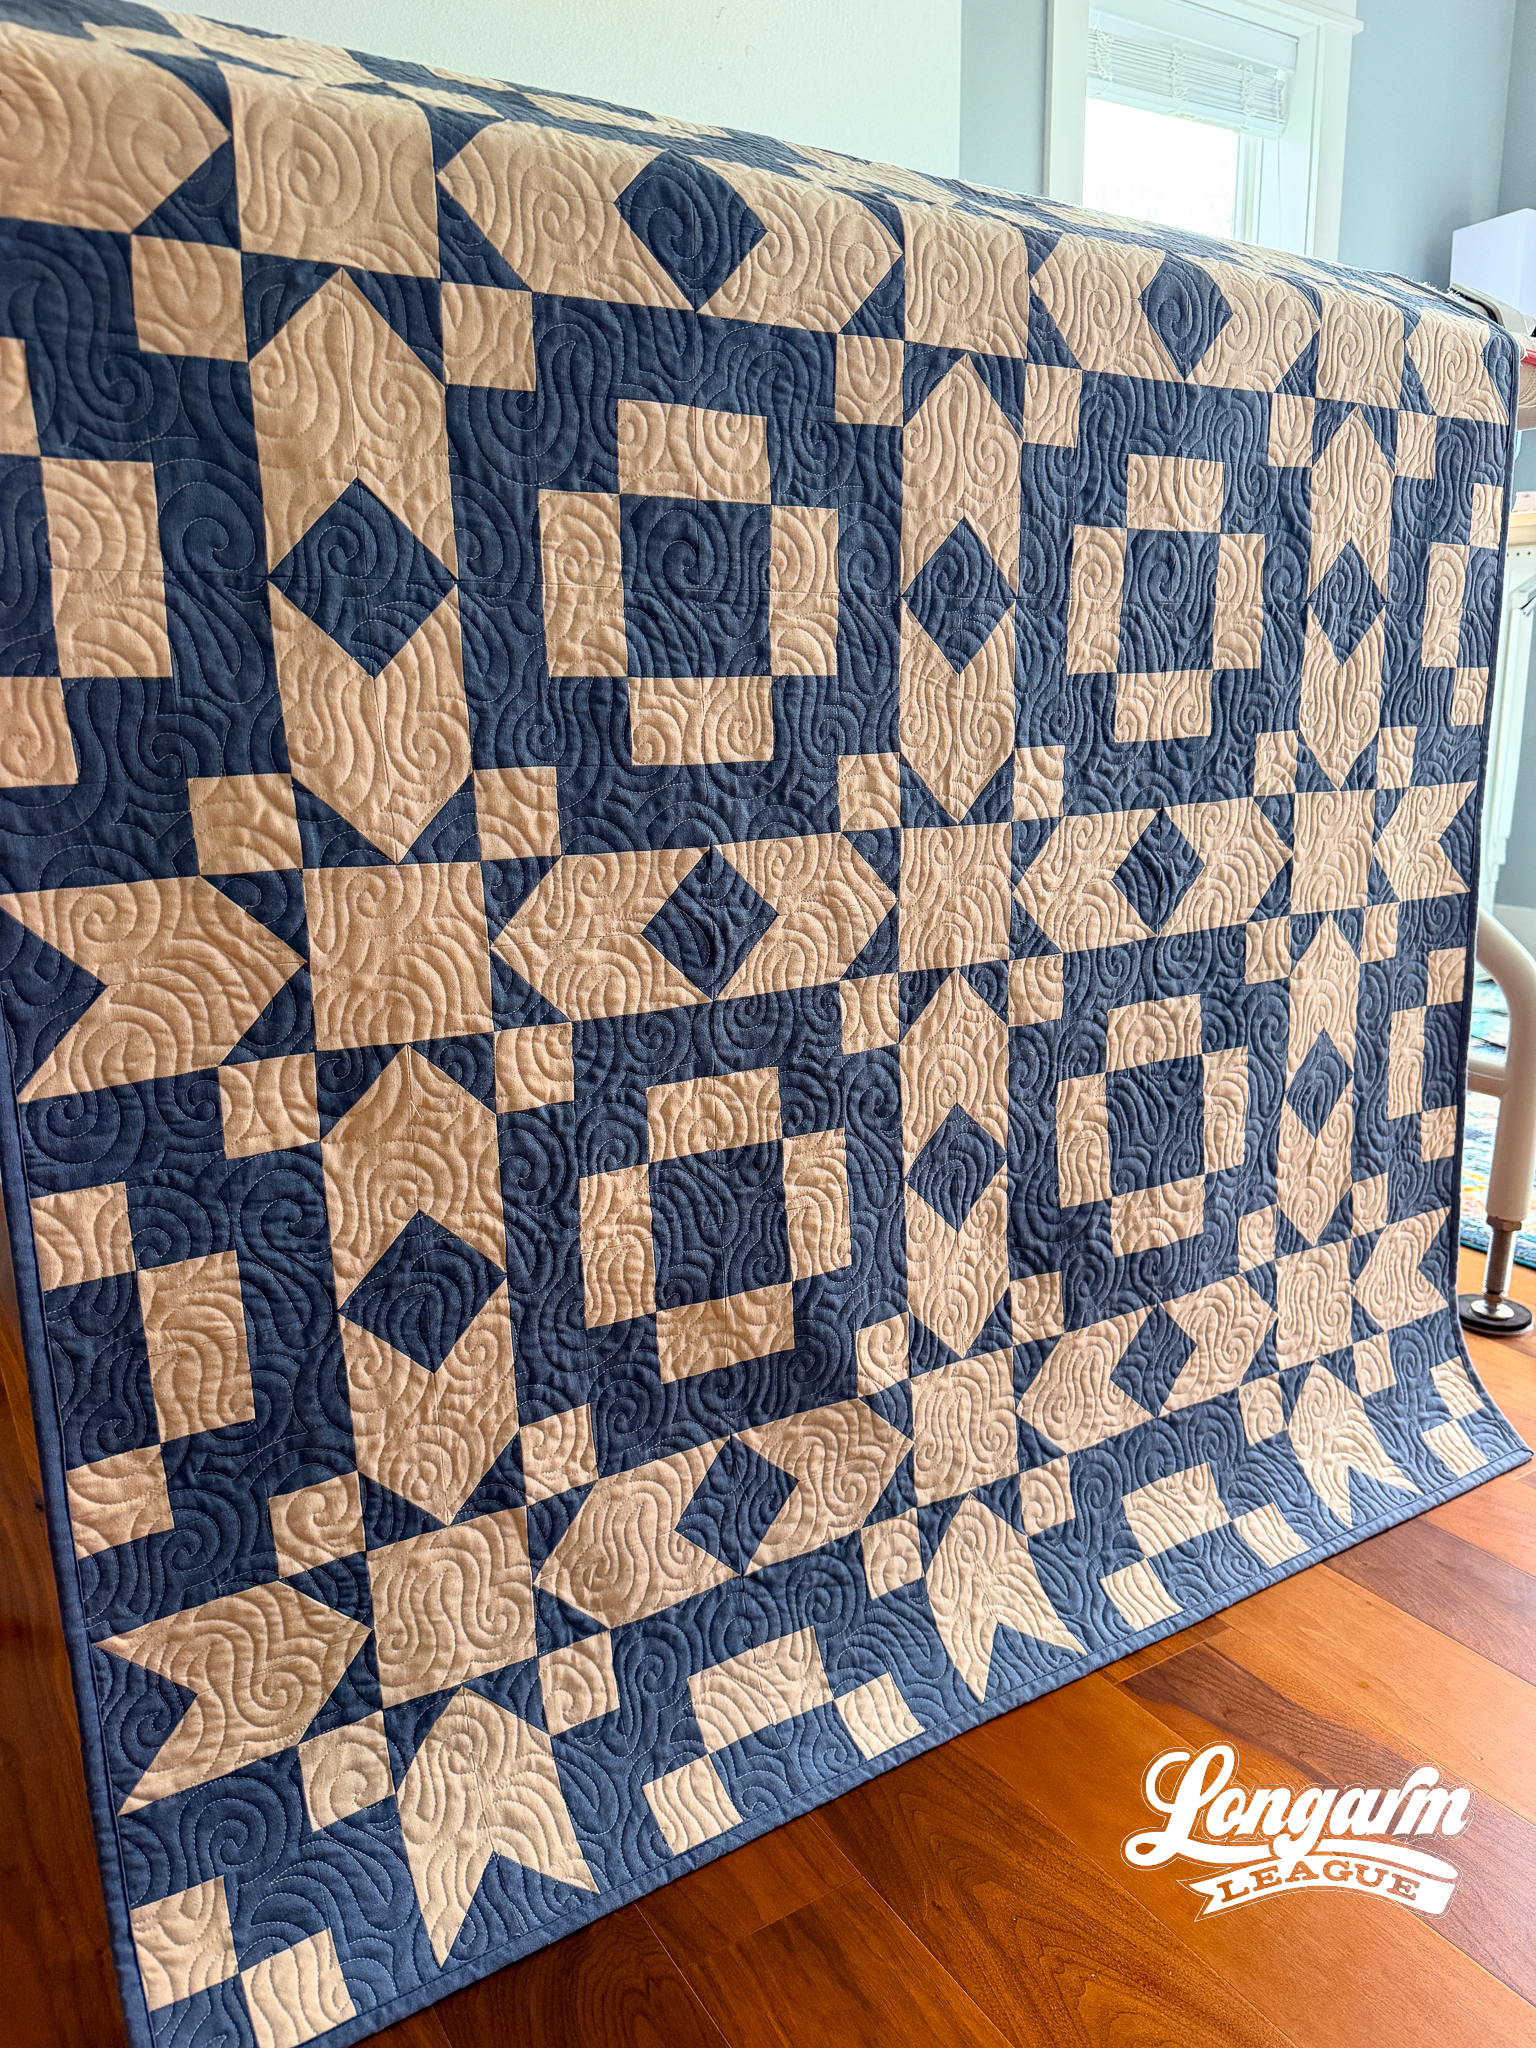
Two weeks ago, Team Longarm League was heading out to our annual retreat in the Kansas City area.
The retreat was our best yet! I think it helps that so many people were returning. We know each other better; we're getting to meet new folks, too. Retreaters know the pace and what to expect. It all felt very relaxed and fun.
As the days went on, sewing and snackin', my friend Emily Hoppe, who was sitting in the same sewing pod as I was, mentioned she had a panto request. She said she loves the look of my Echoed Swirls design, but sometimes she doesn't want the density that comes with it. She said that because it's already sized pretty large, it's tough to scale it up even larger to make it less dense.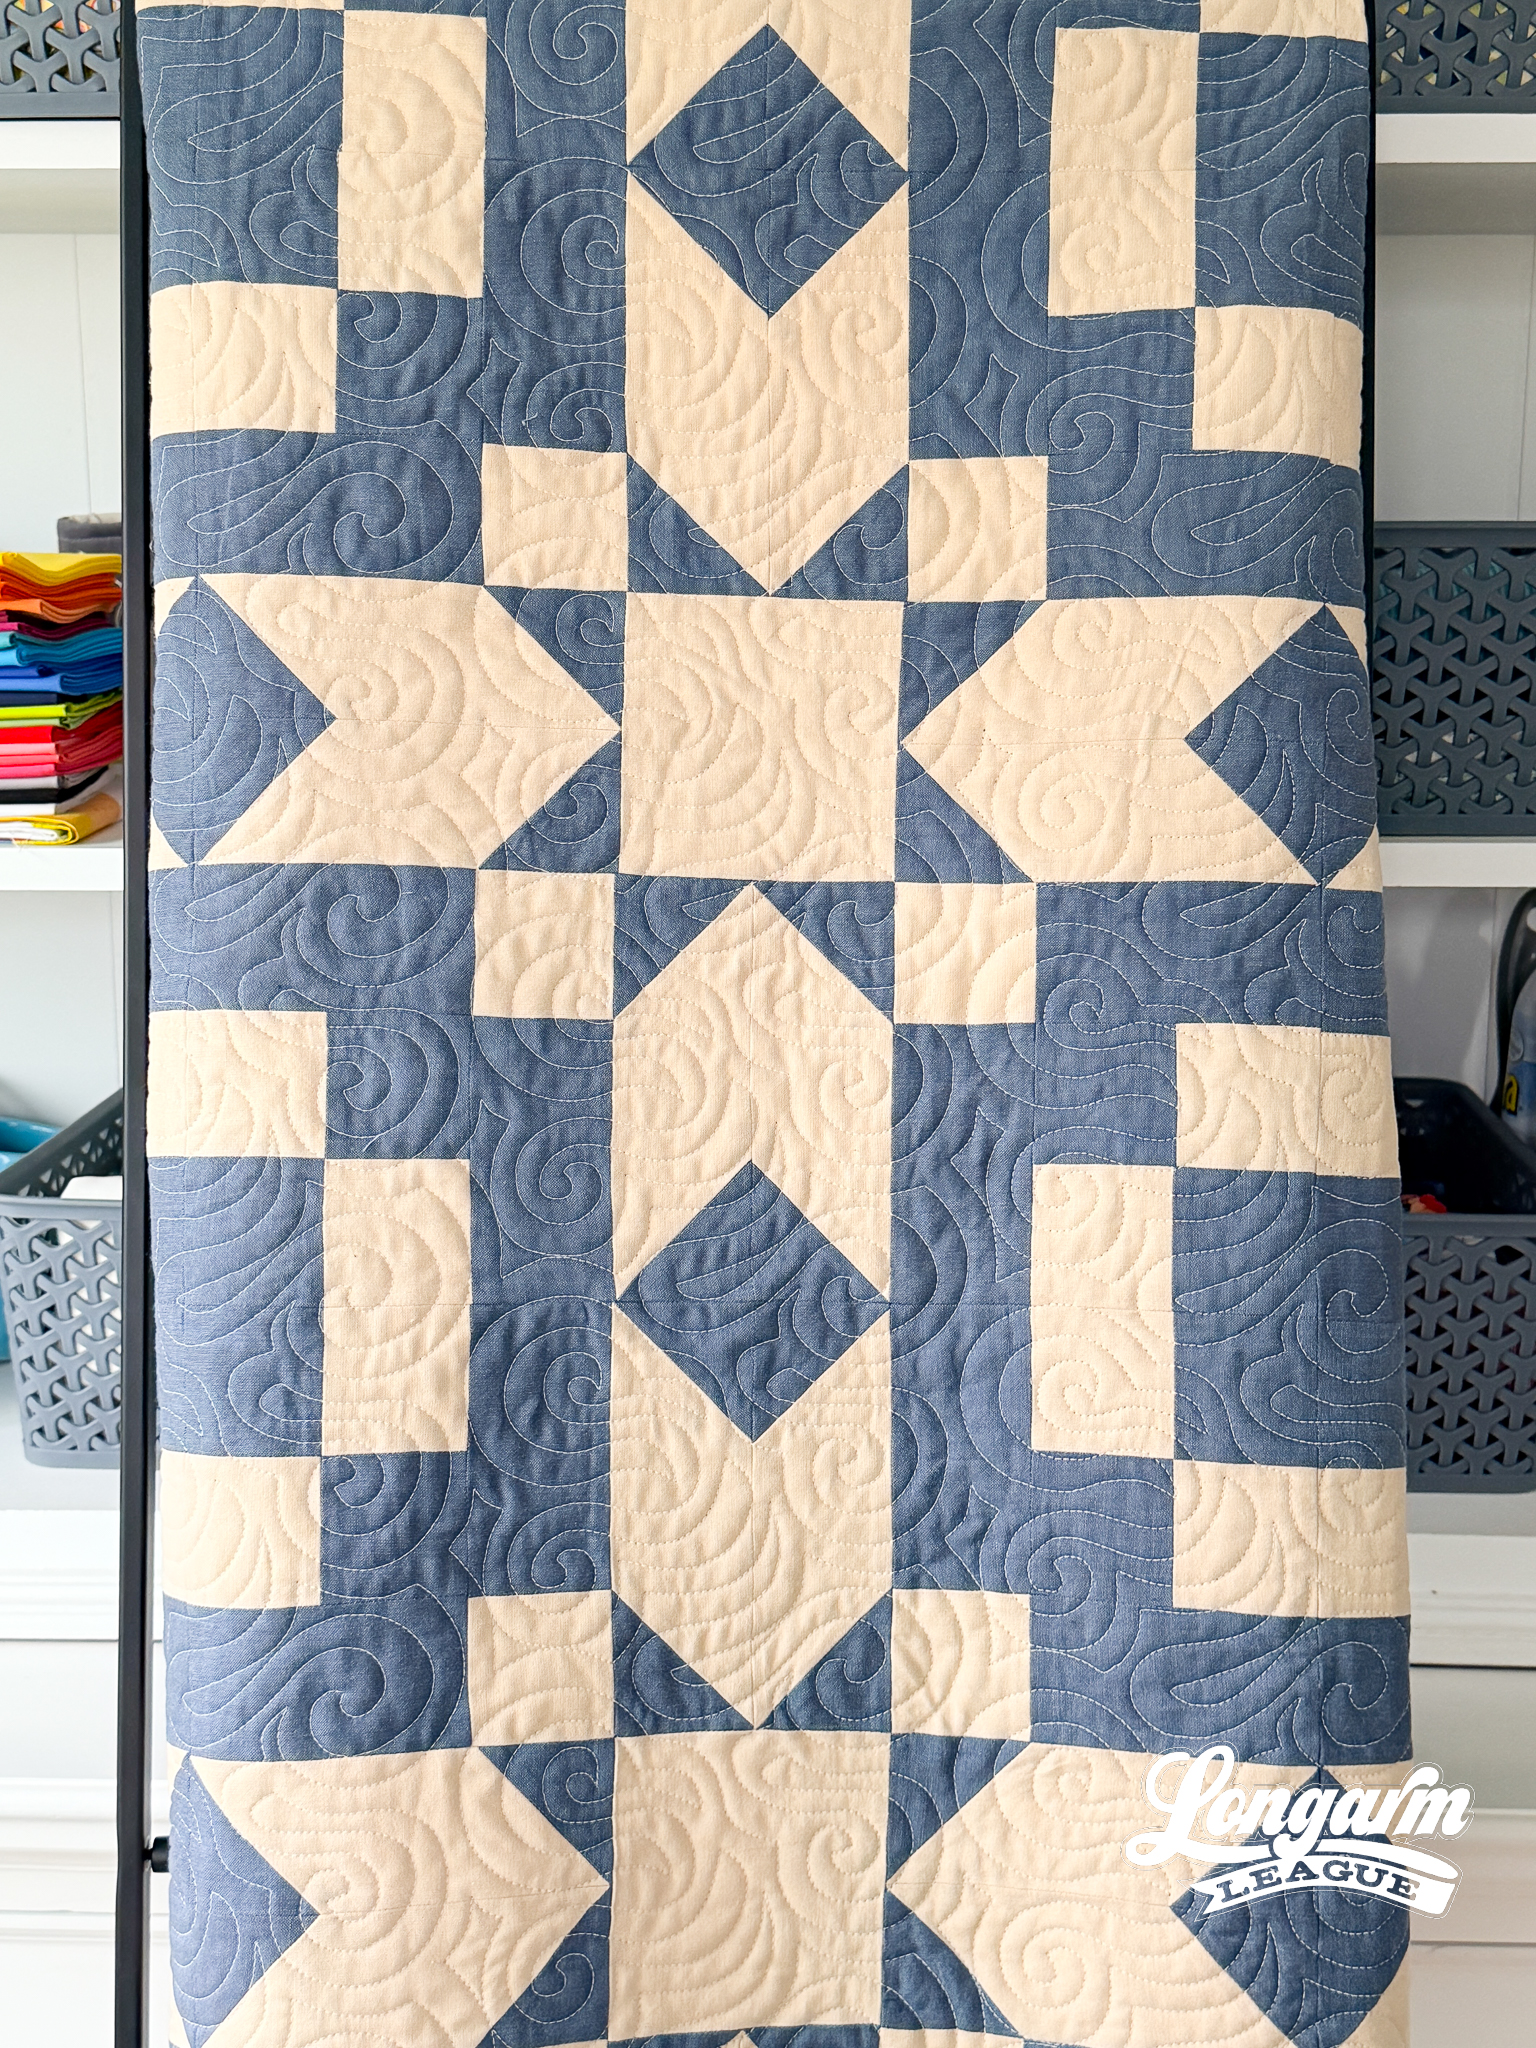
Echoed Swirls was among the first batch of designs I released ever, so I knew that if I took a crack at the design again, I'd have much more experience to draw on and could deliver something like she was describing.
Back then, a priority of mine was translating designs I had free-motion quilted into repeatable digital pantographs. My hand-guiding was super-dense, so naturally, I wanted the digital equivalent to be dense too. I wanted it to have enough swirls so the design looked varied enough that someone would have to look closely to tell whether it was computerized or hand-guided.
So I packed the swirls in. The repeats were larger diamonds that nested deeply from row to row—again, I didn't want the rows to show in a traditional way, so this is how I obscured them. Then I went on with my life and didn't think much more about it.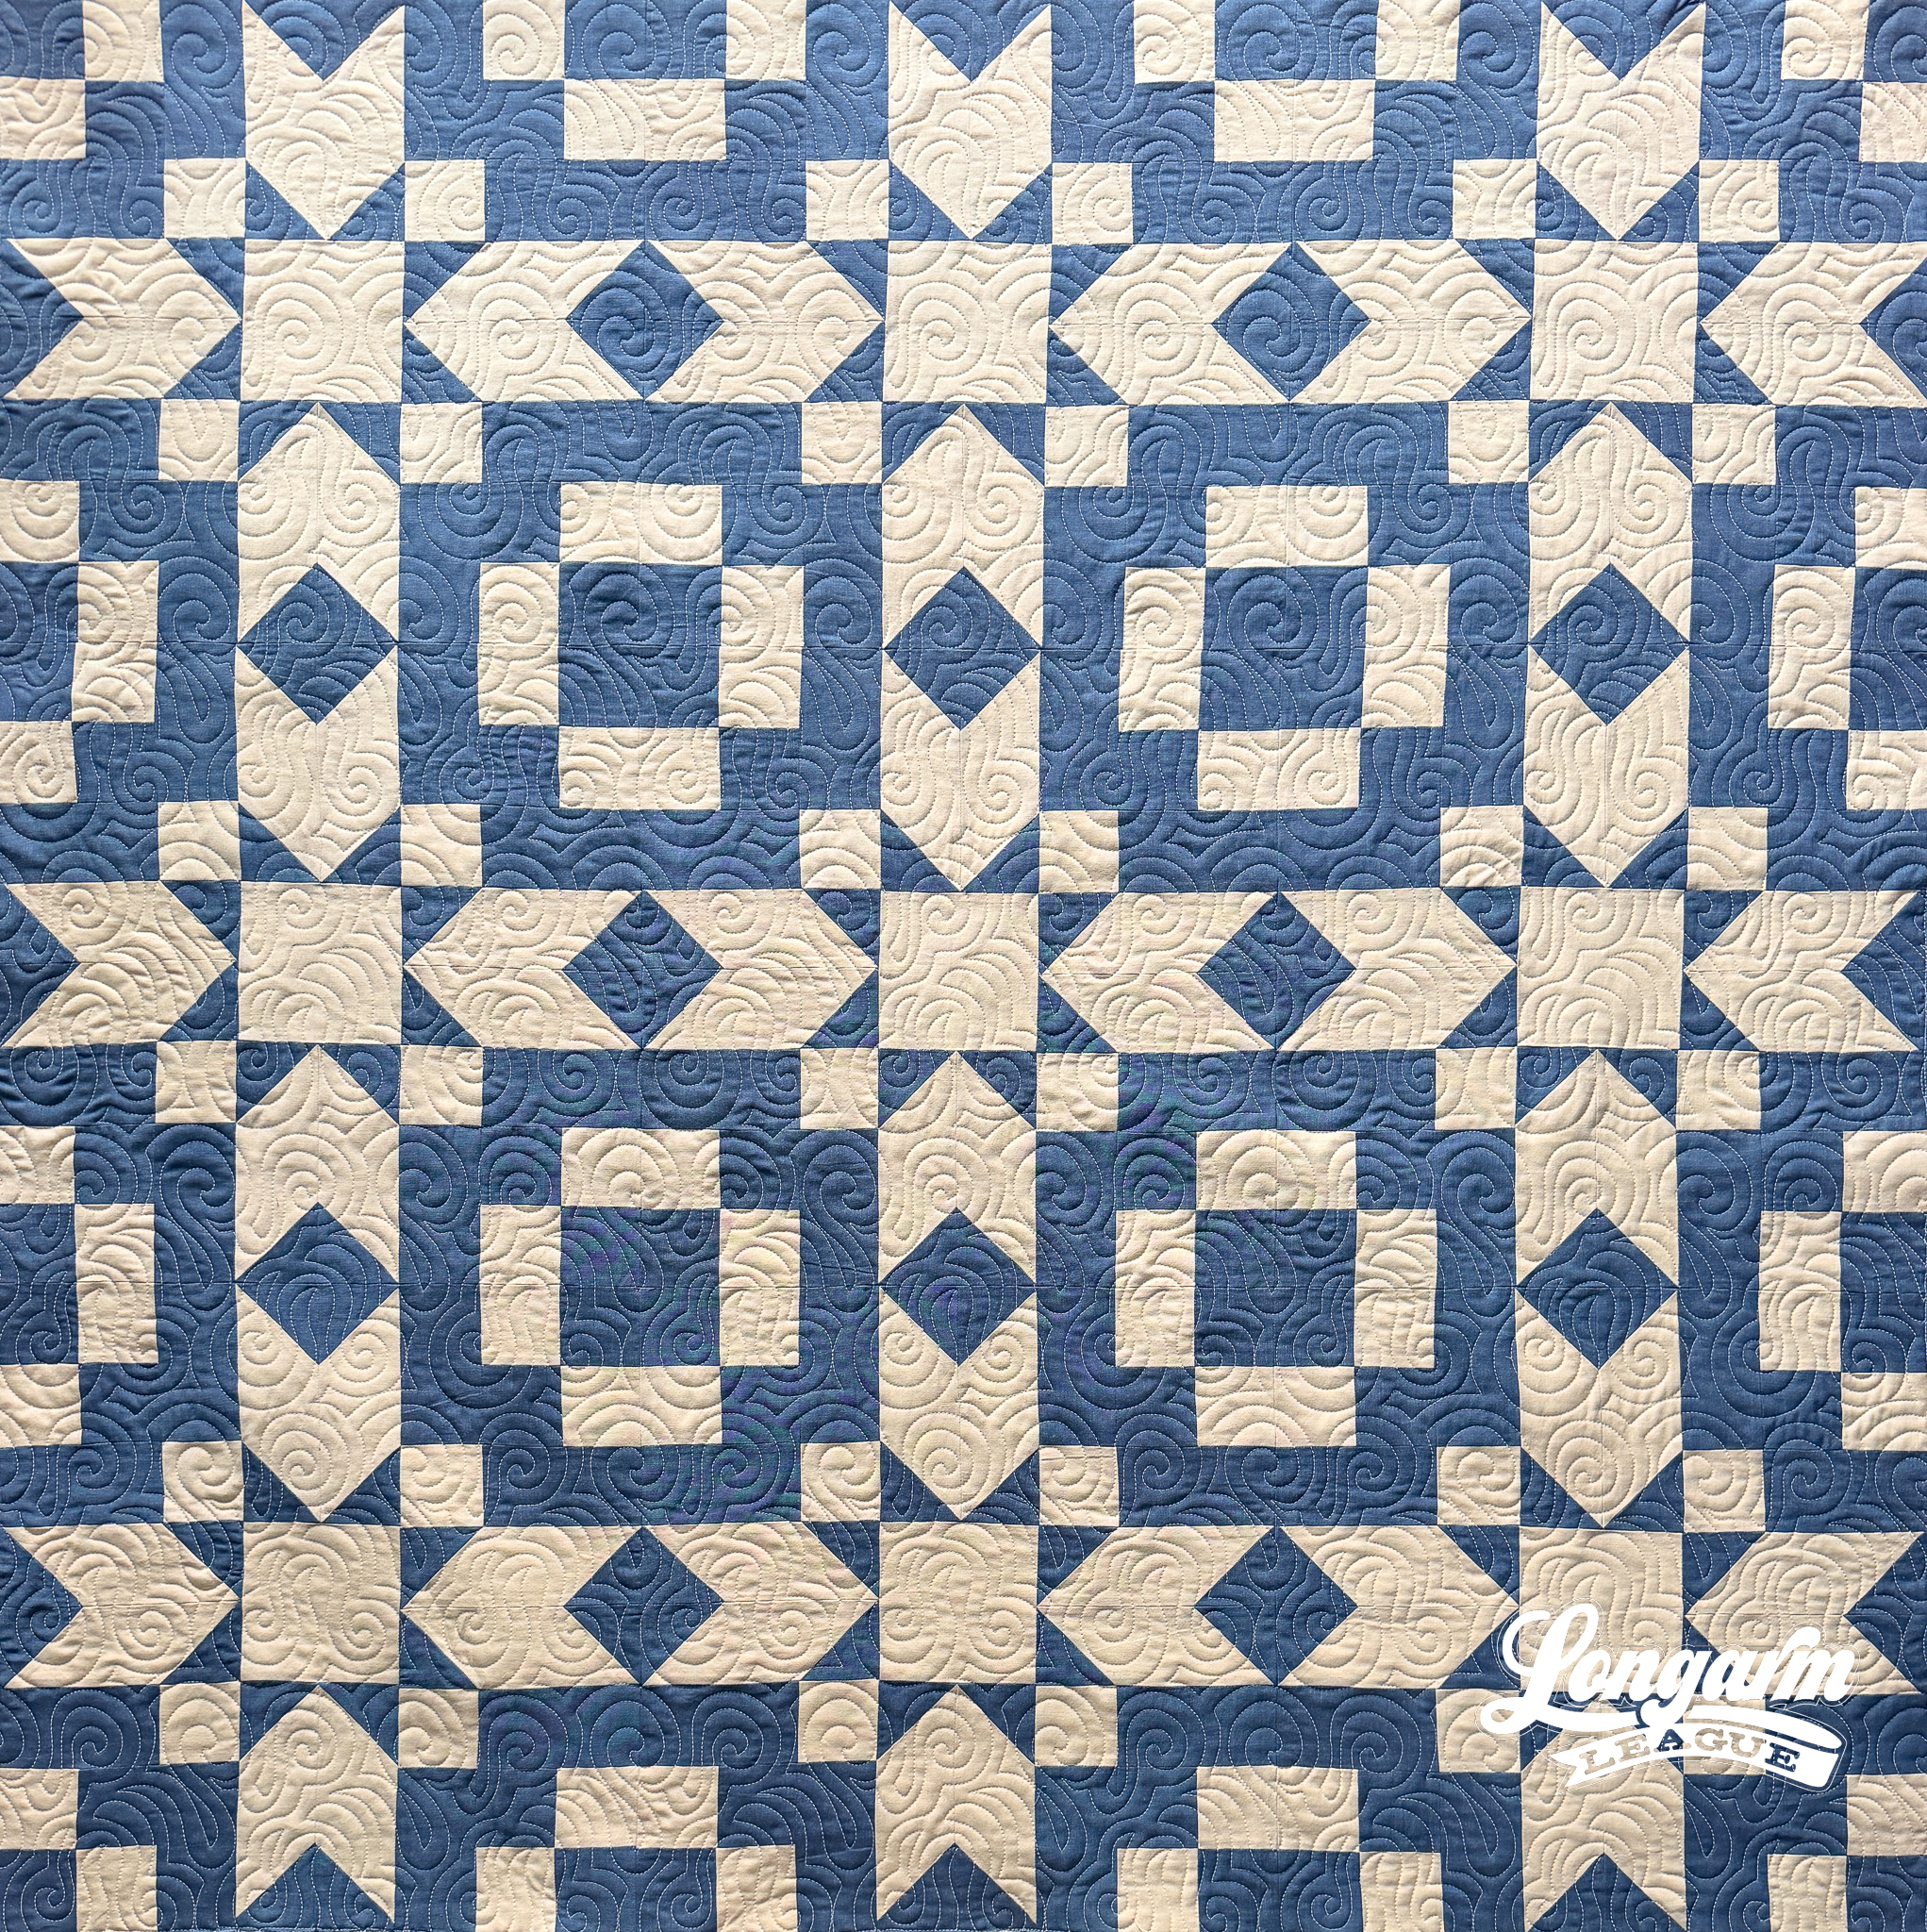
But Emily made a really good point. Sometimes you want the fast and simple option. When I got home from retreat, I revisited the Echoed Swirls design. I opened a copy in my design software and started deleting lines. I worked this way for a while, then thought it'd be even easier to start from scratch. 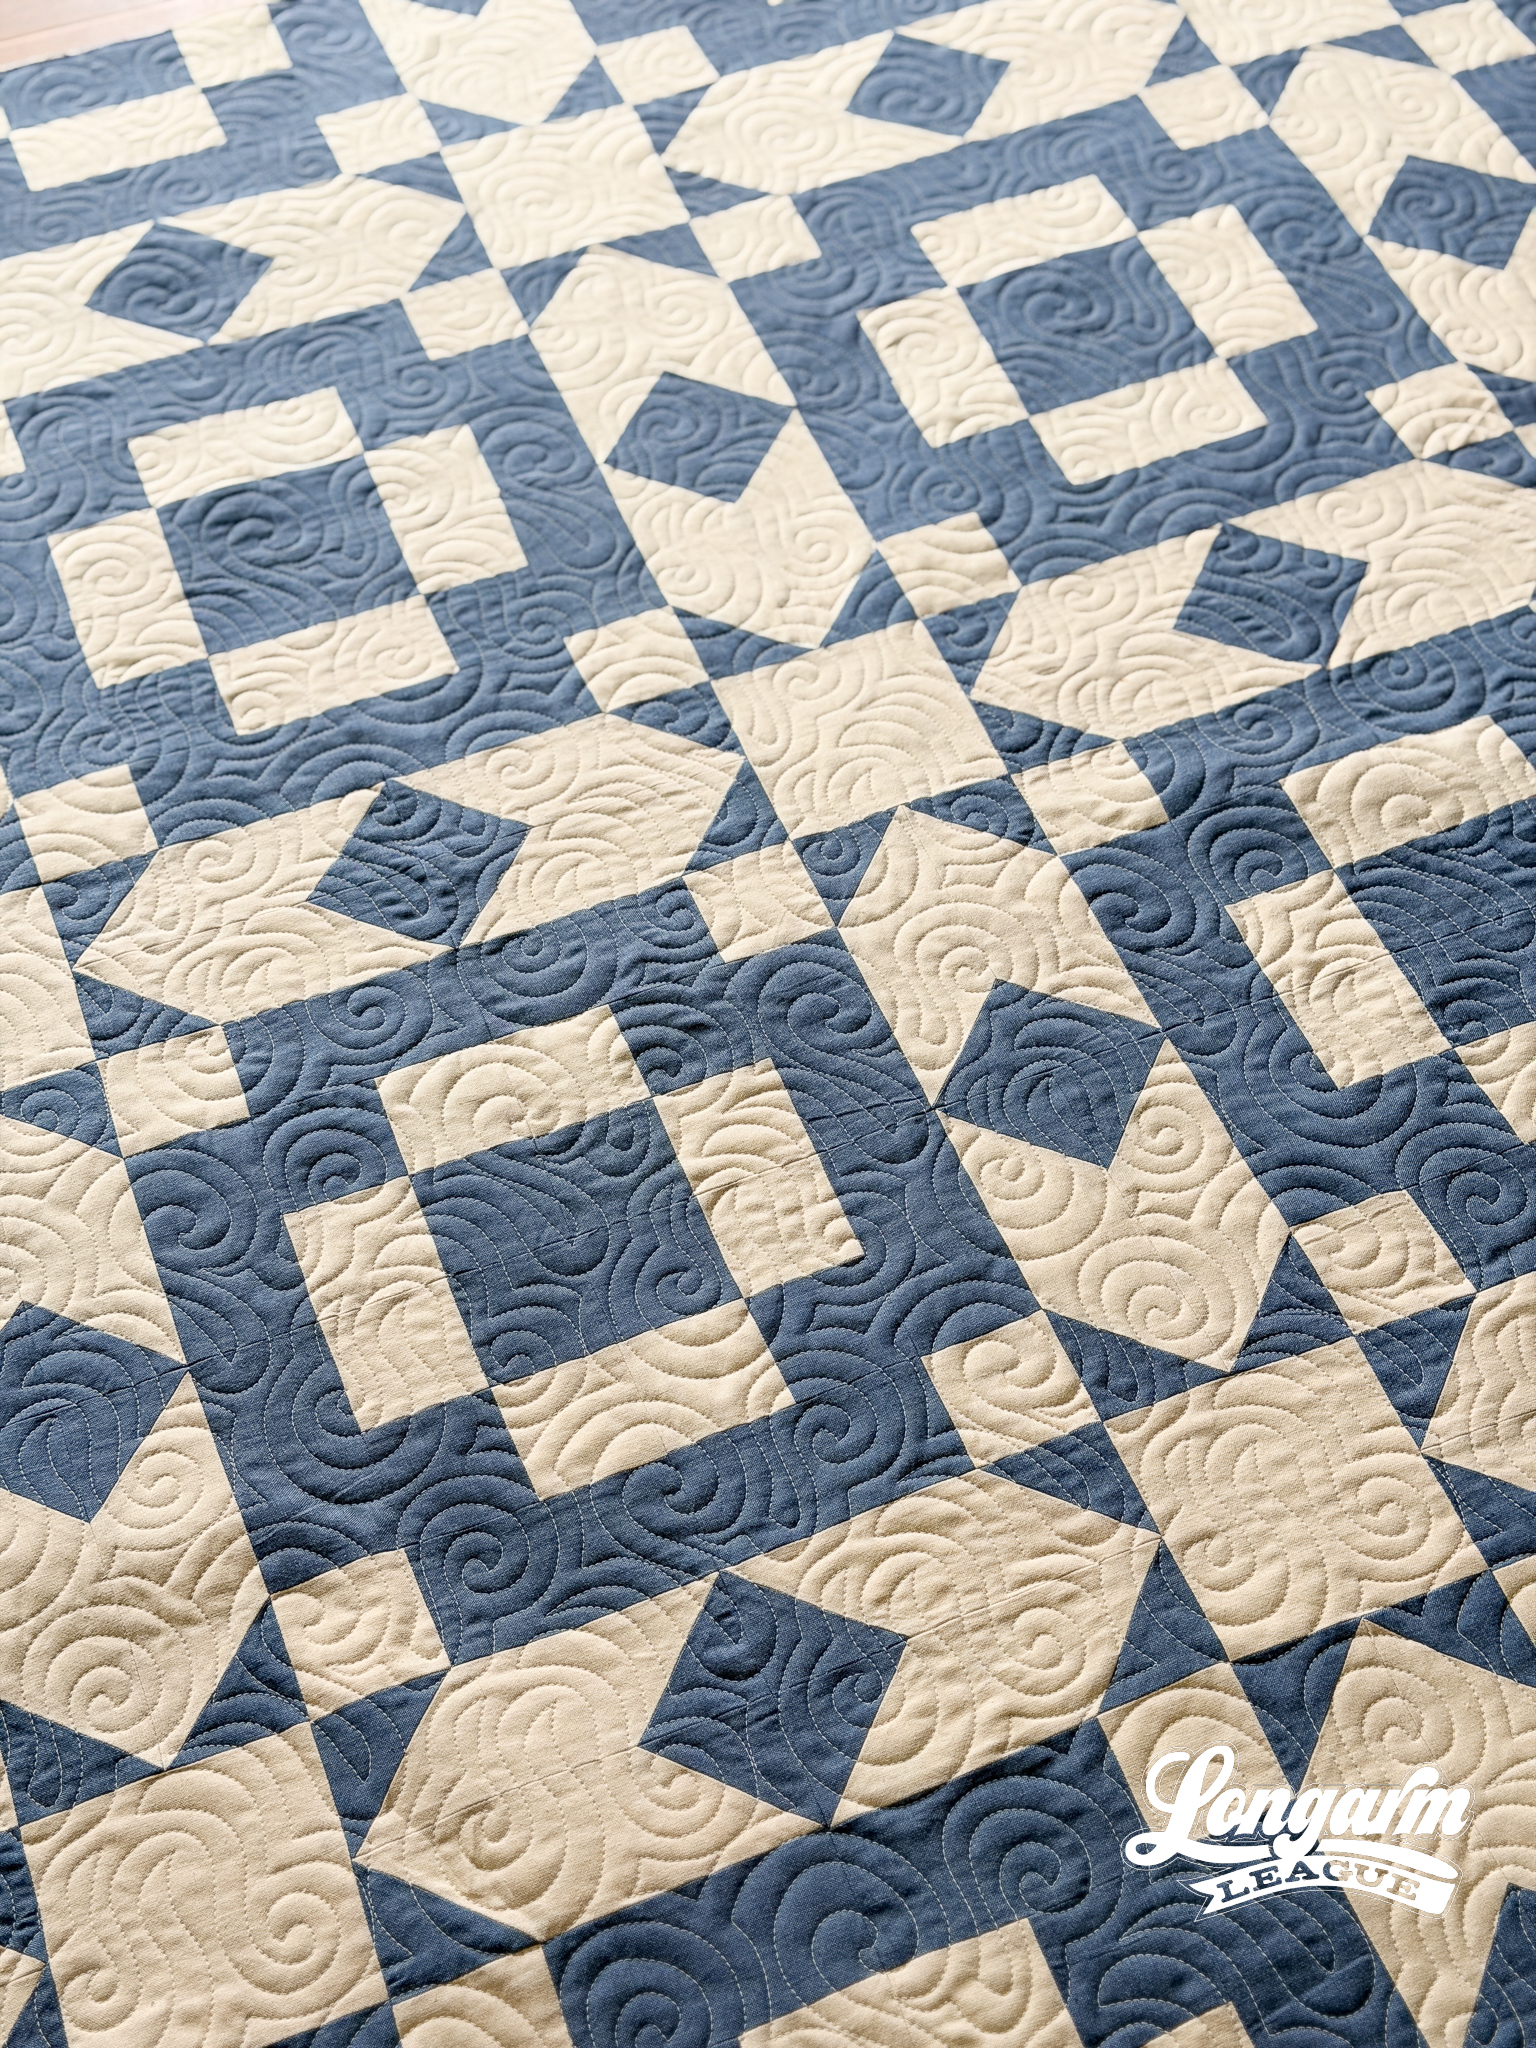
I opened the Graphic app on my iPad and started sketching. I made the design even simpler. I brought the hand-drawn sketch into my design software and kept deleting lines. I aimed to have the swirls branch out in different directions, but I soon realized that it would be great if the repeat didn't even have to be offset like the original.
I kept tweaking lines and simplifying the repeats. I got down to about six main swirls (down from ten in the original) with variety in how they traveled, and then I got rid of two more swirls! I finally reached the point where the rows would nest while still appearing disguised, and no offsetting was necessary! Huzzah!
The Quilt
Quilt Pattern
This section of the story starts with me scrolling Instagram. Not super exciting, not the most inspiring place to begin a tale, I know! It was sometime last year. I follow Jana Anderson, whose Instagram account is Nighthawk_Quilting. She's been a member of the Longarm League for the last several years.
I noticed that Miss Jana started posting about a quilt pattern that she designed and wrote. You know that I love a star quilt, so I made a mental note to return to her pattern called Twilight Spark. Jana shared it several times over the last year, and each time, it made me more excited to sew it!
Cut to "retreat season" (I'm lucky enough to go to two back-to-back retreats in the fall), and I remembered it! I purchased the PDF with enthusiasm and, wanting to keep it simple, followed the two-tone version laid out in her pattern.
I'm a rule-follower, so I read through the pattern first before I started cutting the fabric. I became even more excited to see the techniques she used to form the stars and the blocks. I didn't realize it at the time, but it really was perfect for sewing at a retreat, especially one I was hosting where interruptions are the norm. It was so easy to make the same units over and over again, then look up and be done! 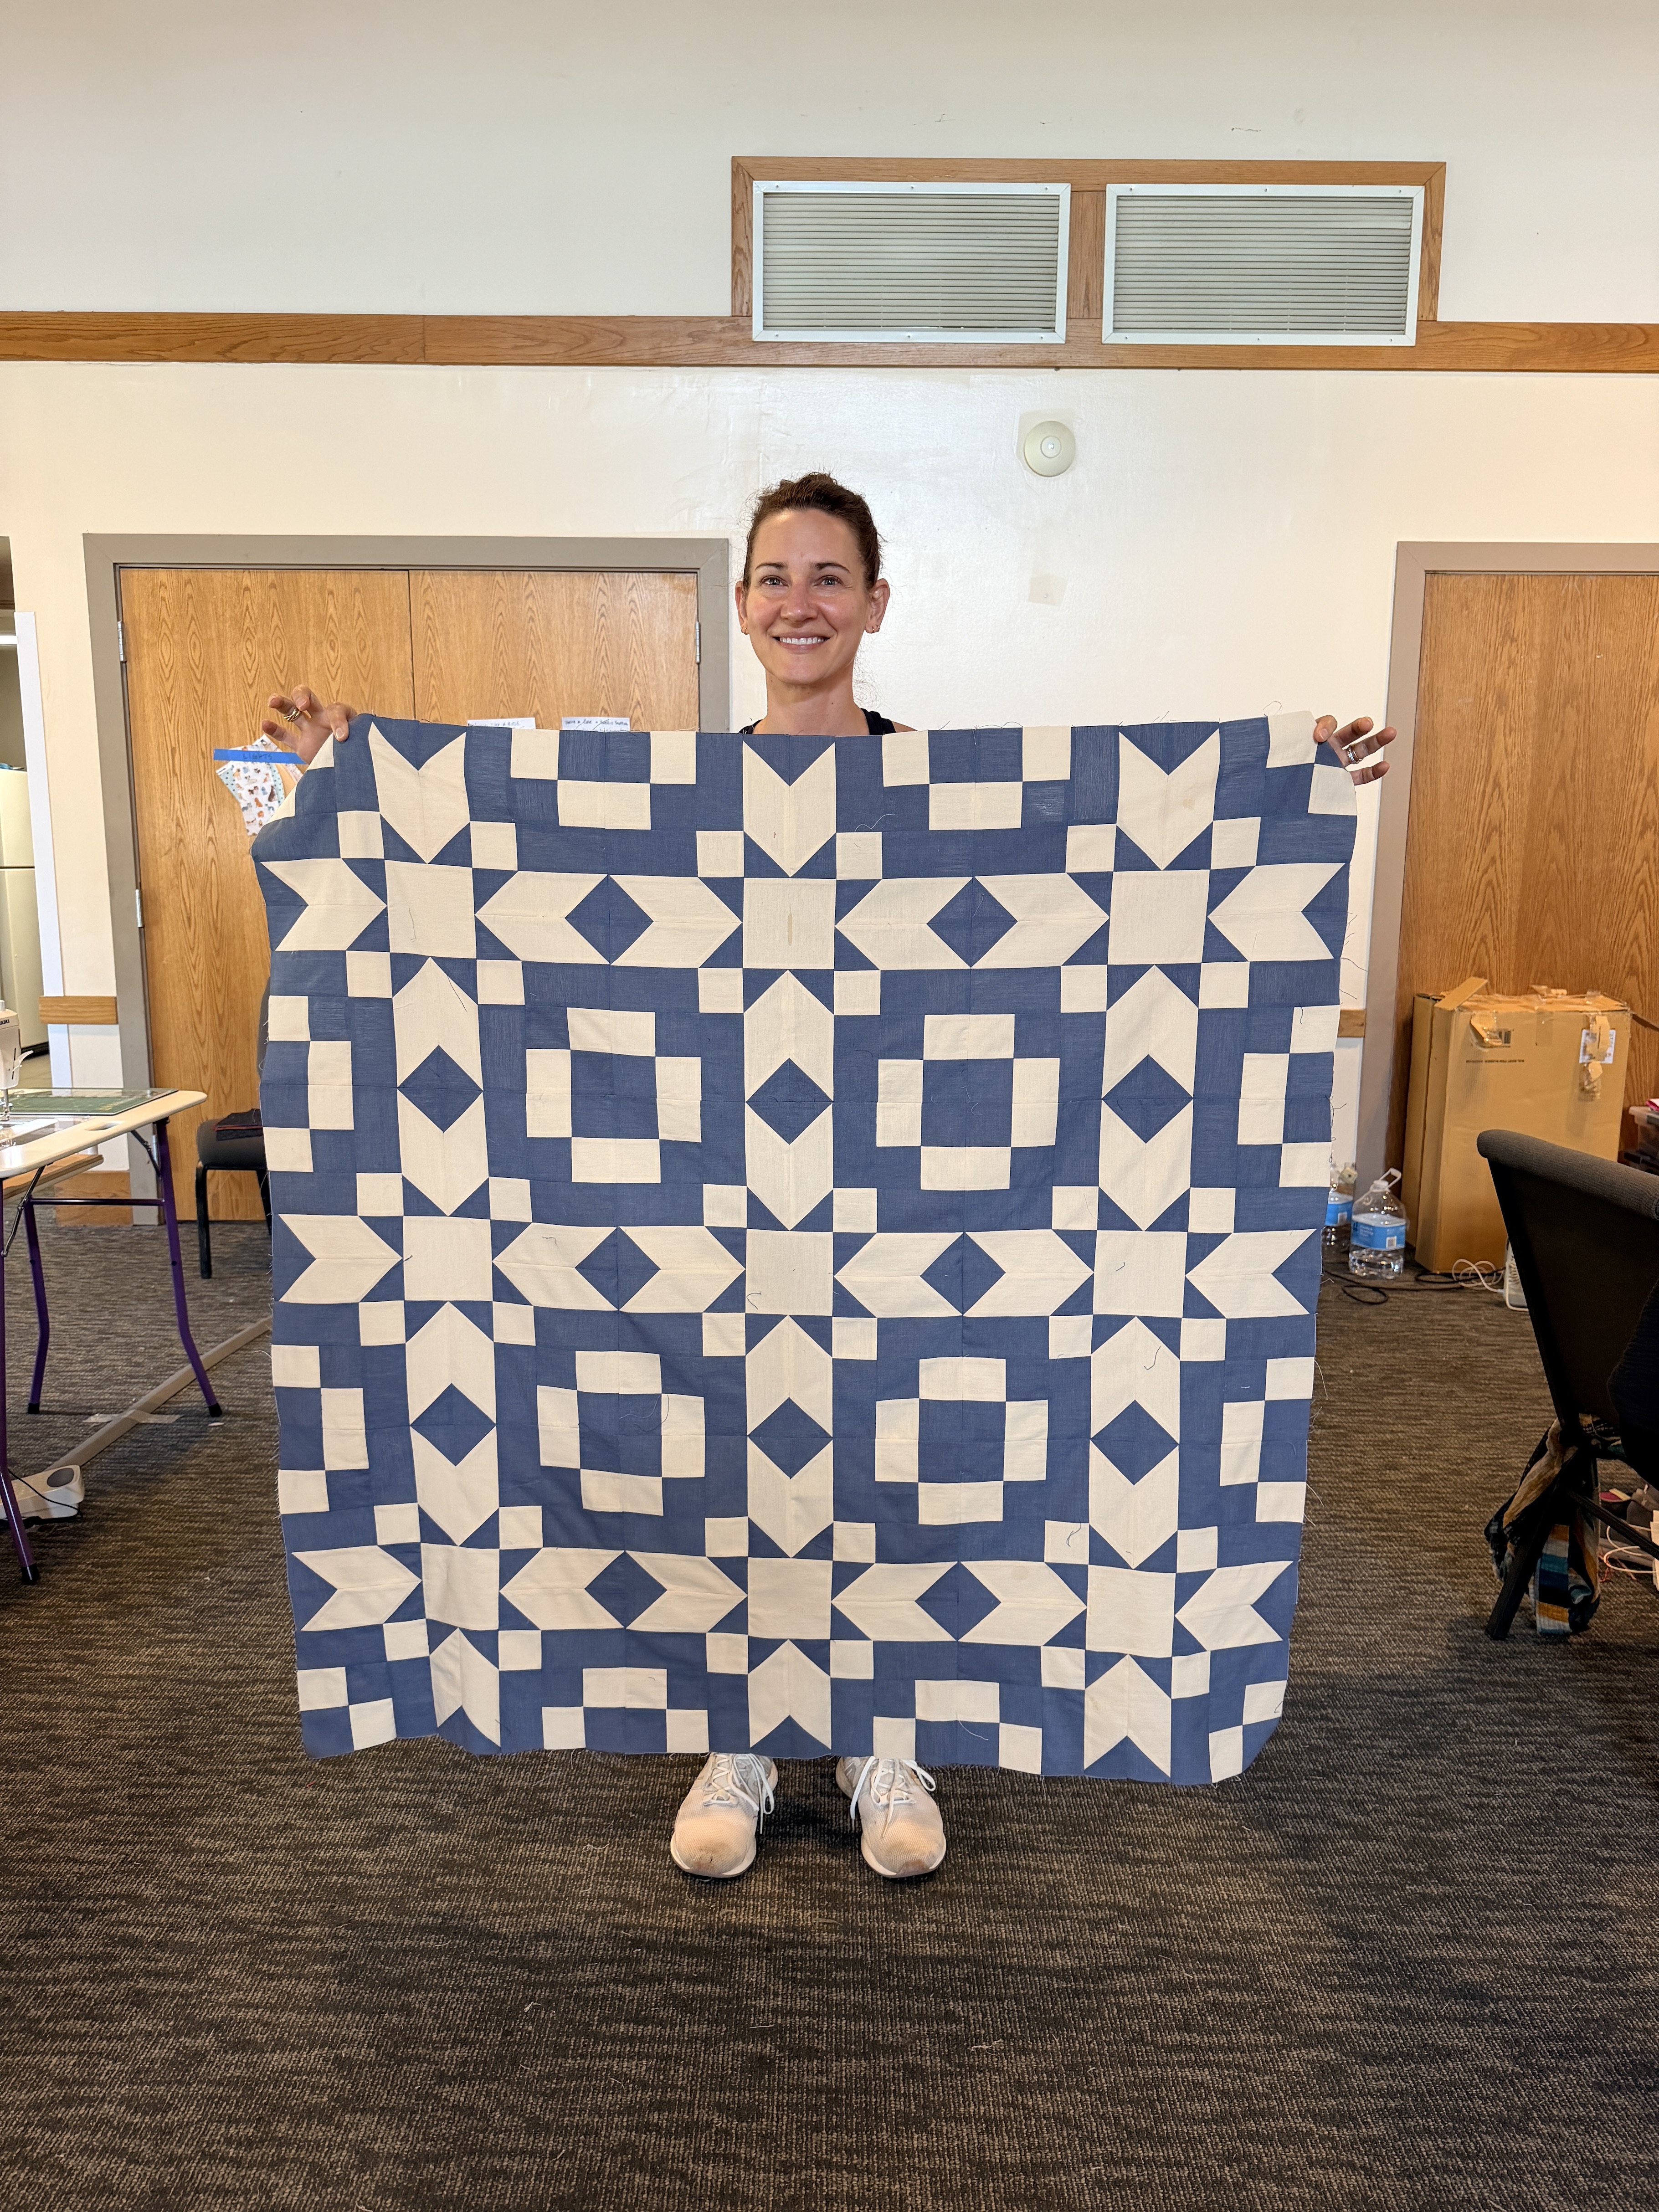
We have a tradition of ringing a service bell when someone finishes a quilt top or other project. It gives us a chance to pause, celebrate, and take pictures. It's a great way to keep up with fun patterns and fabrics, and what our friends are making for themselves, friends, or family.
So, above is a picture of me after ringing the bell for my finished top! It was the only time I got to ring it during this retreat, although I came very close to finishing another small quilt. More on that in a future blog post!
I hope you'll consider making this clever quilt. I'm trying to keep the new quilts I make smaller, but it would have been easy to whip this out in a larger size. Also, can I just mention how satisfying it was to make a two-toned quilt again? It scratched an itch I didn't even realize I had!
When I got home from retreat, I realized how perfect it would be to use the top I made there, while sitting close to Emily, chatting about re-doing Echoed Swirls, and using Jana's pattern to showcase the new design.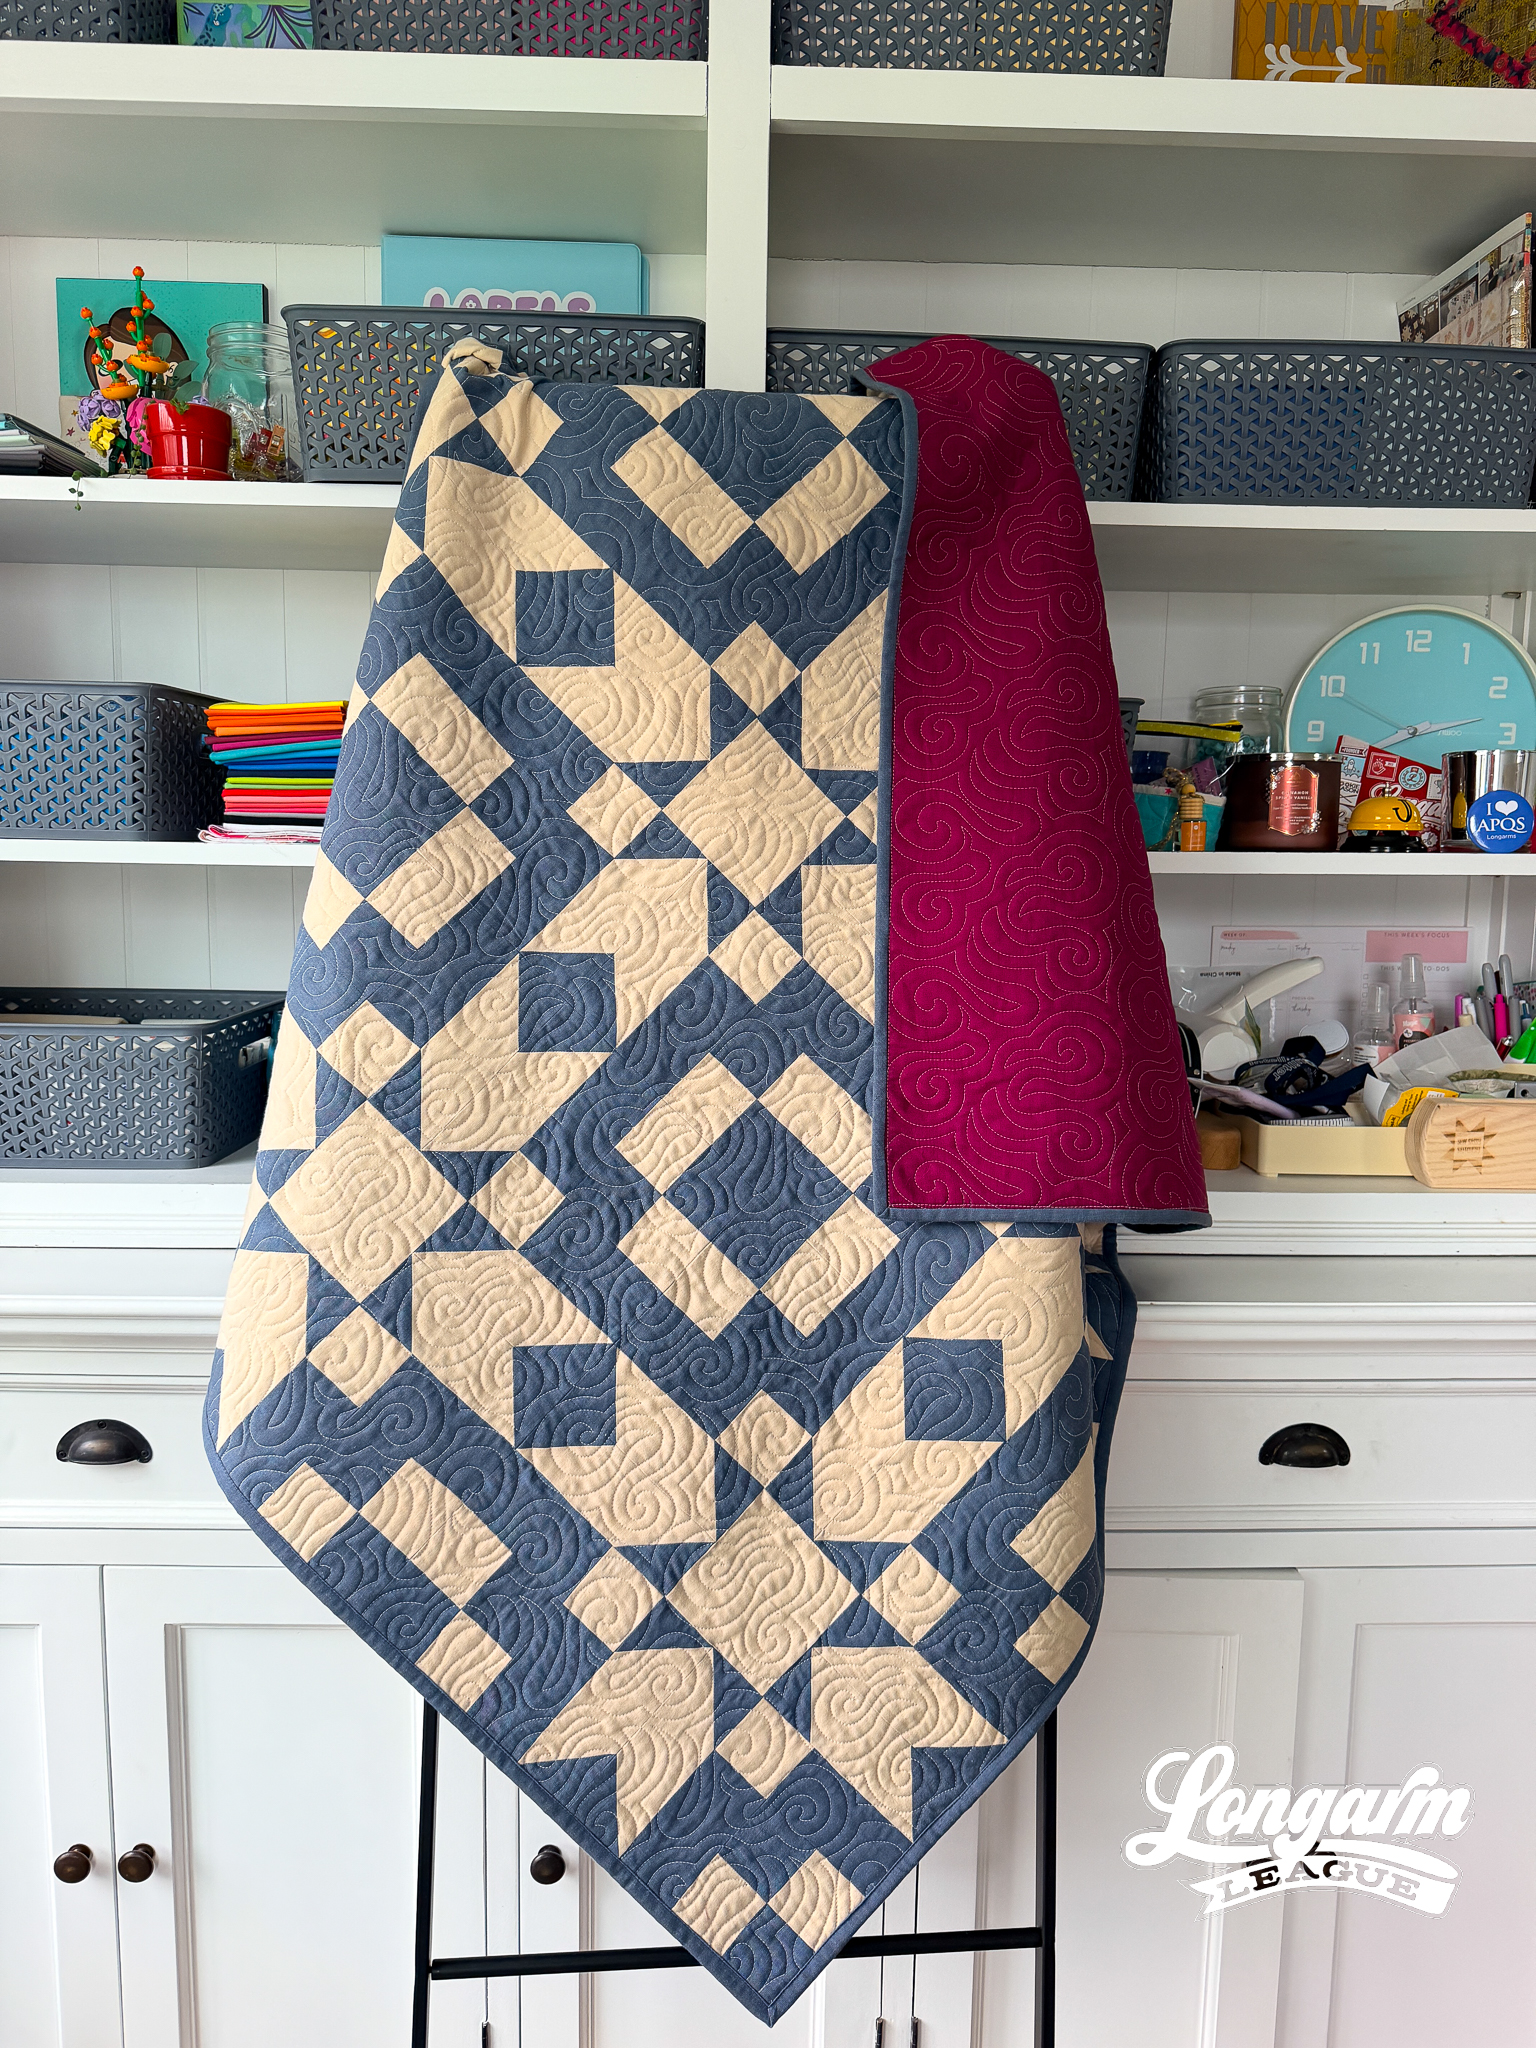
Fabrics
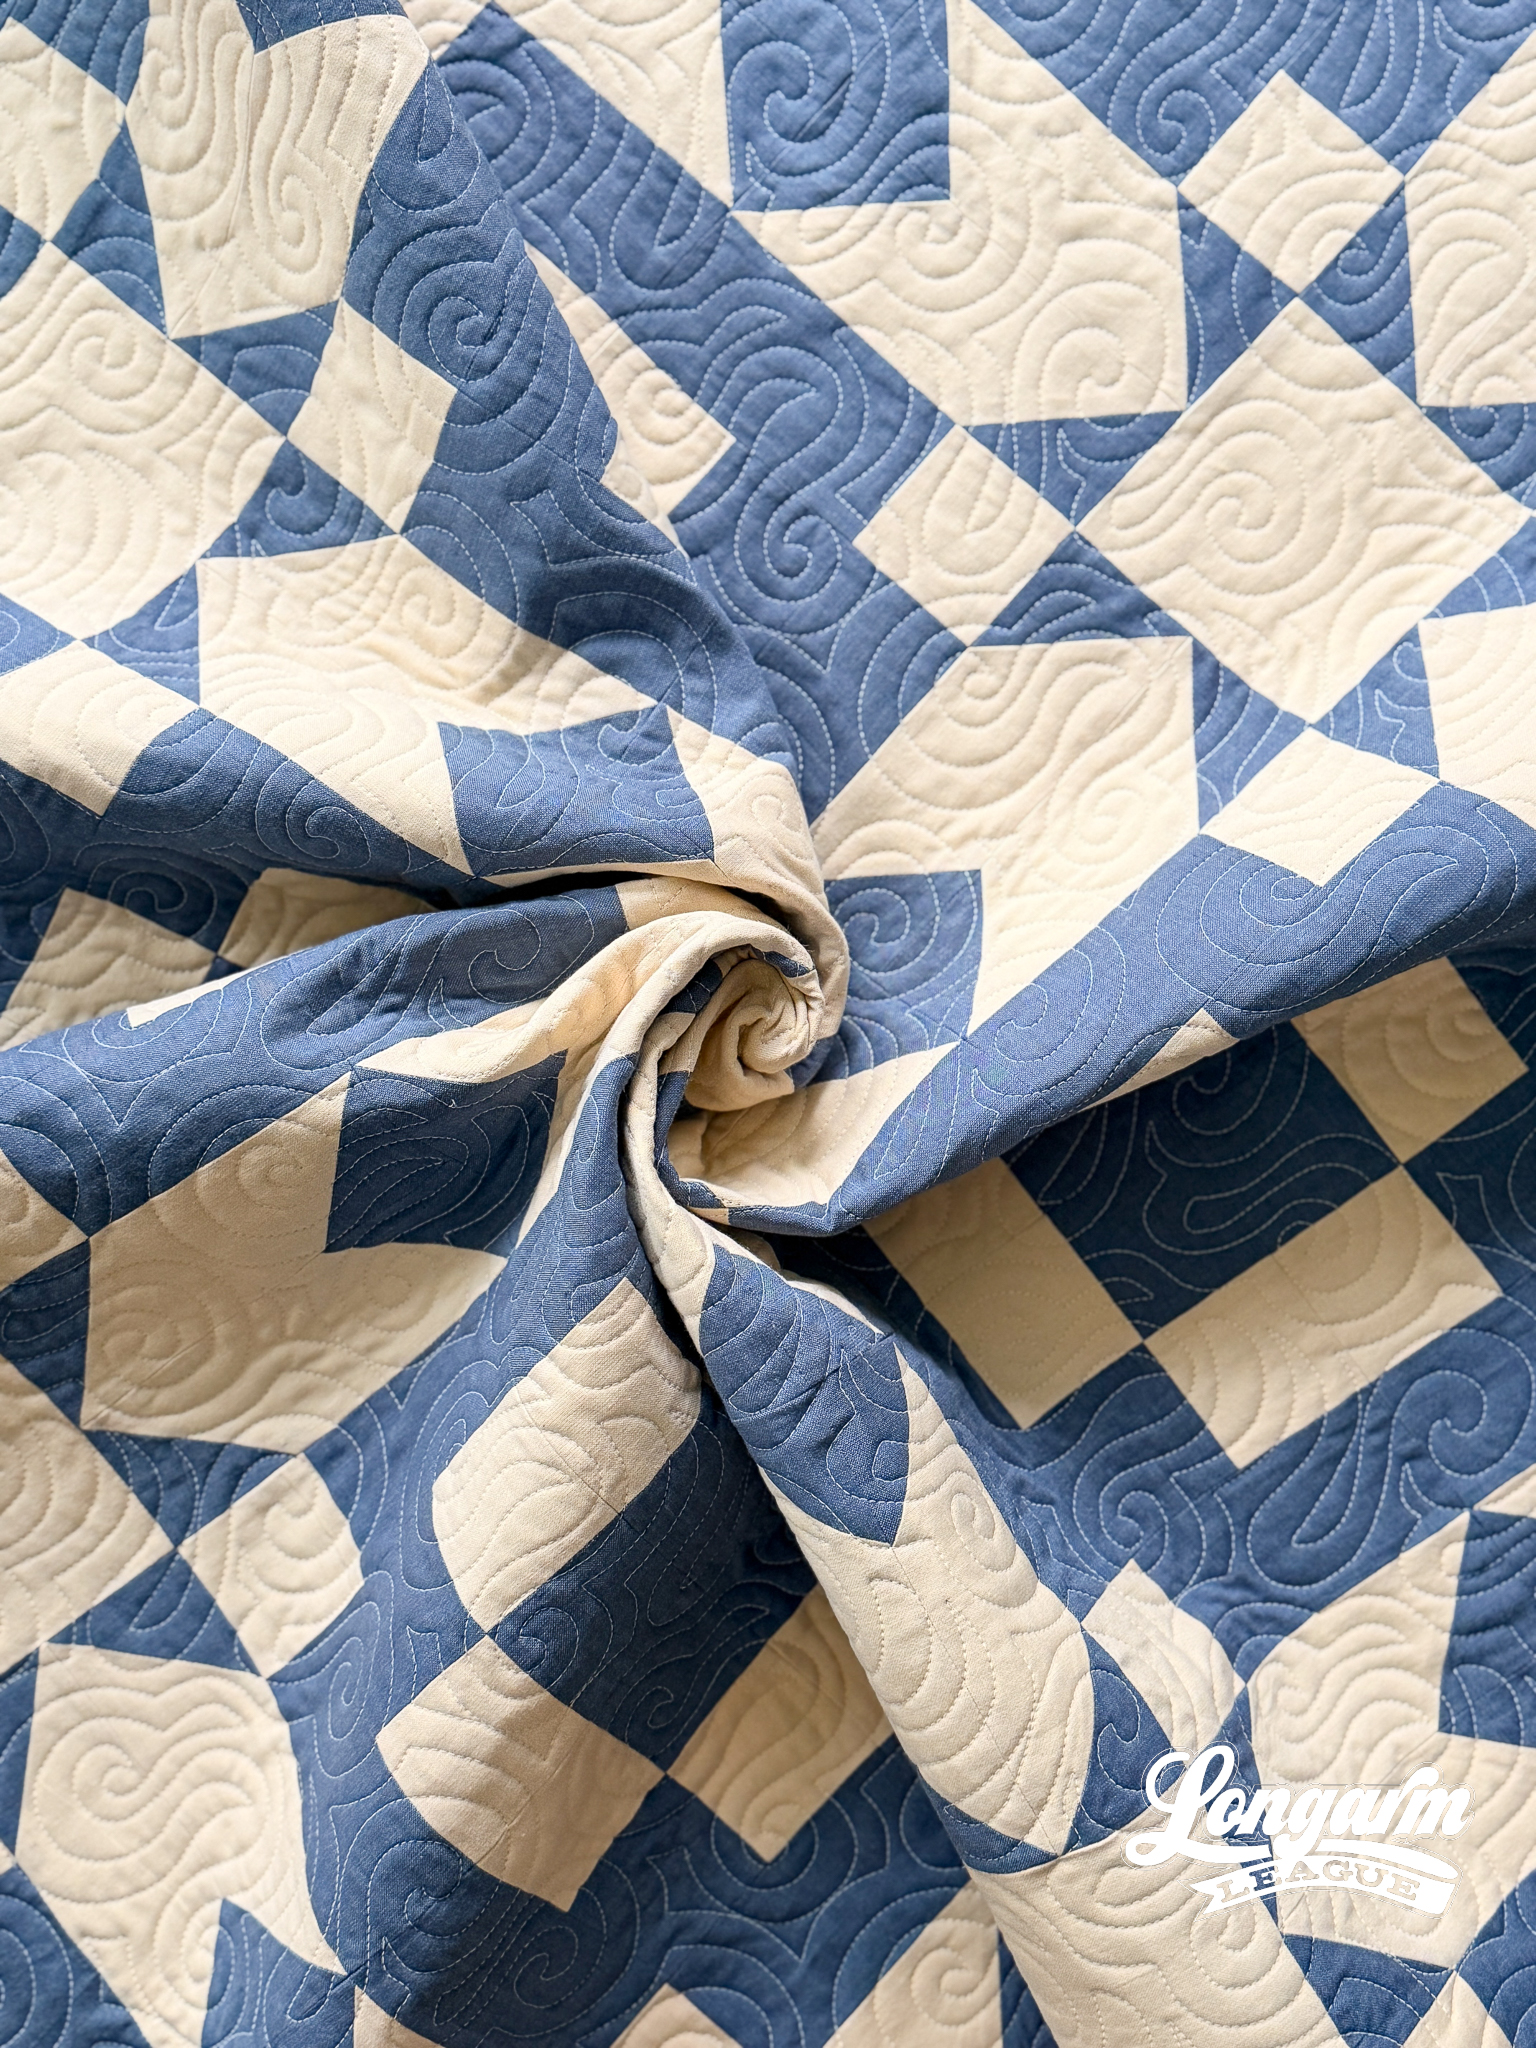
I mentioned I was in retreat-prep mode when I bought the fabrics for this quilt, so I headed out to my local quilt shop, Mashe Modern, to look for fabrics.
The fabric for this quilt is from the Watercolor Wovens line from Fabelism: French Blue and Cashmere. I don't think I would have chosen these if I hadn't shopped in person and been reminded that Fabelism exists. :) Of course, I've admired their wovens online in other people's projects, but I thought this quilt would be the perfect chance to try them out for myself when I saw Kristen's display.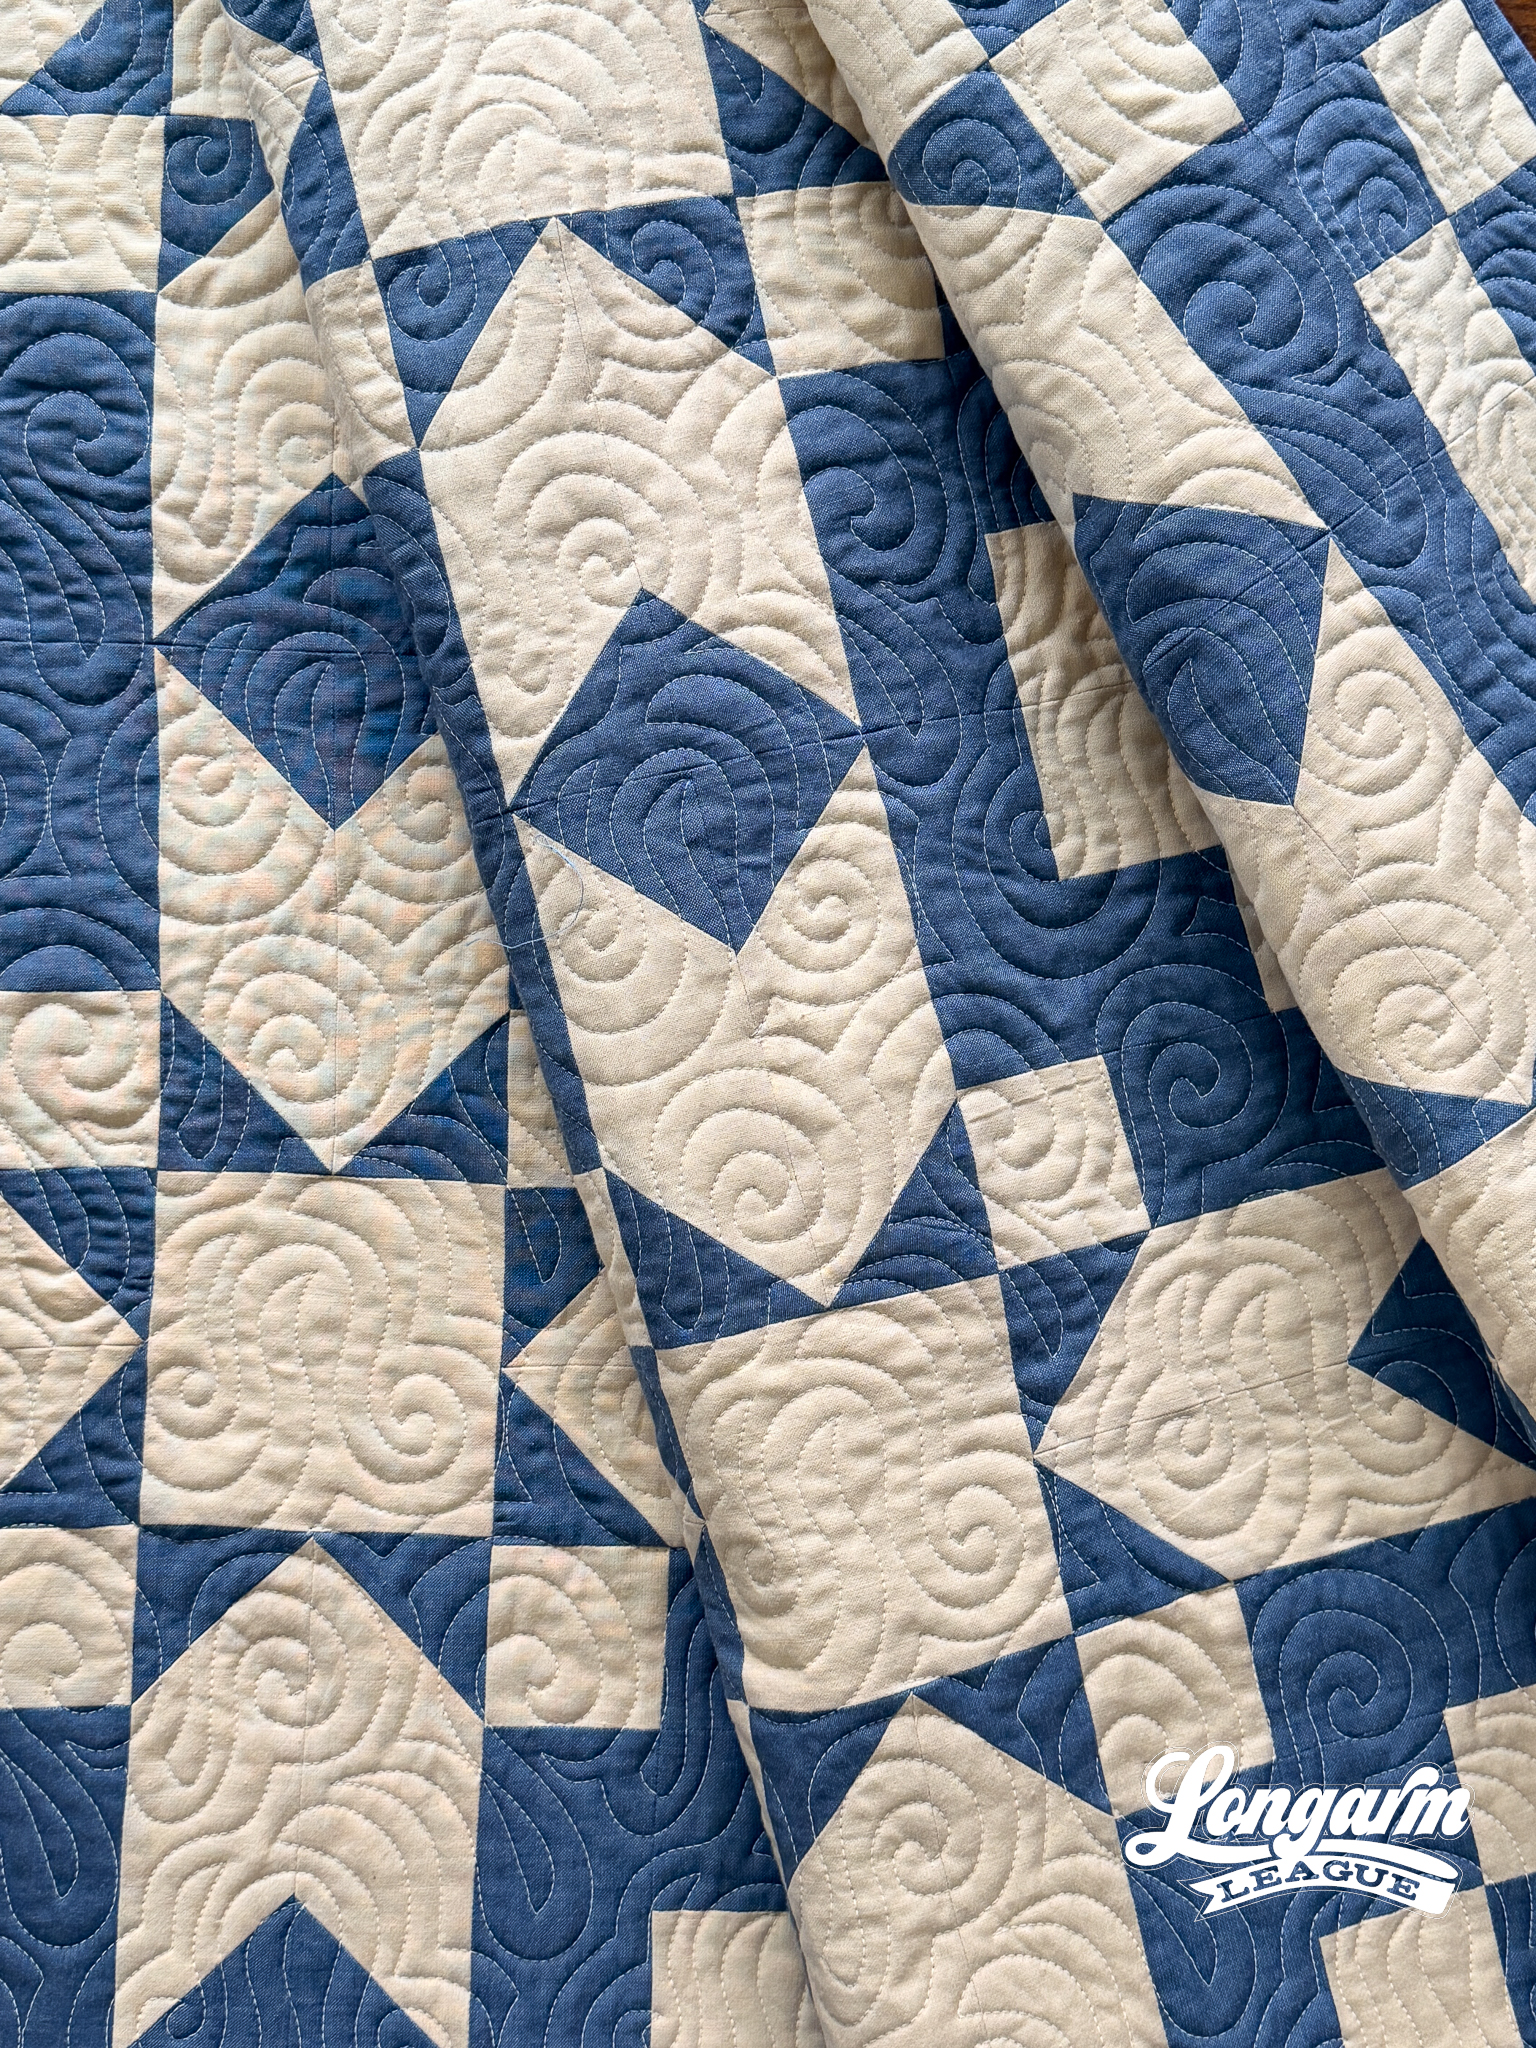
As I cut out the pieces for this quilt before I left for retreat, I only used my Laurastar to steam and press them before strip cutting, as I normally do. When I got to the piecing portion of assembling, I remembered how different and loose the wovens are compared to a typical quilting cotton. I know, I know! I should have realized; it's just been so long since I've worked with wovens. In retrospect, I should have used my starch spray (I love Magic Quilting and Crafting Spray) to give it more body while piecing.
In the end, I didn't have any major problems or puckers; it might have been a more enjoyable experience than worrying about fraying and being slightly off at my intersections. In a retreat mindset, I was simply having fun and making progress. I didn't care about perfection.
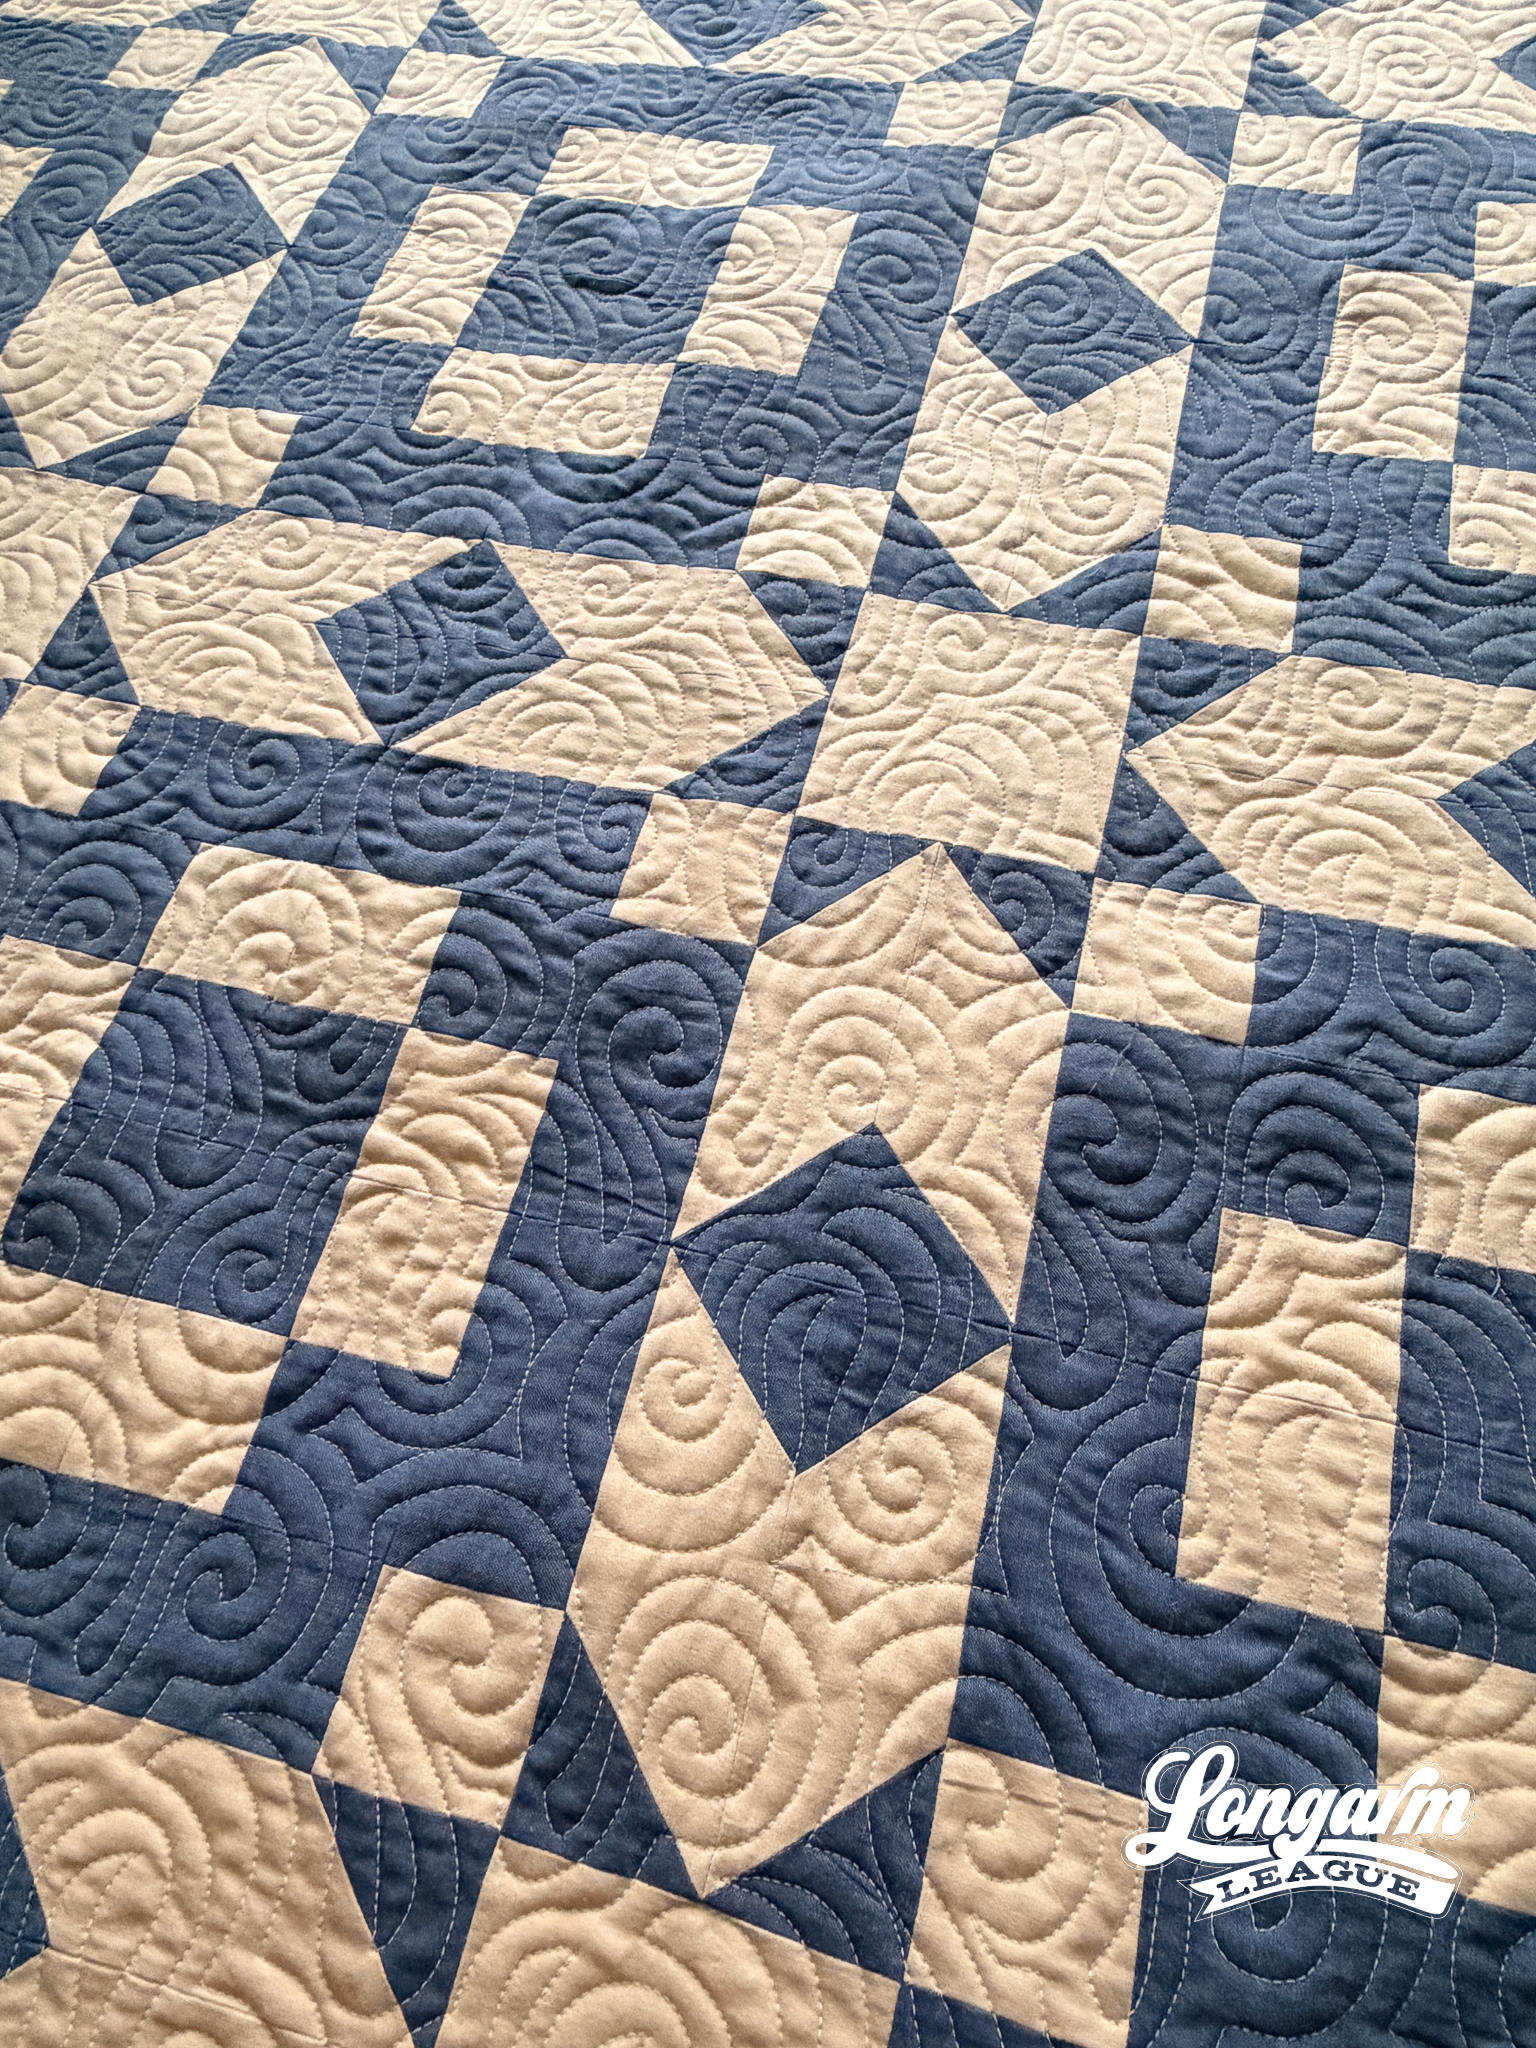
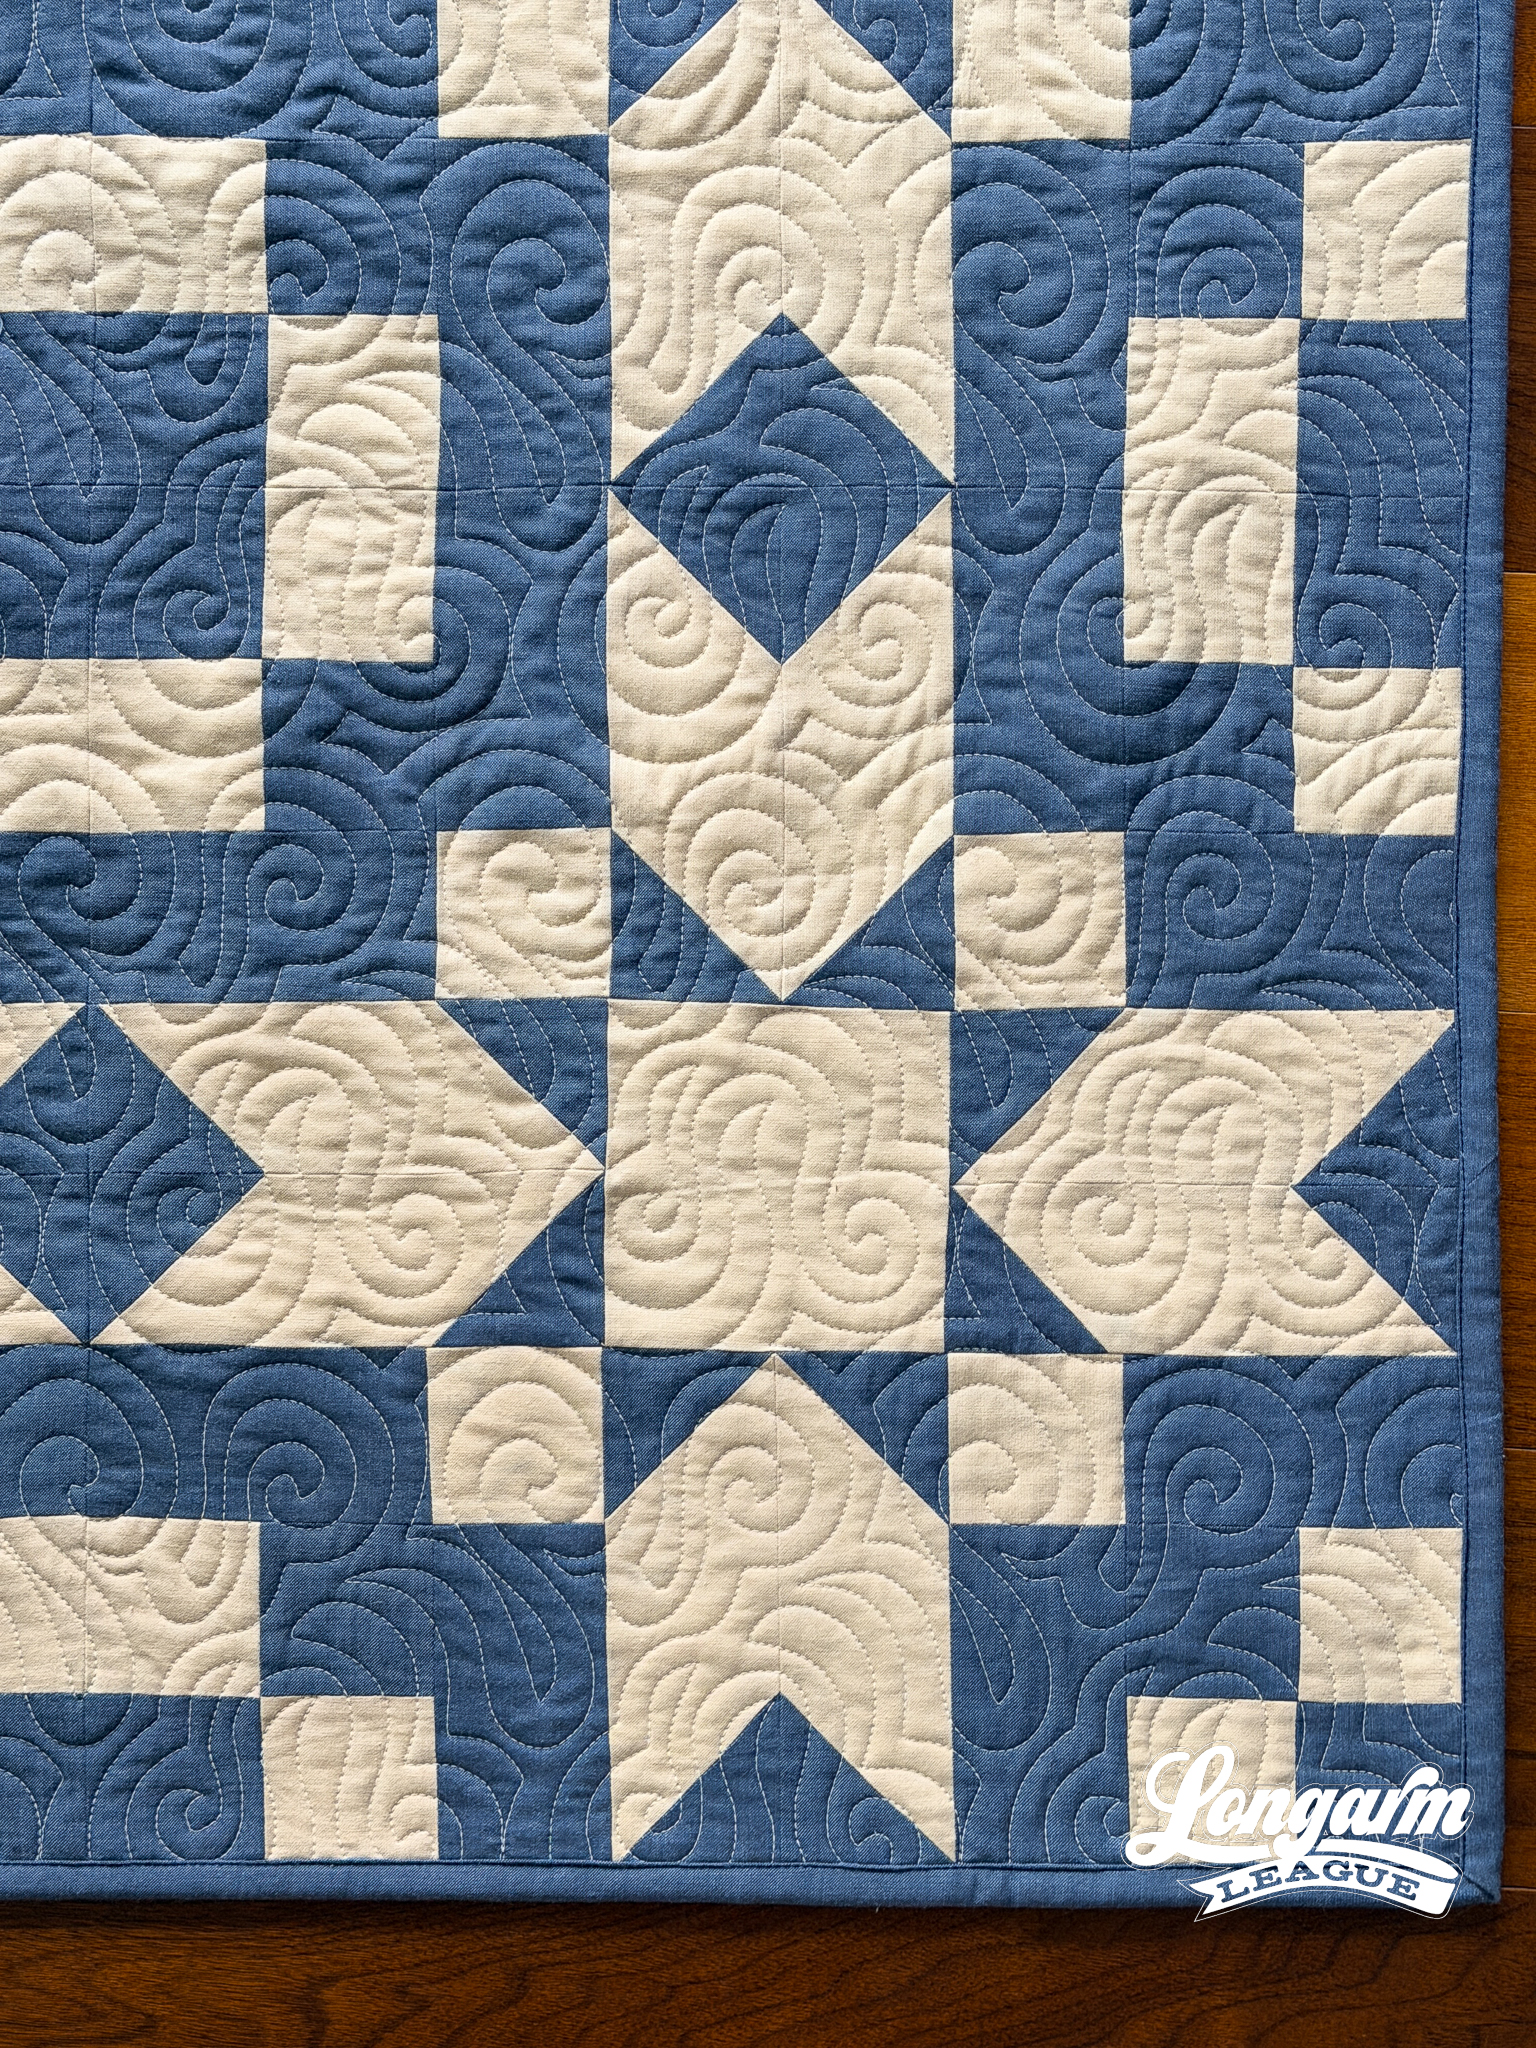
In the finished quilt, I love the difference in tonal hues, the softness, and drape! It's fun to mix it up every once in a while. Totally worth a bit of extra fraying.
Backing
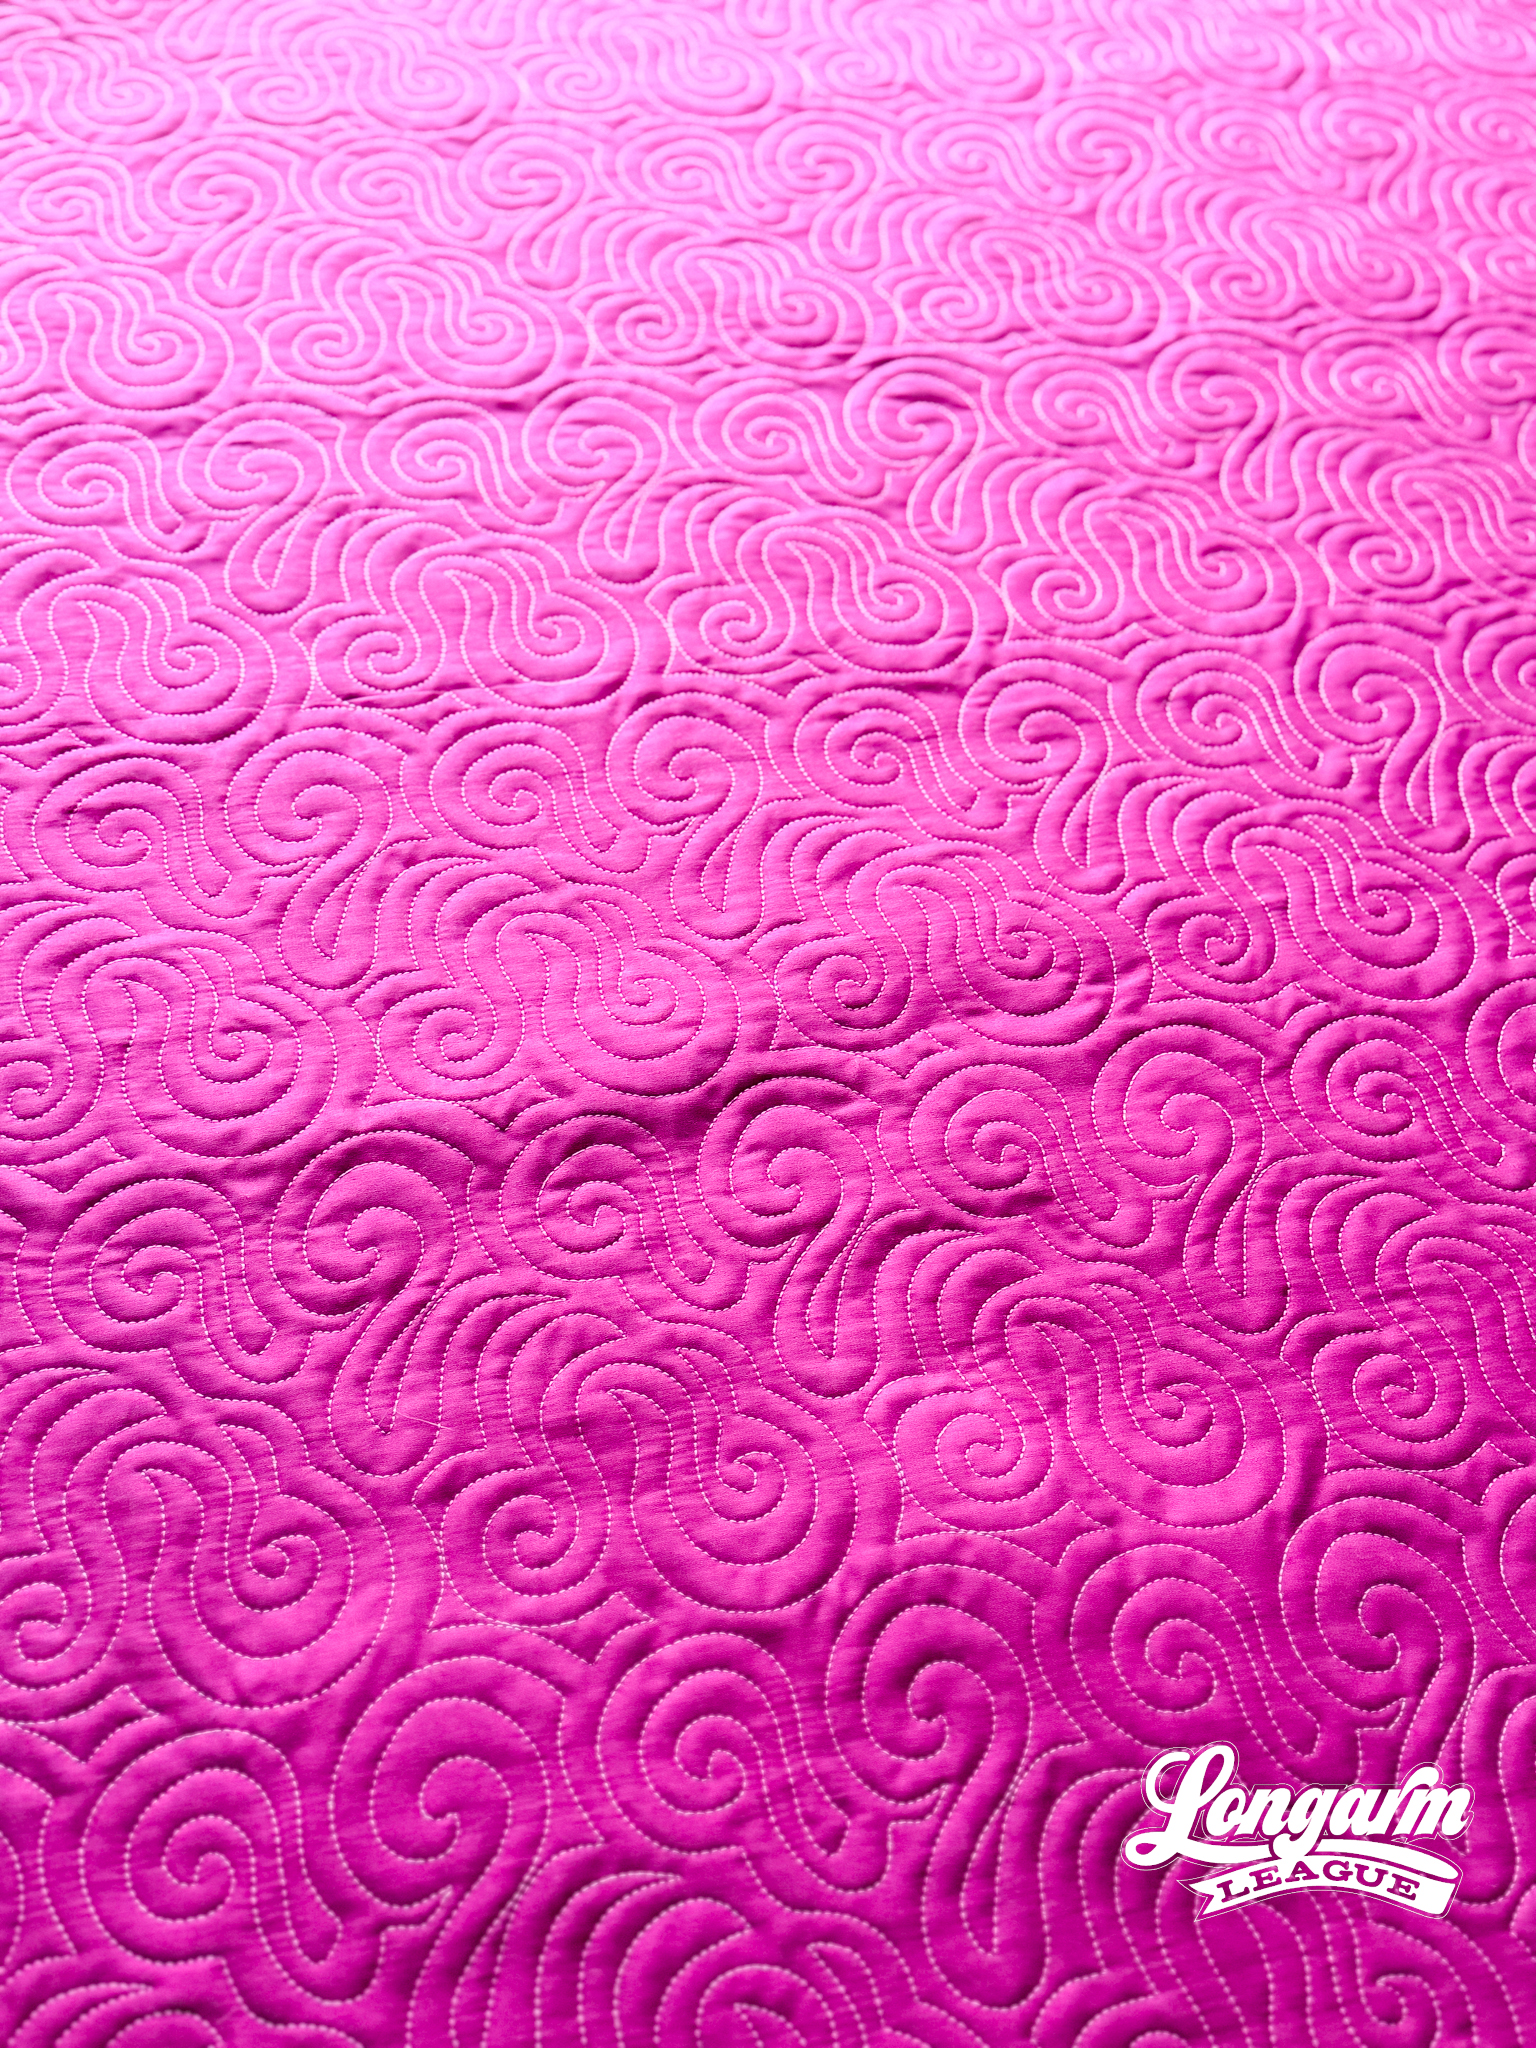
I went back and forth on what yardage to use for the back of this quilt, but all my choices were in the blue family. I'm so glad I went with this berry color - it's so pretty! I'm guessing I got it from my friend Sarah, who has been slowly selling off inventory from her at-home fabric shop over the years. I don't know the manufacturer or name of the color, but it's a touch of the unexpected and I love it!
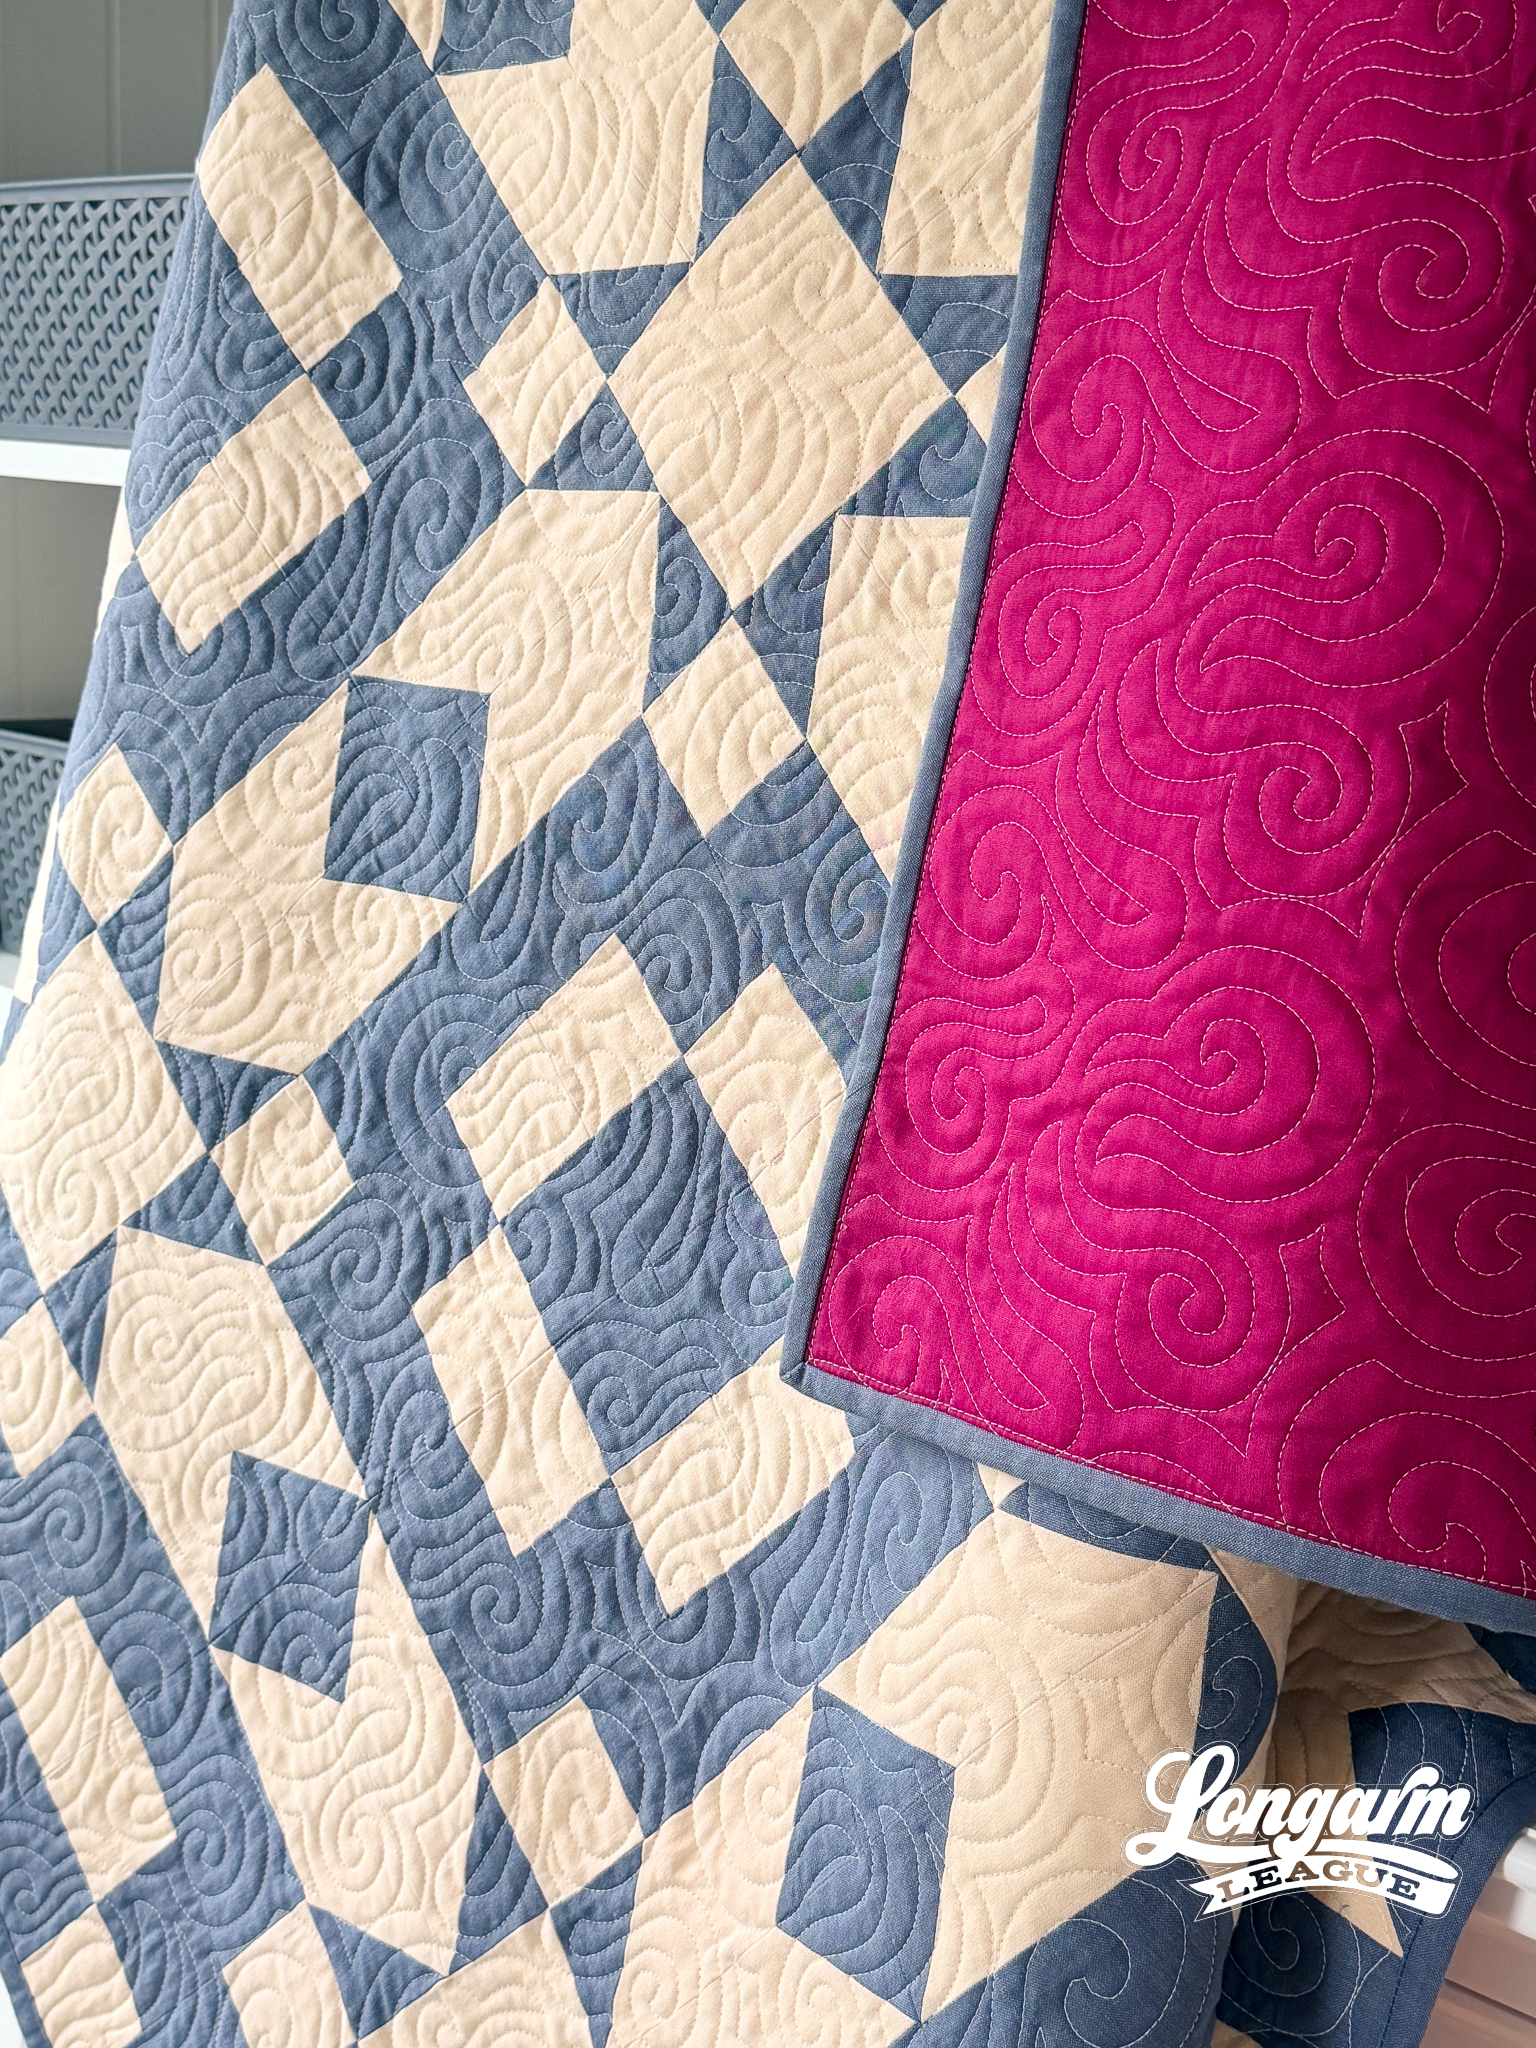
Solids are great for showing off the quilting stitches, and this quilt gives me the best of both worlds on each side.
The Quilting Details
Difficulty Level: Easy
I'm happy to say this digital panto is EASY. No offsetting, no backtracking, no deep nesting to watch out for. I set it up easily with my IntelliQuilter and let it run without babysitting.
Scale
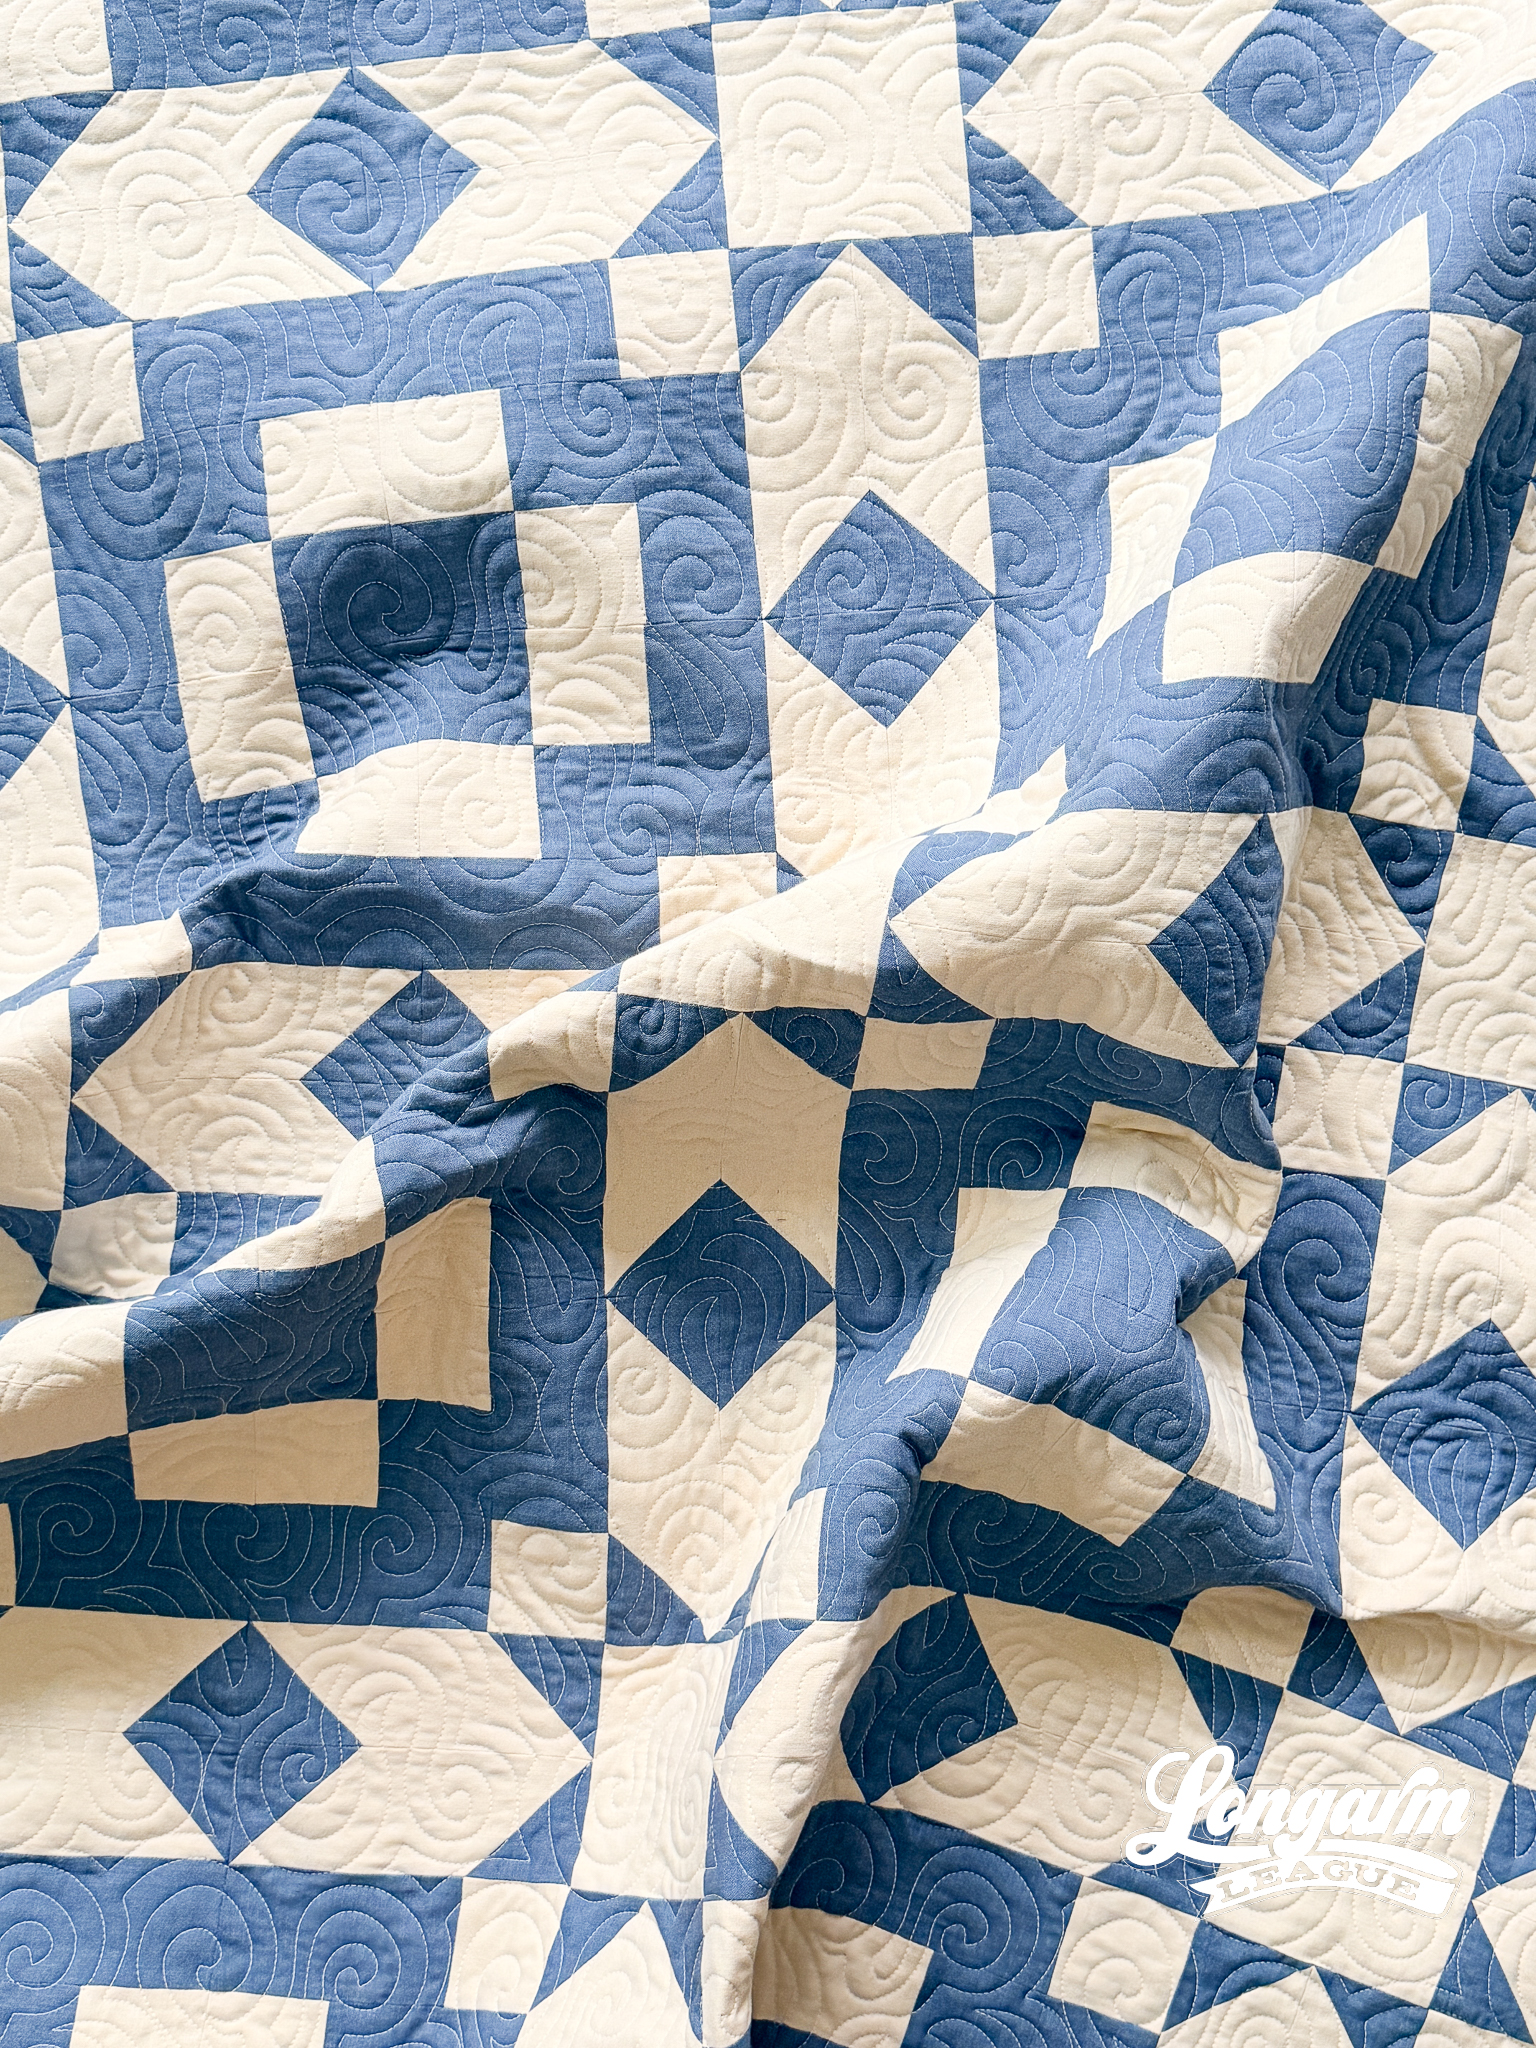
Since the point of this design was to make it less dense from its original version, I didn't want to go too tight, even though it's a smaller quilt at 48" square. At this scale, the space between the lines is about 1/2" with some places being both smaller and larger. Unlike the original design, you can scale up several more inches to make the quilting even more loose.
Here are the sizing specifications for how I set up this quilt using my Intelliquilter (quilt size 48" x 48"):
Row height: 7"
Gap: -0.368"
Pattern height: 7.368" (measurement from top to bottom of the repeat)
Offset: none
Backtracking: none
Here's a look at the included PDF: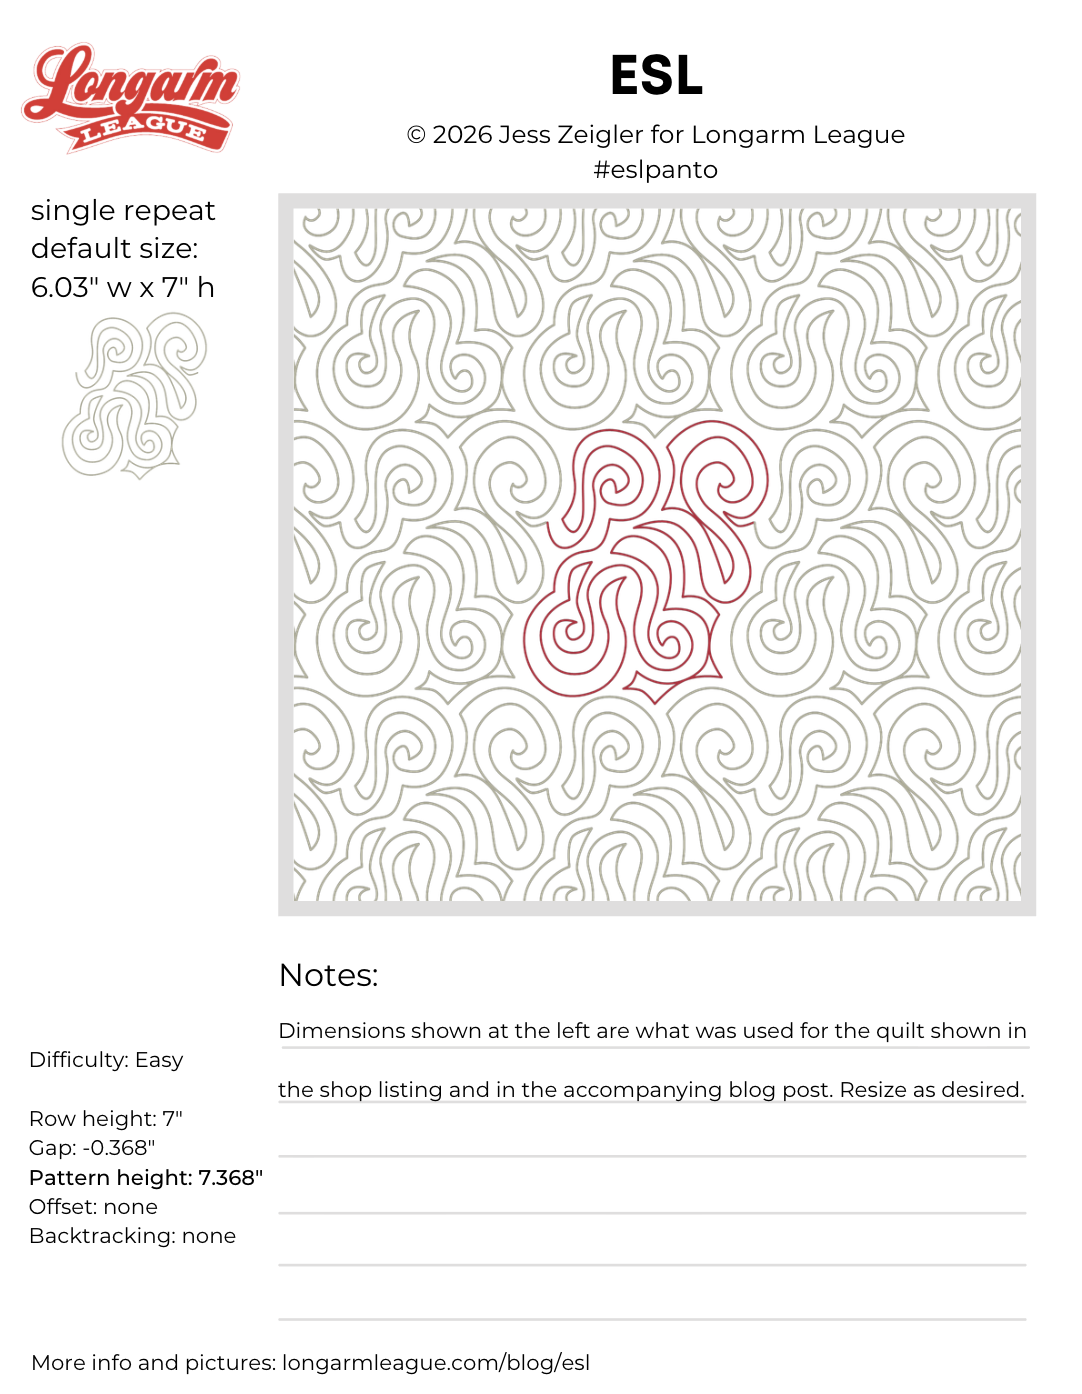
Want new digital pantograph designs like this one on release day (and at a deep discount)? It now also includes access to our online community. Sign up for our Digital Panto Club and get them delivered directly to your inbox on the first Wednesday of each new month. 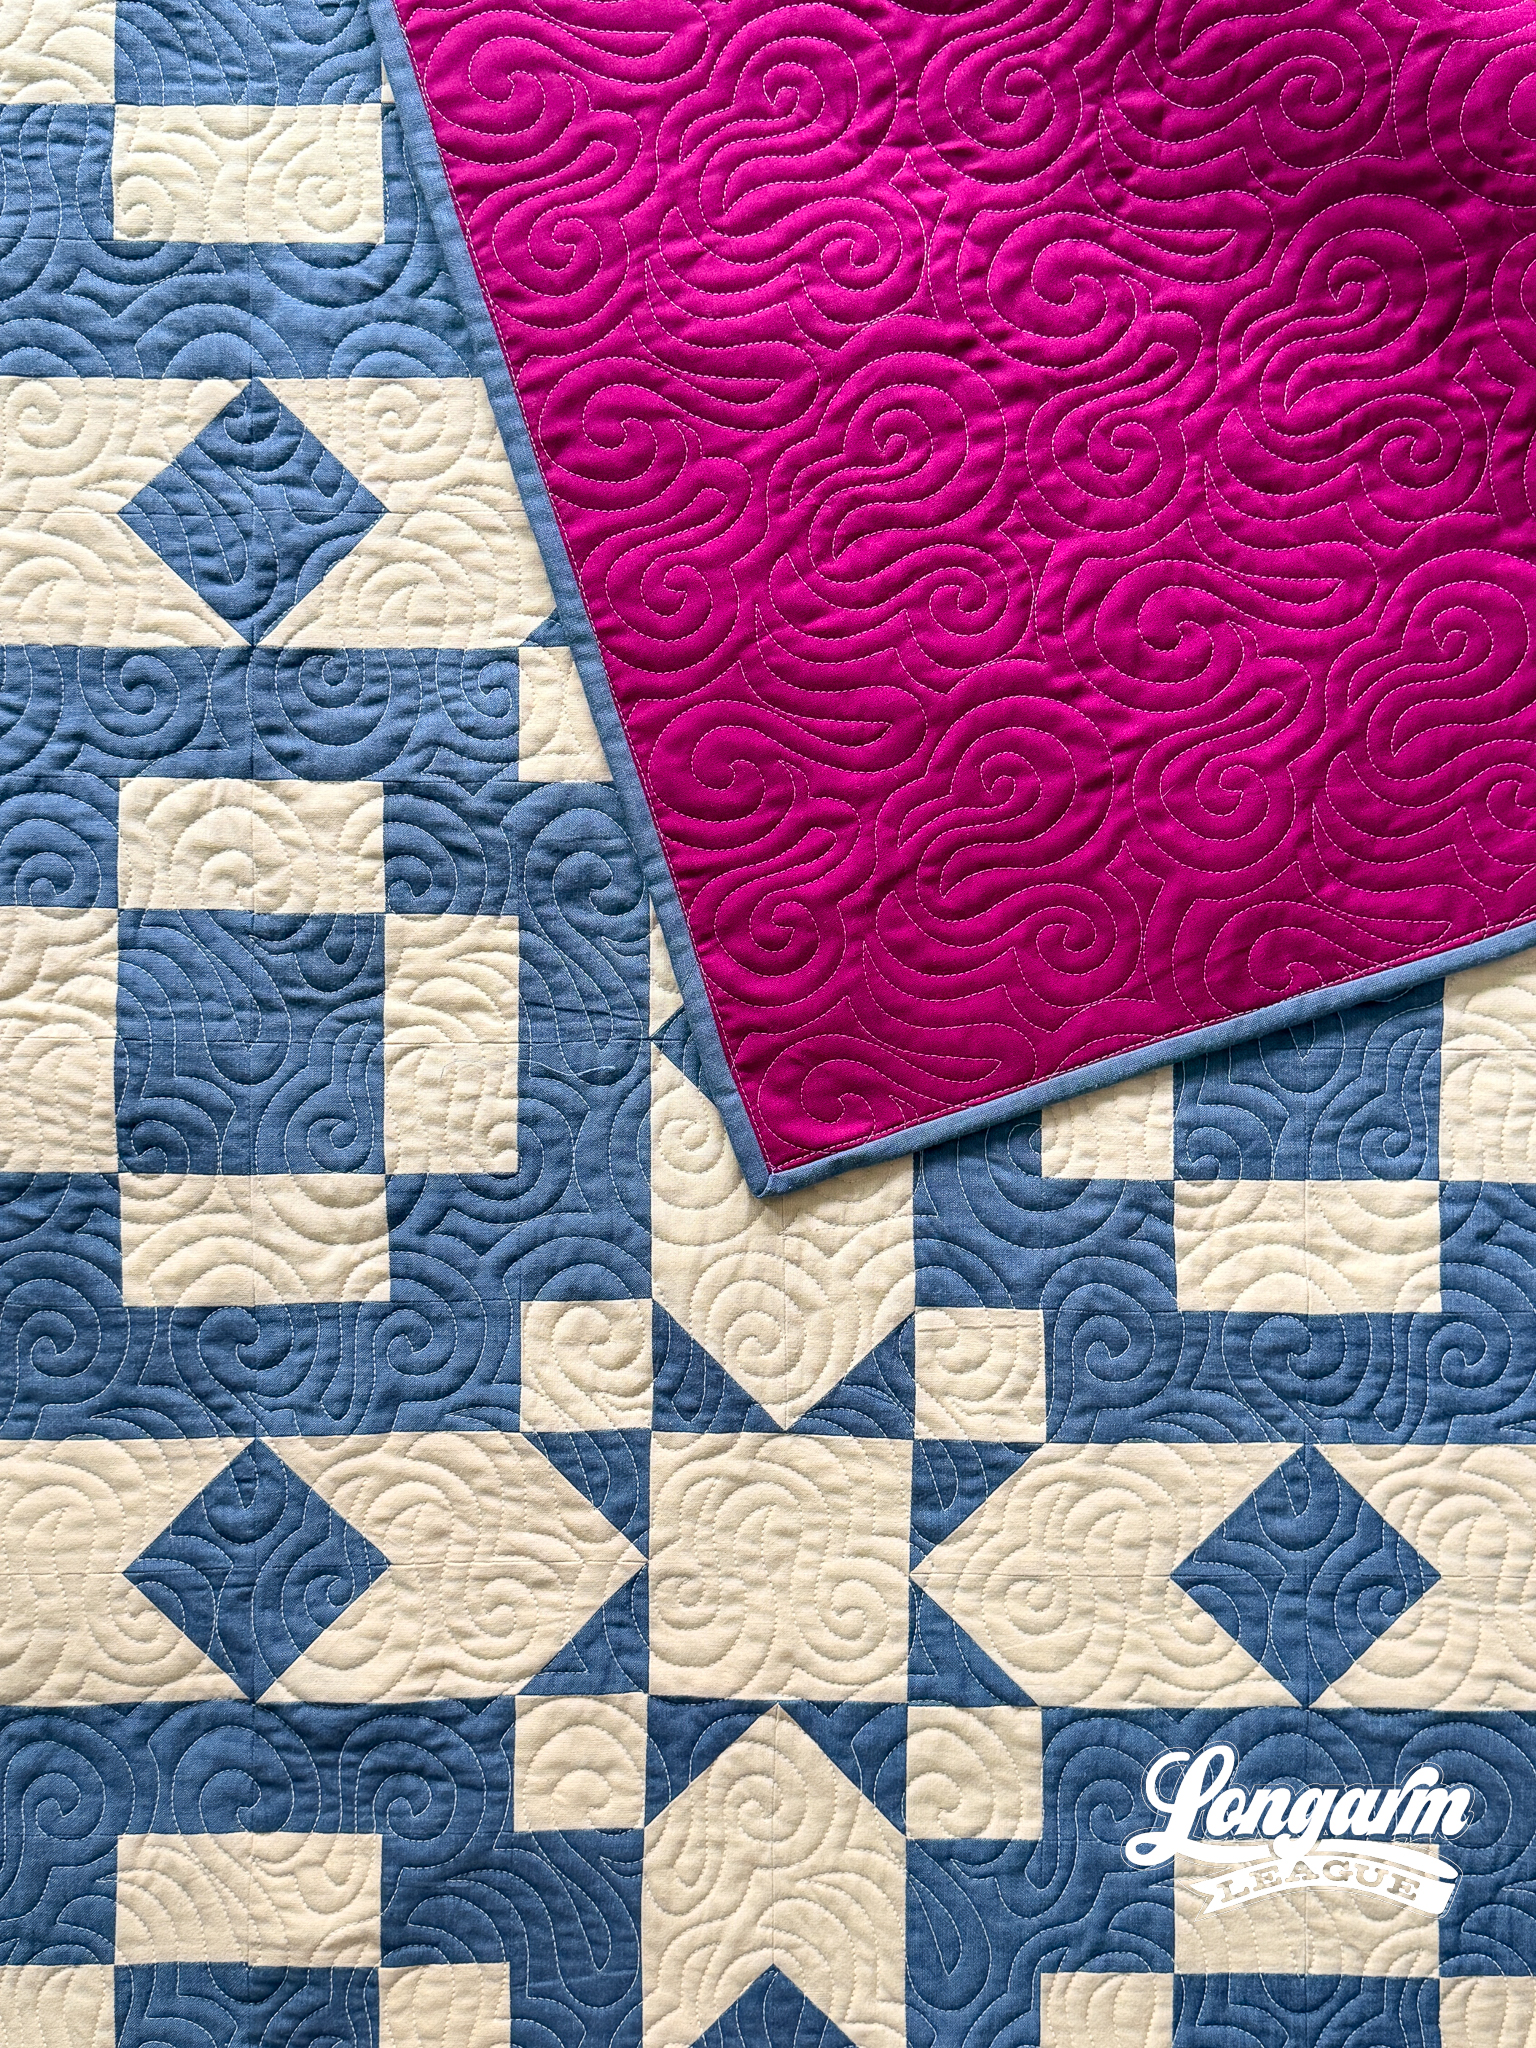

Jess Zeigler
Longarm League Commish & Owner of Threaded Quilting Studio, LLC.


