
Held Hearts | Edge-to-Edge Quilting Design for Computerized Longarms

Well, this is embarrassing! For the second time in a month (here's a link to the first time), I found myself inspired by a Quilty Love pattern, and dropped everything to make it because I wanted to use a new panto inspired by the patchwork. More about the pattern in a bit.
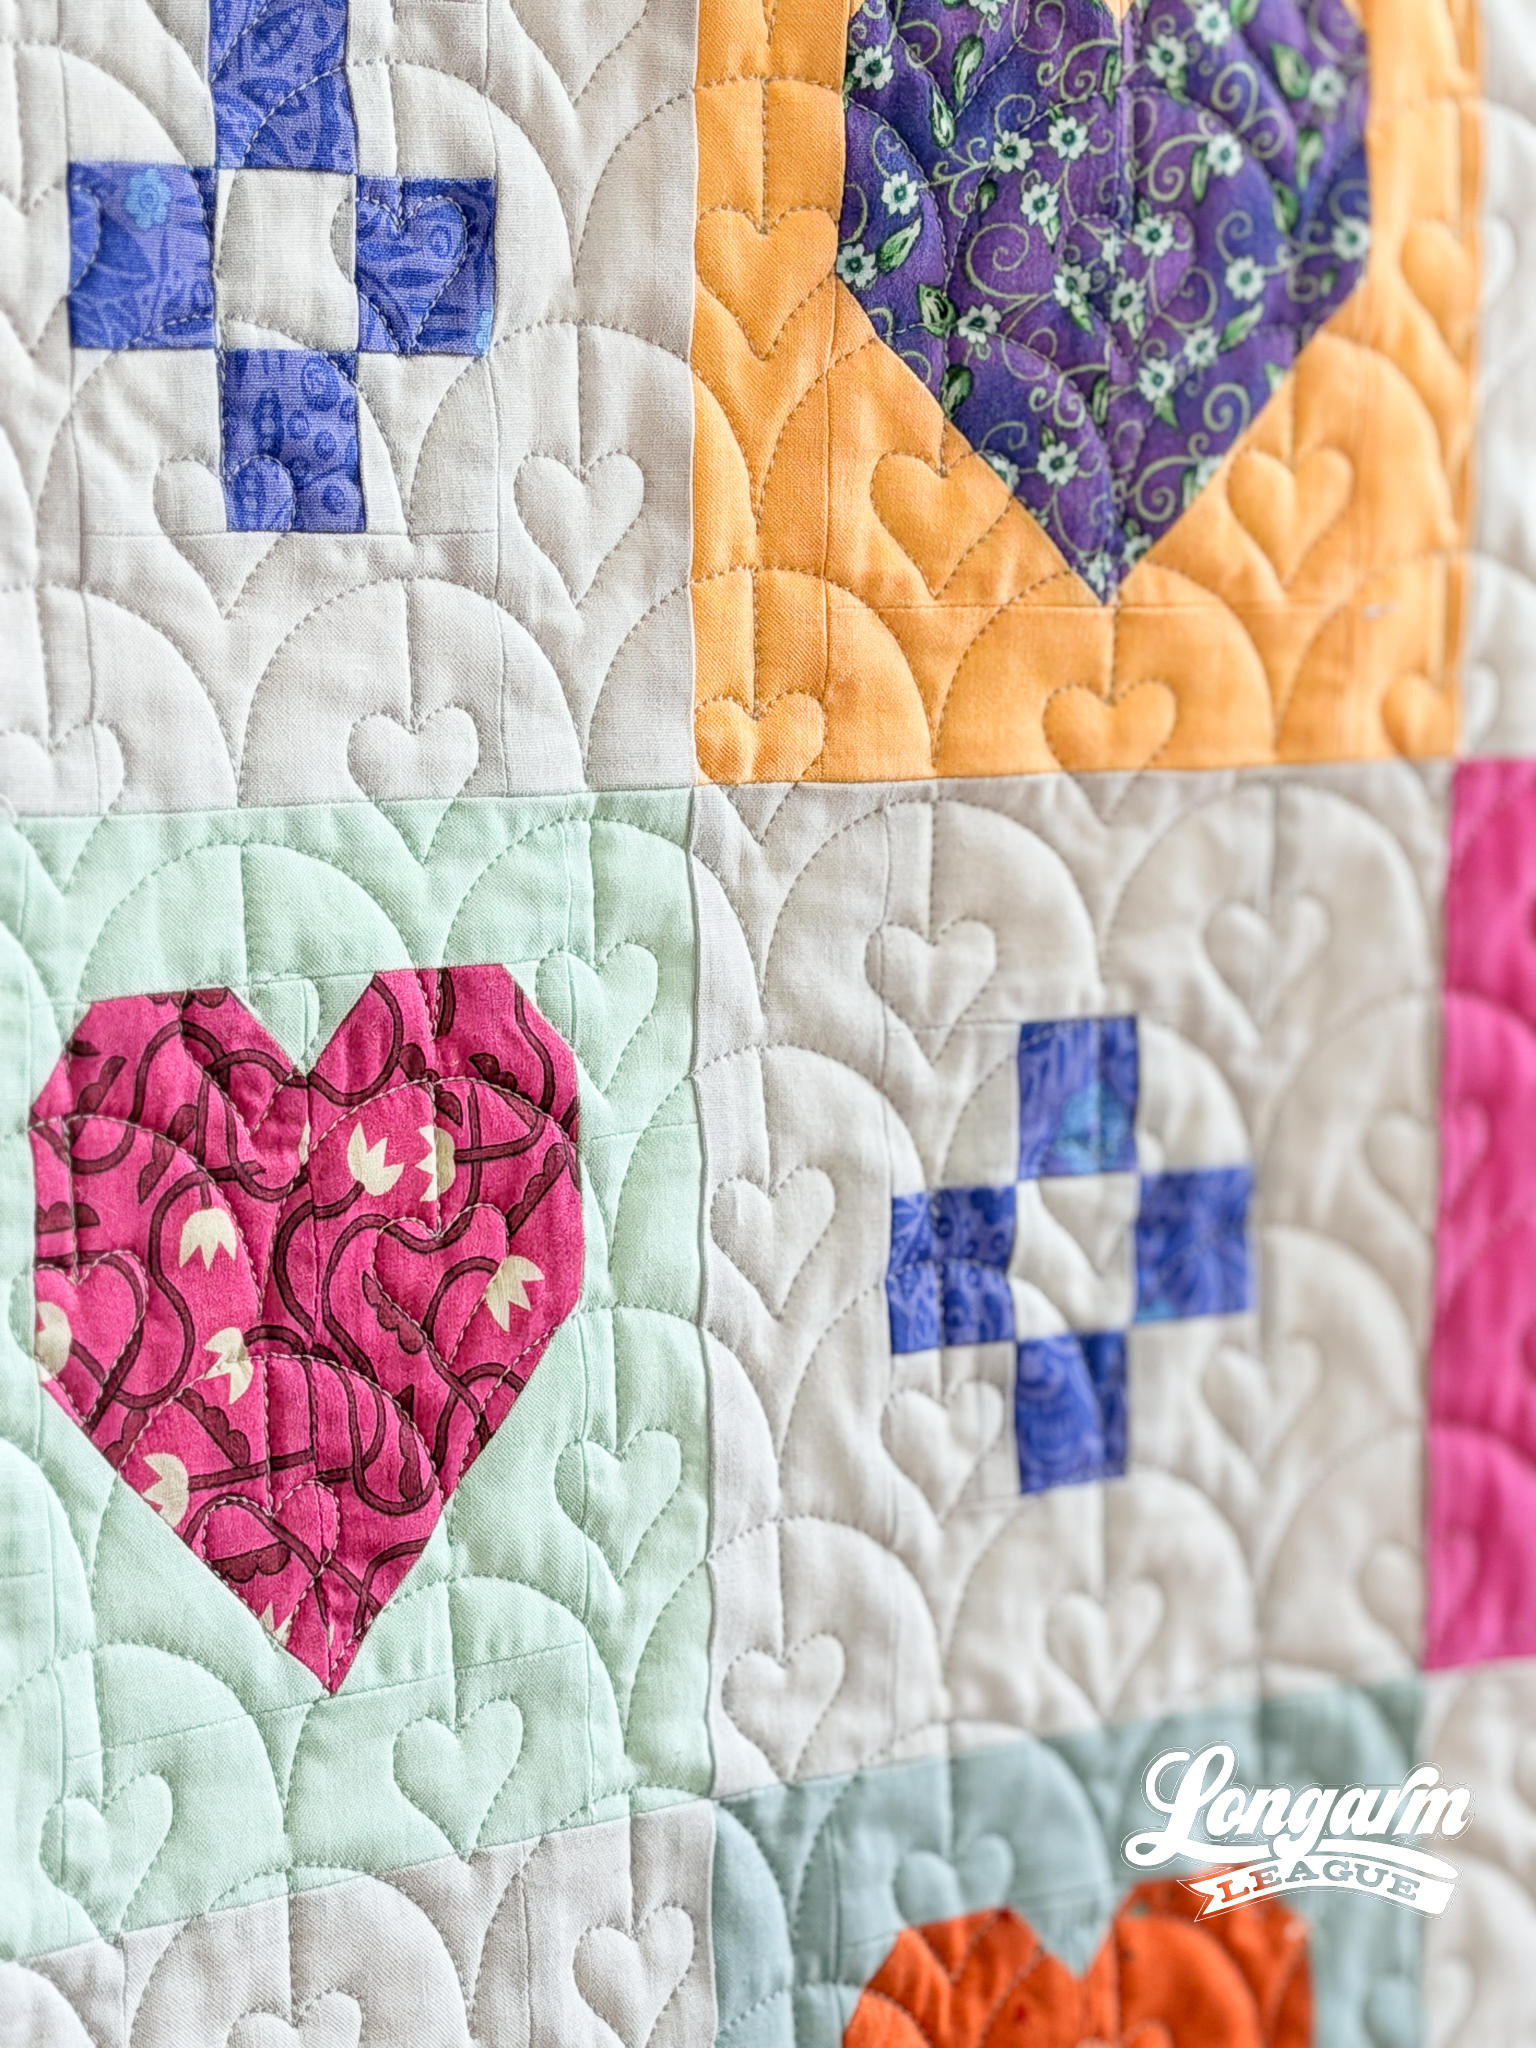
Let's talk about the digital panto first, shall we? As you can see, it's a ridiculously simple design combining a clamshell with a heart. It's not earth-shattering, but it is exactly what I wanted for this quilt!

This design is all about balance. The heart shape is "held" suspended at the center of each clamshell, giving it a little space to shine on its own.
The scale of the heart in relation to the clamshell is giving dainty cuteness! On this quilt, that's the same vibe as the little 9-patches in the alternate blocks, which are so adorable.
As an edge-to-edge design, there's a cascading effect across the quilt, which I find nice. I say this all of the time, but I love the texture that simple, repeated shapes produce, and this panto is no different.
The Quilt
Quilt Pattern

It was either on Instagram or in the Quilty Love newsletter—or both—that I saw Emily working on this upcoming release and became inspired. It's called Cozy Checkered Hearts, and it reminded me of the cottagecore style, which leans into simplicity, domestic tradition, repetition, and handmade comfort. I wanted a quaint pantograph to pair with it.
I was lucky enough to get my hands on a copy of the pattern ahead of its release date (January 8, 2026). It's as straightforward as all Quilty Love patterns, which is to say that I love the cutting diagrams, charts, and clearly written instructions (that you don't even have to read if you have some experience, know what I mean?). If you're reading this close to the release date, the Quilty Love 8th annual heart quilt sew-along starts January 12, 2026. Get more info here (and the pattern when it comes out)!
Fabrics
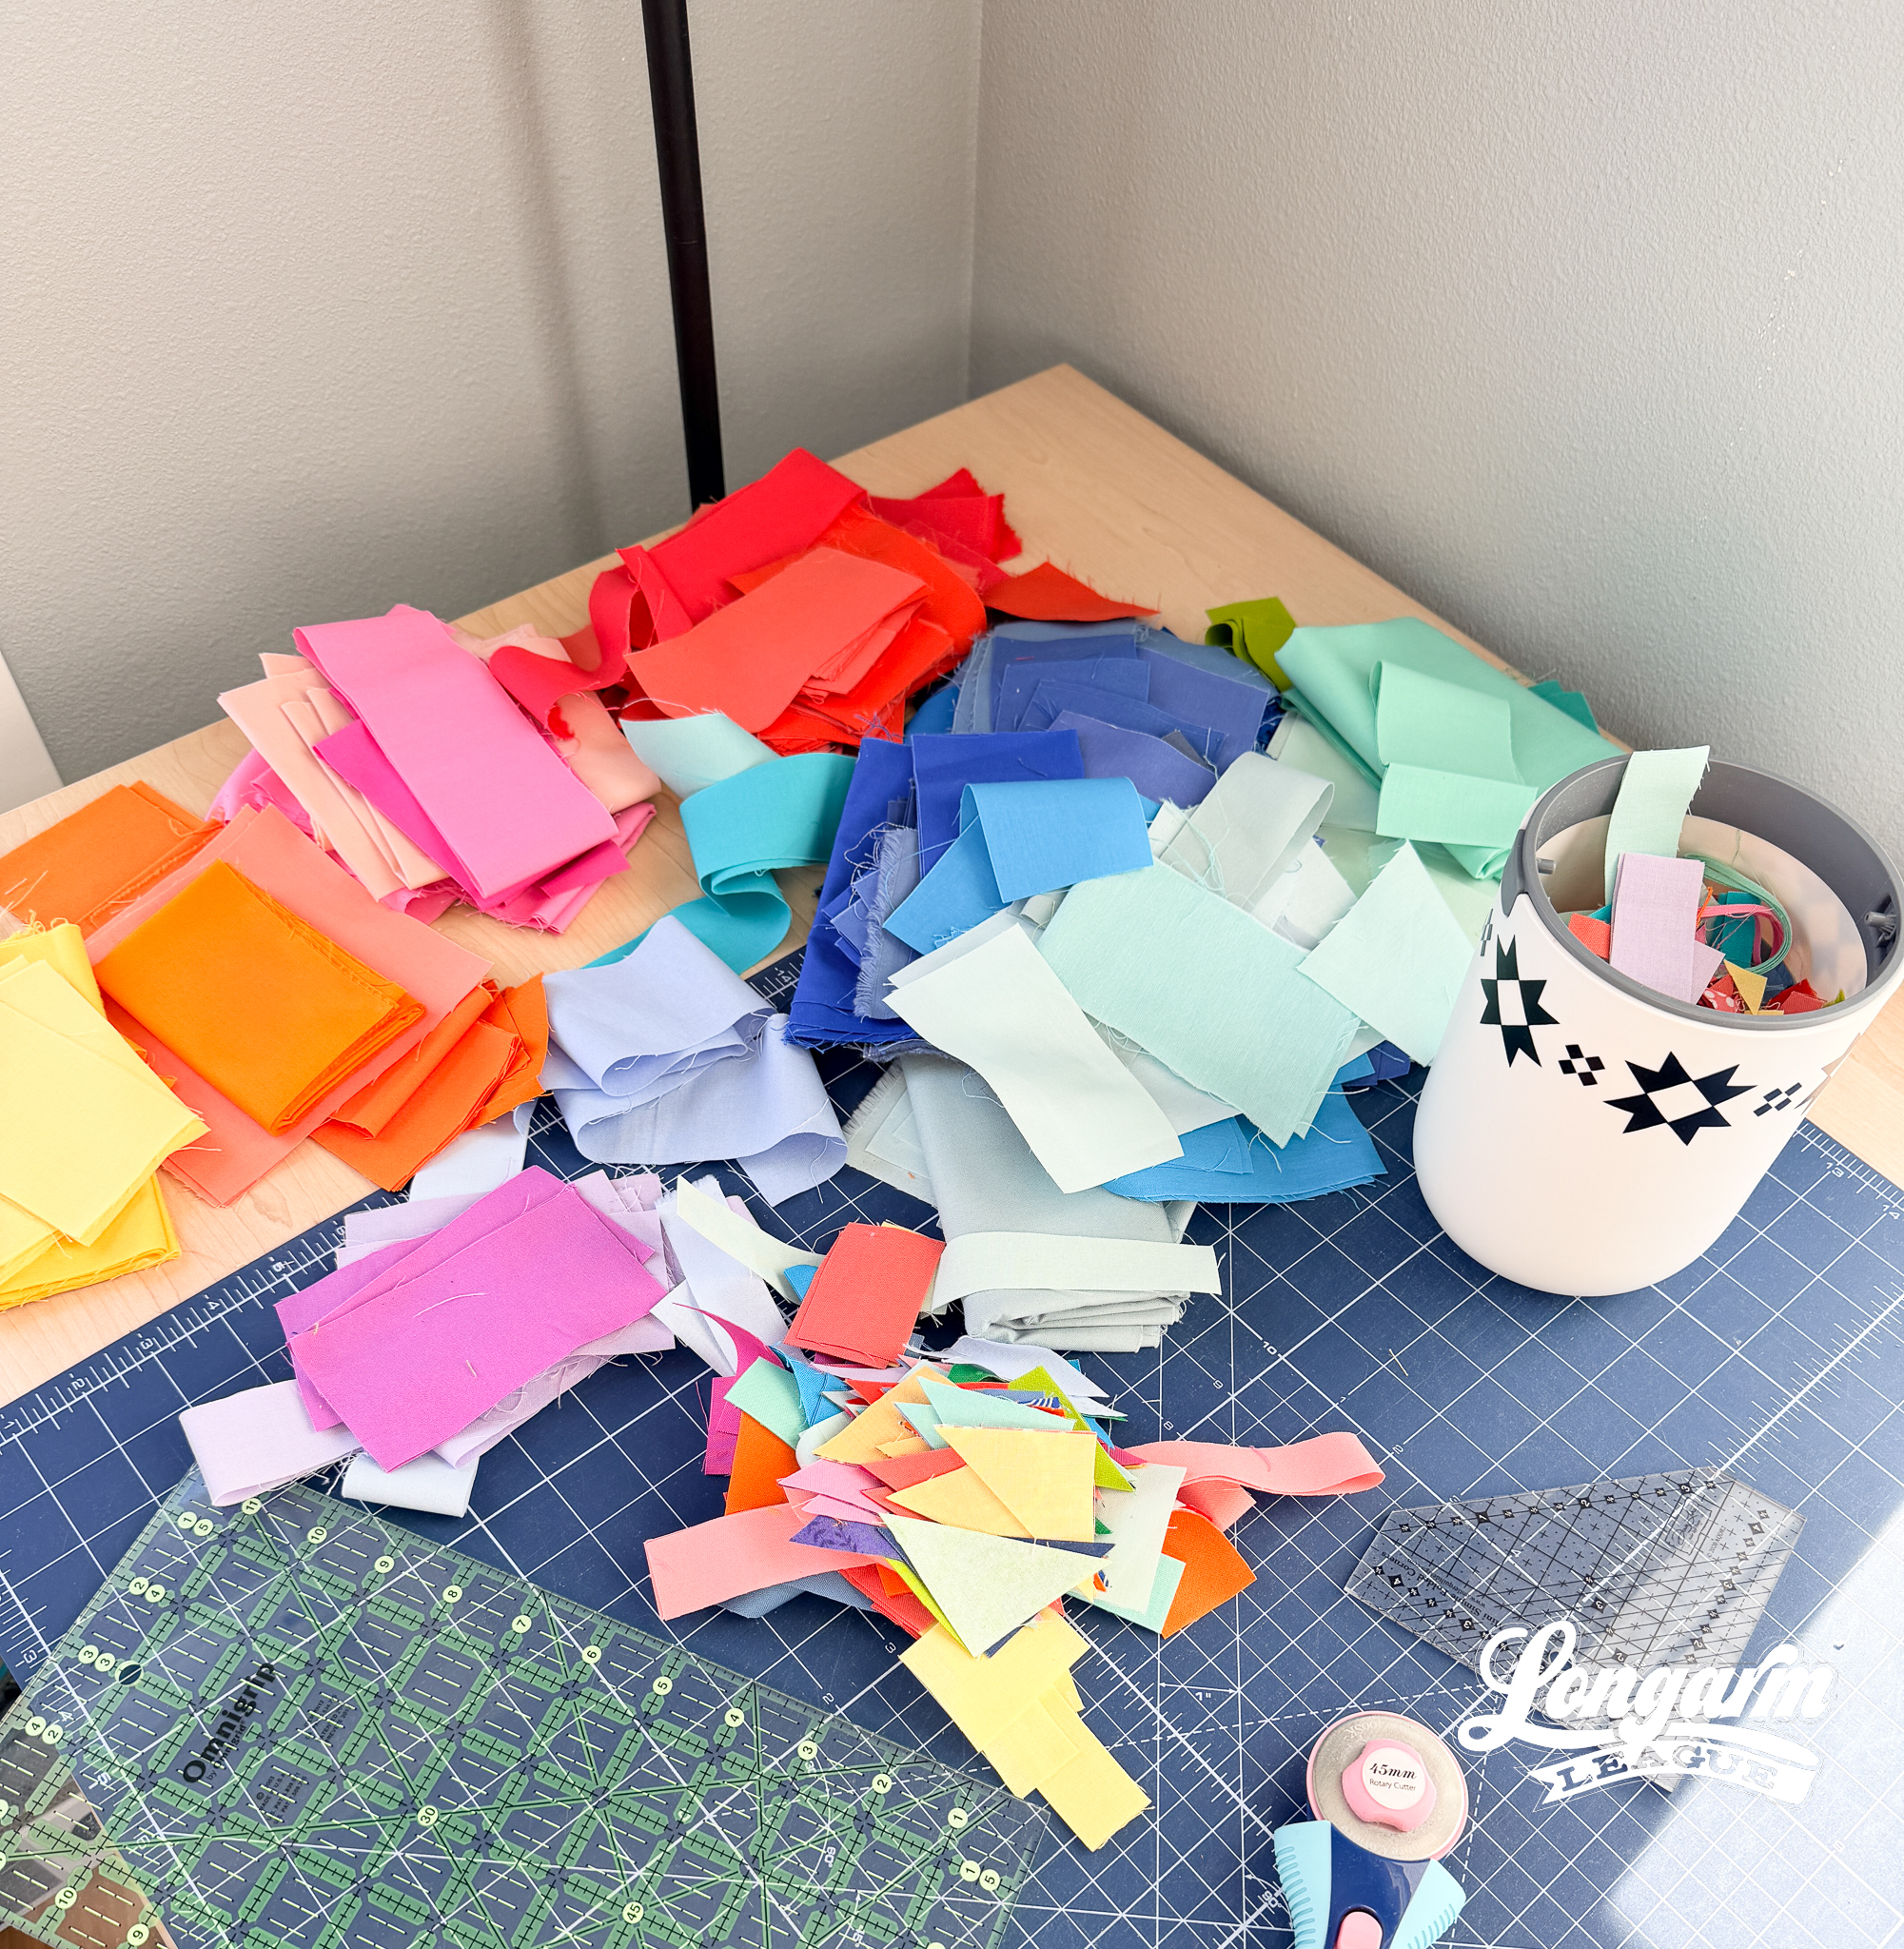
Well, yikes. My fabrics were all over the place!
Here is what happened.
I knew I wanted to make the smallest baby/lap size, so I started pulling fat quarters out and soon had a rainbow theme going on.
I decided to sew up a test block of the heart, and realized just how little fabric I needed for each block. That's when I abandoned my fabric pull and went to my scrap bins instead. I found similar fabrics in my scraps, so I didn't have to cut into my fat quarters. I quickly reconstituted my rainbow pull scrap-style, but decided that, instead of using the same fabrics for the hearts and backgrounds, I would use solid fabrics as backgrounds to contrast with the heart prints.
In the end, I used 28 different heart prints and 28 different solid fabrics for the heart blocks. In hindsight, it was too many. If I had it to do over again, I think I'd be happier constraining my palette and not doing the rainbow thing. It would have certainly been less work! I think a part of me went with the rainbow colors because I didn't have the patience to pick a palette out of the fat quarters I had.
For the 9-patch blocks, I used yardage I had of both the background (I want to say the color is Silver from Kona) and an Anna Maria print for the 9-patches and binding. Because I had yardage, I was able to save loads of time and follow the efficient cutting and strip-piecing directions in the pattern. These blocks went together in a flash!
Backing
Silver Dapple Dots by Riley Blake goes with everything! I bought a bolt last year, and I still have SO MUCH LEFT. It's a great option to have on hand. This backing does have a seam in it because it was made with leftover pieces from other projects, so I didn't even get to unroll the wide bolt this time.

The Quilting Details
Difficulty Level
This design gets an easy rating. I made it even easier by not setting up my rows to touch. I find that leaving a little space between rows significantly reduces stress! Let go of the perfection of having the rows touch exactly and build in space from the start. Look closely at the photos in this post and notice that it doesn't really matter if the rows have space between them.
You will need to use a 50% offset between rows. This produces a staggered effect, like that of typical clamshells. The lines holding the hearts get backstitched.
If you'd like to view the stitch path, a short video is available at the top of the blog post.

Scale
This quilt is fairly small, so I scaled the pantograph design down from the default size. As stitched, each individual heart is just shy of 1" tall.
Here are the sizing specifications for how I set up this quilt using my Intelliquilter (42" x 48" quilt size):
Row height: 1.4"
Gap: -0.267"
Pattern height: 1.667" (measurement from top to bottom of the repeat)
Offset: 50%
Backtracking: some
Here's a look at the included PDF: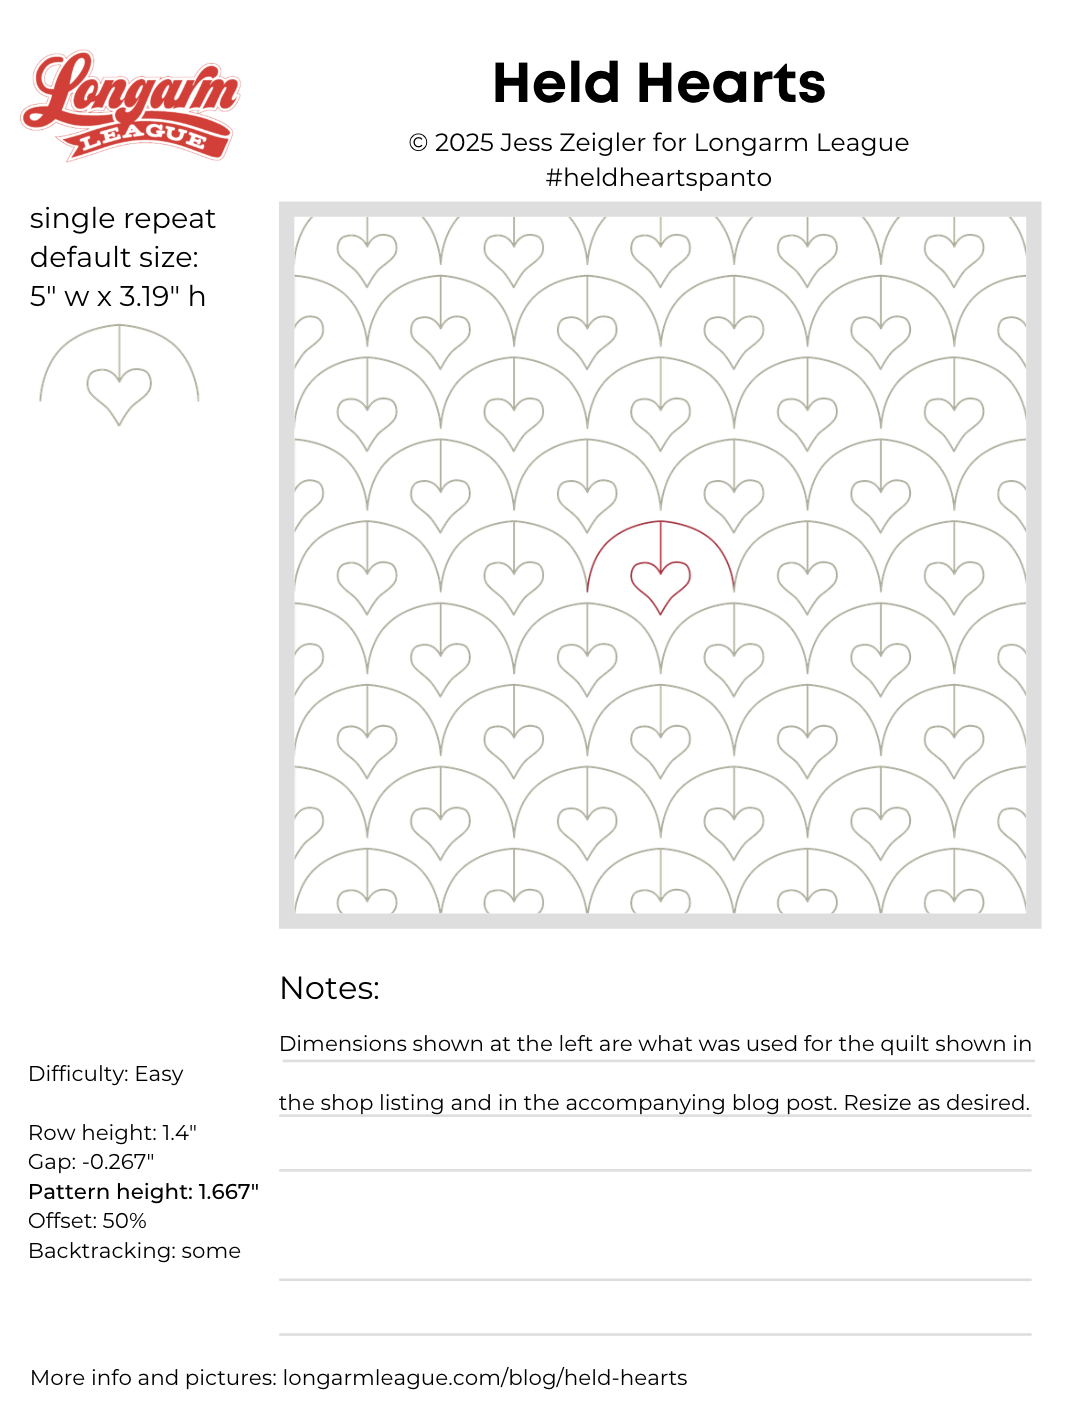

Interested in getting new digital pantograph designs like this one on the day they're released (and at a deep discount)? Sign up for our Digital Panto Club and get them delivered directly to your inbox on the first Wednesday of each new month.

Jess Zeigler
Longarm League Commish & Owner of Threaded Quilting Studio, LLC.


