
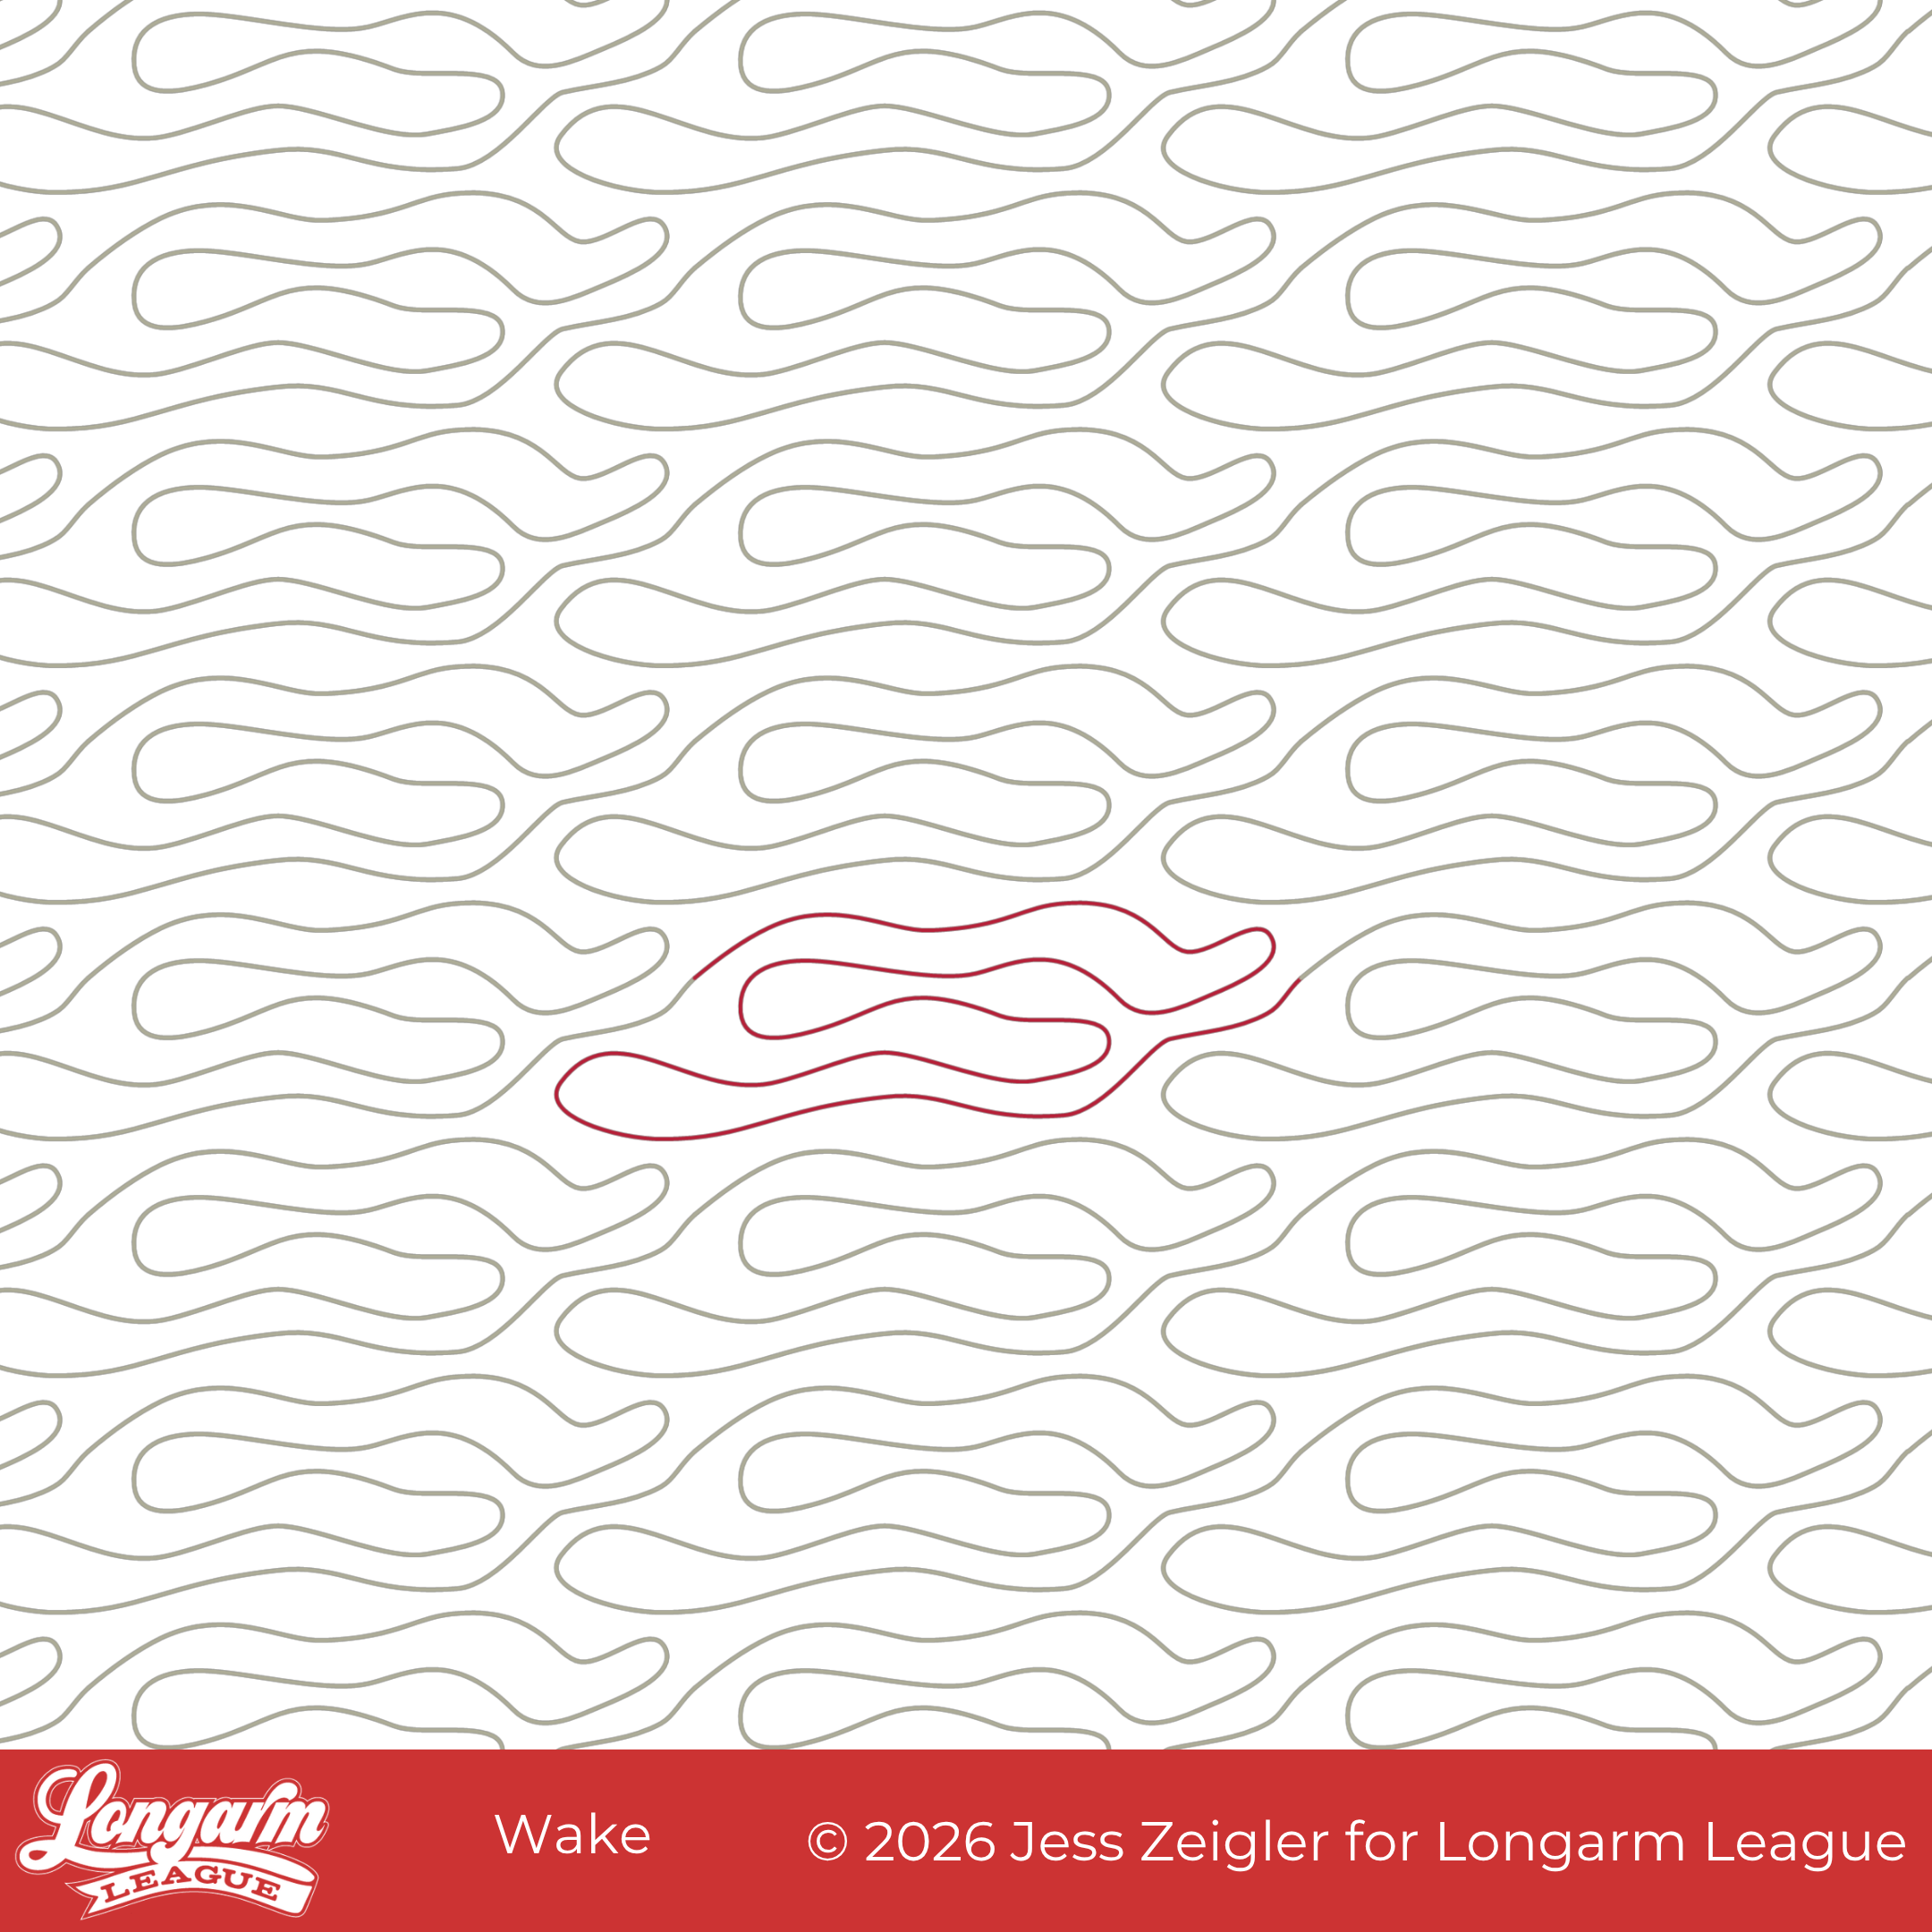
Wake Edge-to-Edge Computerized Quilting Design
I can finally put this design to bed! :) Like last month's Boho Bulbs release, this design has been in the works for several years. It started with a date night at a local sushi restaurant. I was inspired by their back wall:

Isn't it cool?!
I loved how the lighting in the restaurant brought so much dimension and interest to the monochromatic wall. I immediately thought of quilting texture and took a picture with my phone. I started a sketch in my design software, but never fully fleshed out the design until now.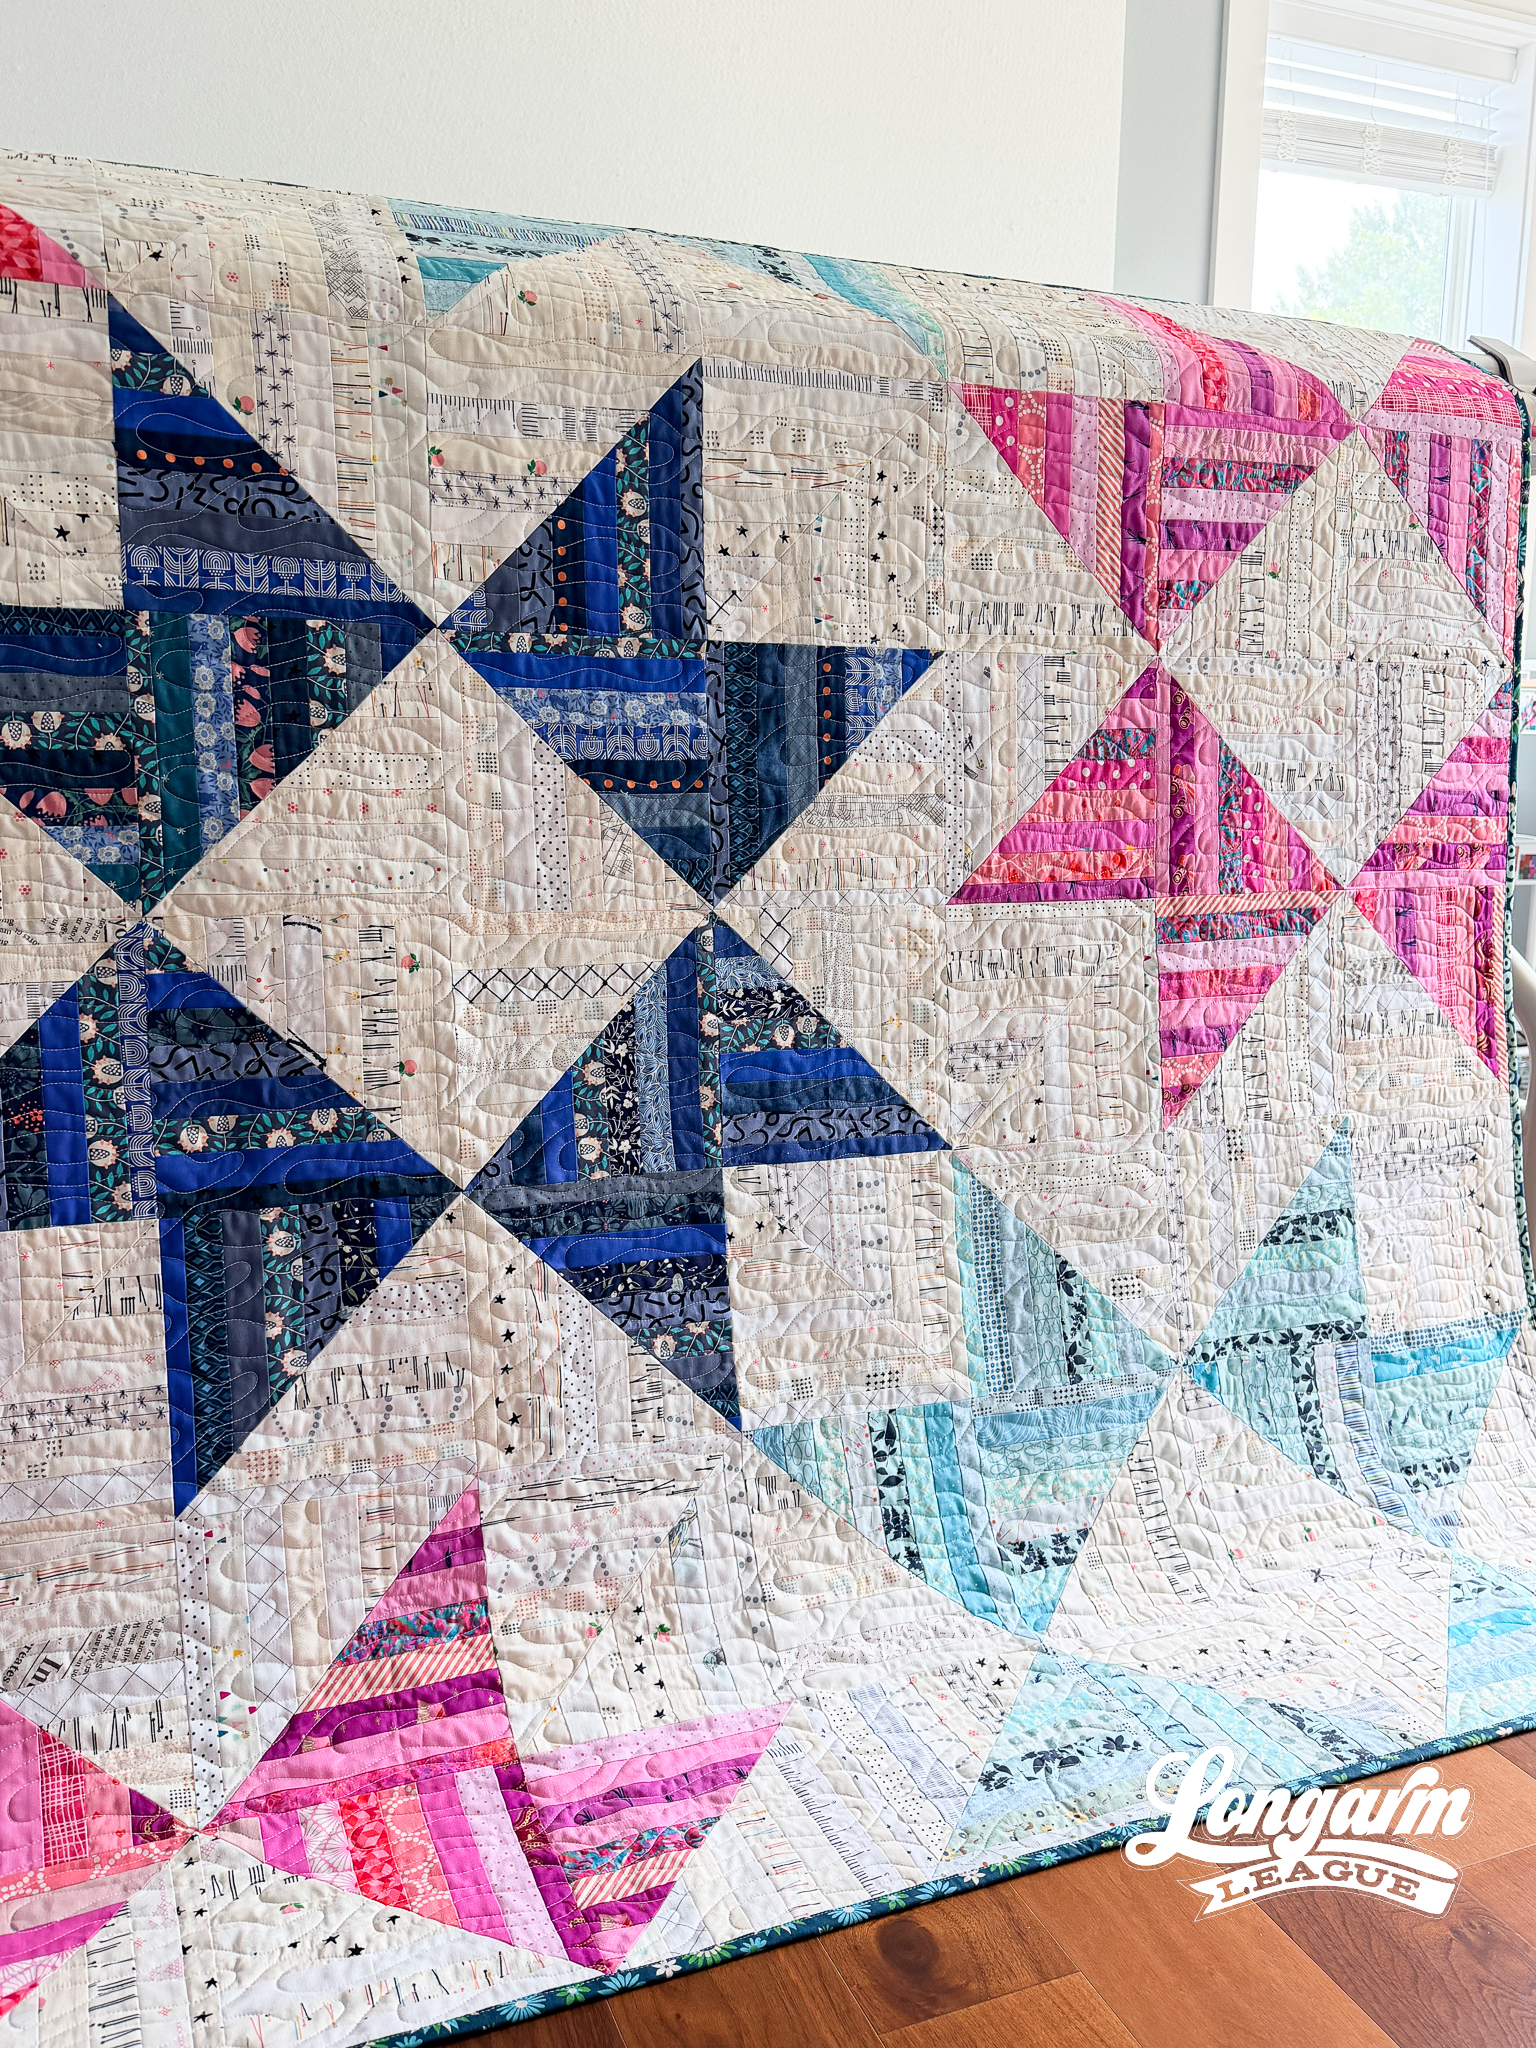
The challenge was conveying the strong horizontal orientation of the lines while coming up with a repeat that didn't have any backtracking and was easy to align/realign. 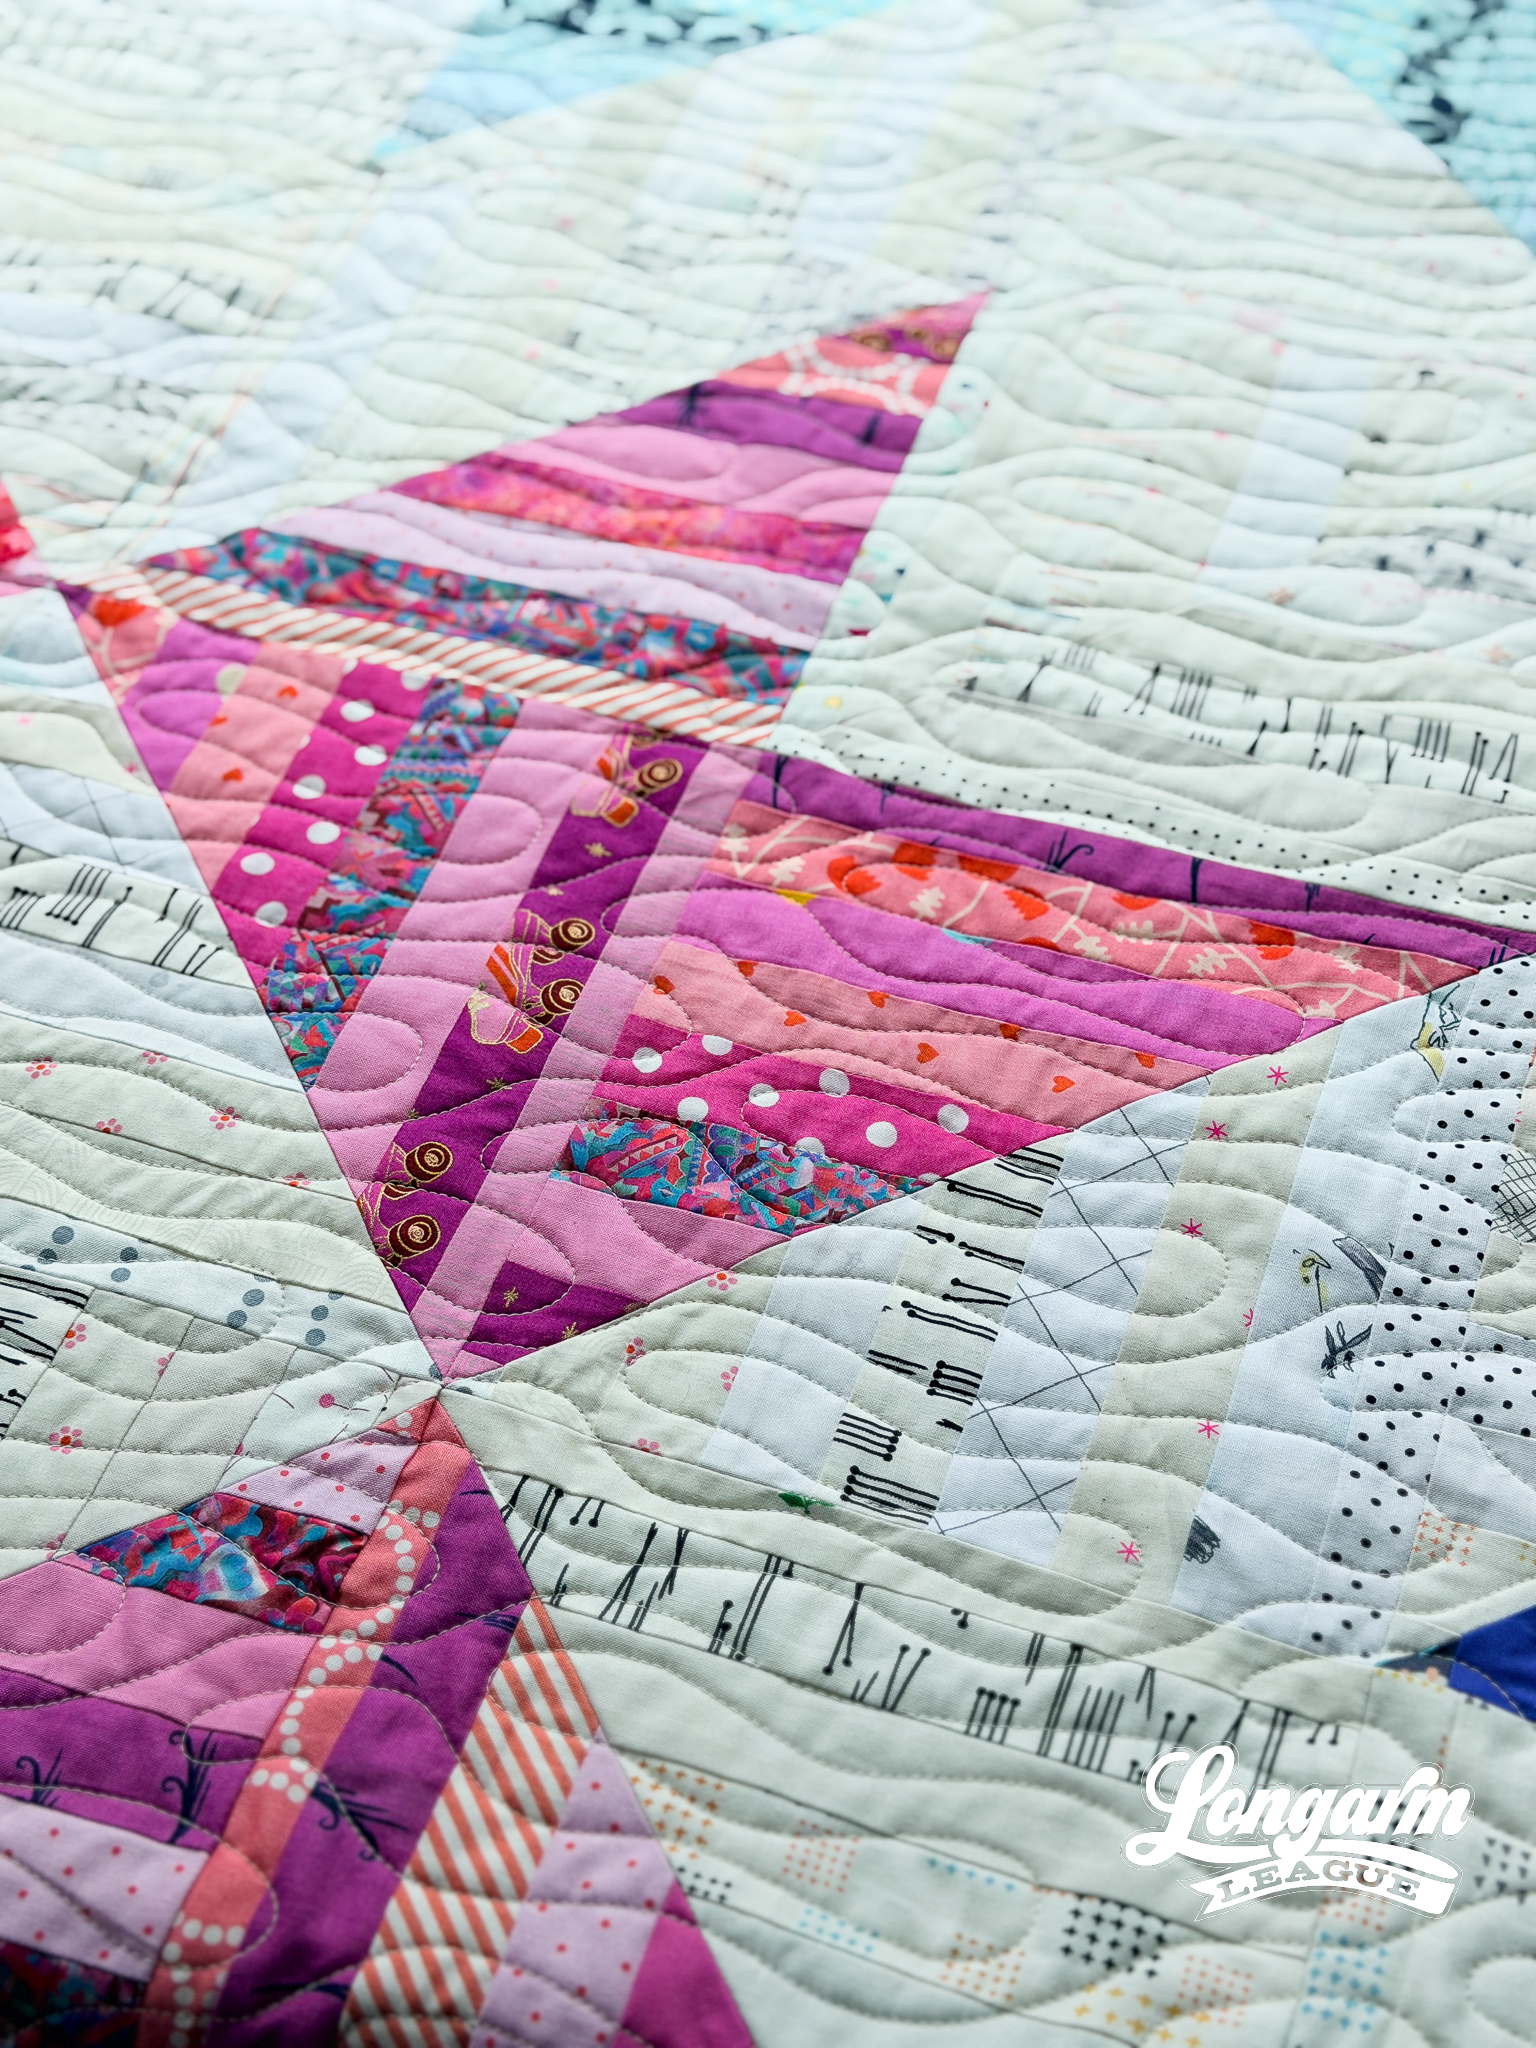
While I like the way the lines of the dimensional panels of the restaurant converge and nest together, I thought rounded ends and gaps between the long back and forth lines would be easier to stitch while still getting the horizontal flow and texture of the inspiration piece.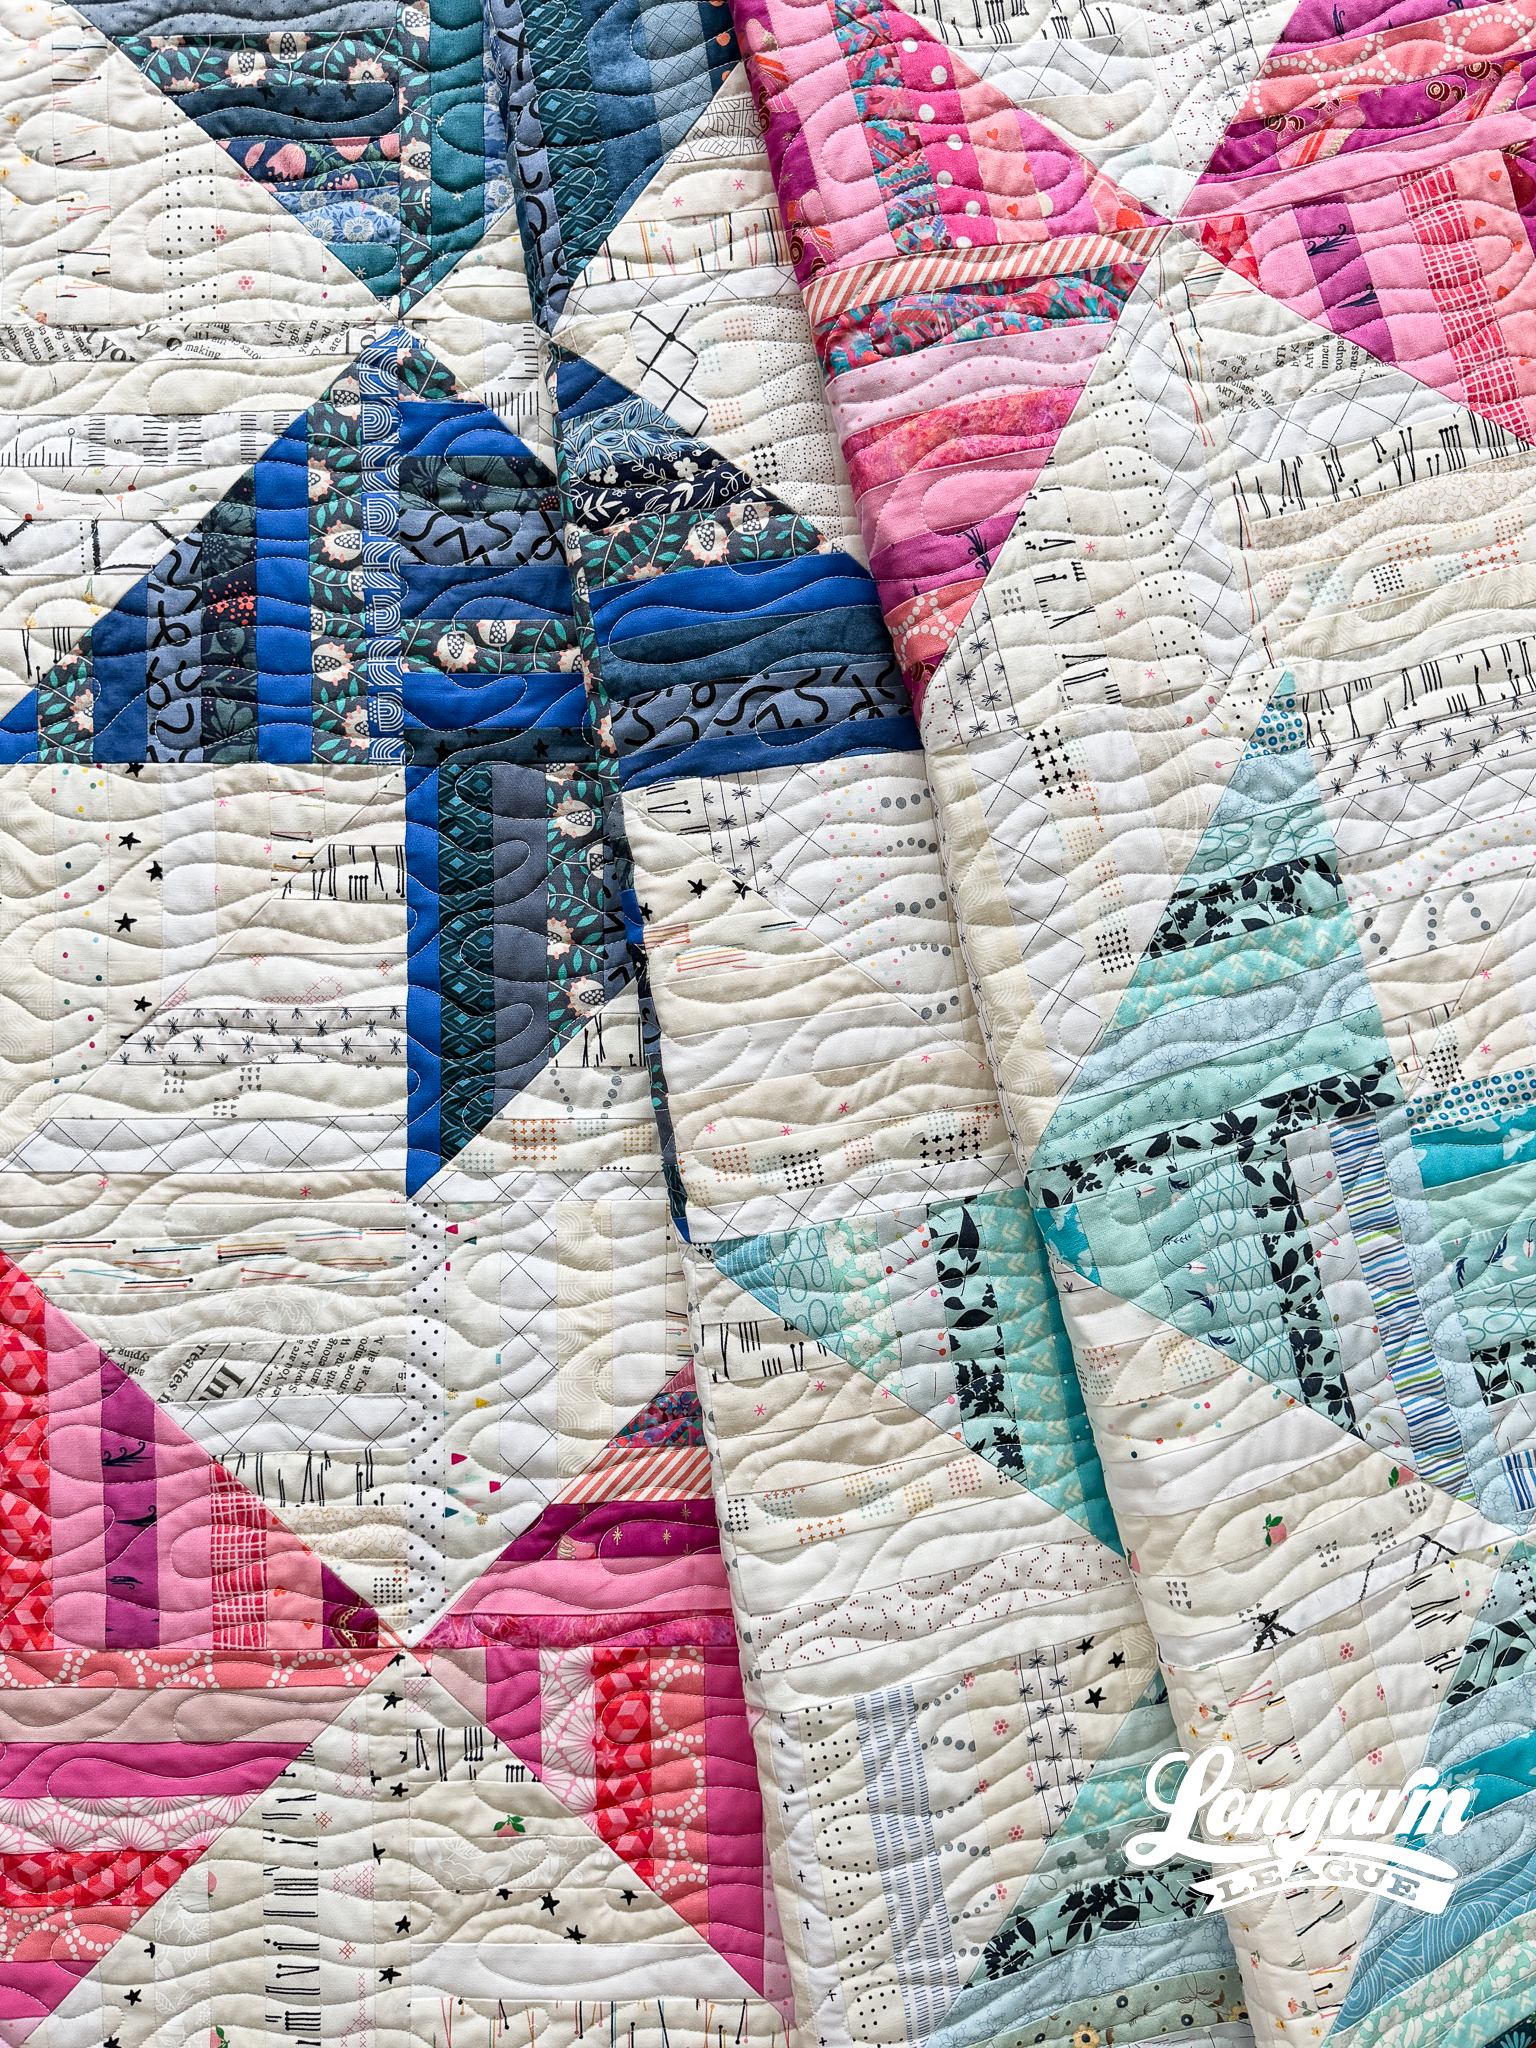
I named this design Wake because it reminded me of water and the name Ripples (as my own draft was named) had already been taken—at least a few times—for other edge-to-edge quilting designs.
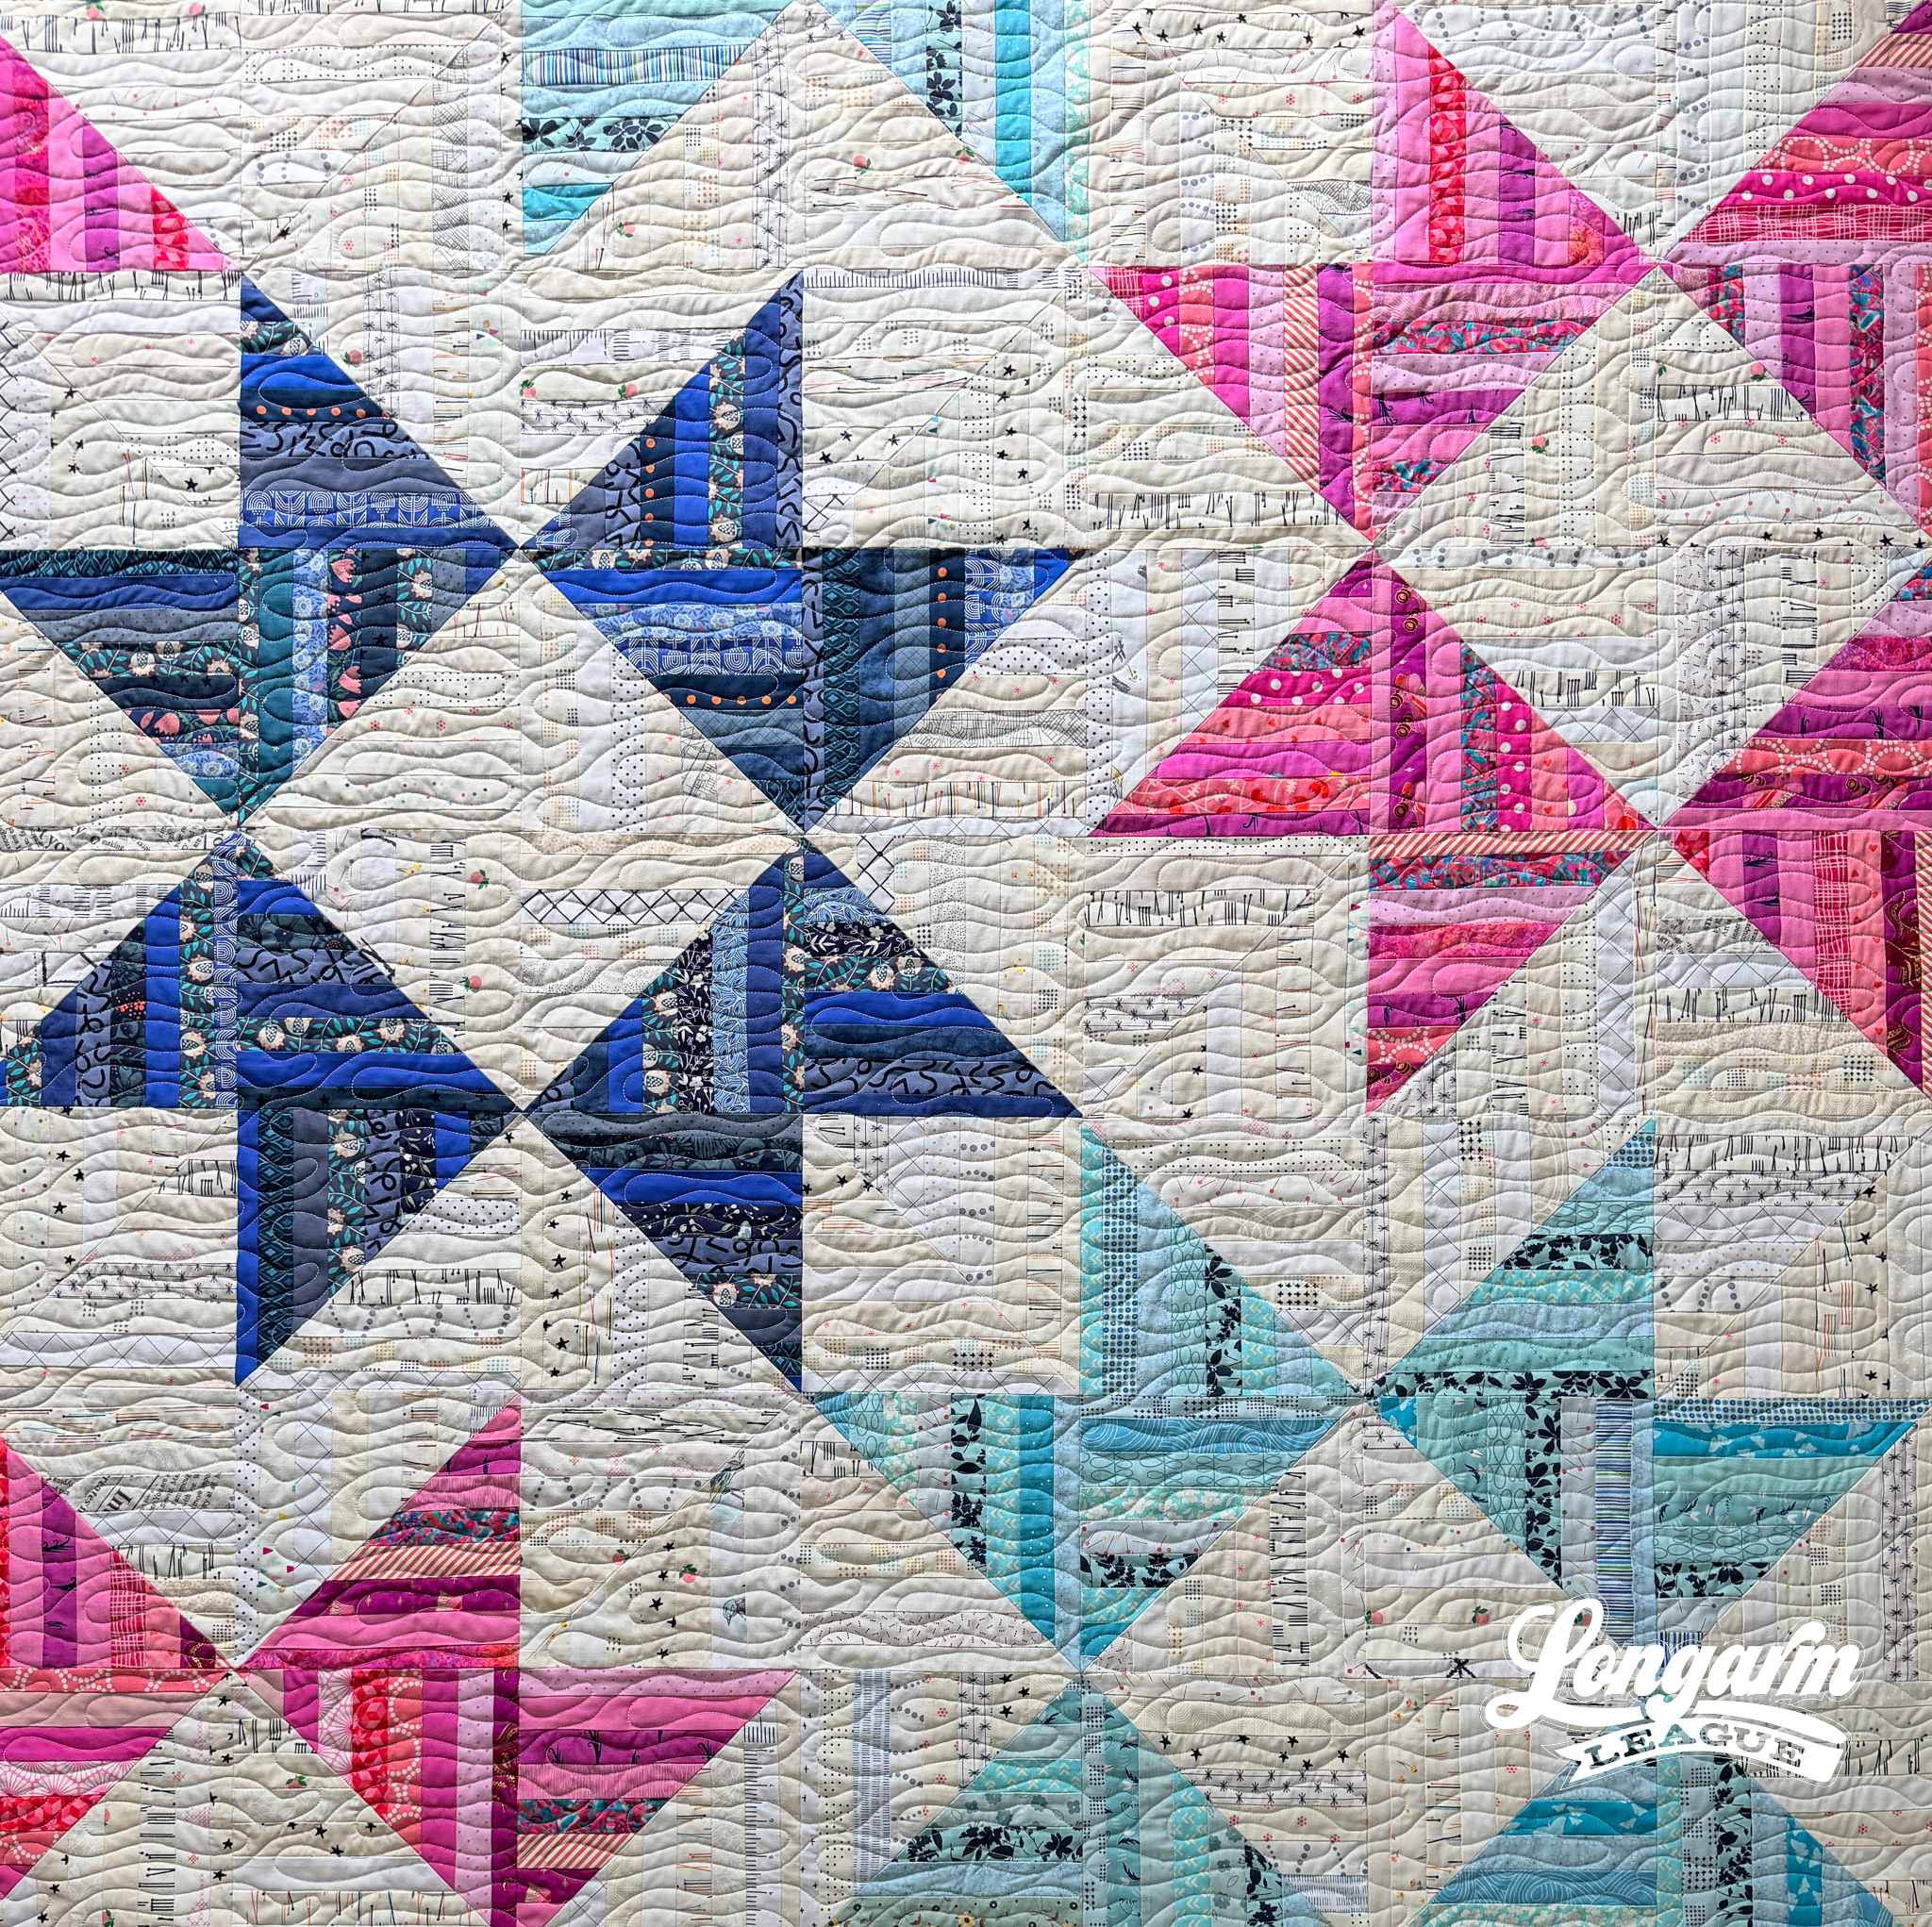
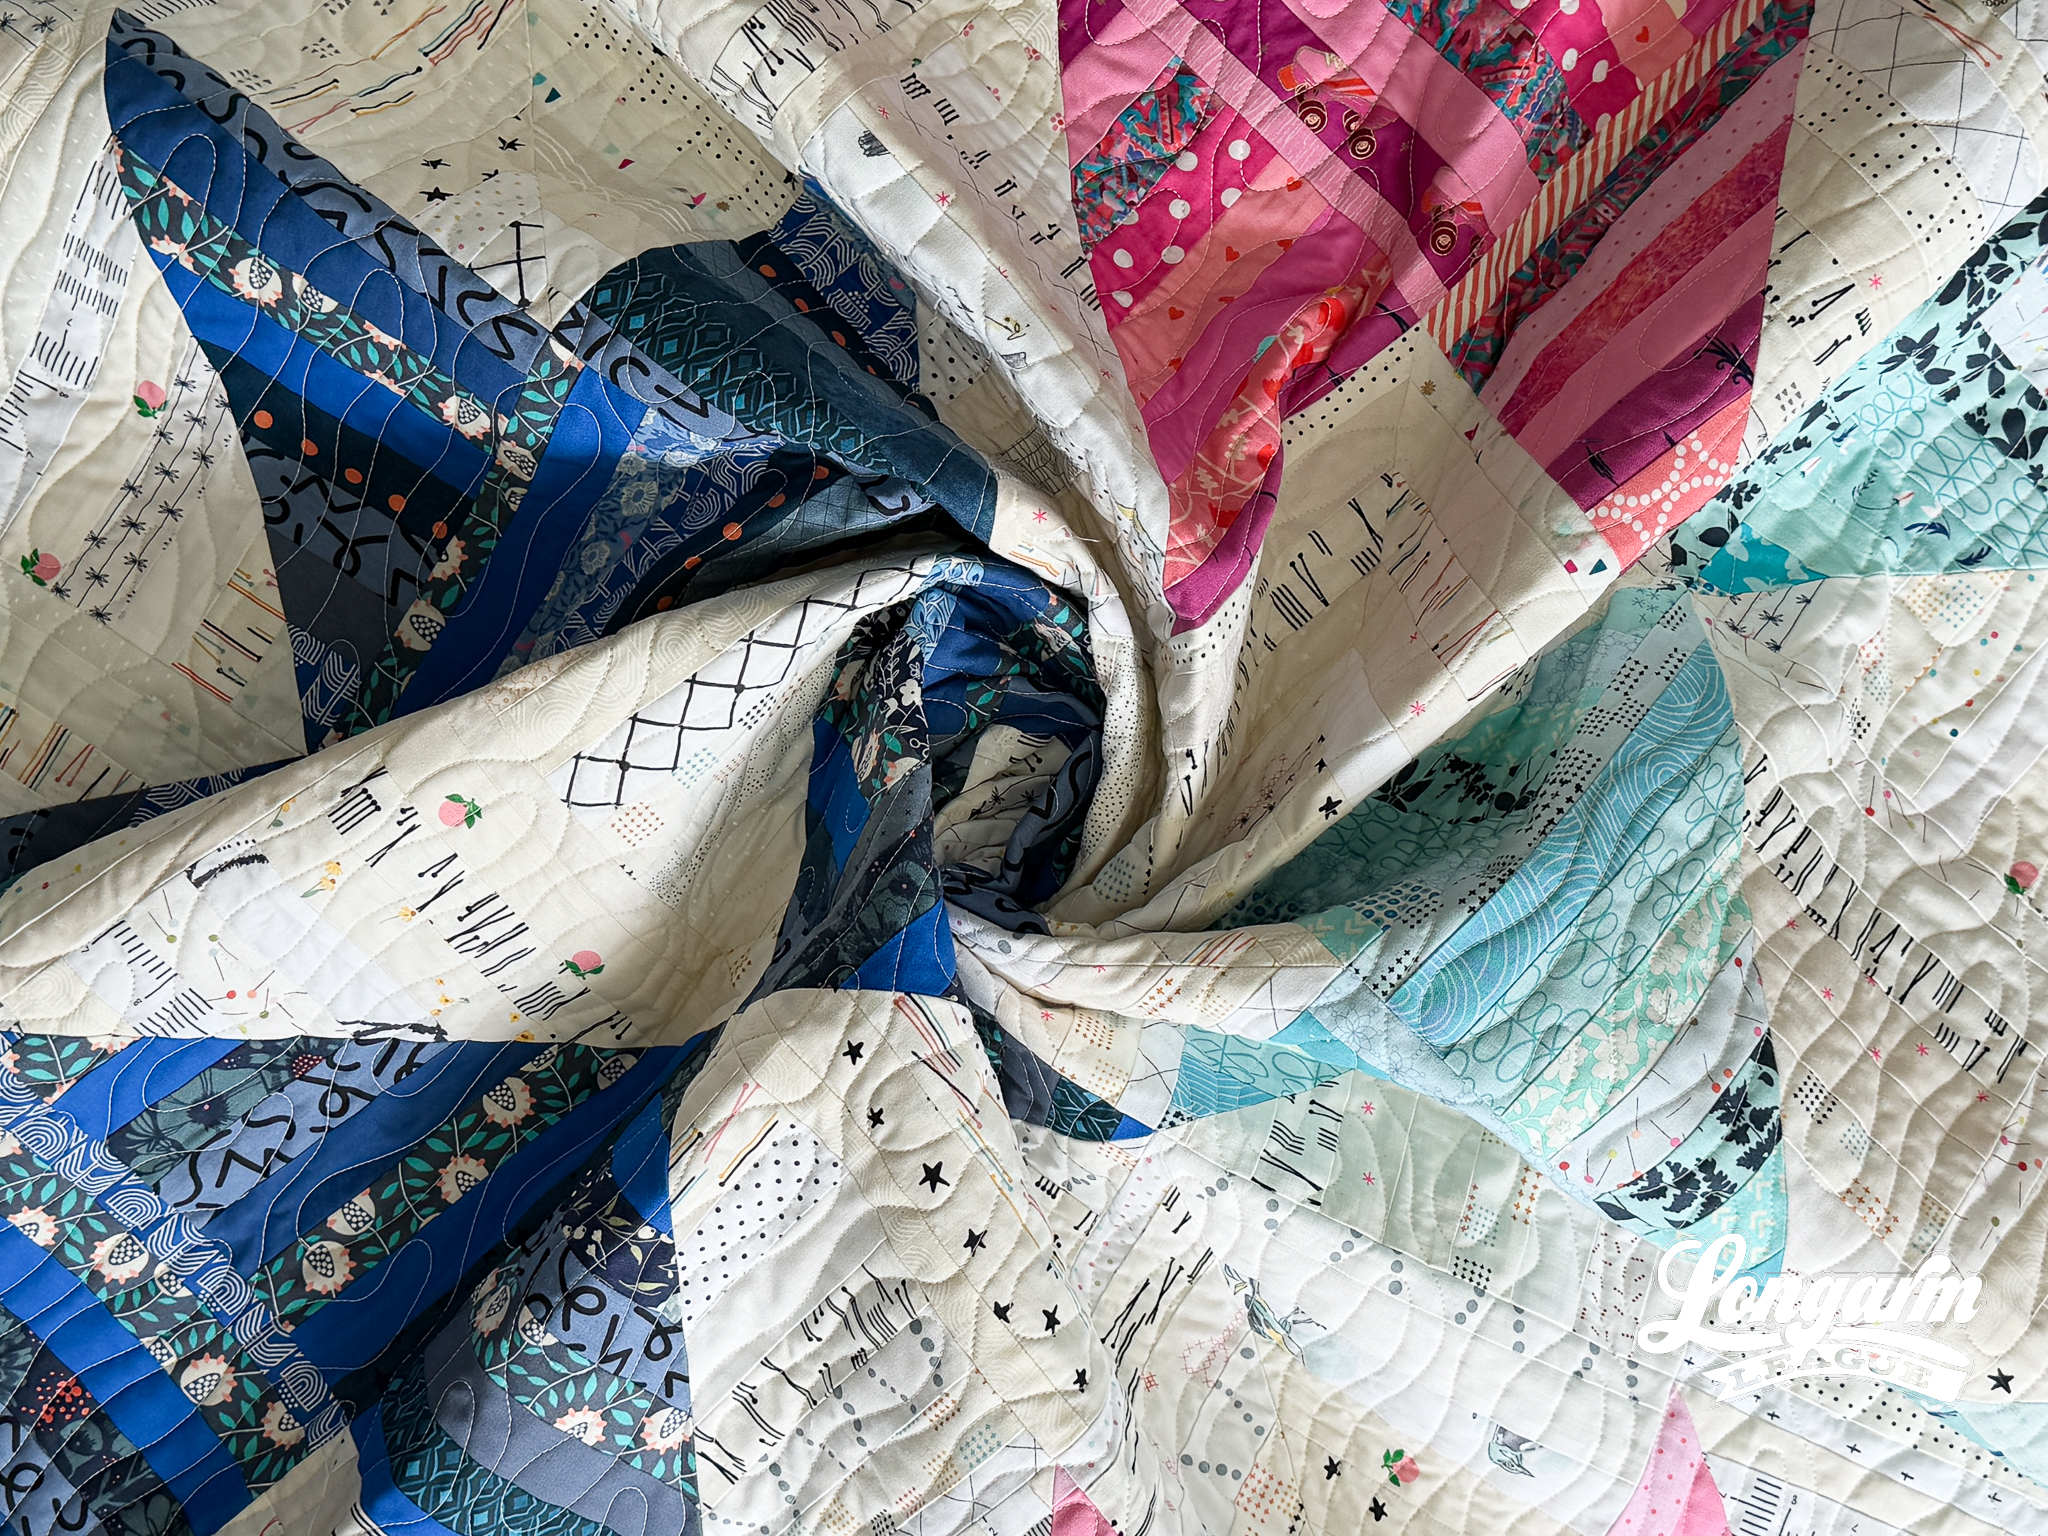
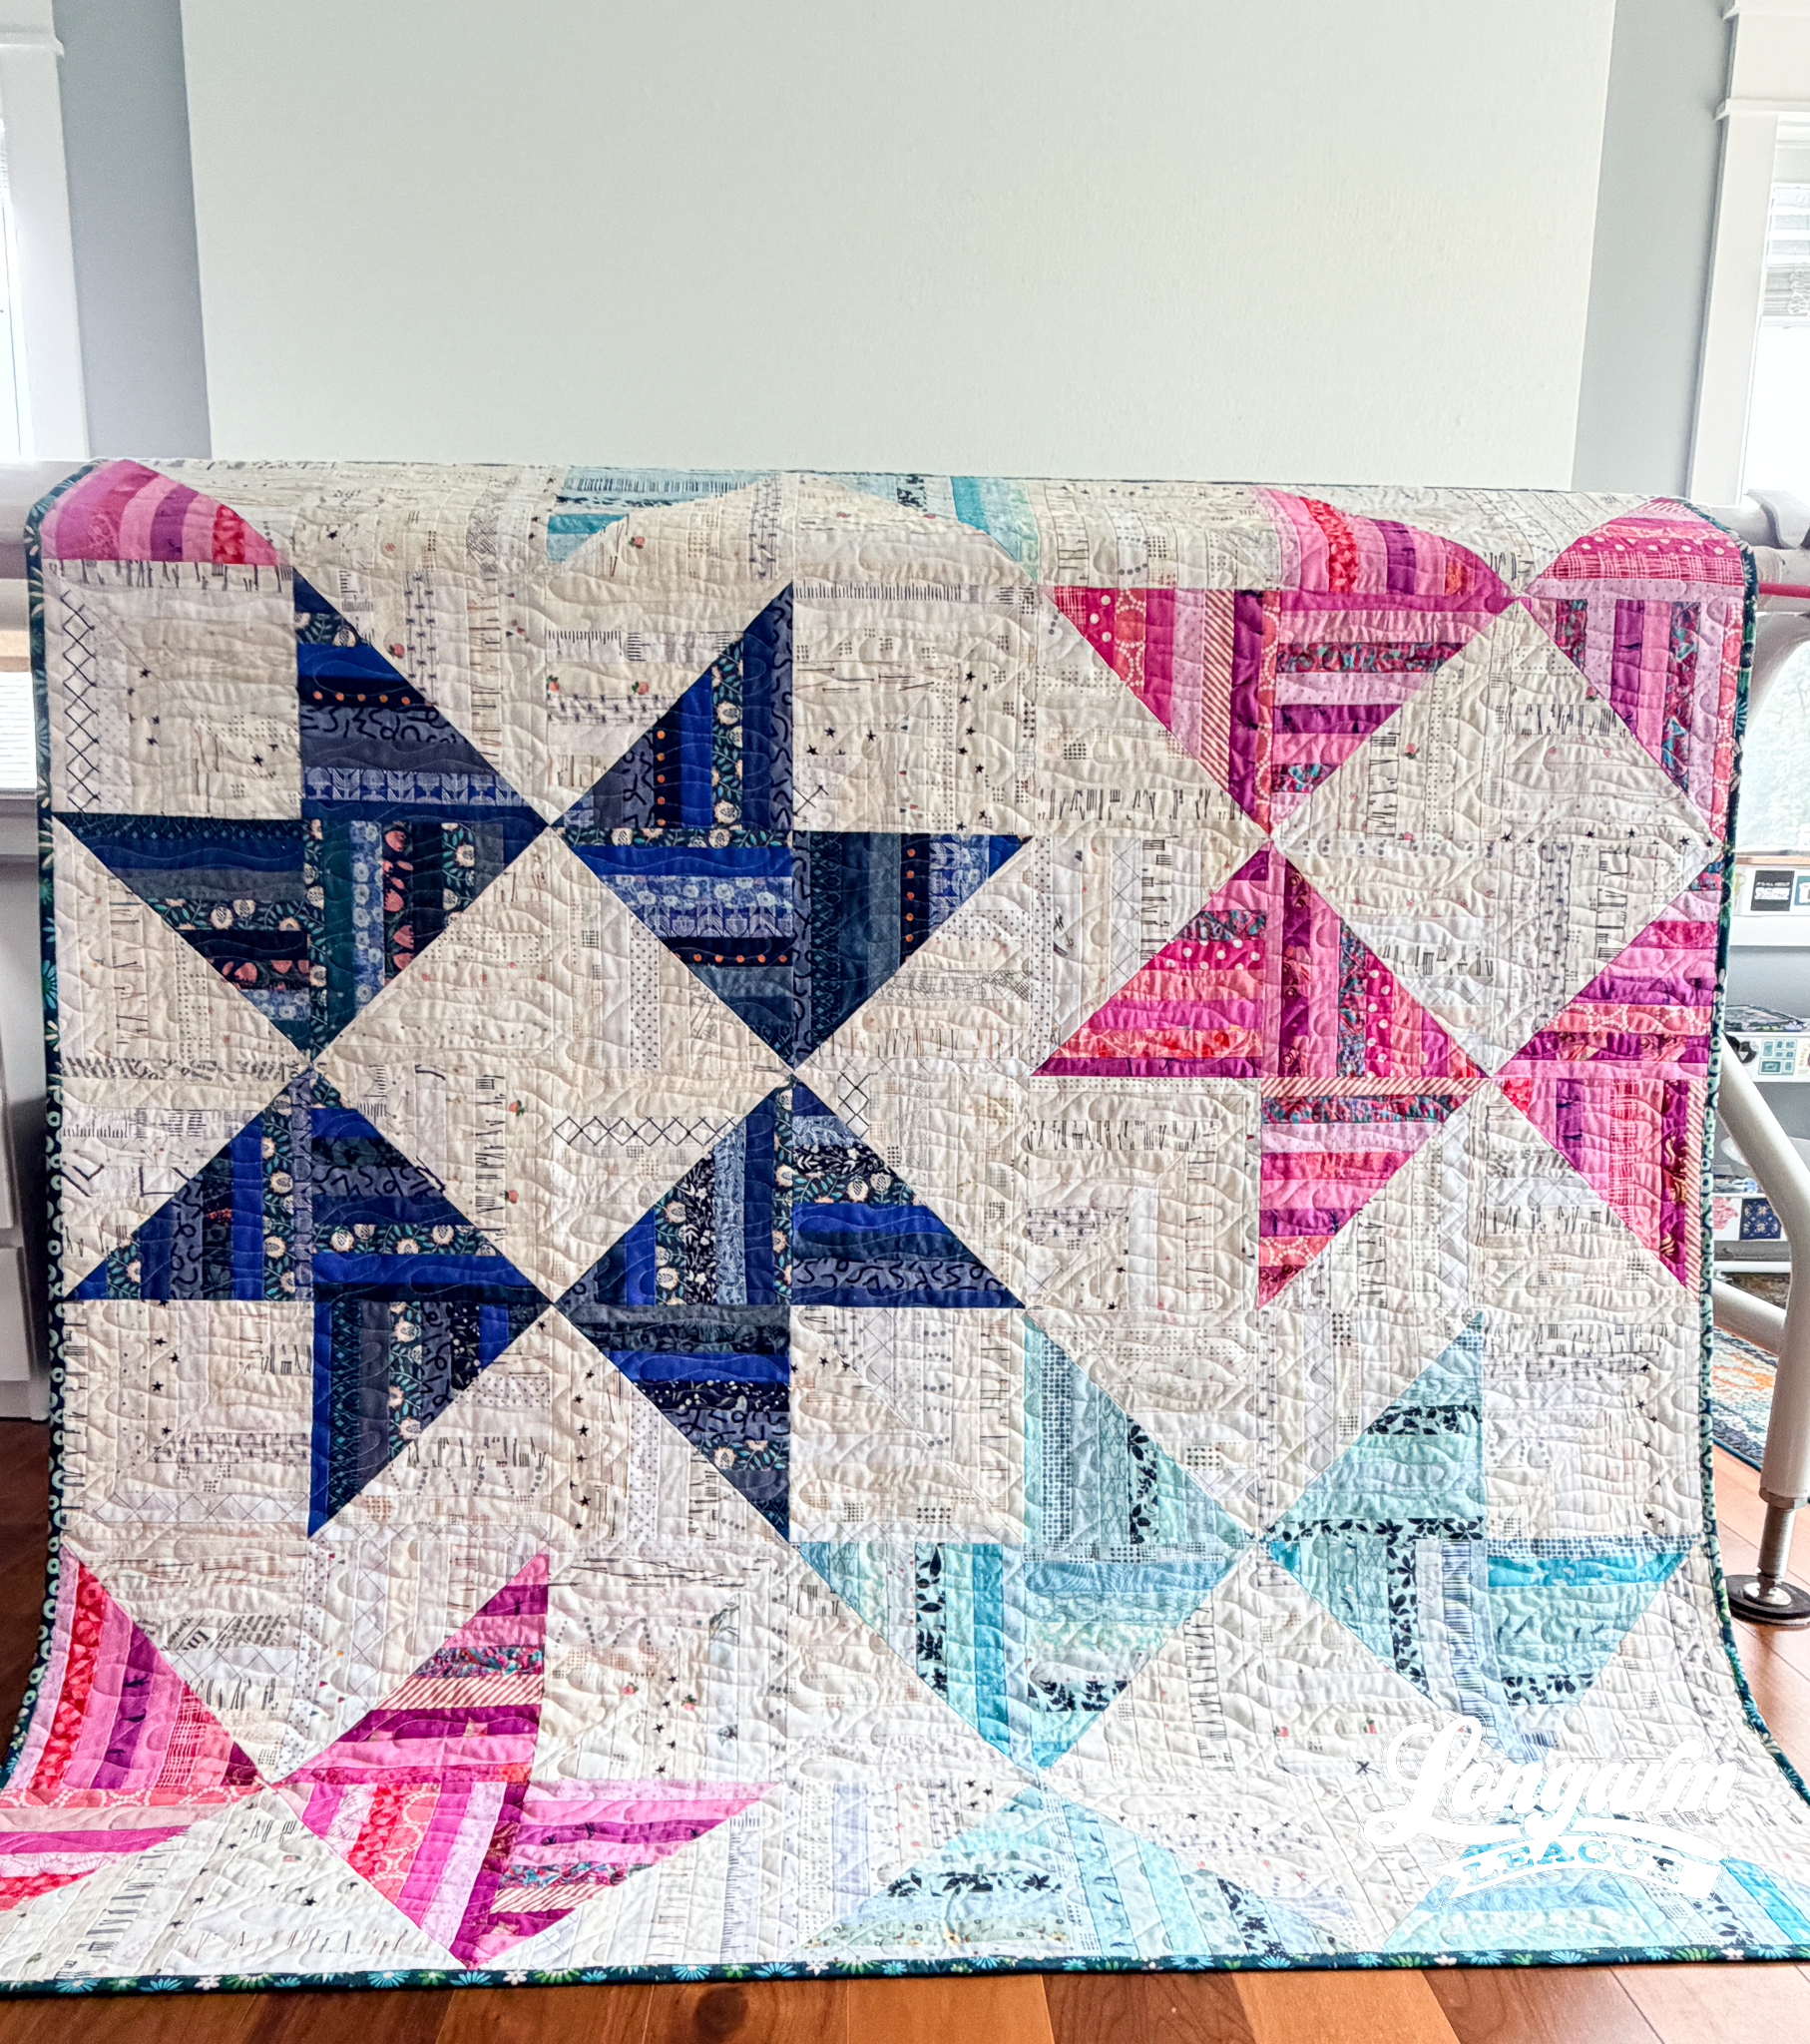
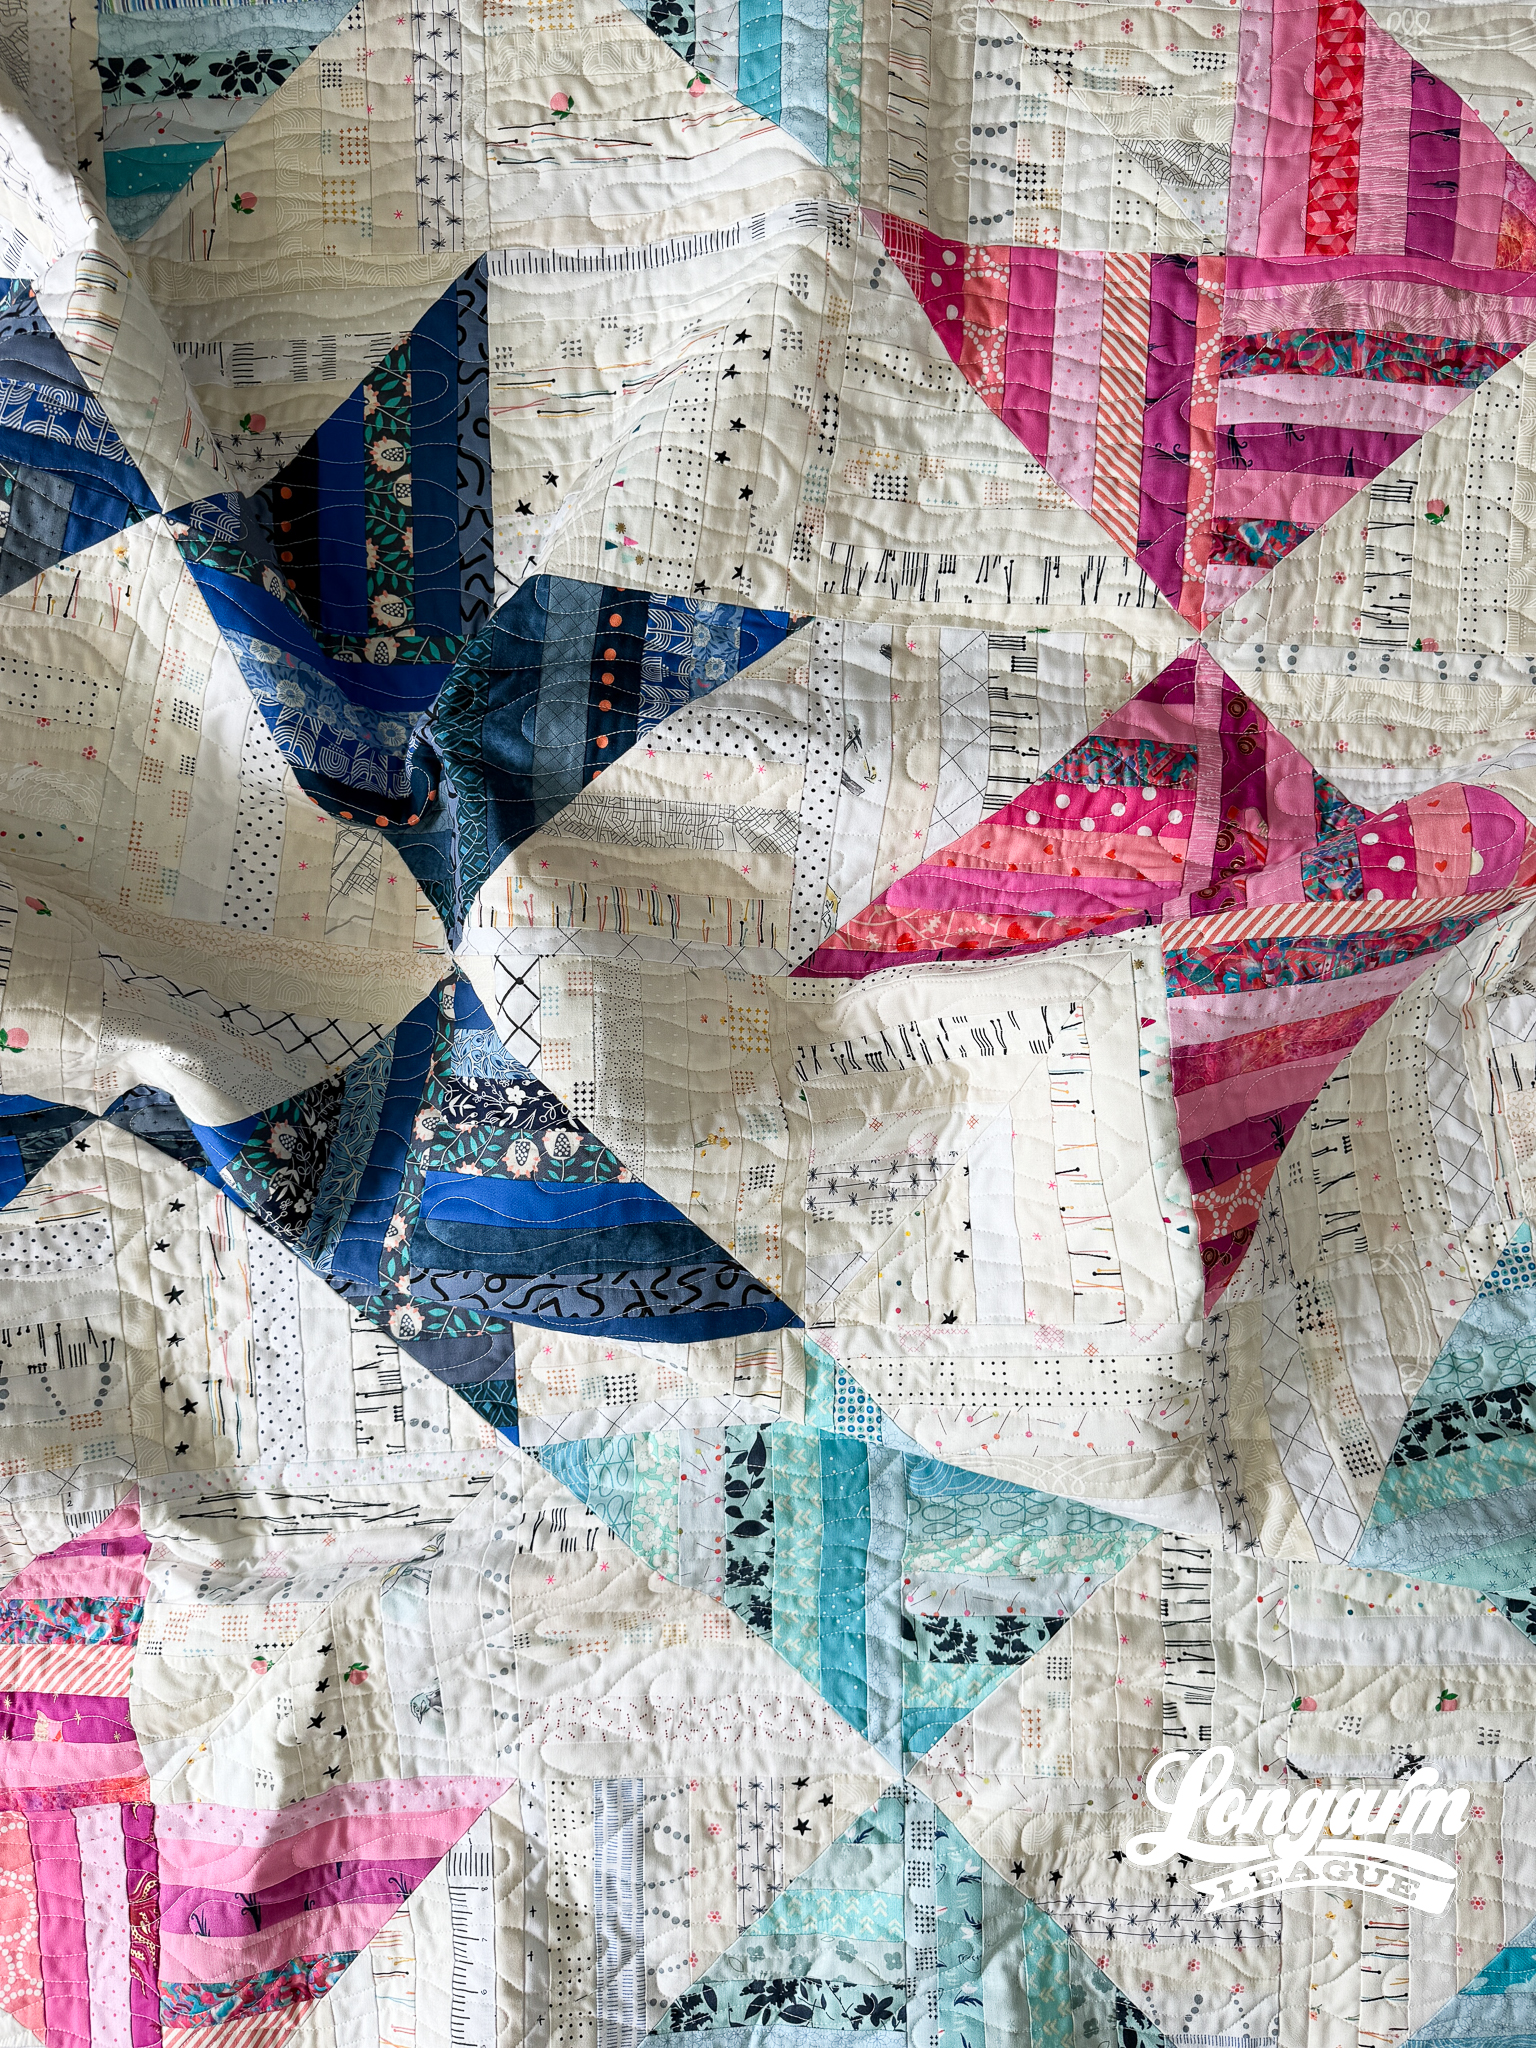
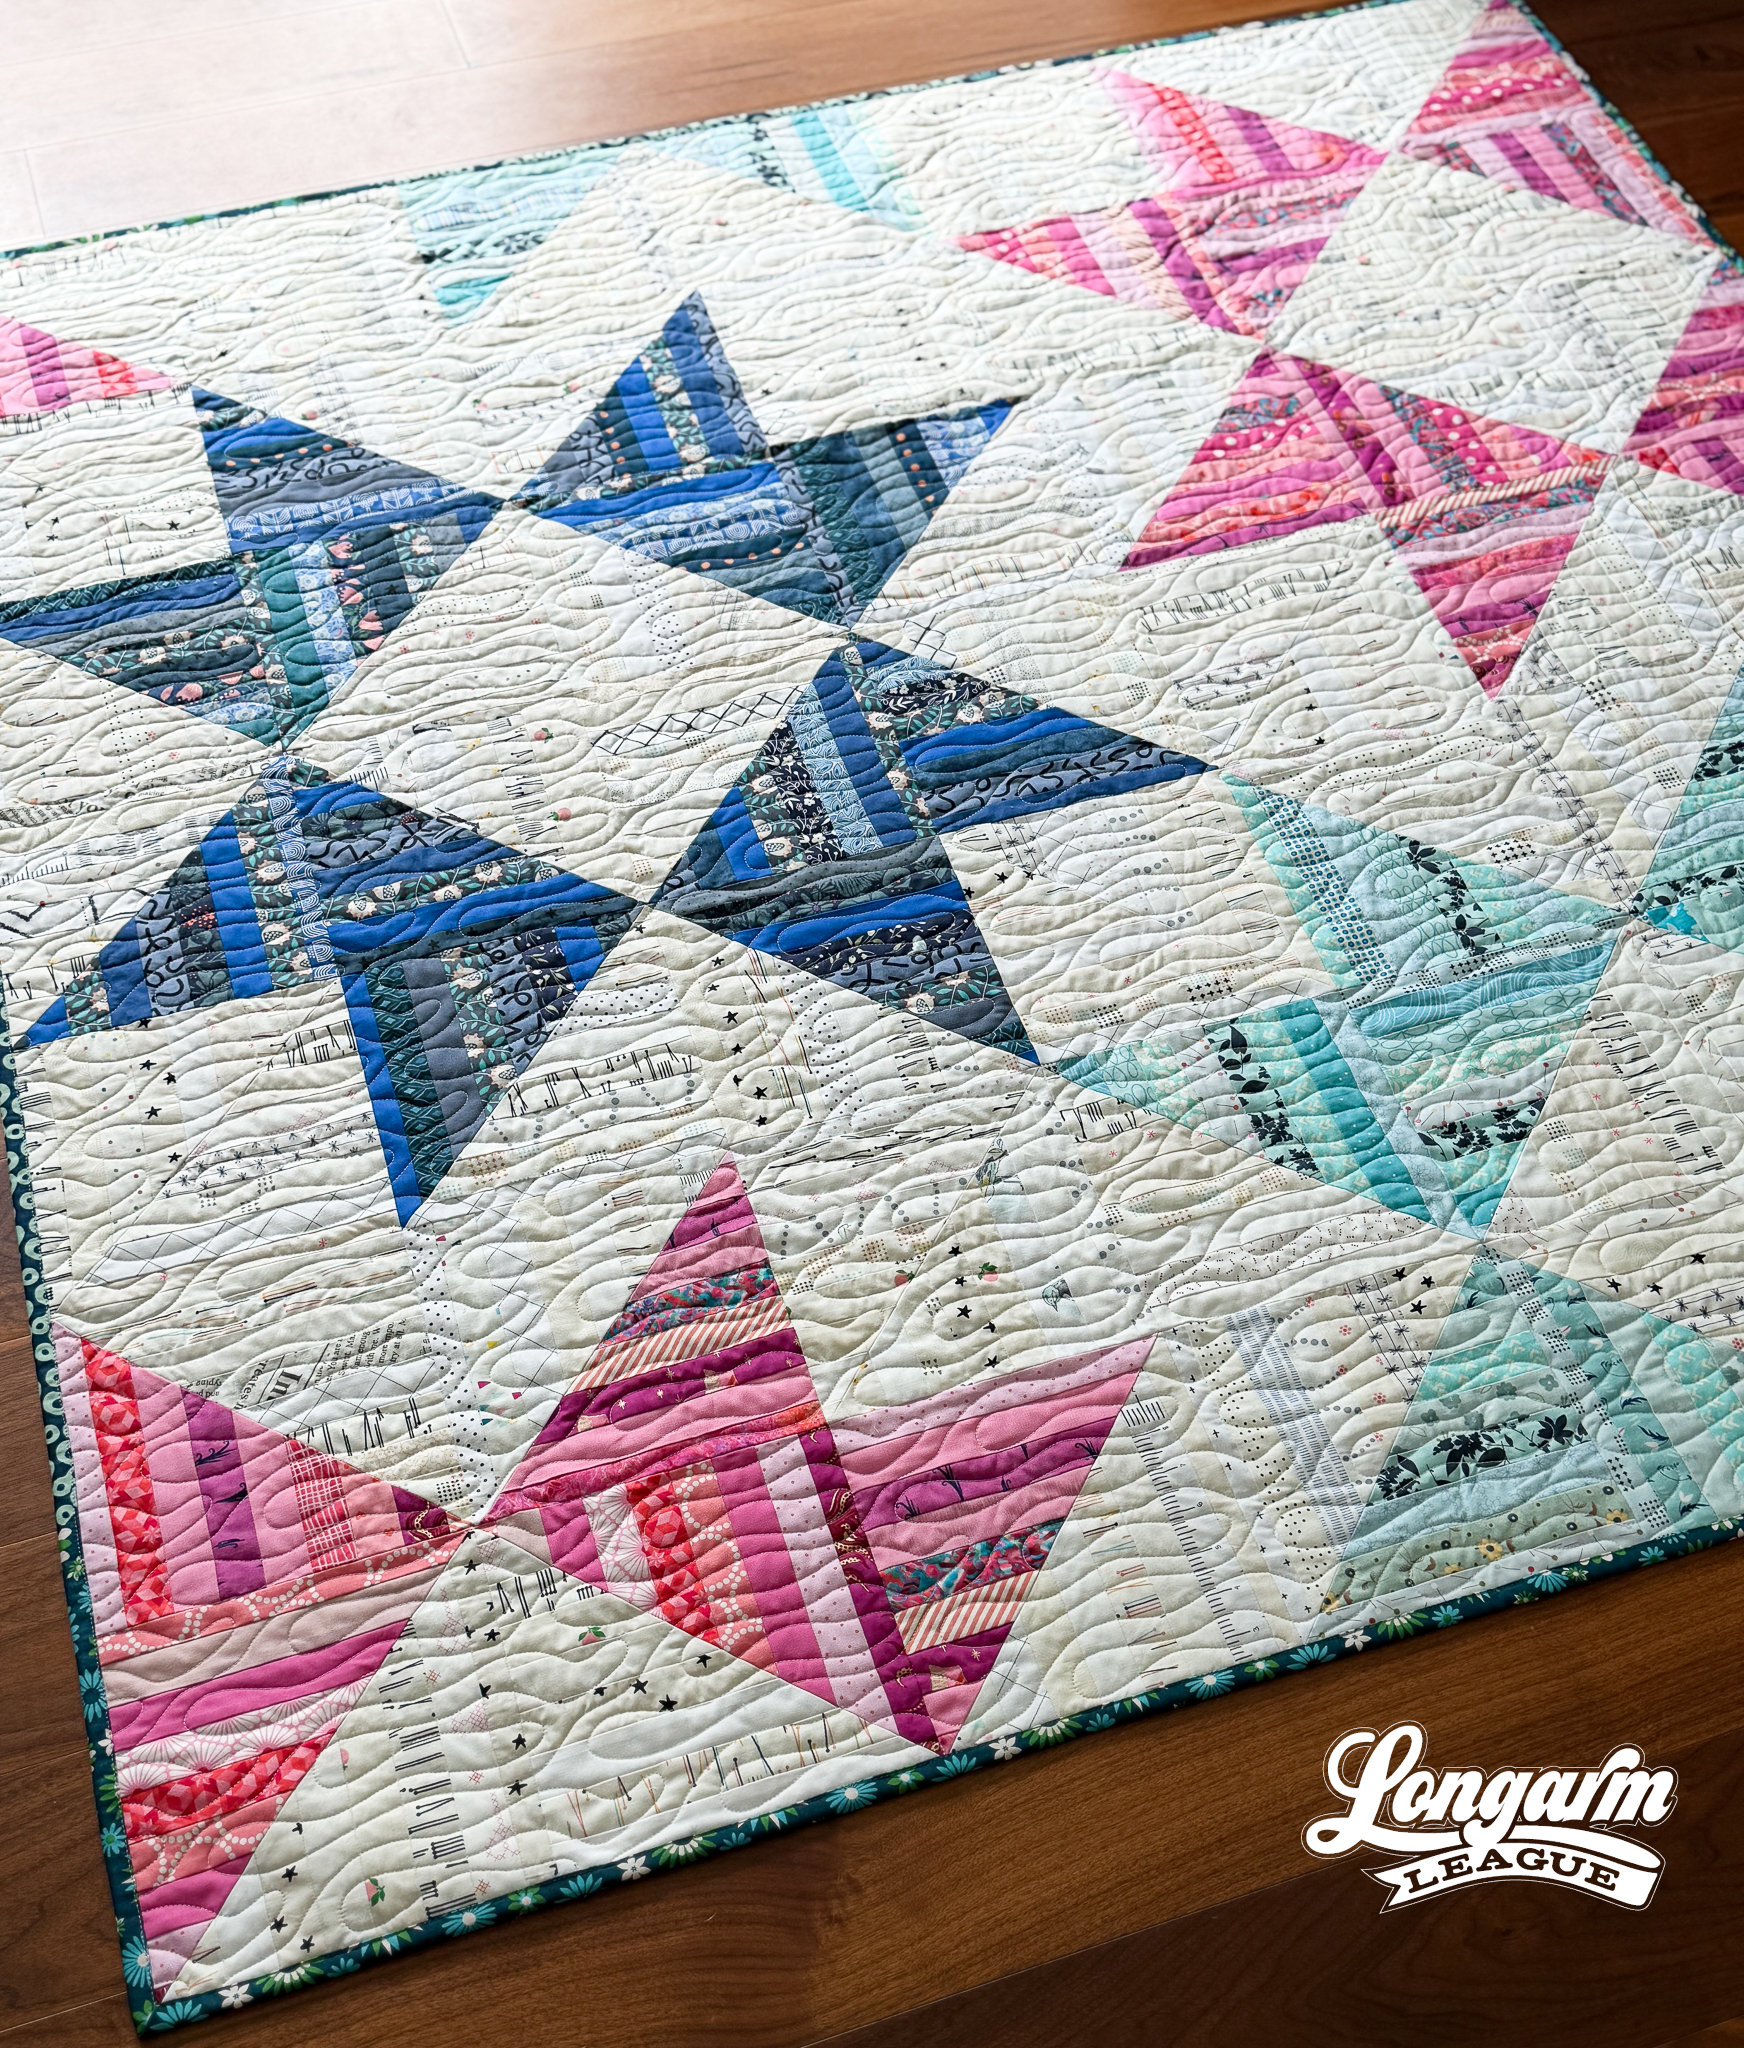
As for the kinds of quilt tops this digital pantograph would work well for, it does not have to be water-themed. In fact, this star quilt has nothing to do with water! I paired Wake with this quilt top because it has so many scraps, that I thought a good "unifying" design would work better than an intricate or more detailed panto.
I also think that this design would be great for t-shirt or memory quilts because it's fast, the stitching doesn't overlap, and it would let the tees or logos be the stars of the show.
The Quilt
Quilt Pattern
The quilt pattern featured is called Rock Star by Tonya Alexander and it is available as a stand-alone pattern from American Patchwork & Quilting. I'm rarely on Facebook, but I was delivered an ad for this pattern and snatched it up right away! I love stars quilts, I love scrap quilts, and I was enchanted by the unique construction and off-beat layout.
I didn't recall seeing the pattern before on social media, so I felt like I "discovered" it. When I pieced the top together at retreat, I made a big, mysterious deal about not revealing what I was working on until it was done.
I'm sure the suspense was only palpable for me! 🤣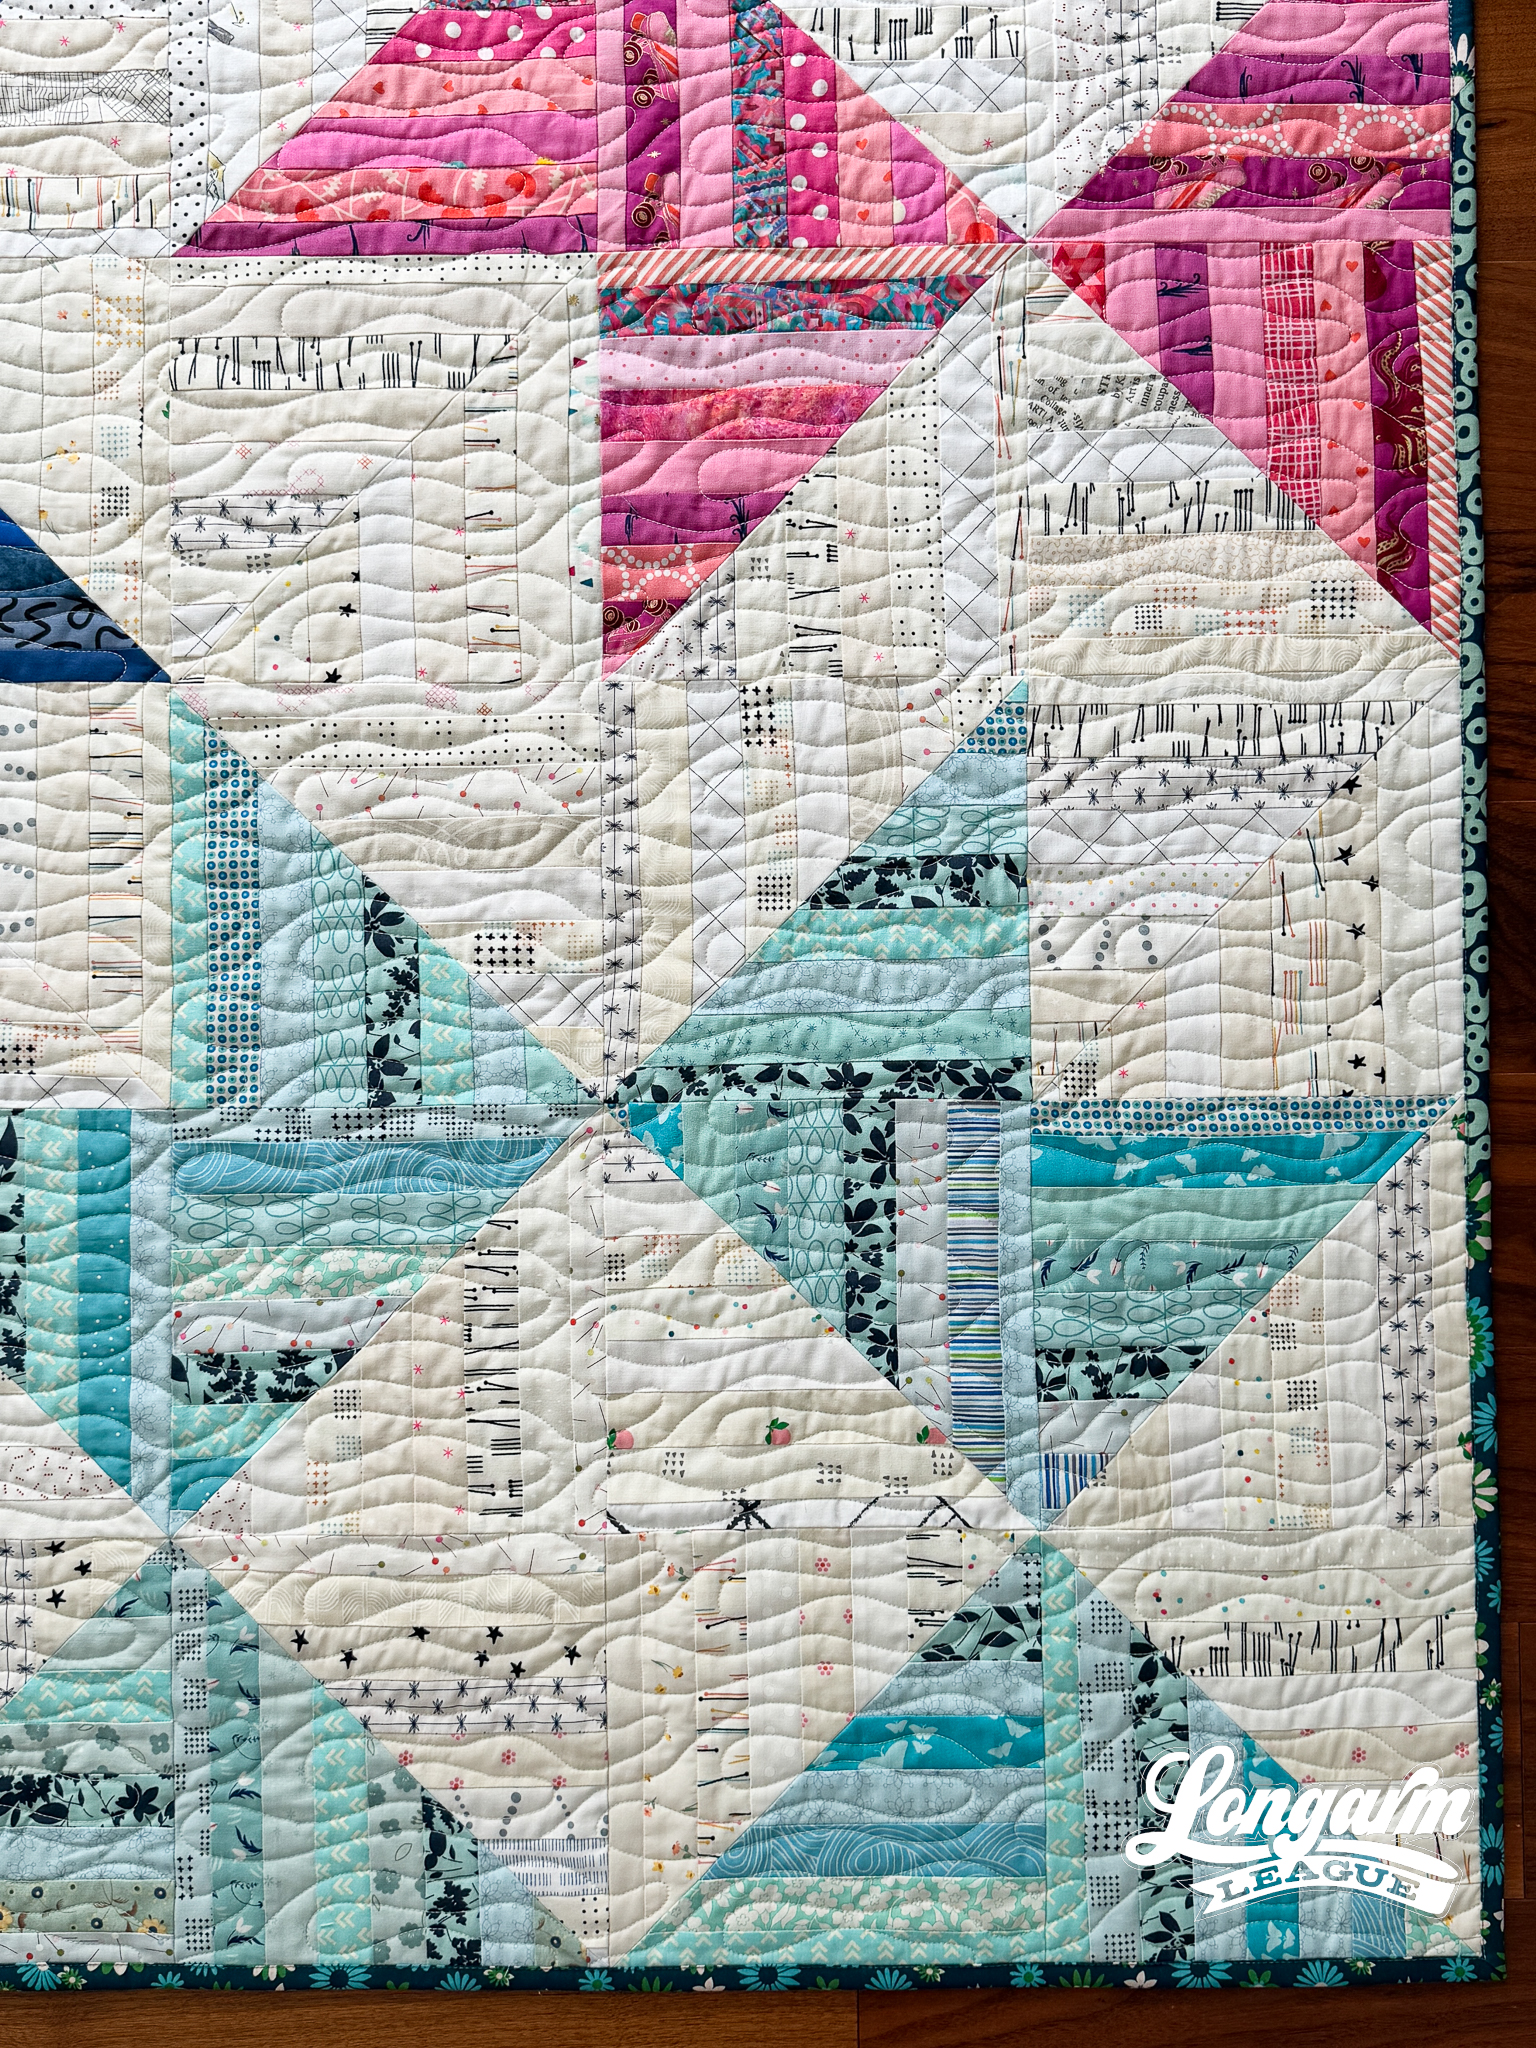
Fabrics
This pattern was perfect for using scrap strips, of which I had PLENTY. The pattern shows a limited palette of three colors for the stars and a low-volume background. To make things extra easy on myself, I followed the same format and only swapped out the yellow of the original pattern for pink and orange in favor of aqua. 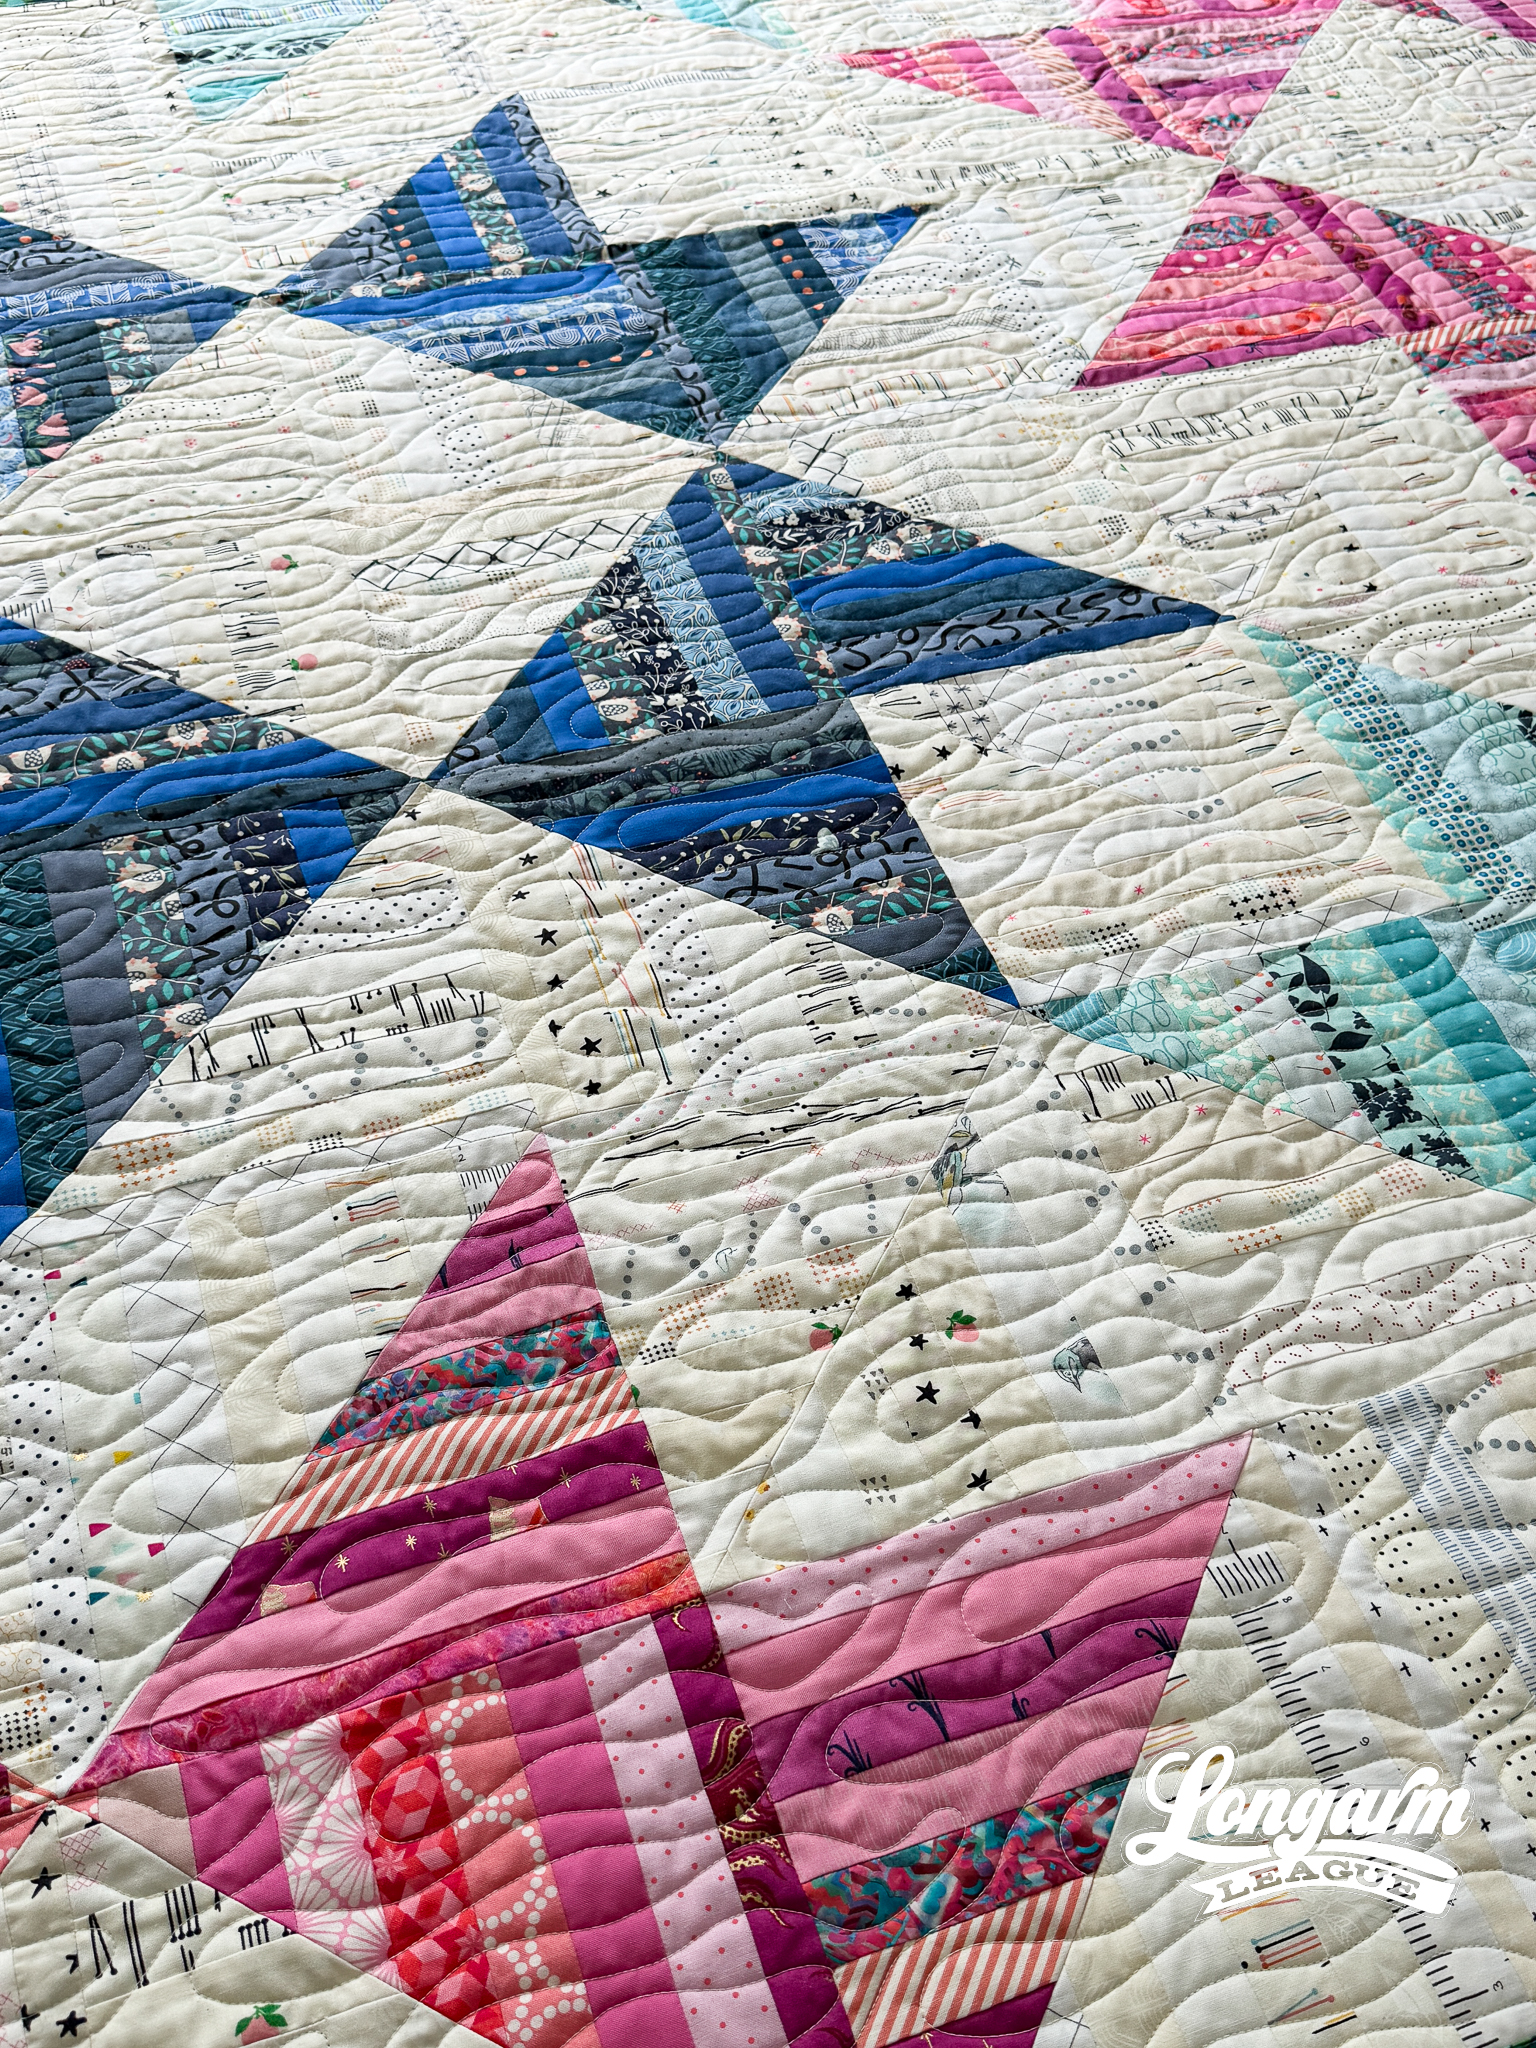
I absolutely love how this quilt turned out! This color combo is a go-to of mine, so that all but ensured success.
I was a bit leery of following the pressing instructions, but that's only because I usually prefer pressing seams open, and that would have been way too much work for this quilt. When making the strip sets, my pressing was a bit lazy at first, and I didn't think my blocks would be the same size. But then my Laurastar iron did the heavy lifting and shape-shifting when it was time to assemble the blocks, and everything turned out surprisingly great! There was no need to be leery; I should have trusted the process and/or been more careful with my initial pressing.
Backing & Batting Choices
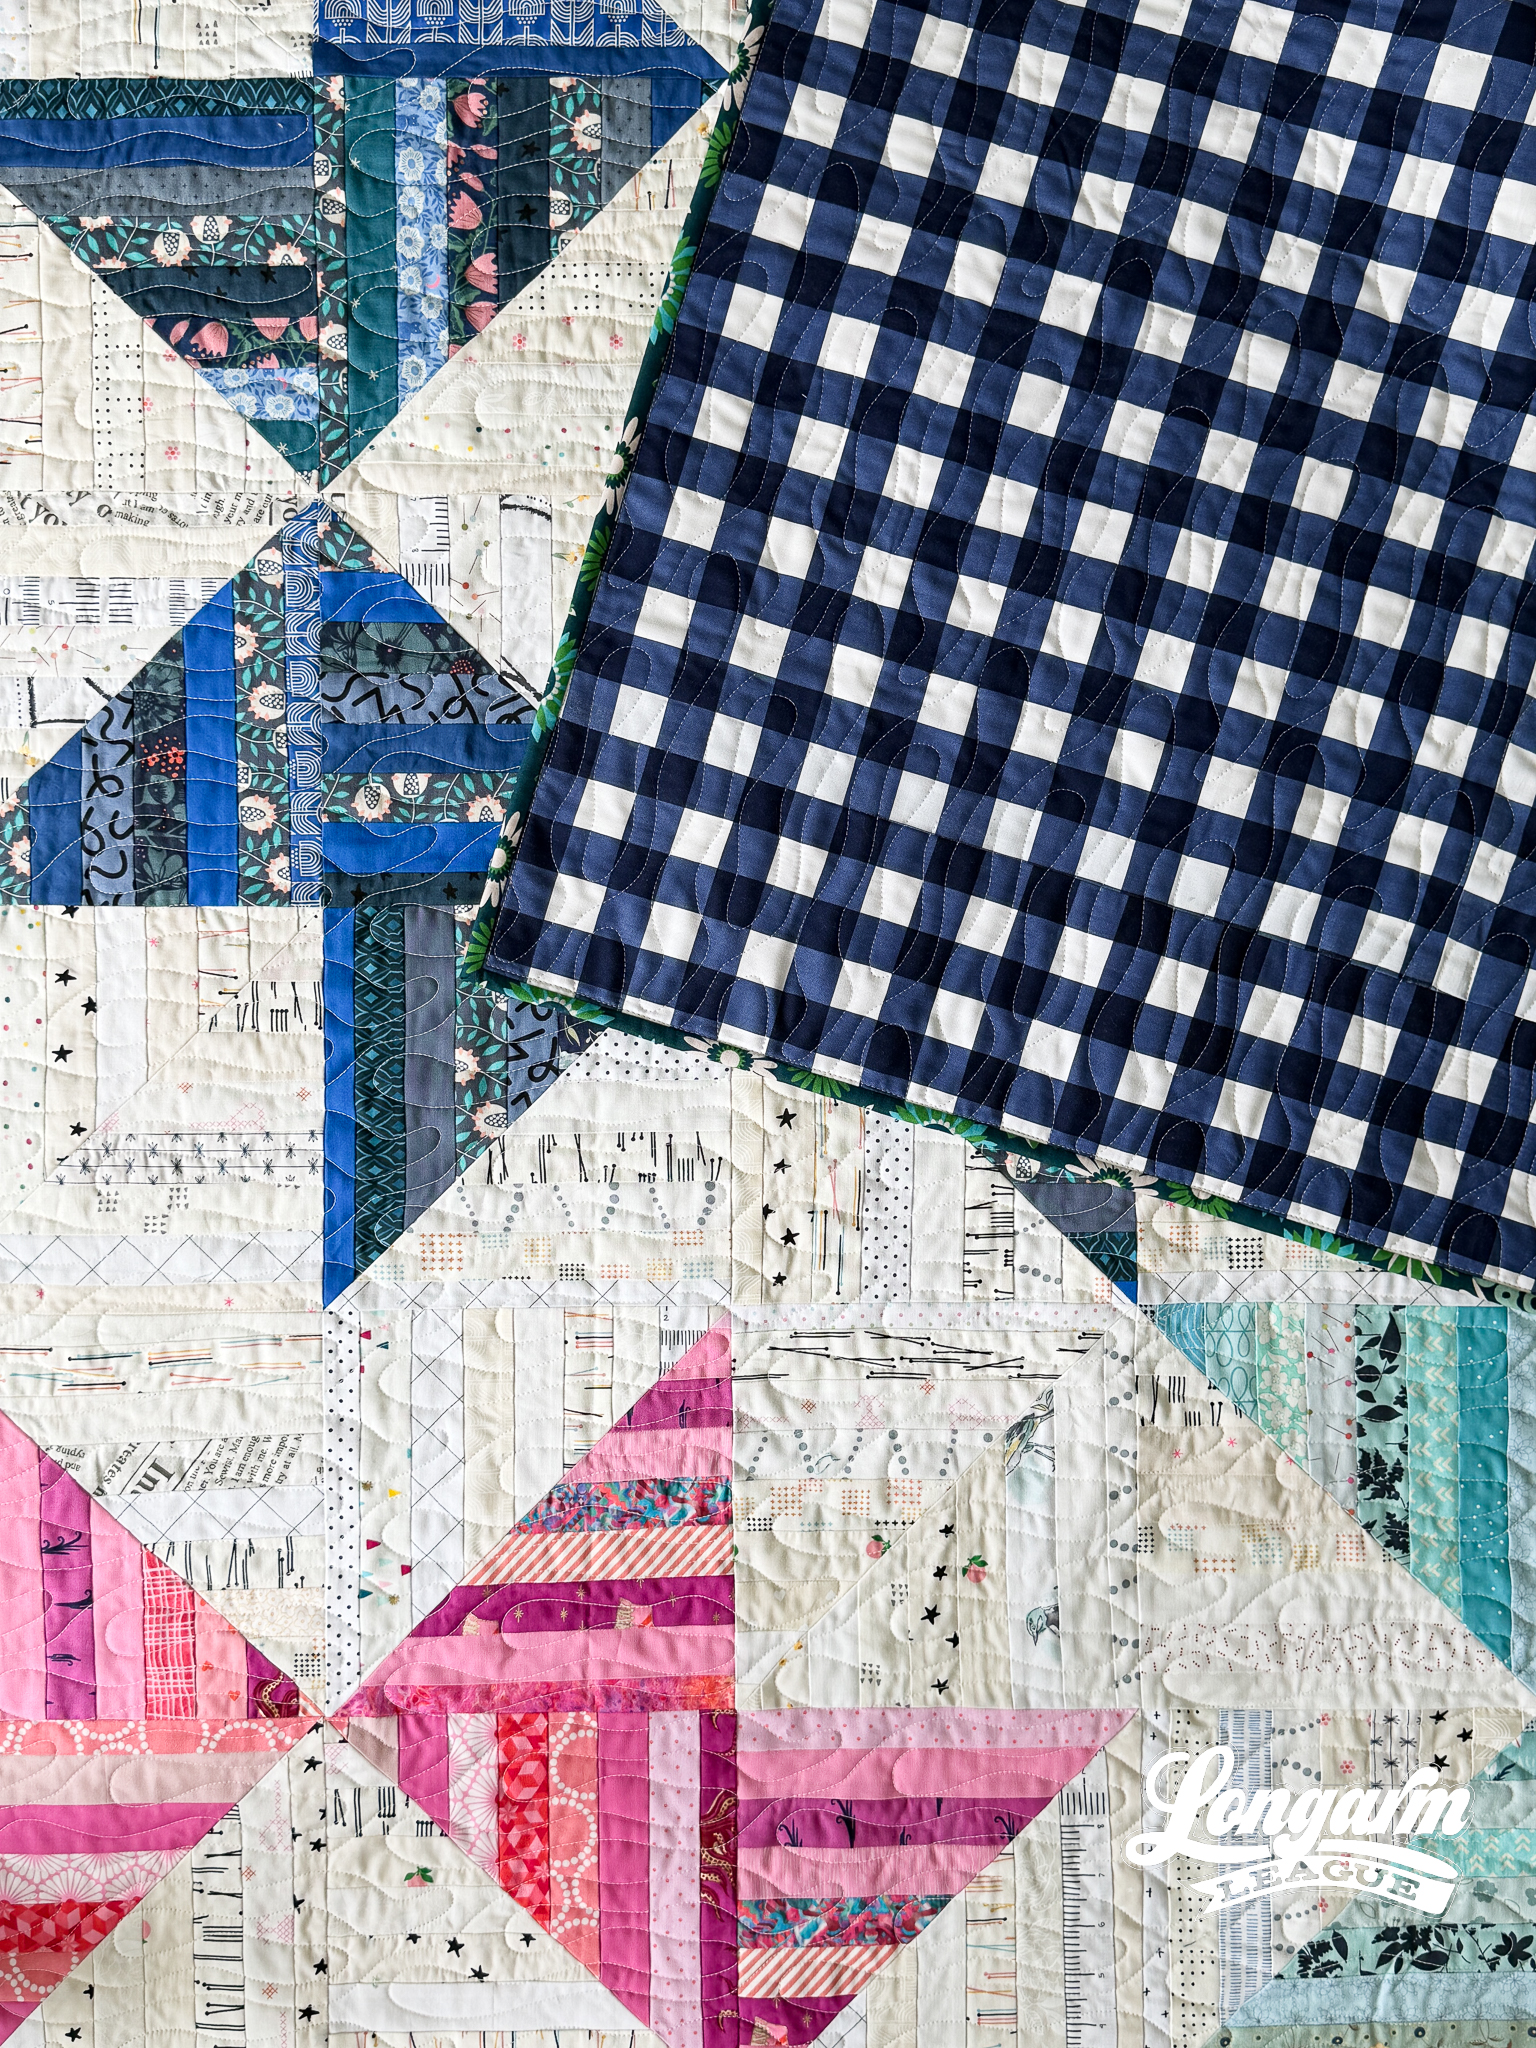
I've been looking for a reason to use this large-scale gingham print from Riley Blake for the last 11 years! I wish I had had a little more yardage so I could have gotten my pattern-matching down pat. Alas, I tried my best an effort was made to pattern-match the main seam, but then I had to add more width to the sides so the backing would be big enough, and my patience had expired.
Since the quilt is on the small side at ~56" square, I did take a little extra time and zig-zag stitch batting remnants together so that I didn't have to cut any new batting off the roll. Hero level, unlocked! 🔓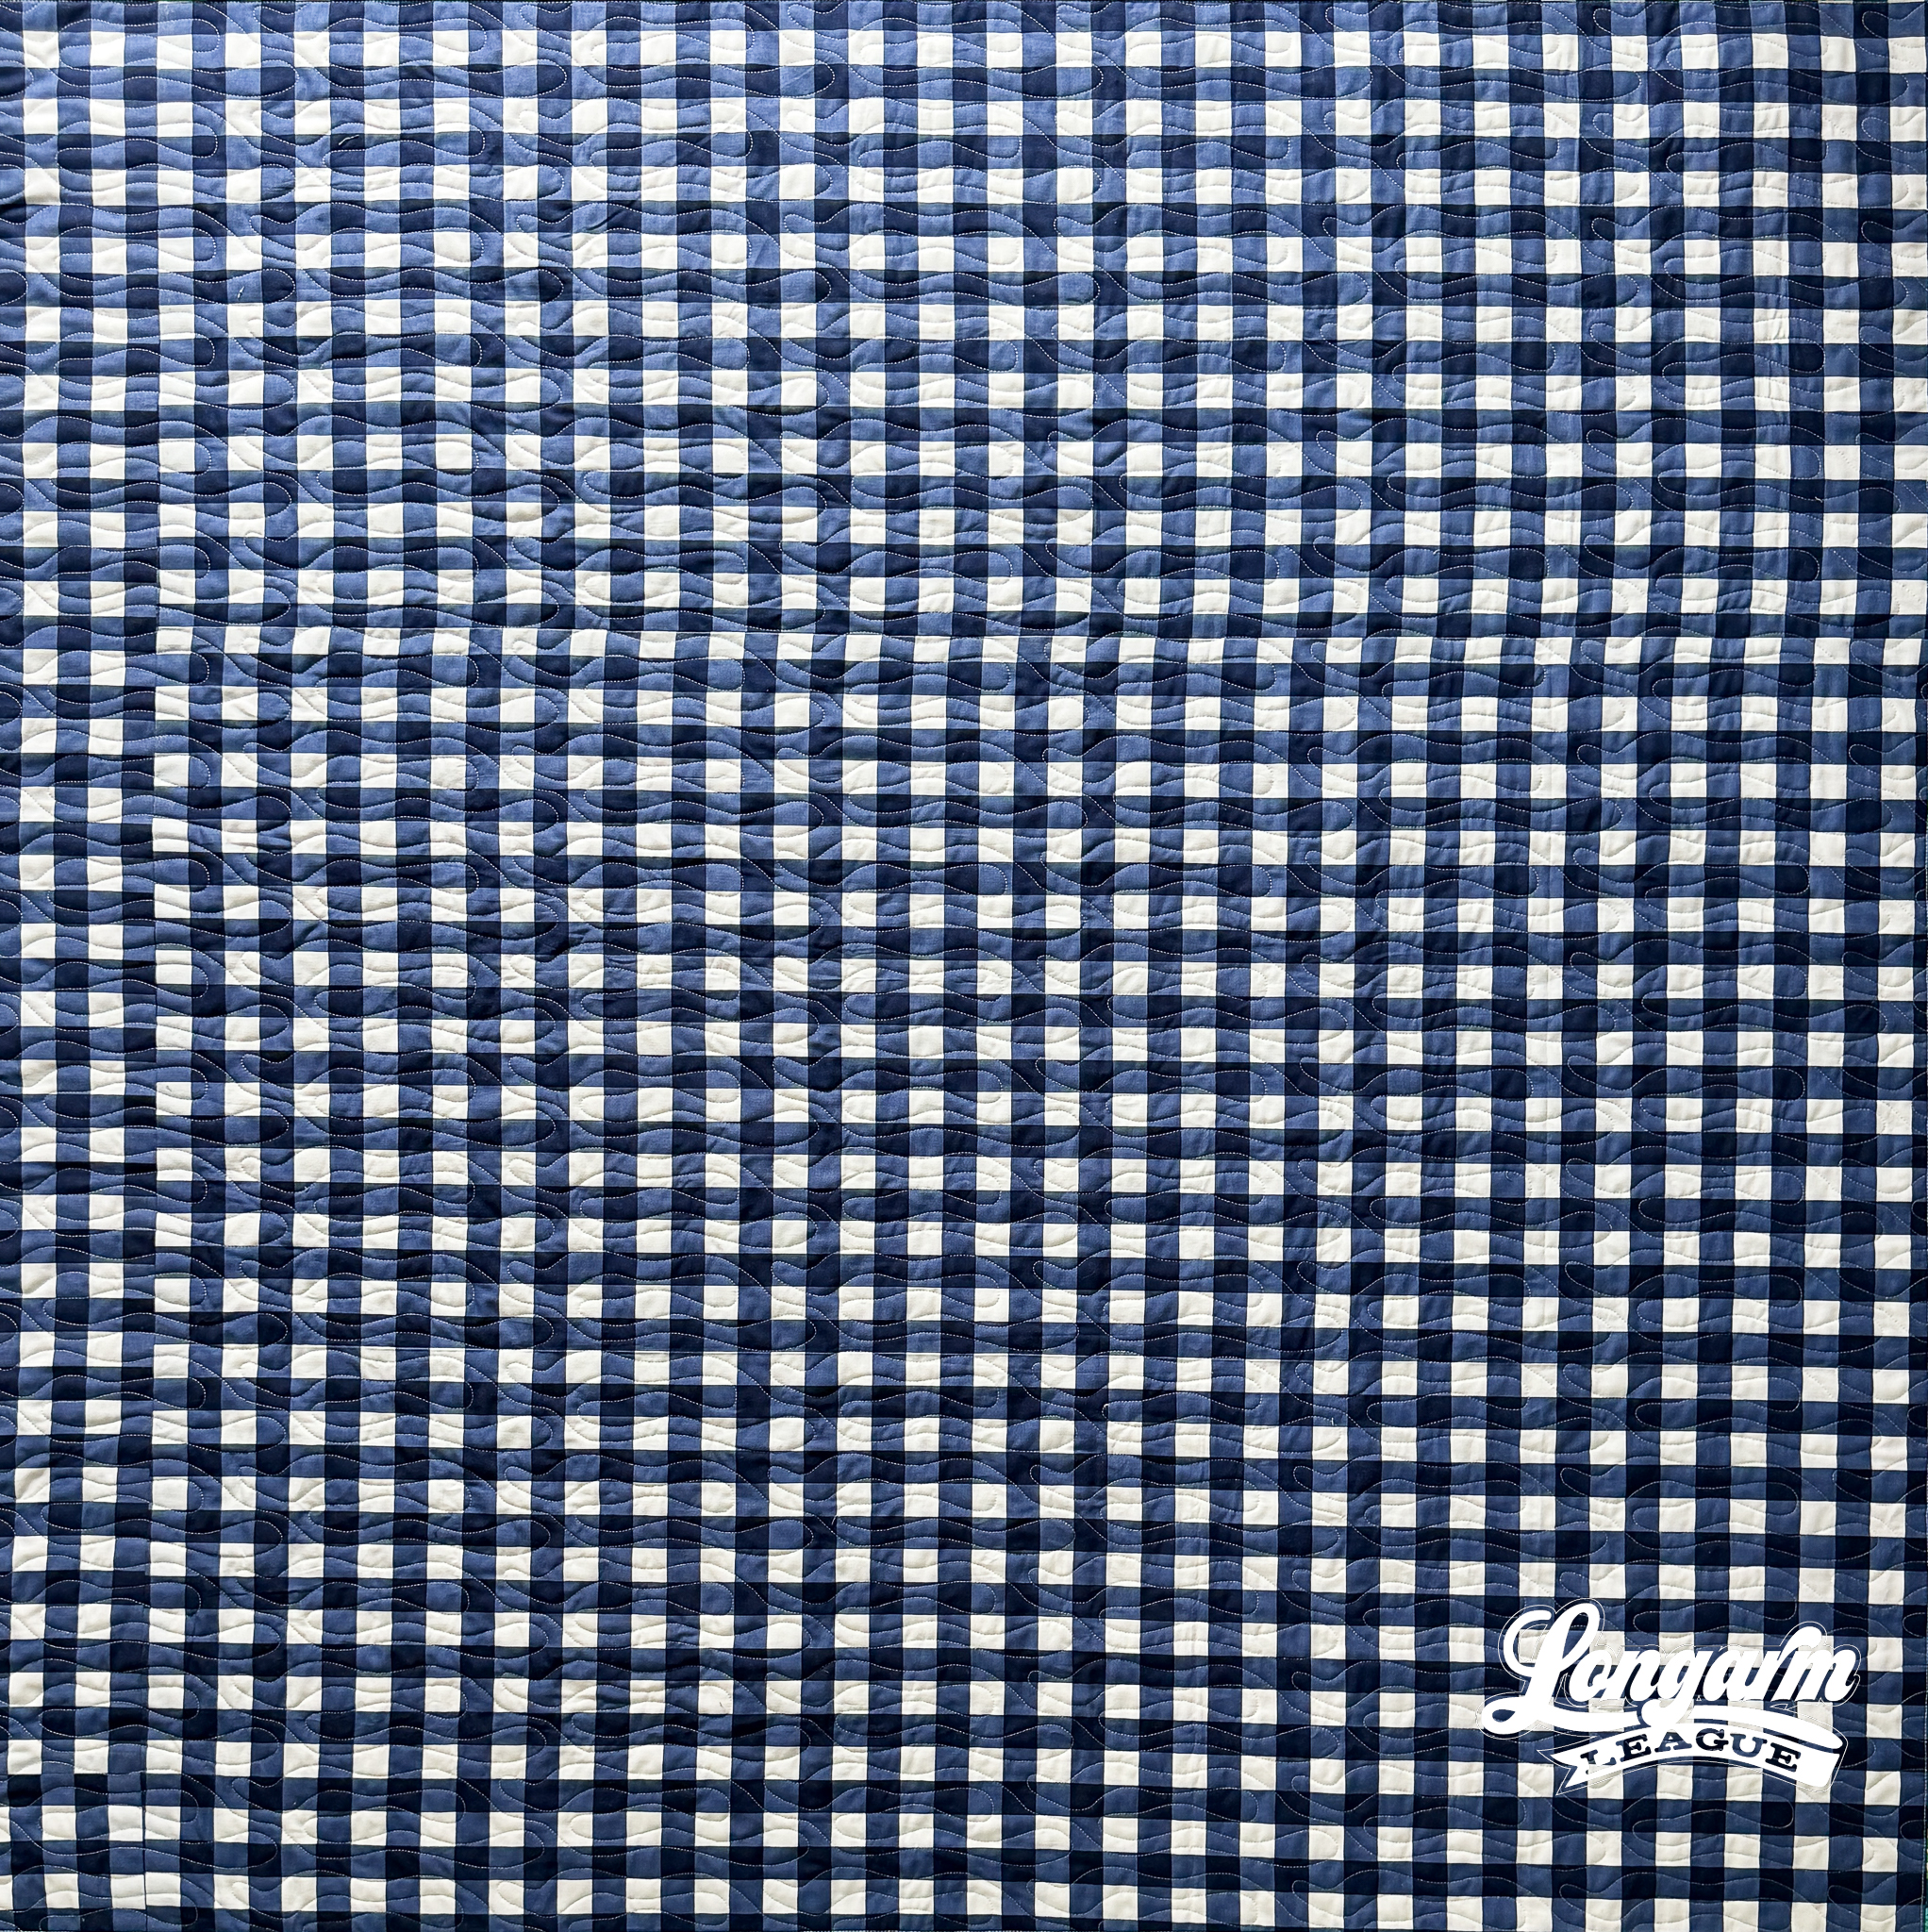
Top and Bobbin Thread
Again (only the second time), I used Wonderfil's new Polymatte thread for the top (PM201), a 40-weight, 2-ply matte polyester thread, paired with Wonderfil's 80-weight DecoBob (DB112) bobbin thread. And again, I found the combo to be delightful! I had balanced tension throughout the whole project.
It'll take me quite a while to go through all the Magna-Glide classic bobbins I have, but I could see myself ordering more of this Wonderfil combo again. I've been very happy with both the top and bobbin threads.
The Quilting Details
Difficulty Level: Easy
If you'd like to view the stitch path, a short video is available at the top of the blog post. There's no offsetting, no backtracking, and alignment is easy. The only thing that could be a problem is if your machine doesn't stitch well right to left. There are segments of the stitch path that travel this way, but not for terribly long stretches and not without some gentle movement to ward against thread breaks.
Scale
Get a load of this: I stitched this exactly at the default size! I NEVER do that. But for this quilt, it just happened to be what I wanted. At the default sizing, the gaps between lines range from just over 1/4" to 1". It was speedy, too!
Here are the sizing specifications for how I set up this quilt using my Intelliquilter (56" x 56" quilt size):
Row height: 3"
Gap: 0"
Pattern height: 3" (measurement from top to bottom of the repeat)
Offset: none
Backtracking: none
Here's a look at the included PDF: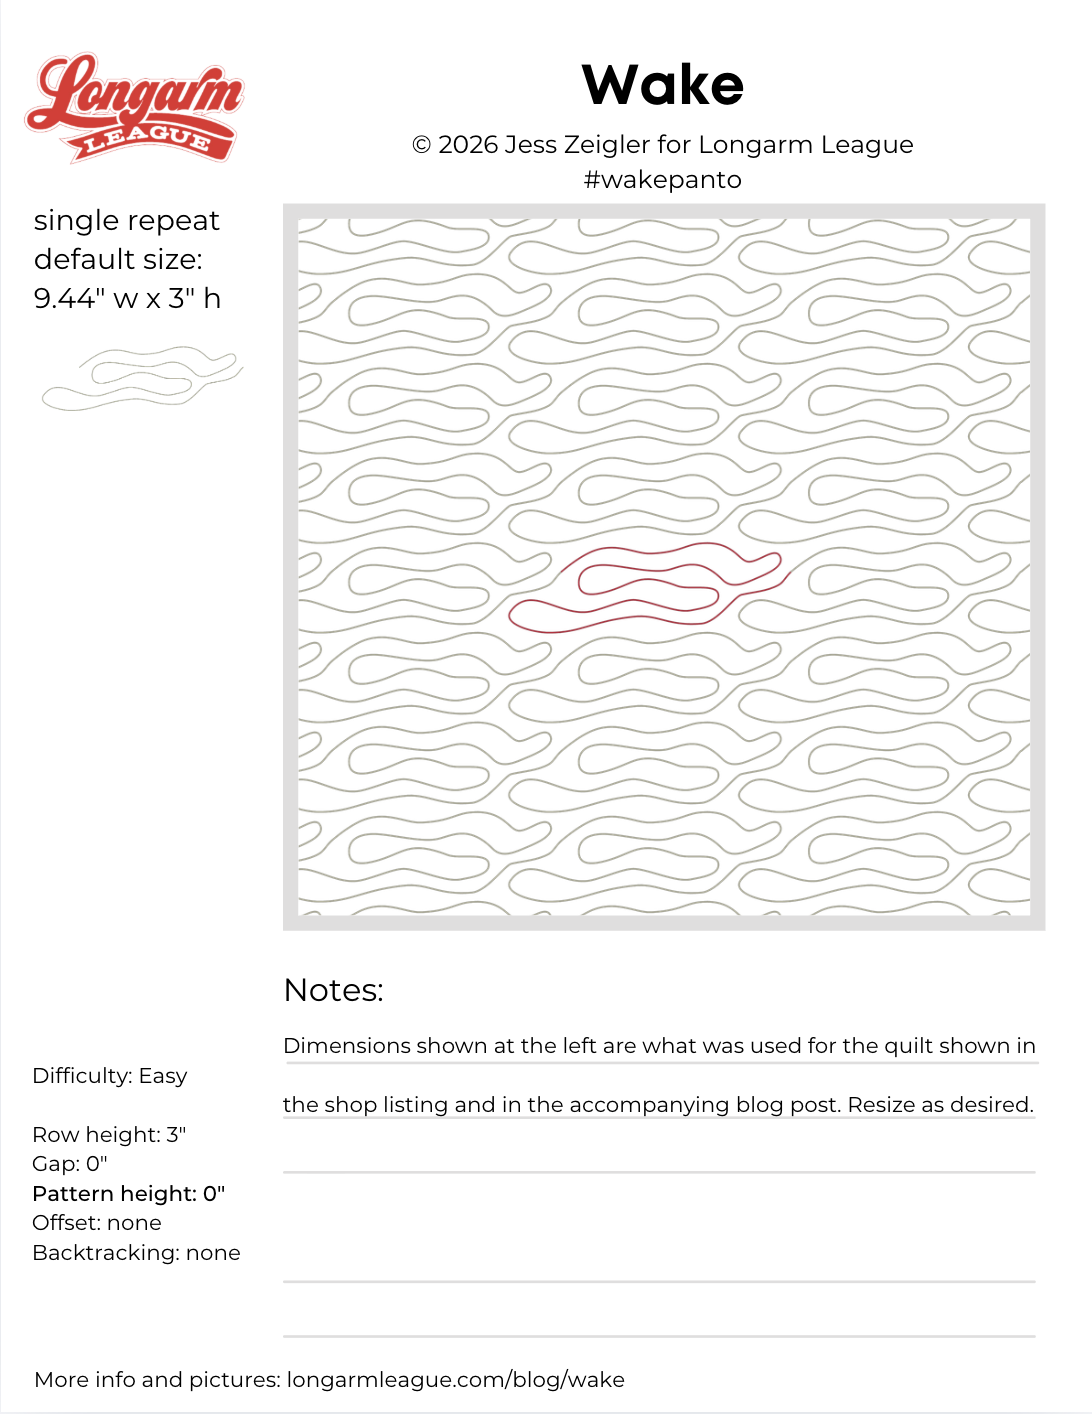
Interested in getting new digital pantograph designs like this one on the day they're released (and at a deep discount)? Sign up for our Digital Panto Club and get them delivered directly to your inbox on the first Wednesday of each new month.

Jess Zeigler
Longarm League Commish & Owner of Threaded Quilting Studio, LLC.


