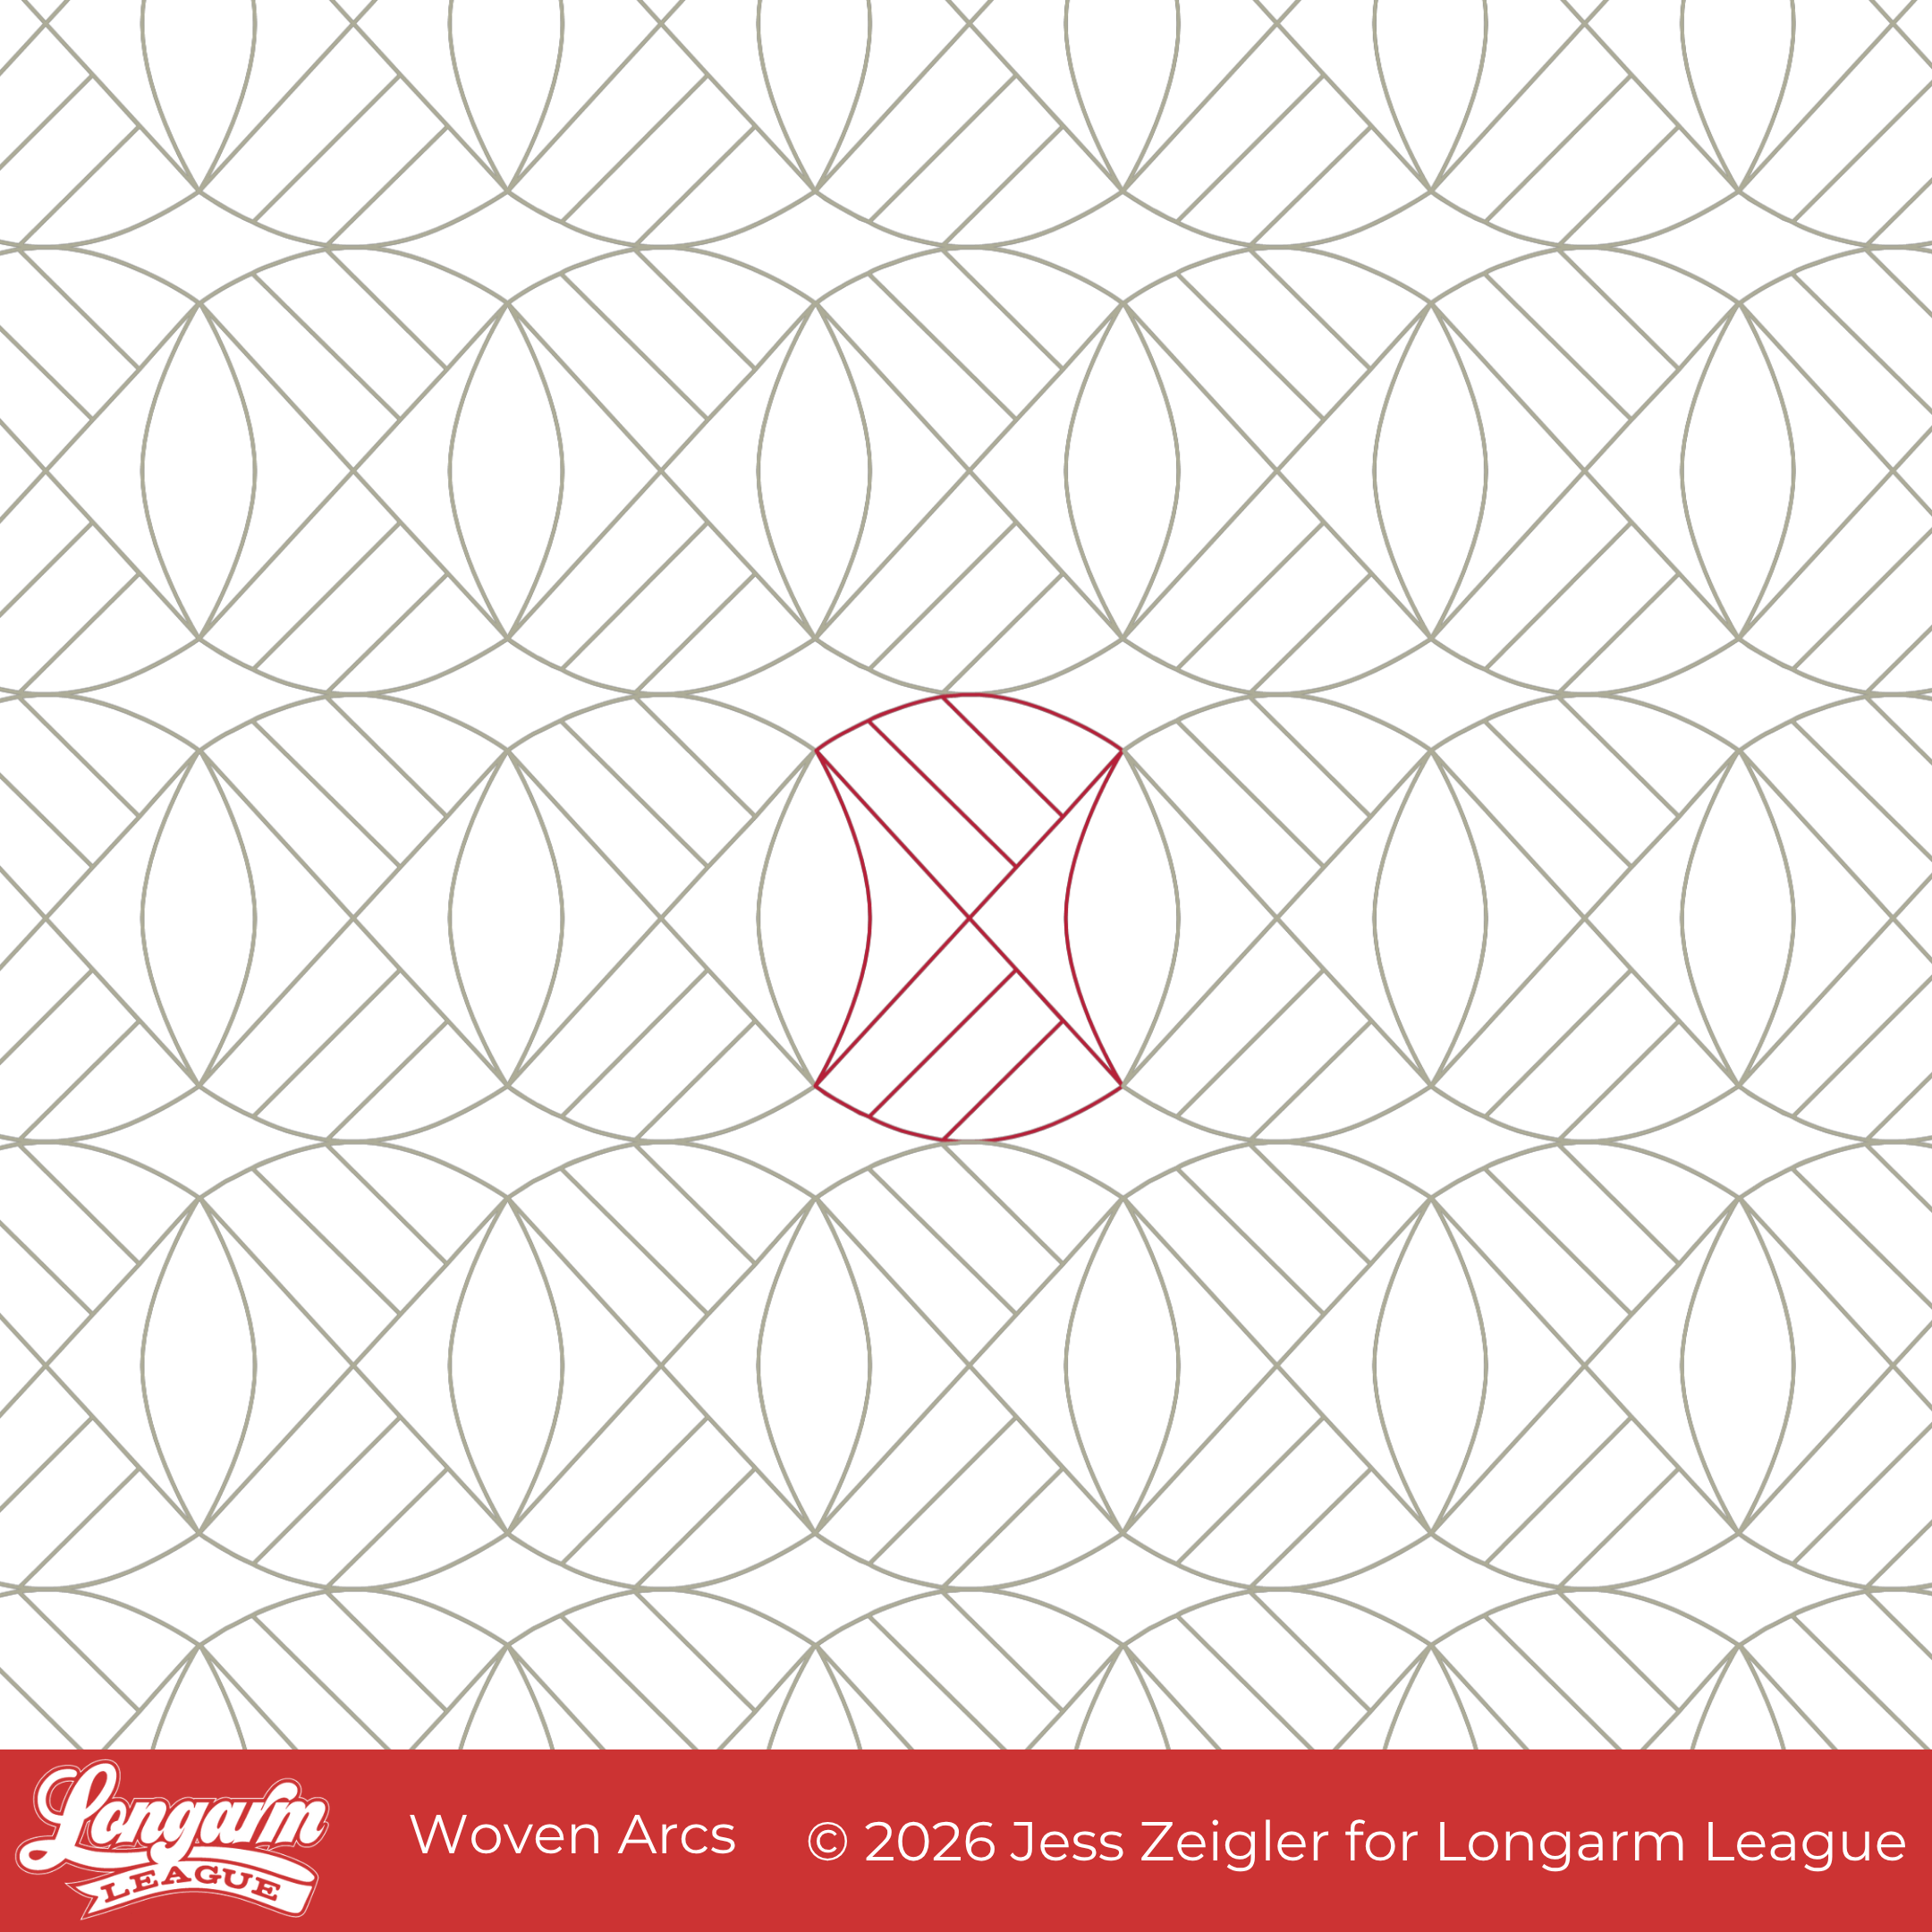
Woven Arcs Digital E2E Quilting Design
I'd like to briefly take you back to the days before Longarm League started to show you where the seed for this edge-to-edge design began to germinate.
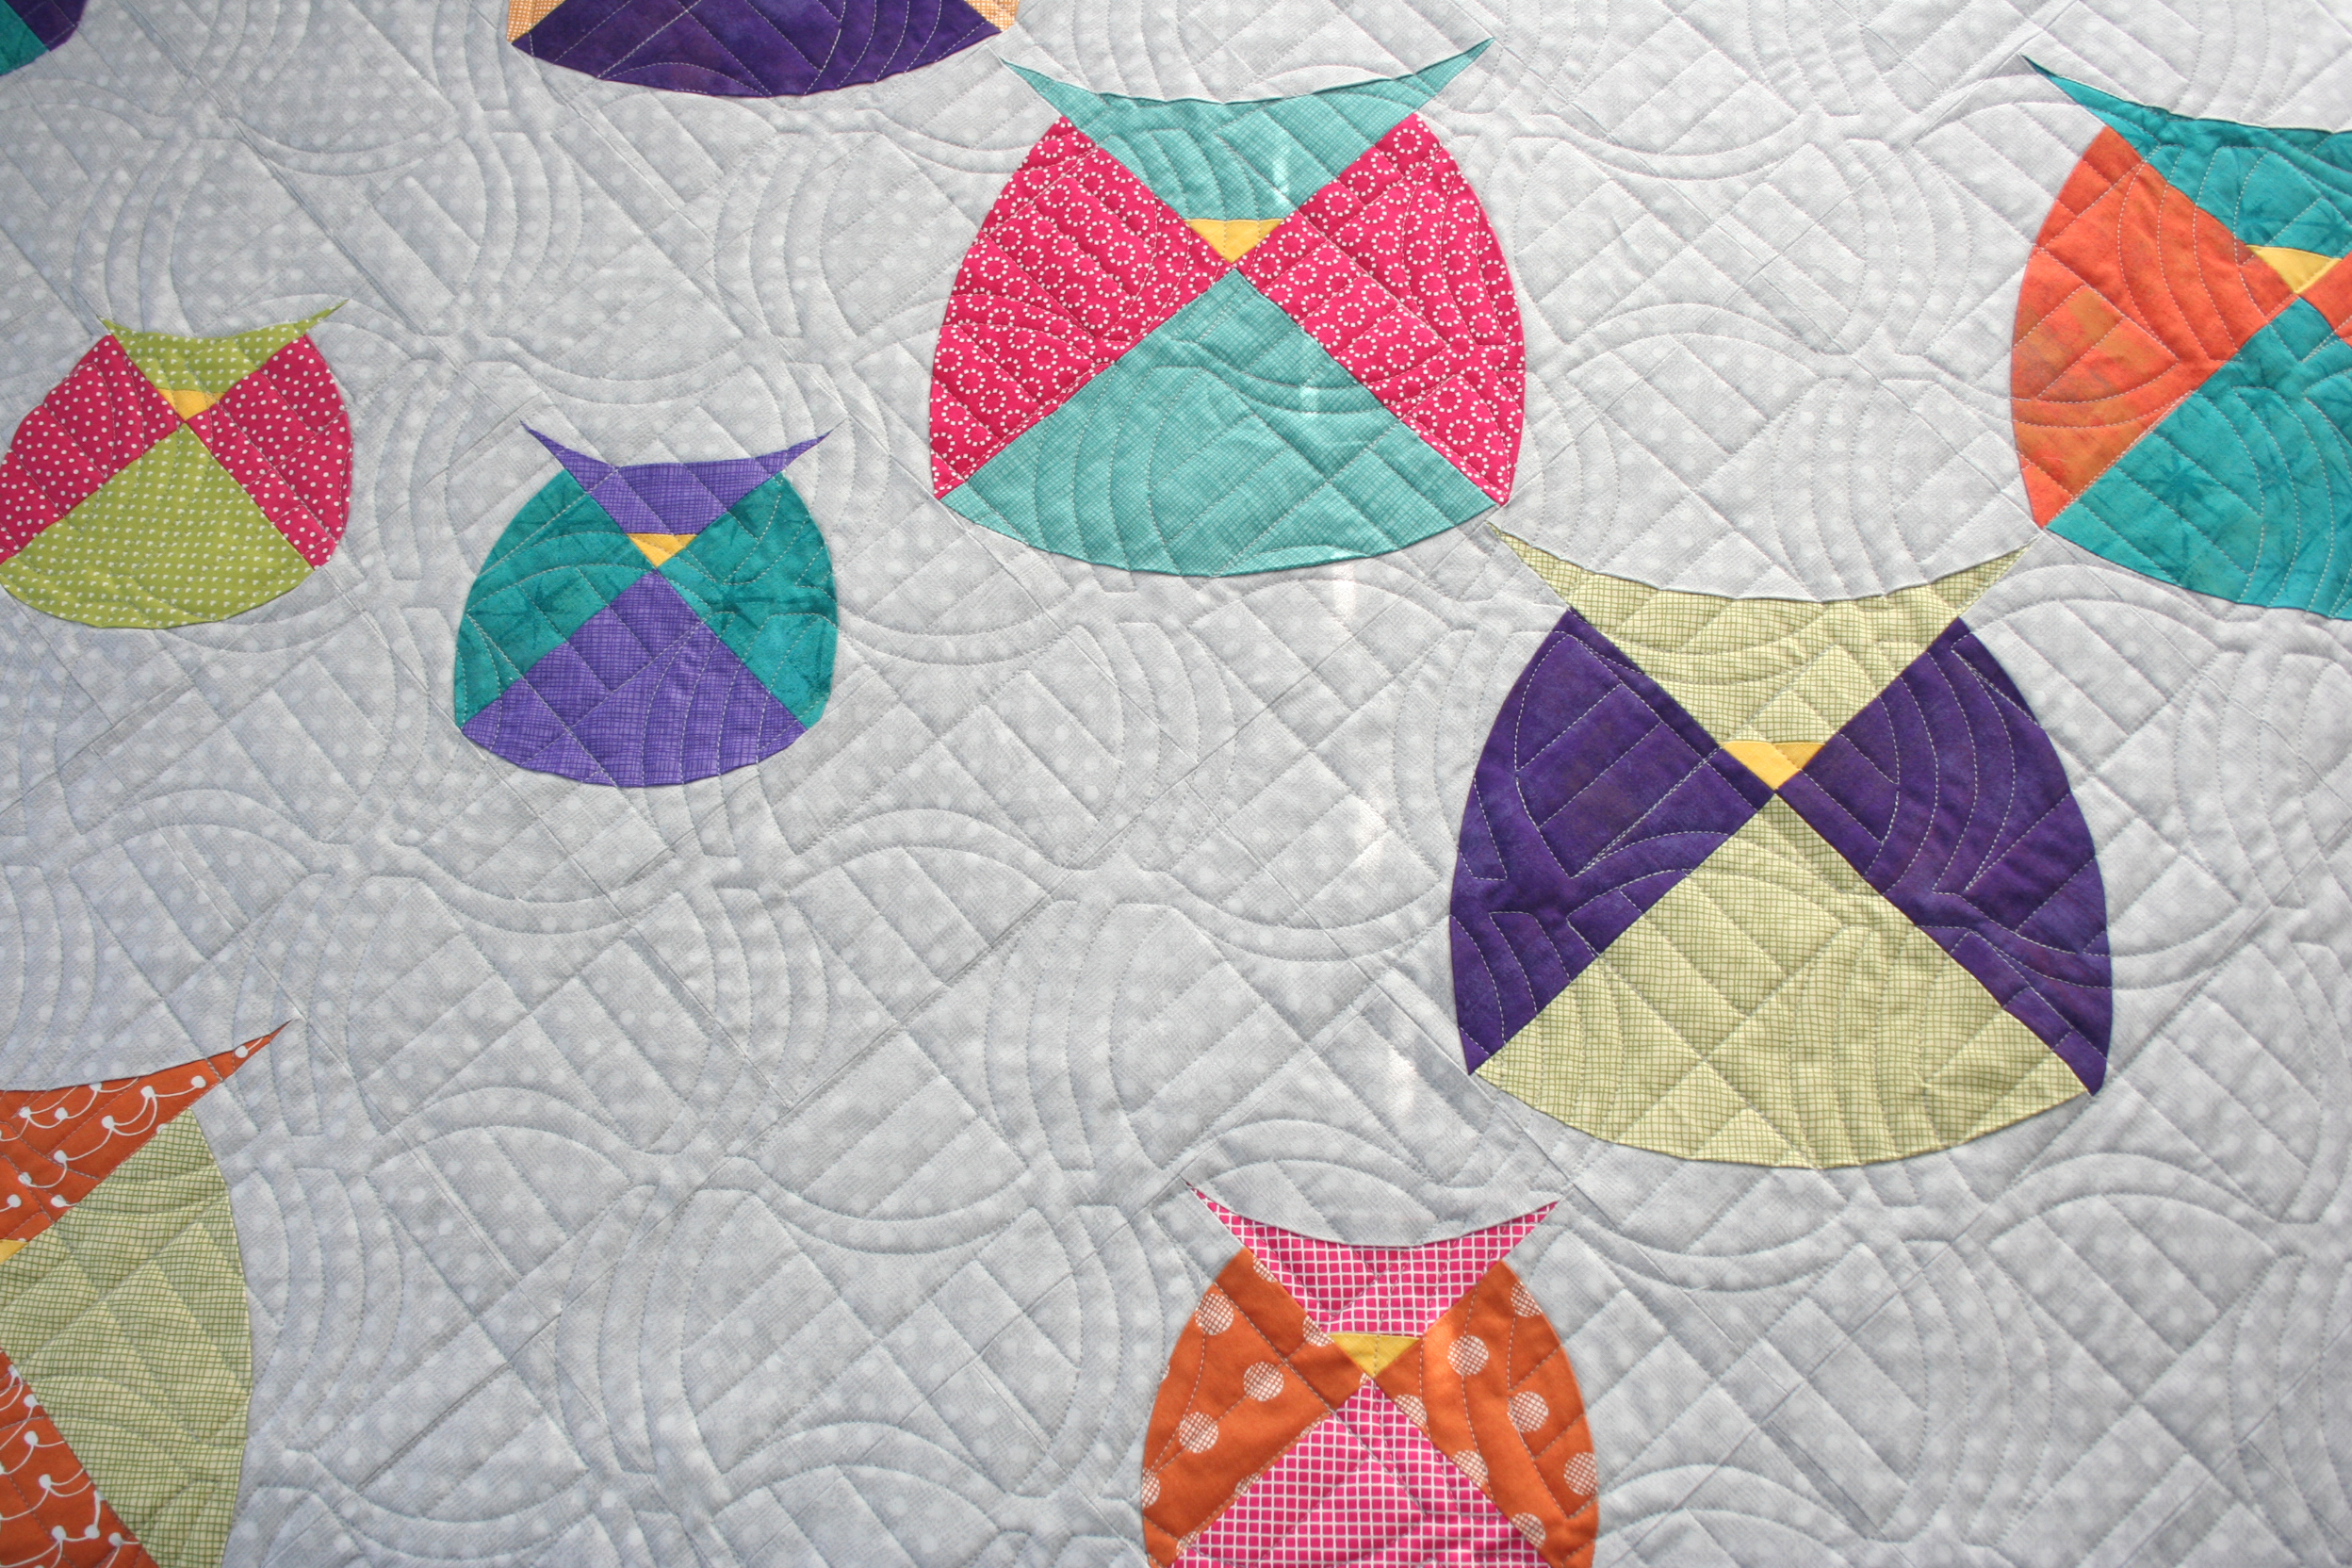
I was providing computerized edge-to-edge quilting for clients, and my friend Jessica Plunkett brought me this quilt she'd made using the Mod Owls quilt pattern by Sew Kind of Wonderful.
I'd recently purchased my design software called Art and Stitch, and I was eager to use it. I was inspired by the curves of the patchwork and the cross-section of the owls' bodies, and I let that guide me as I created a bespoke design for Jessica.
Luckily, she let me go for it! It's a one-of-a-kind quilting job, that's for sure! 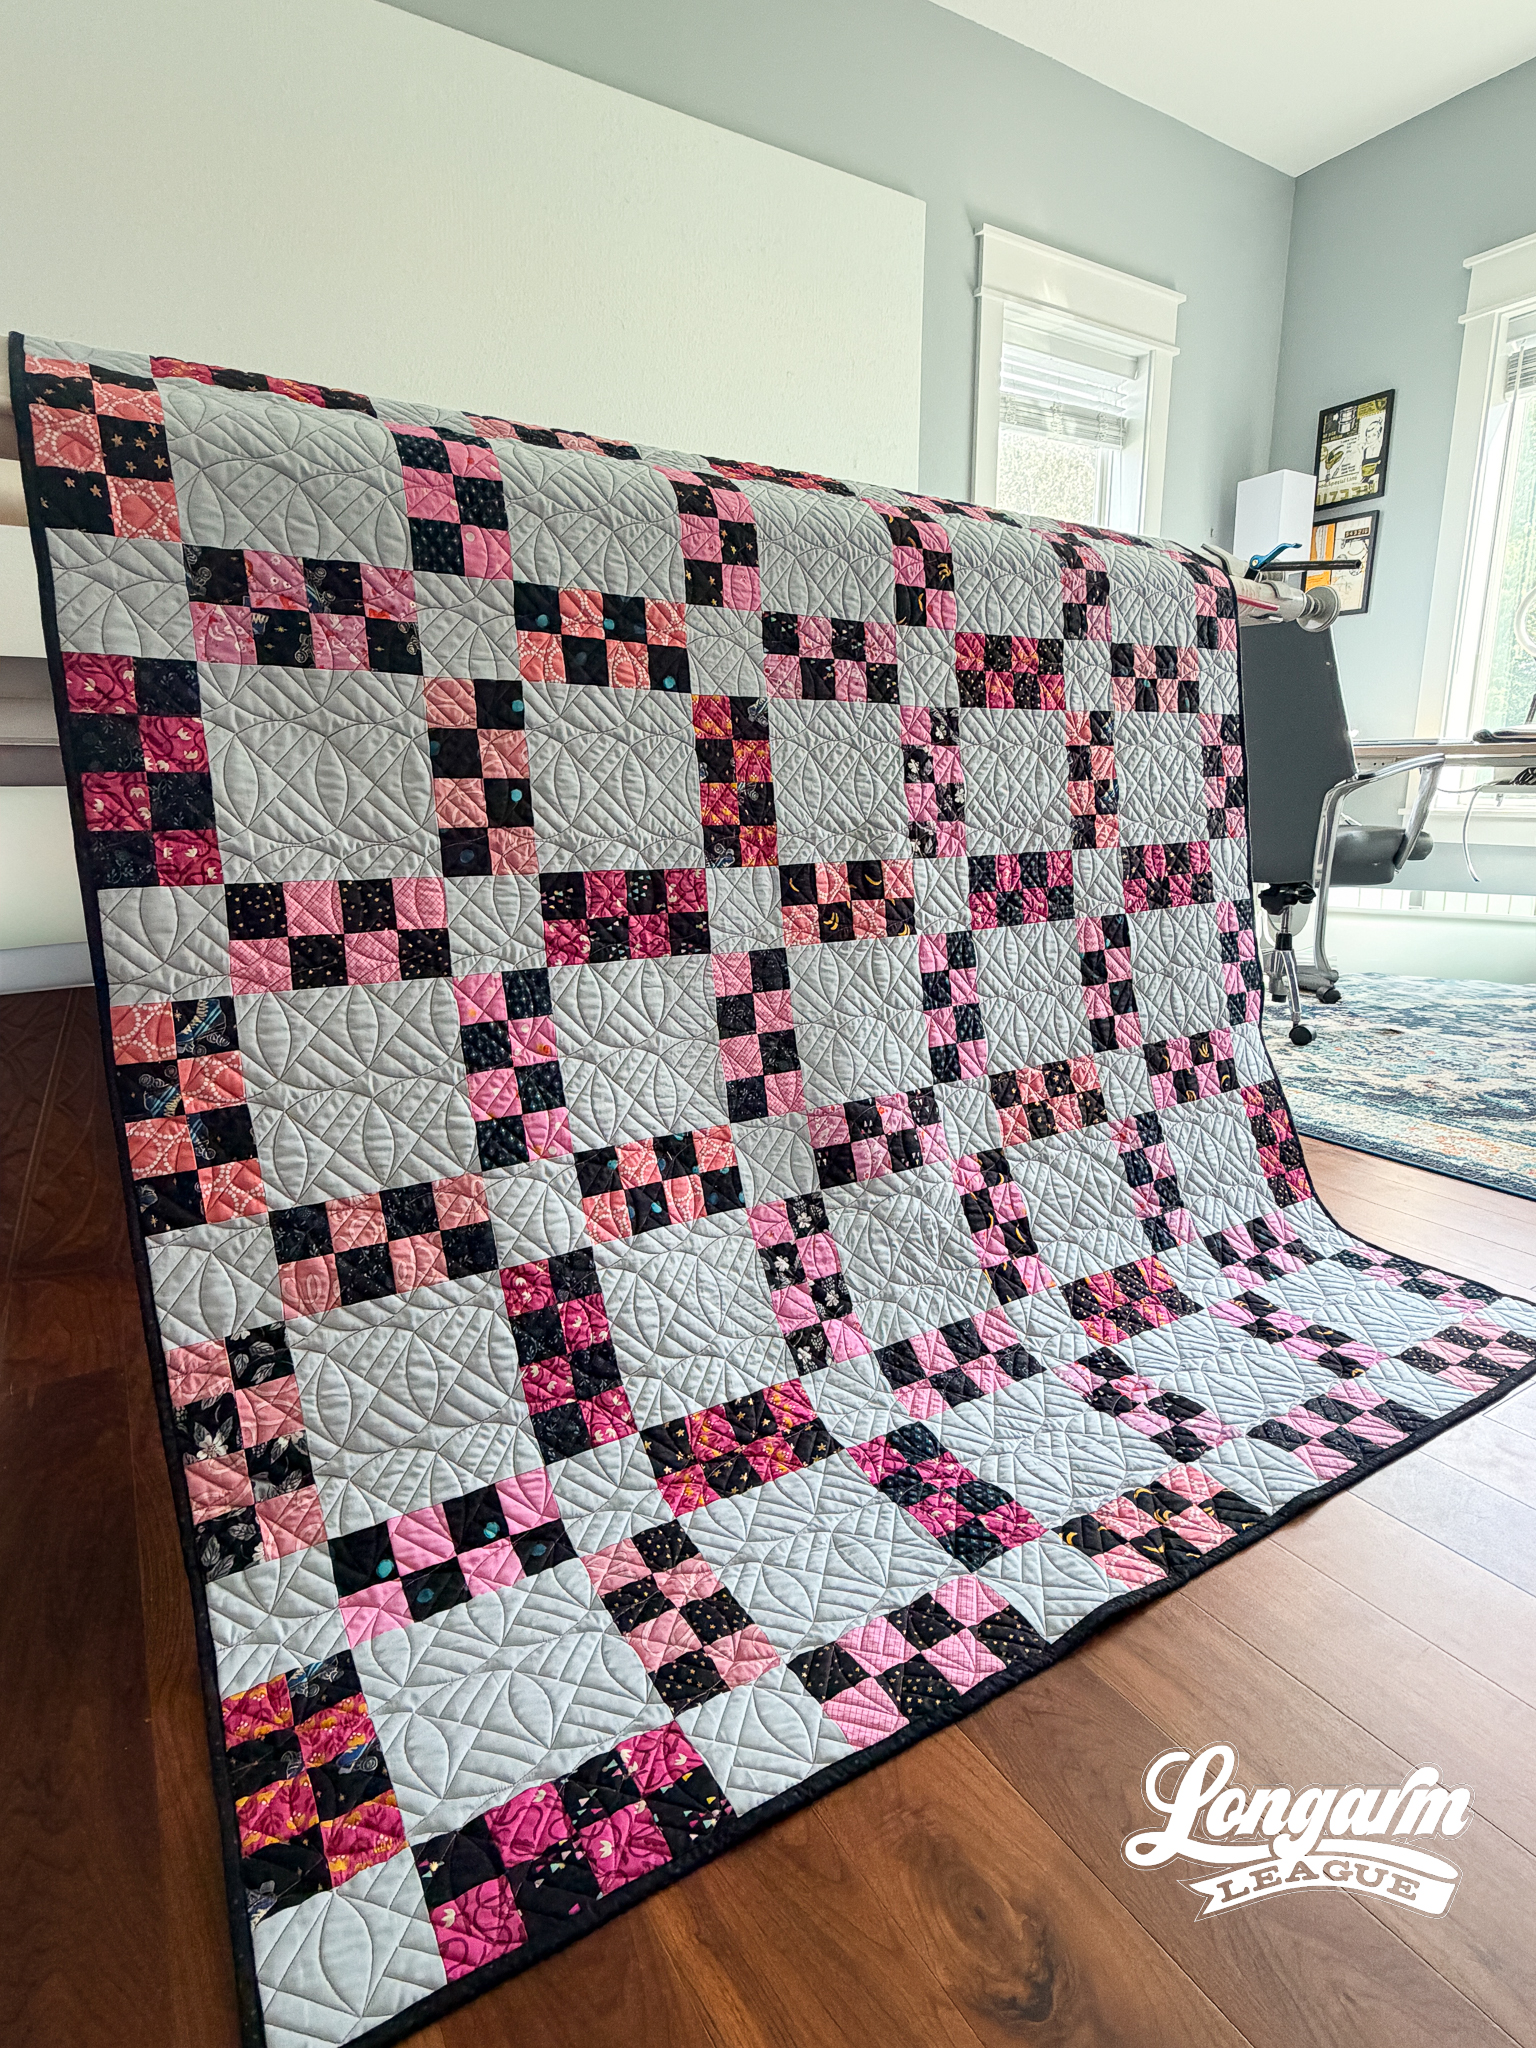
The stitch path of the original design was a bit messy, but that makes sense, since I was only about a month into having the software and didn't have much experience under my belt. Long stretches of line got double-stitched.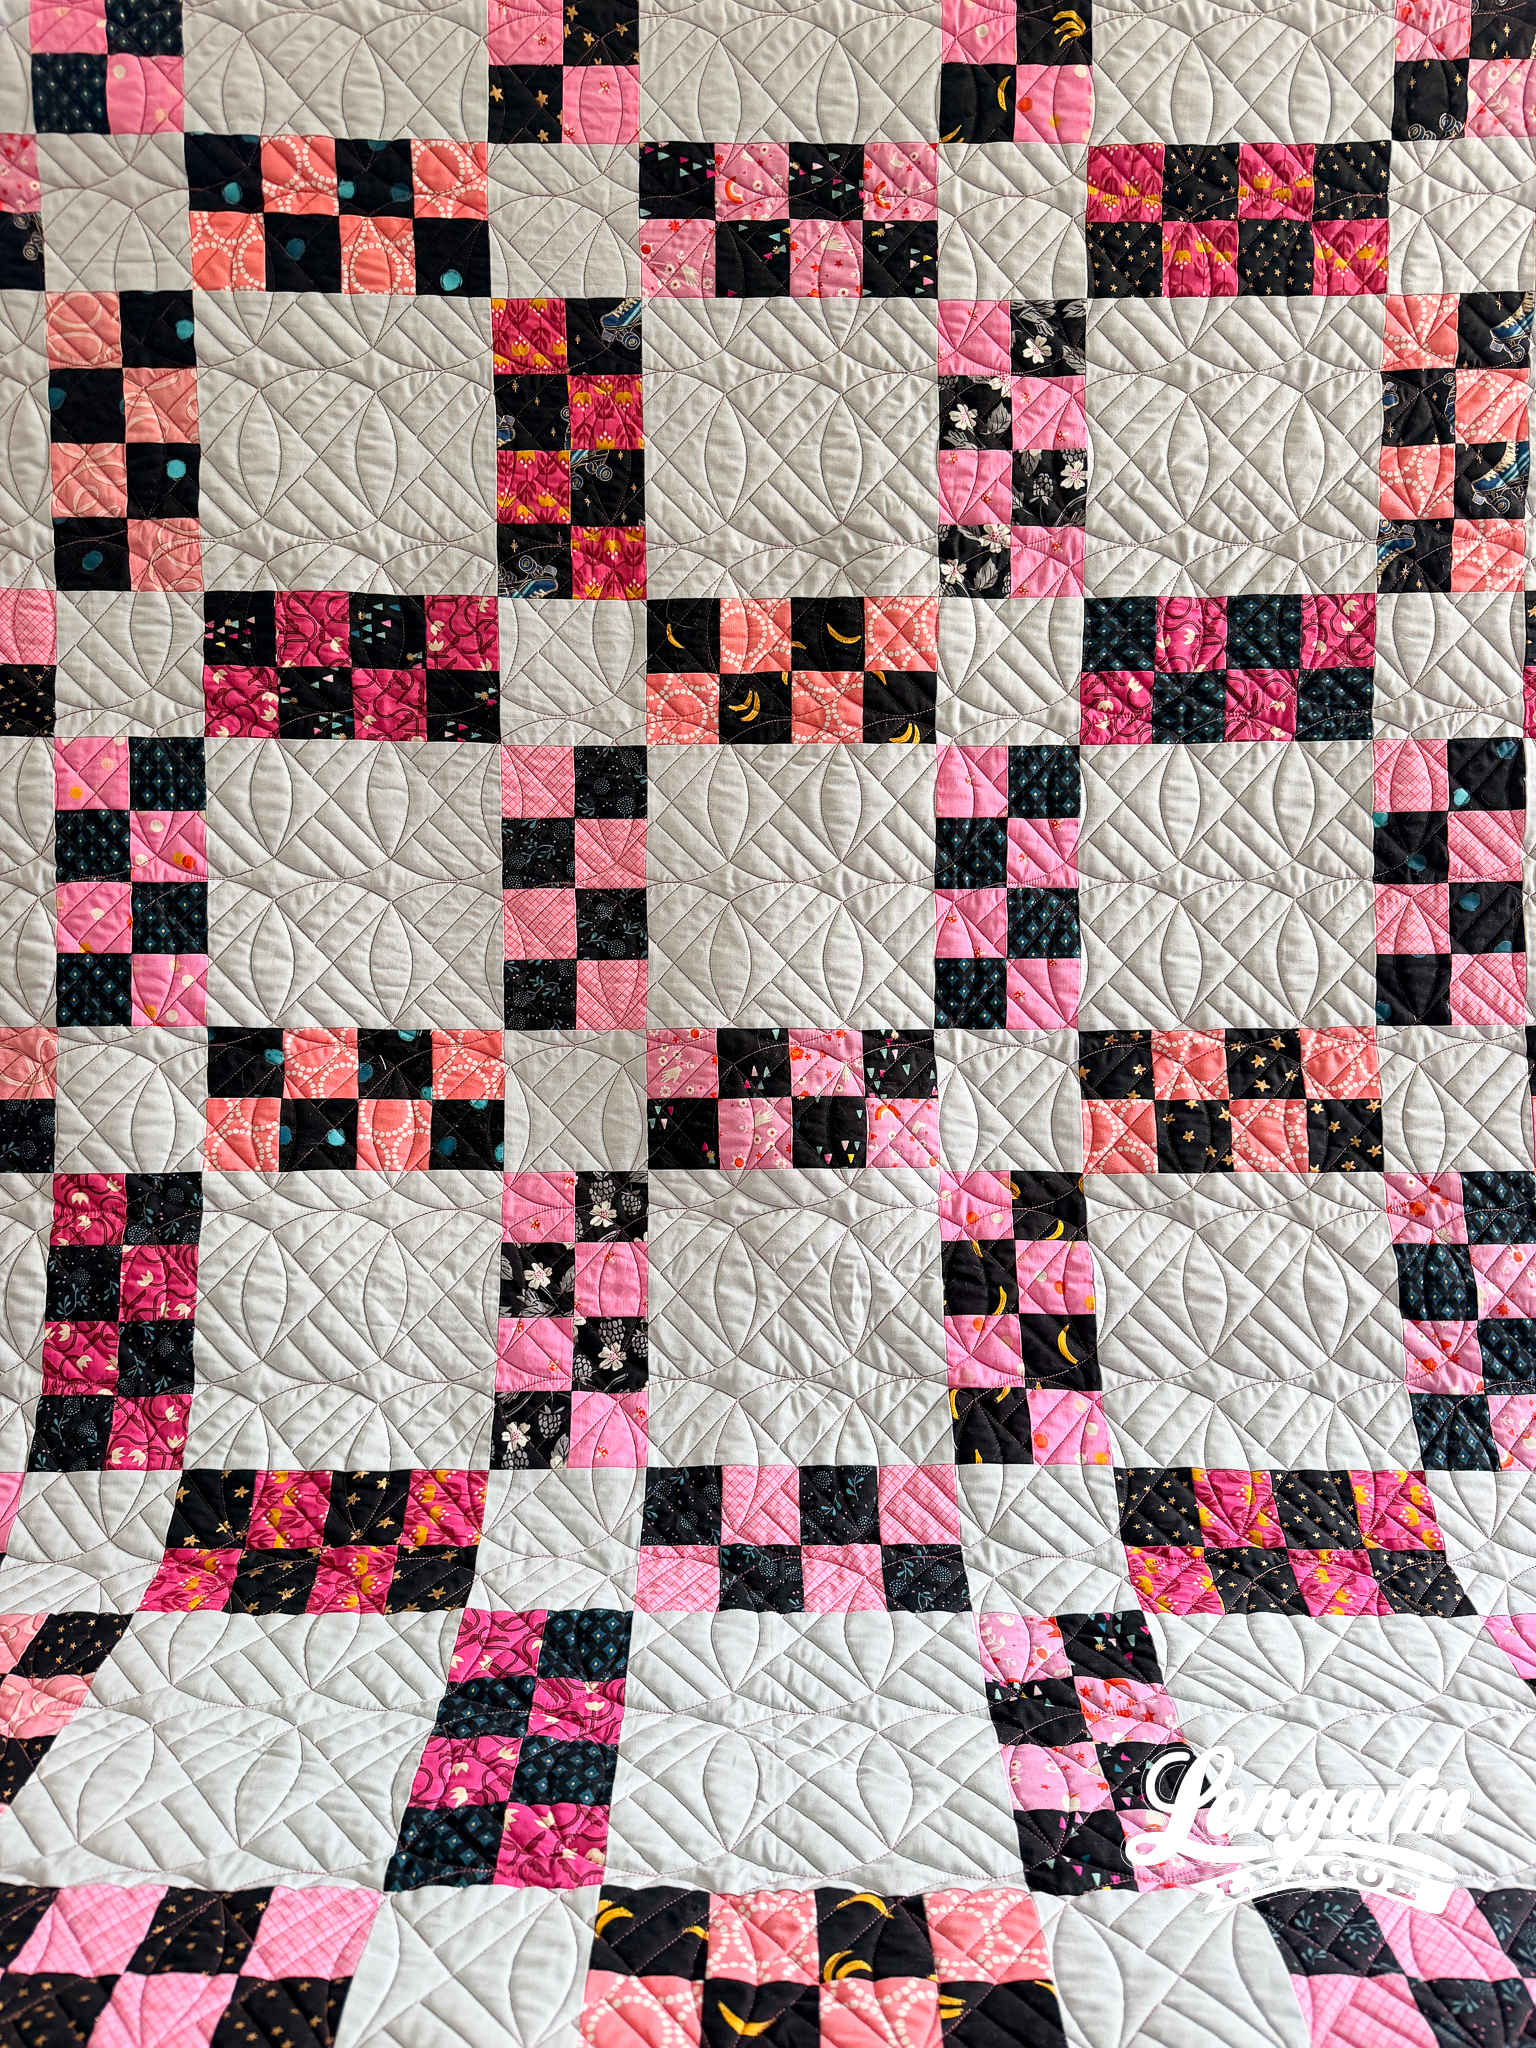
The original design featured sets of parallel lines traveling at opposing angles. I really liked the geometric drama of it all, so I revisited the design and simplified it as best I could. After seven years of design experience and a better grasp of Art and Stitch tools, today's design has a better stitch path.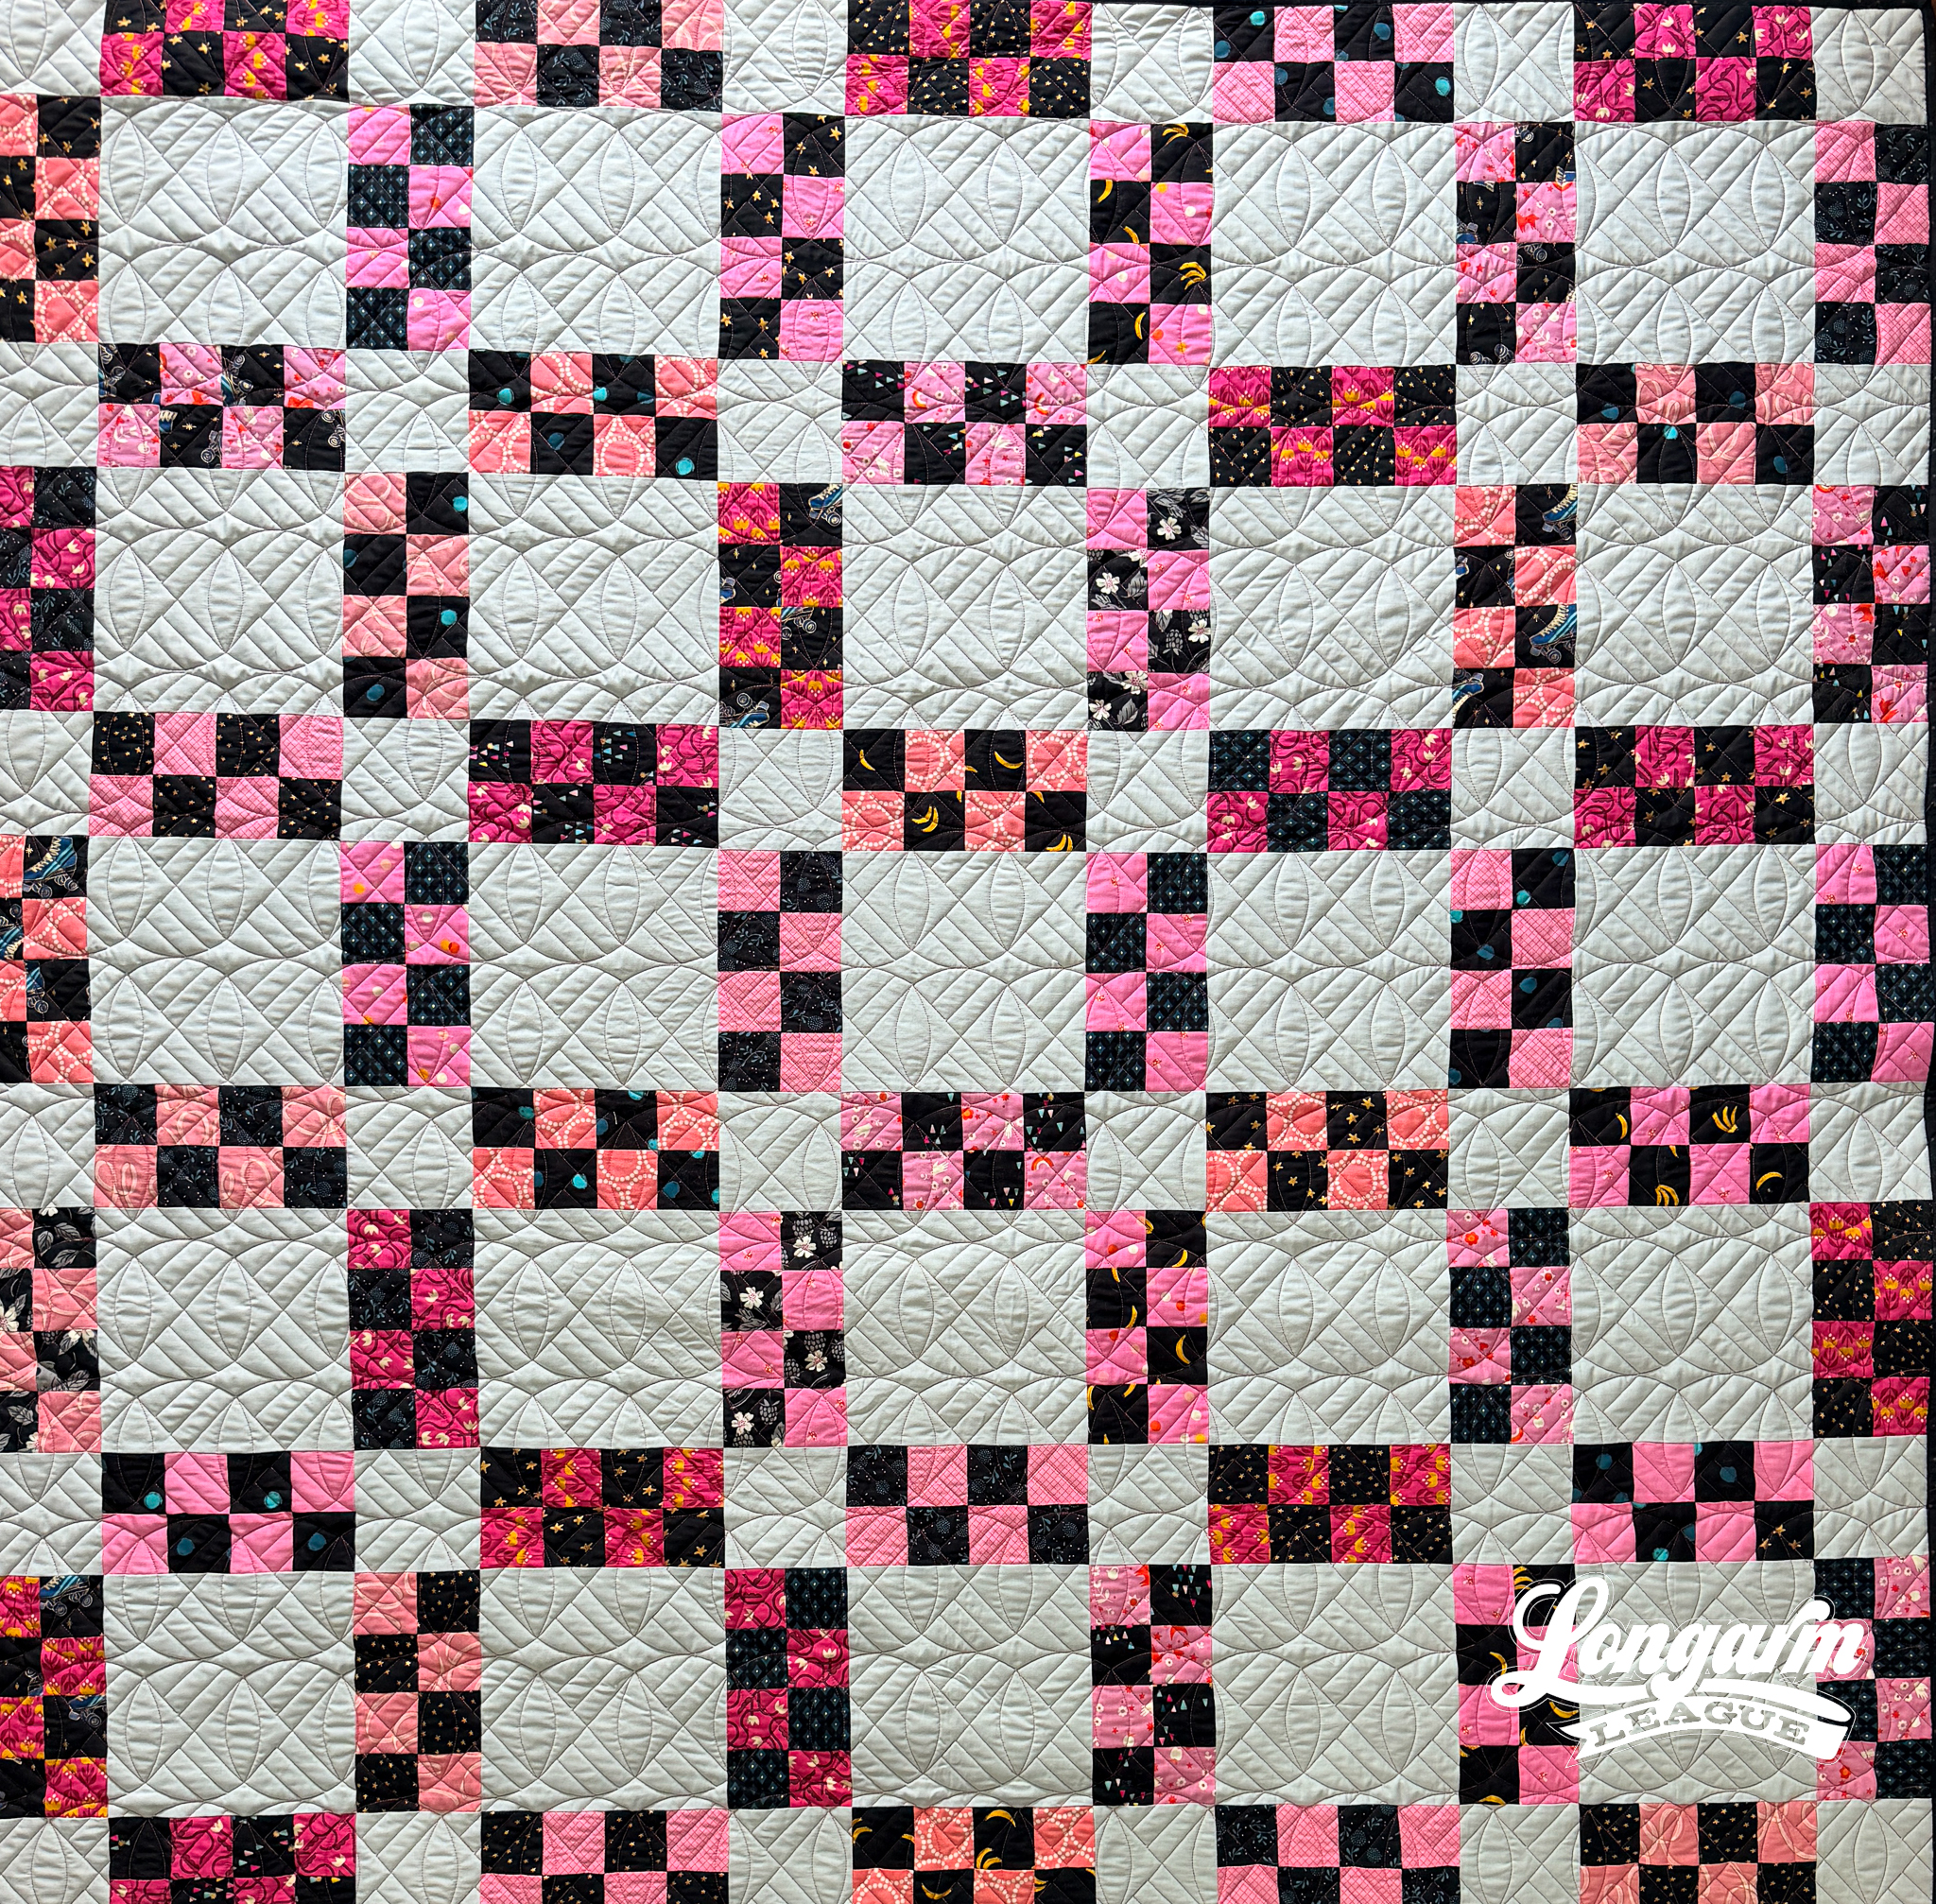
As I was breaking the original design down into parts, I realized that if I took one of the "apple core" shapes and repeated it, I got a really interesting interplay of shapes, similar to an orange peel.
From apple cores to orange peels? Yes, it's true!
Also, positioning the rows without gaps, like orange peel quilting, creates a fantastic tertiary curved diamond shape that I really enjoy.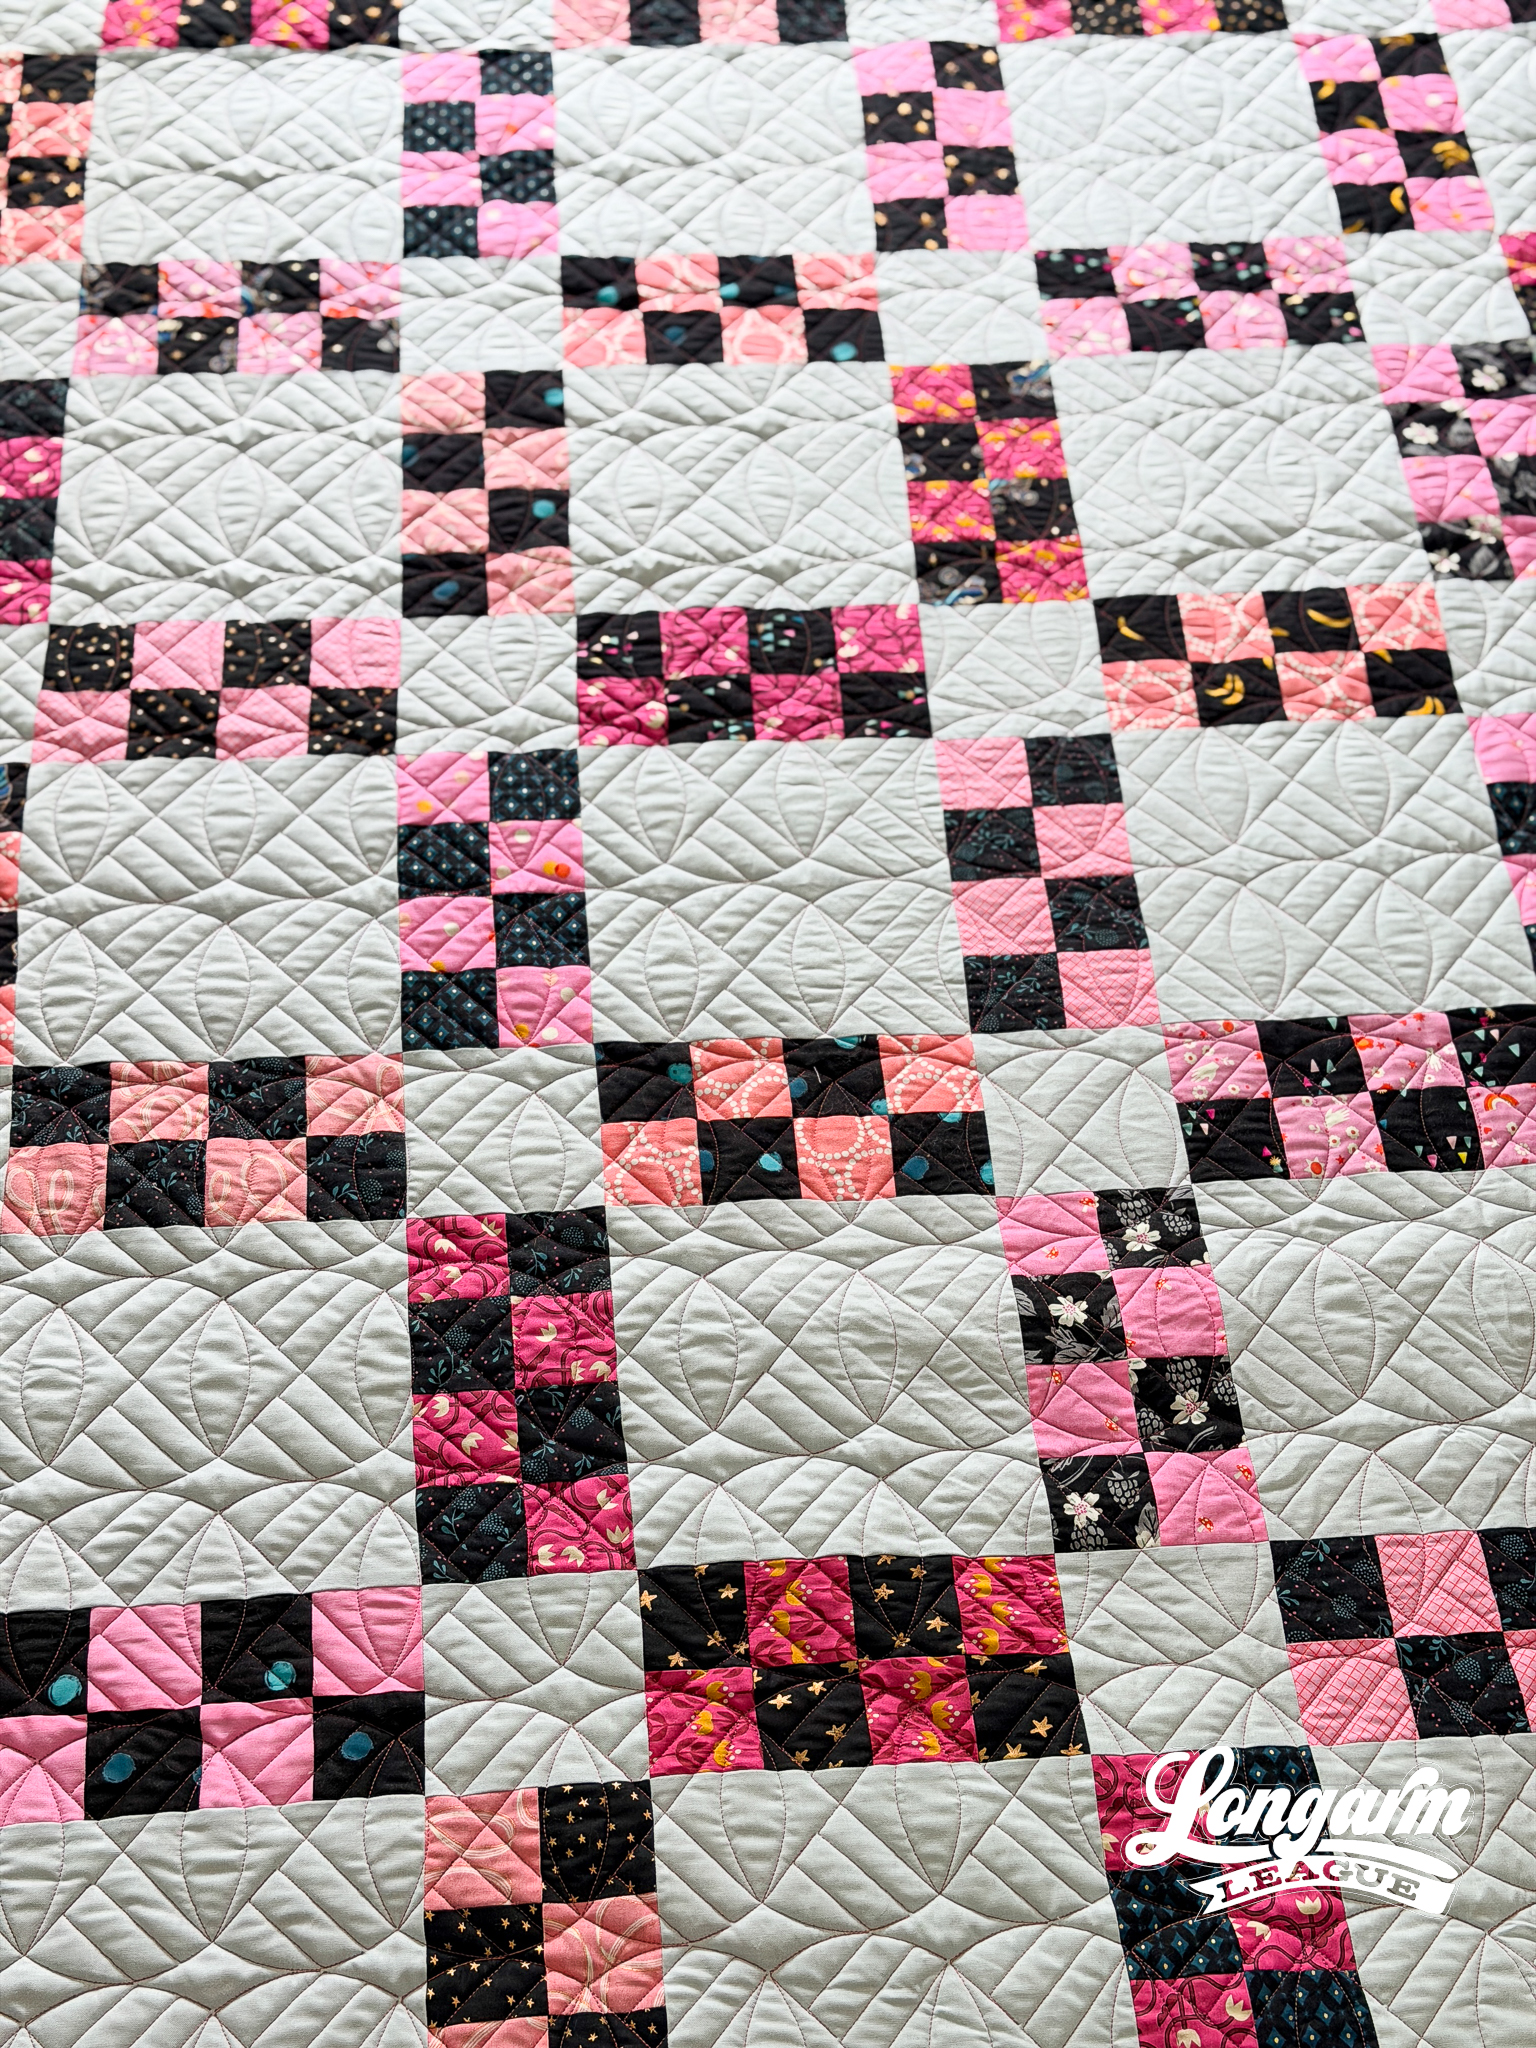
I found a way to use "quick pivoting" and short backtracked segments to eliminate the need for overstitching or backtracking in the looong lines, as in the original design.
The parts of the original design I want to incorporate into a future design are how the apple core shapes alternate between the vertical and horizontal positions and nest together between rows. I think that would be fun to explore in a future iteration.
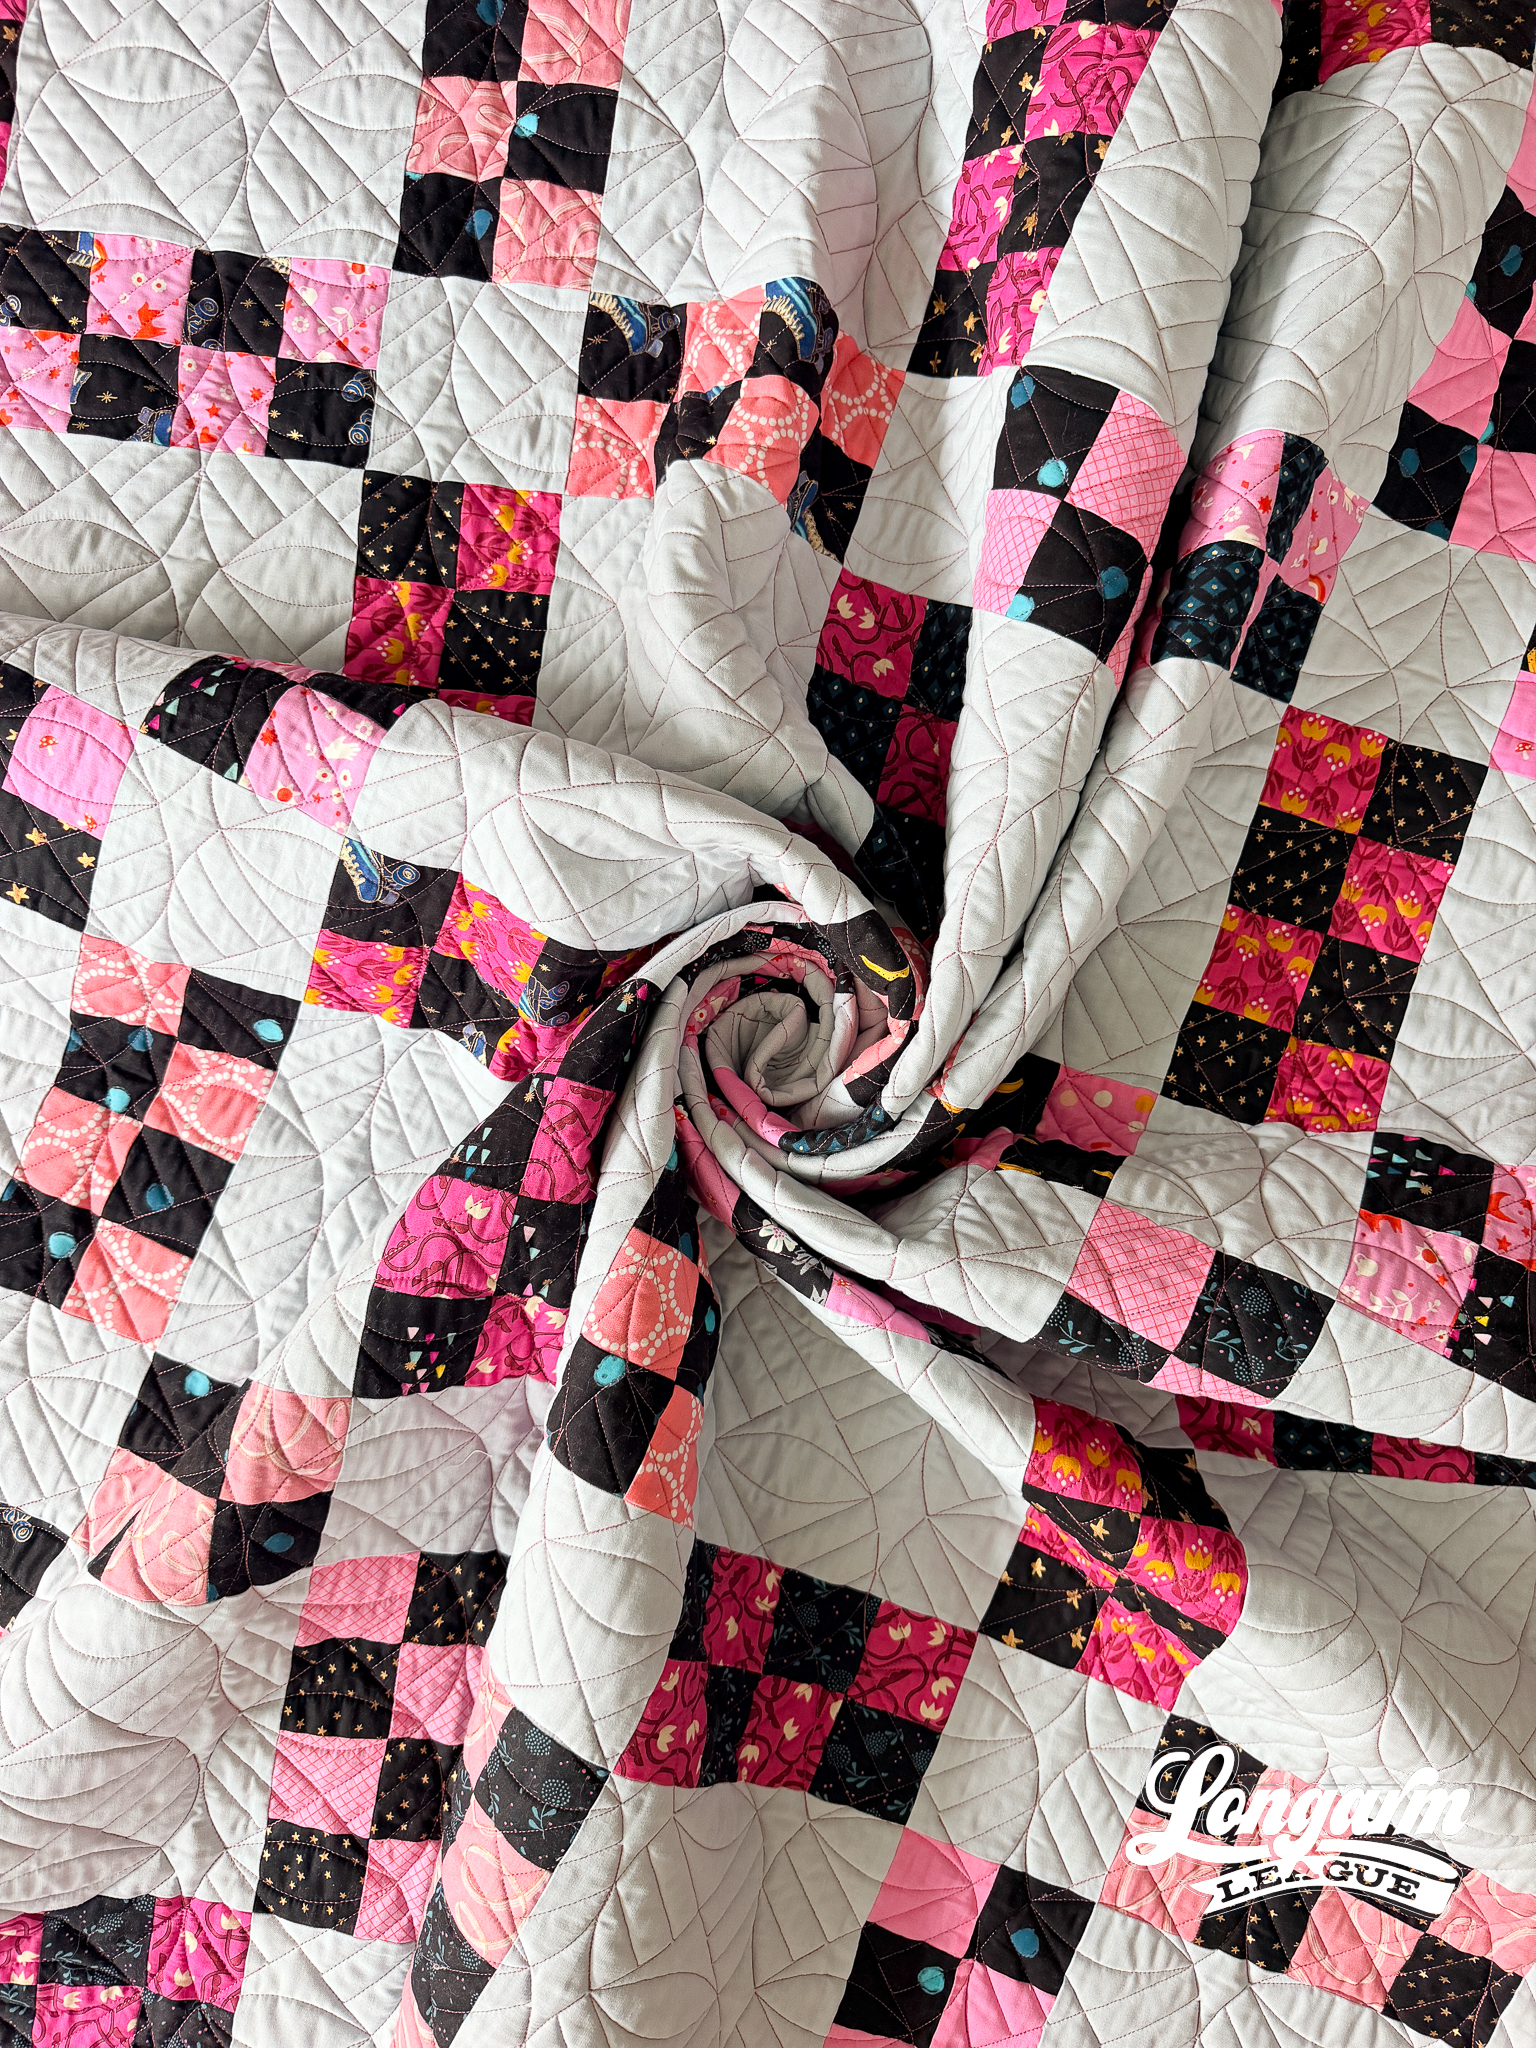
The quilt shown here is square, and the quilting looks great no matter which side is up. In other words, I consider it multidirectional.
The Quilt
Quilt Pattern
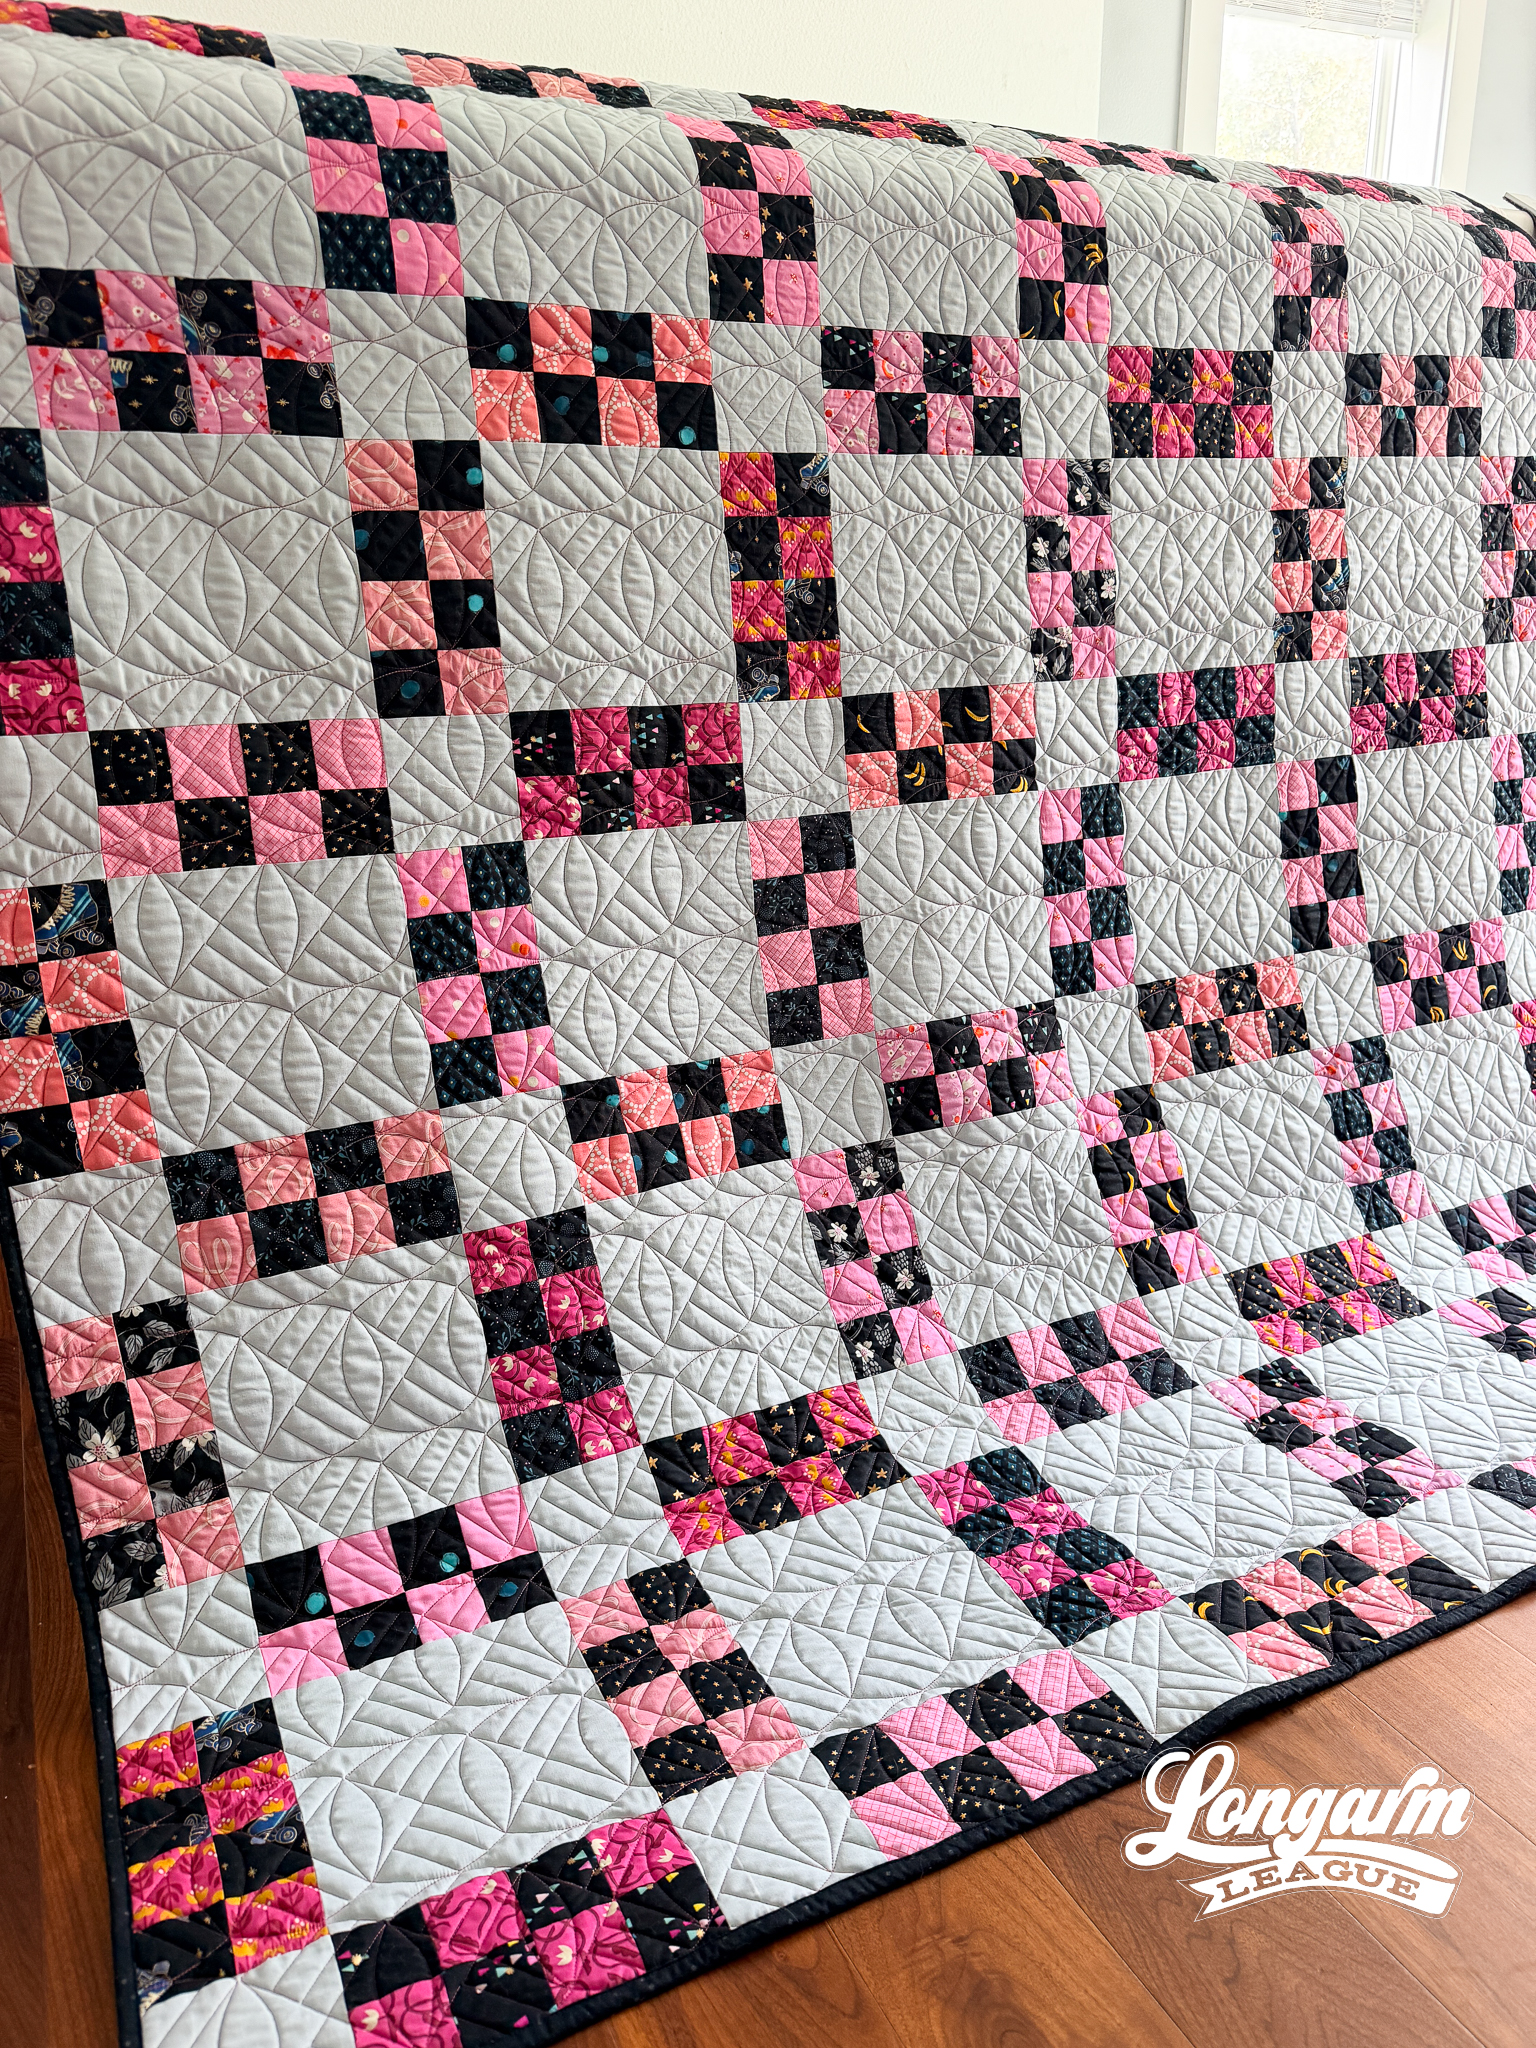
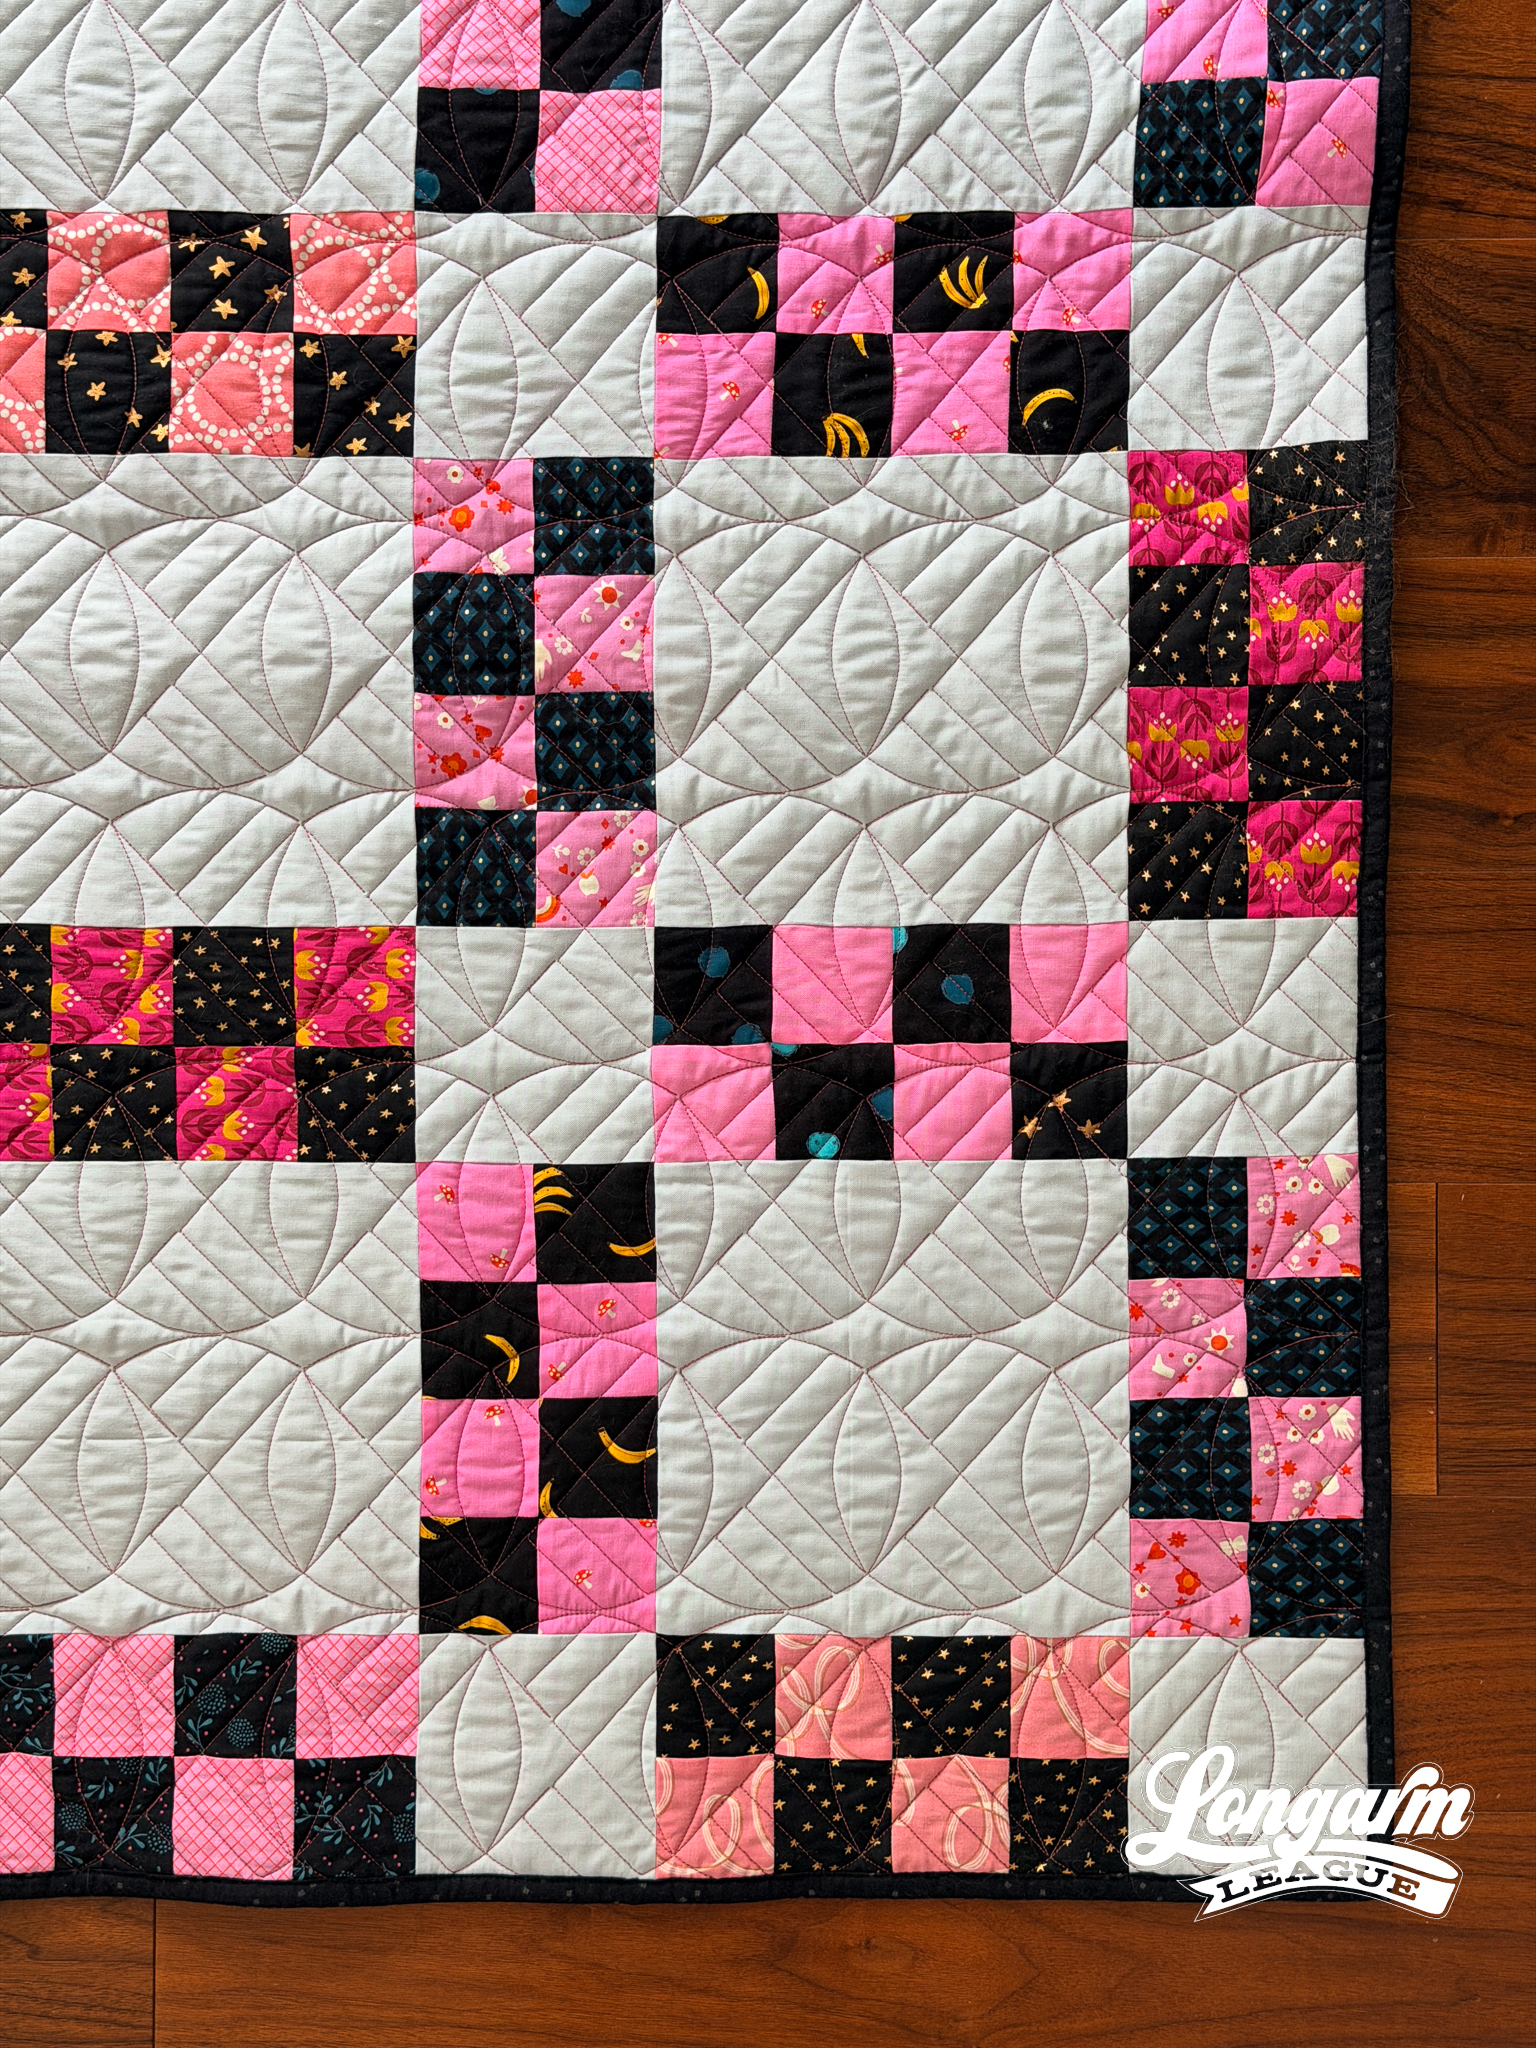
The quilt featured in this blog post is the Dorothy quilt pattern by Penelope Handmade.
I'm pretty sure I was influenced by friends at retreat who were also planning to make this quilt, so I cut my fabric pieces out in advance and sewed it up in March of 2026. It was the first quilt I completed at retreat, which I normally reserve for fast, fun quilts without much difficulty. Starting with a quick-win is always a good idea!
As I hoped, I sailed through this well-written pattern and had lots of fun making it.
Fabrics
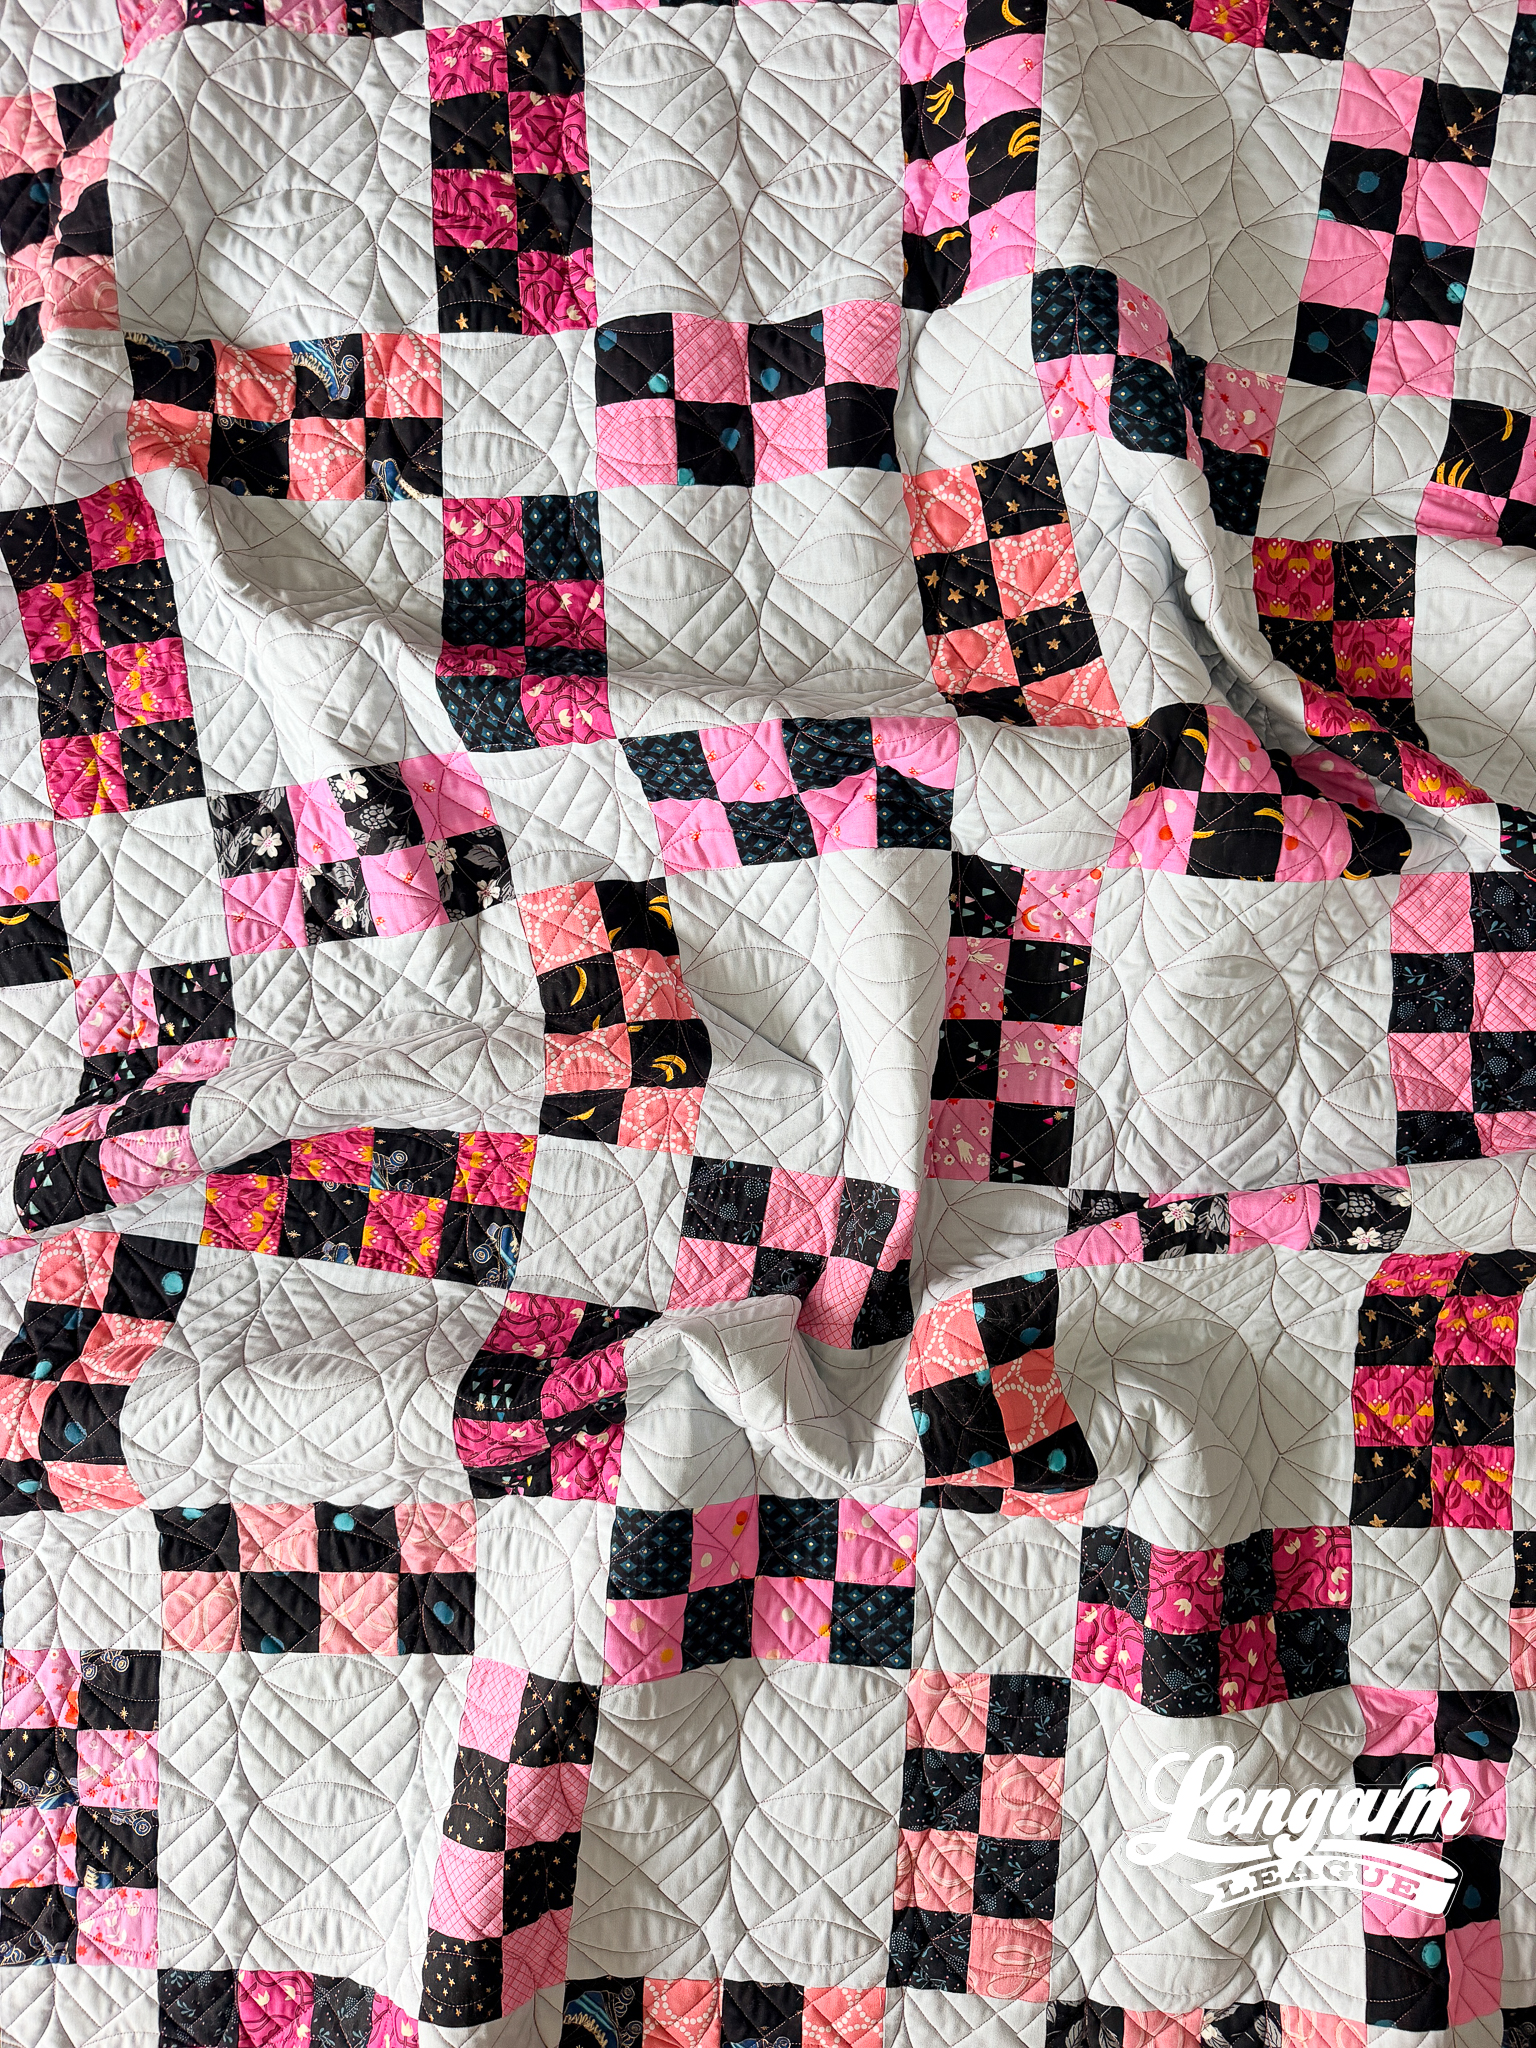
For the most part, I used Ruby Star Society fabrics I had on hand for the black and pink prints to make up the checkerboard sections of the quilt.
I love black fabrics, but sometimes I struggle to work them into patchwork—not with this quilt. I'd say the black prints are the feature, and pink the accent pairing.
I love how playful and modern this quilt is!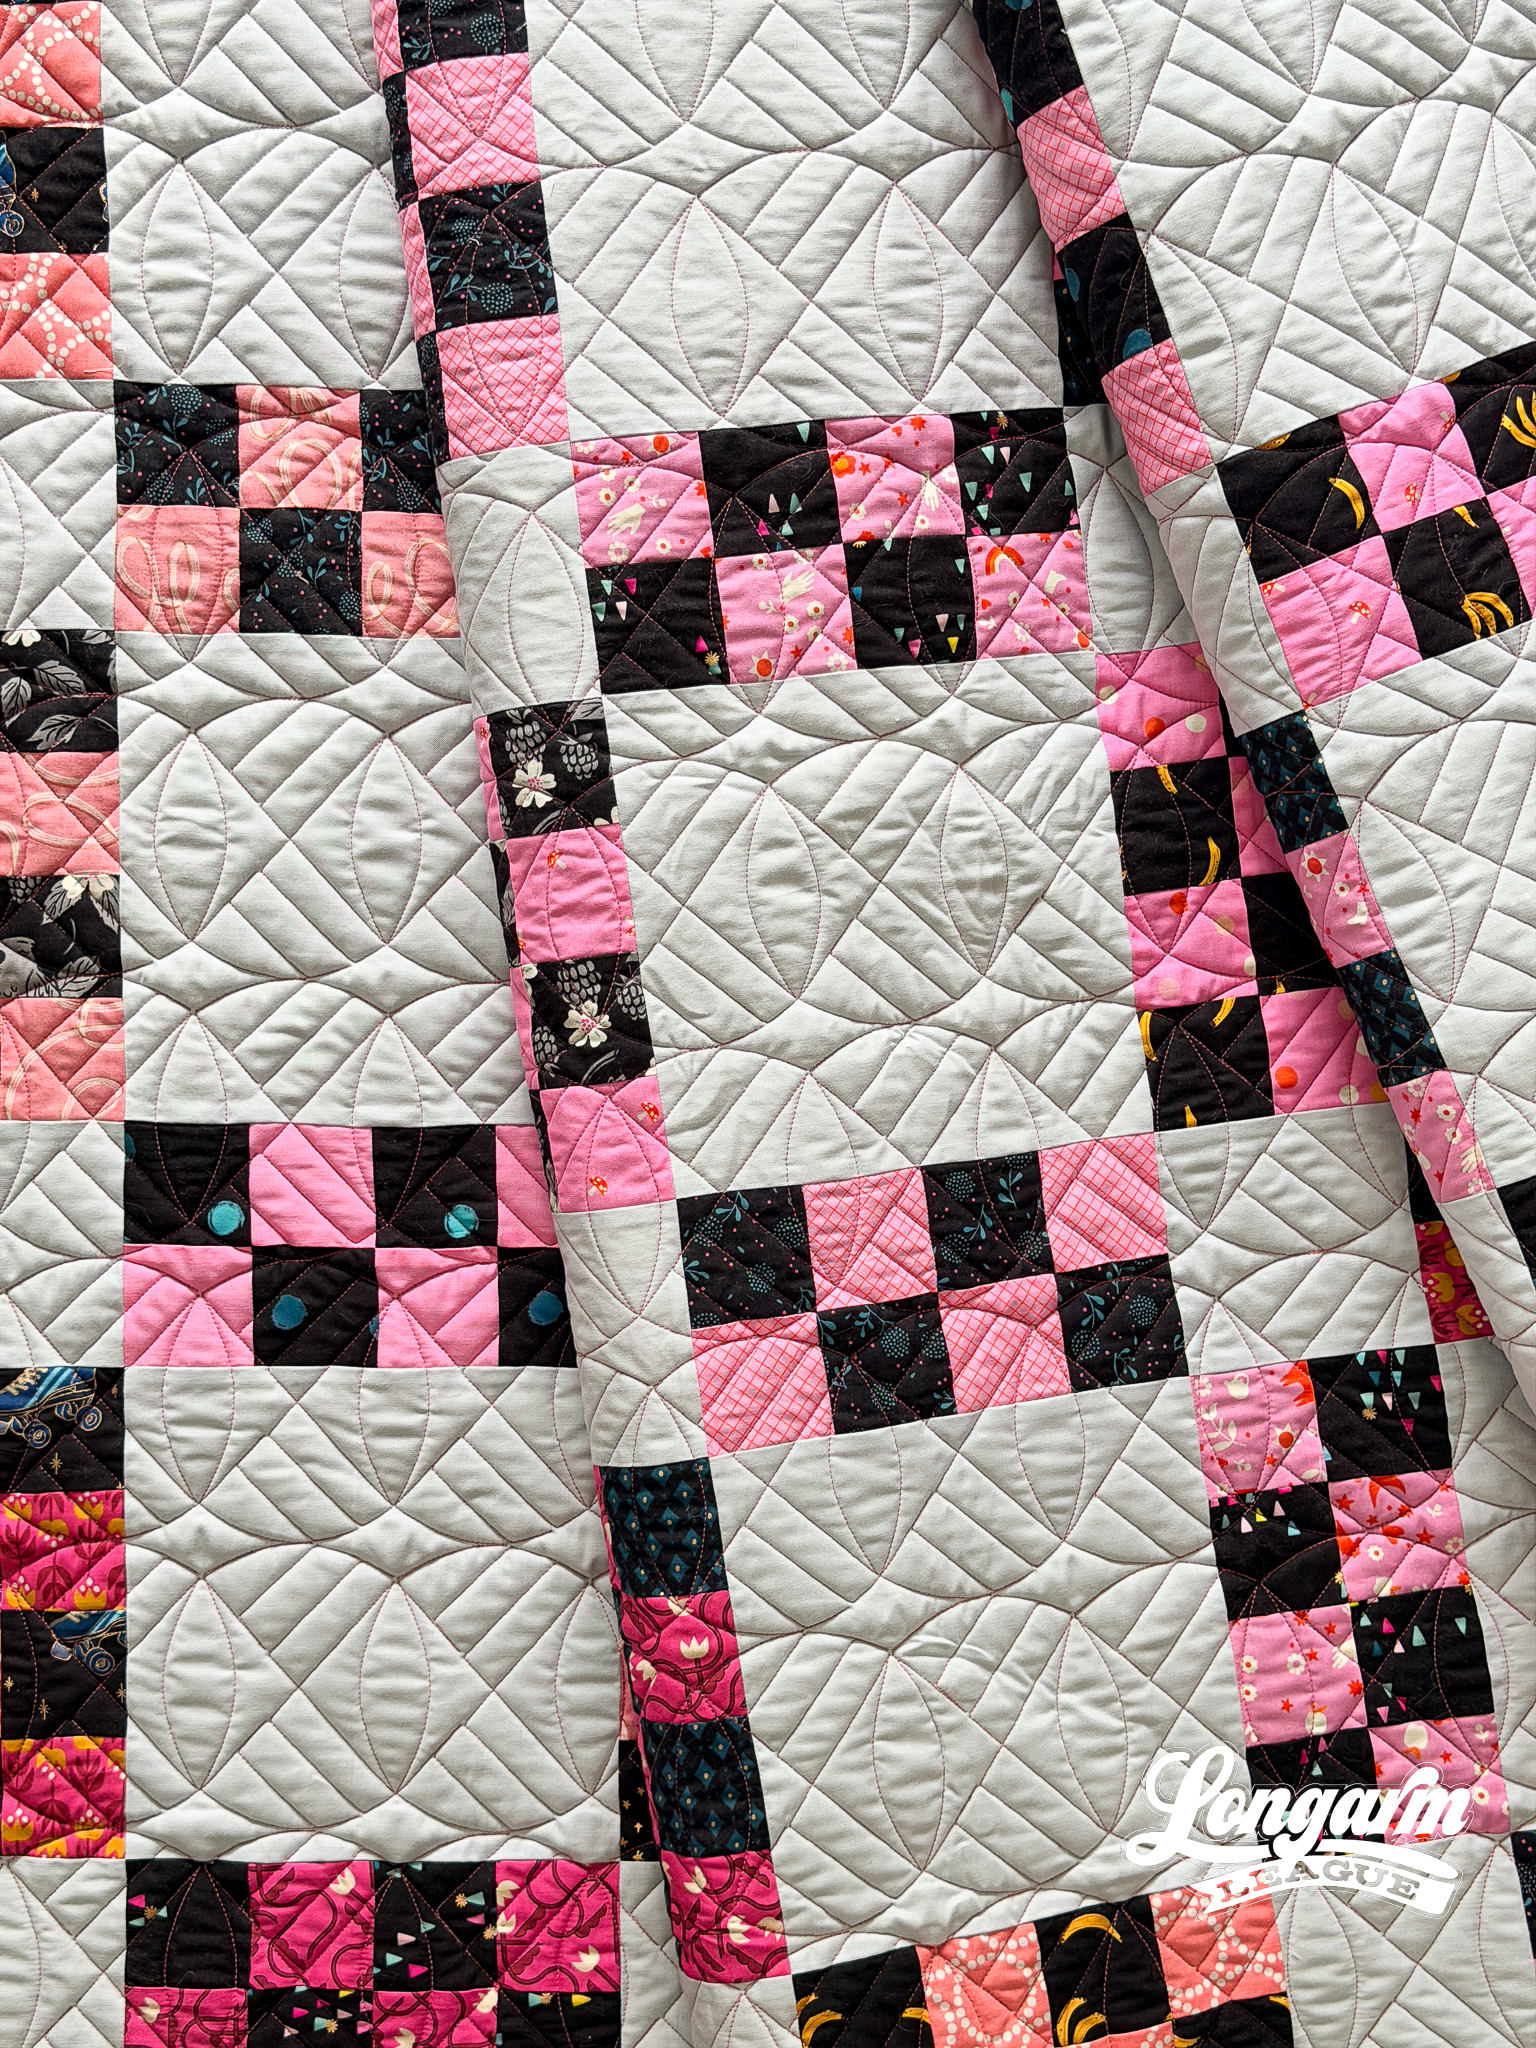
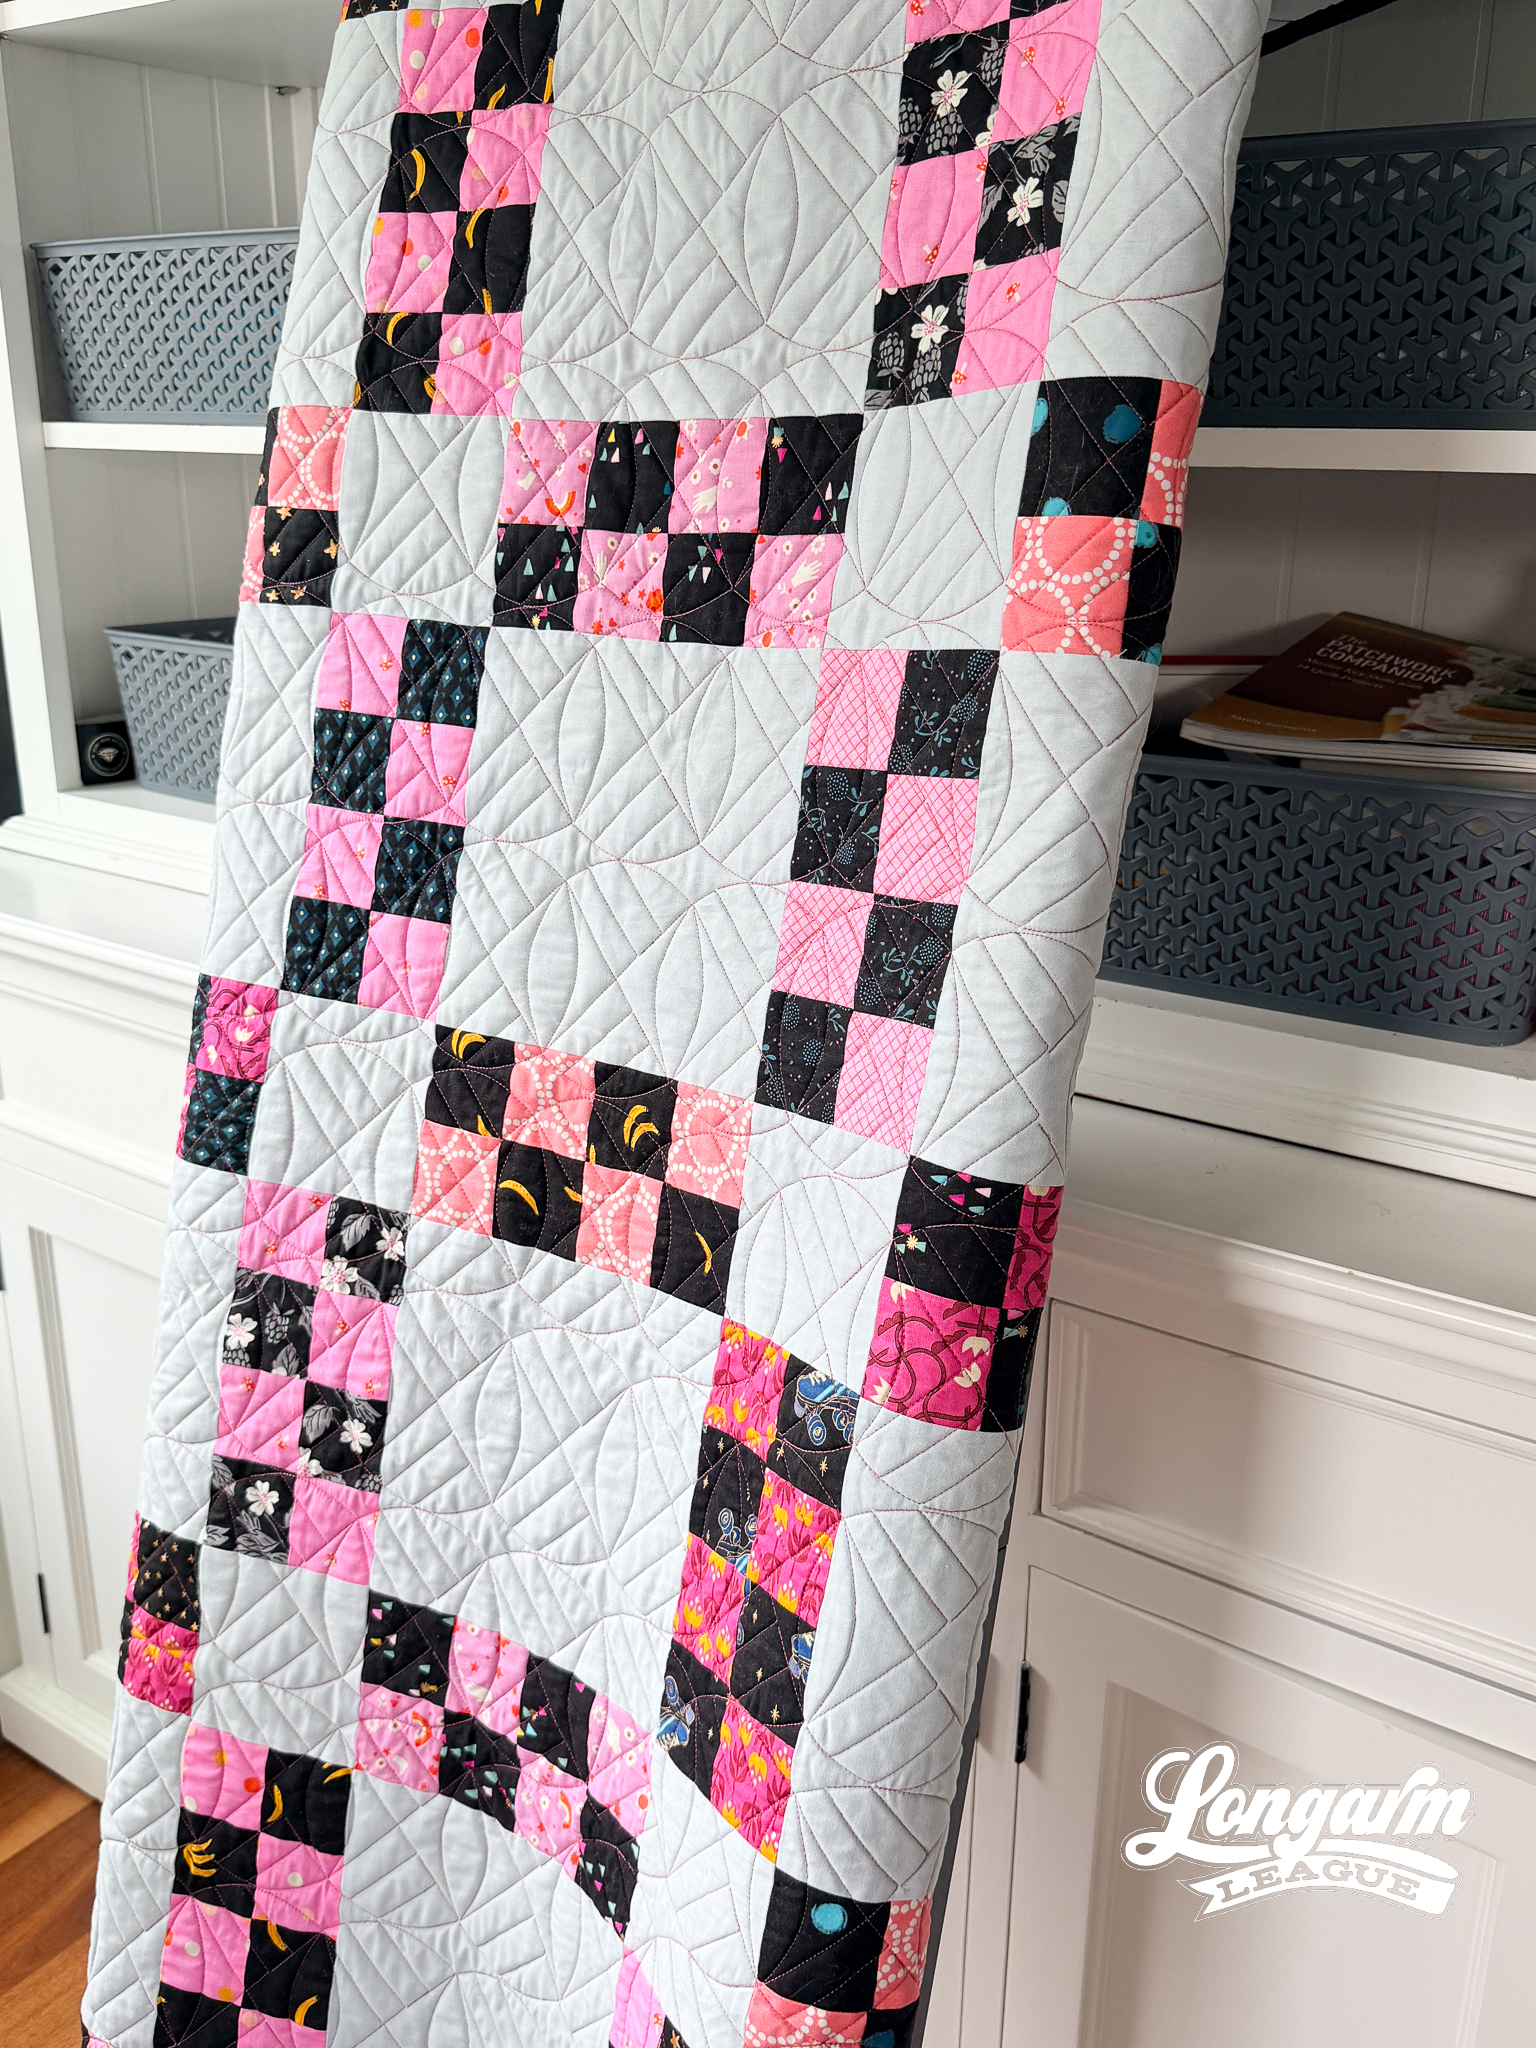
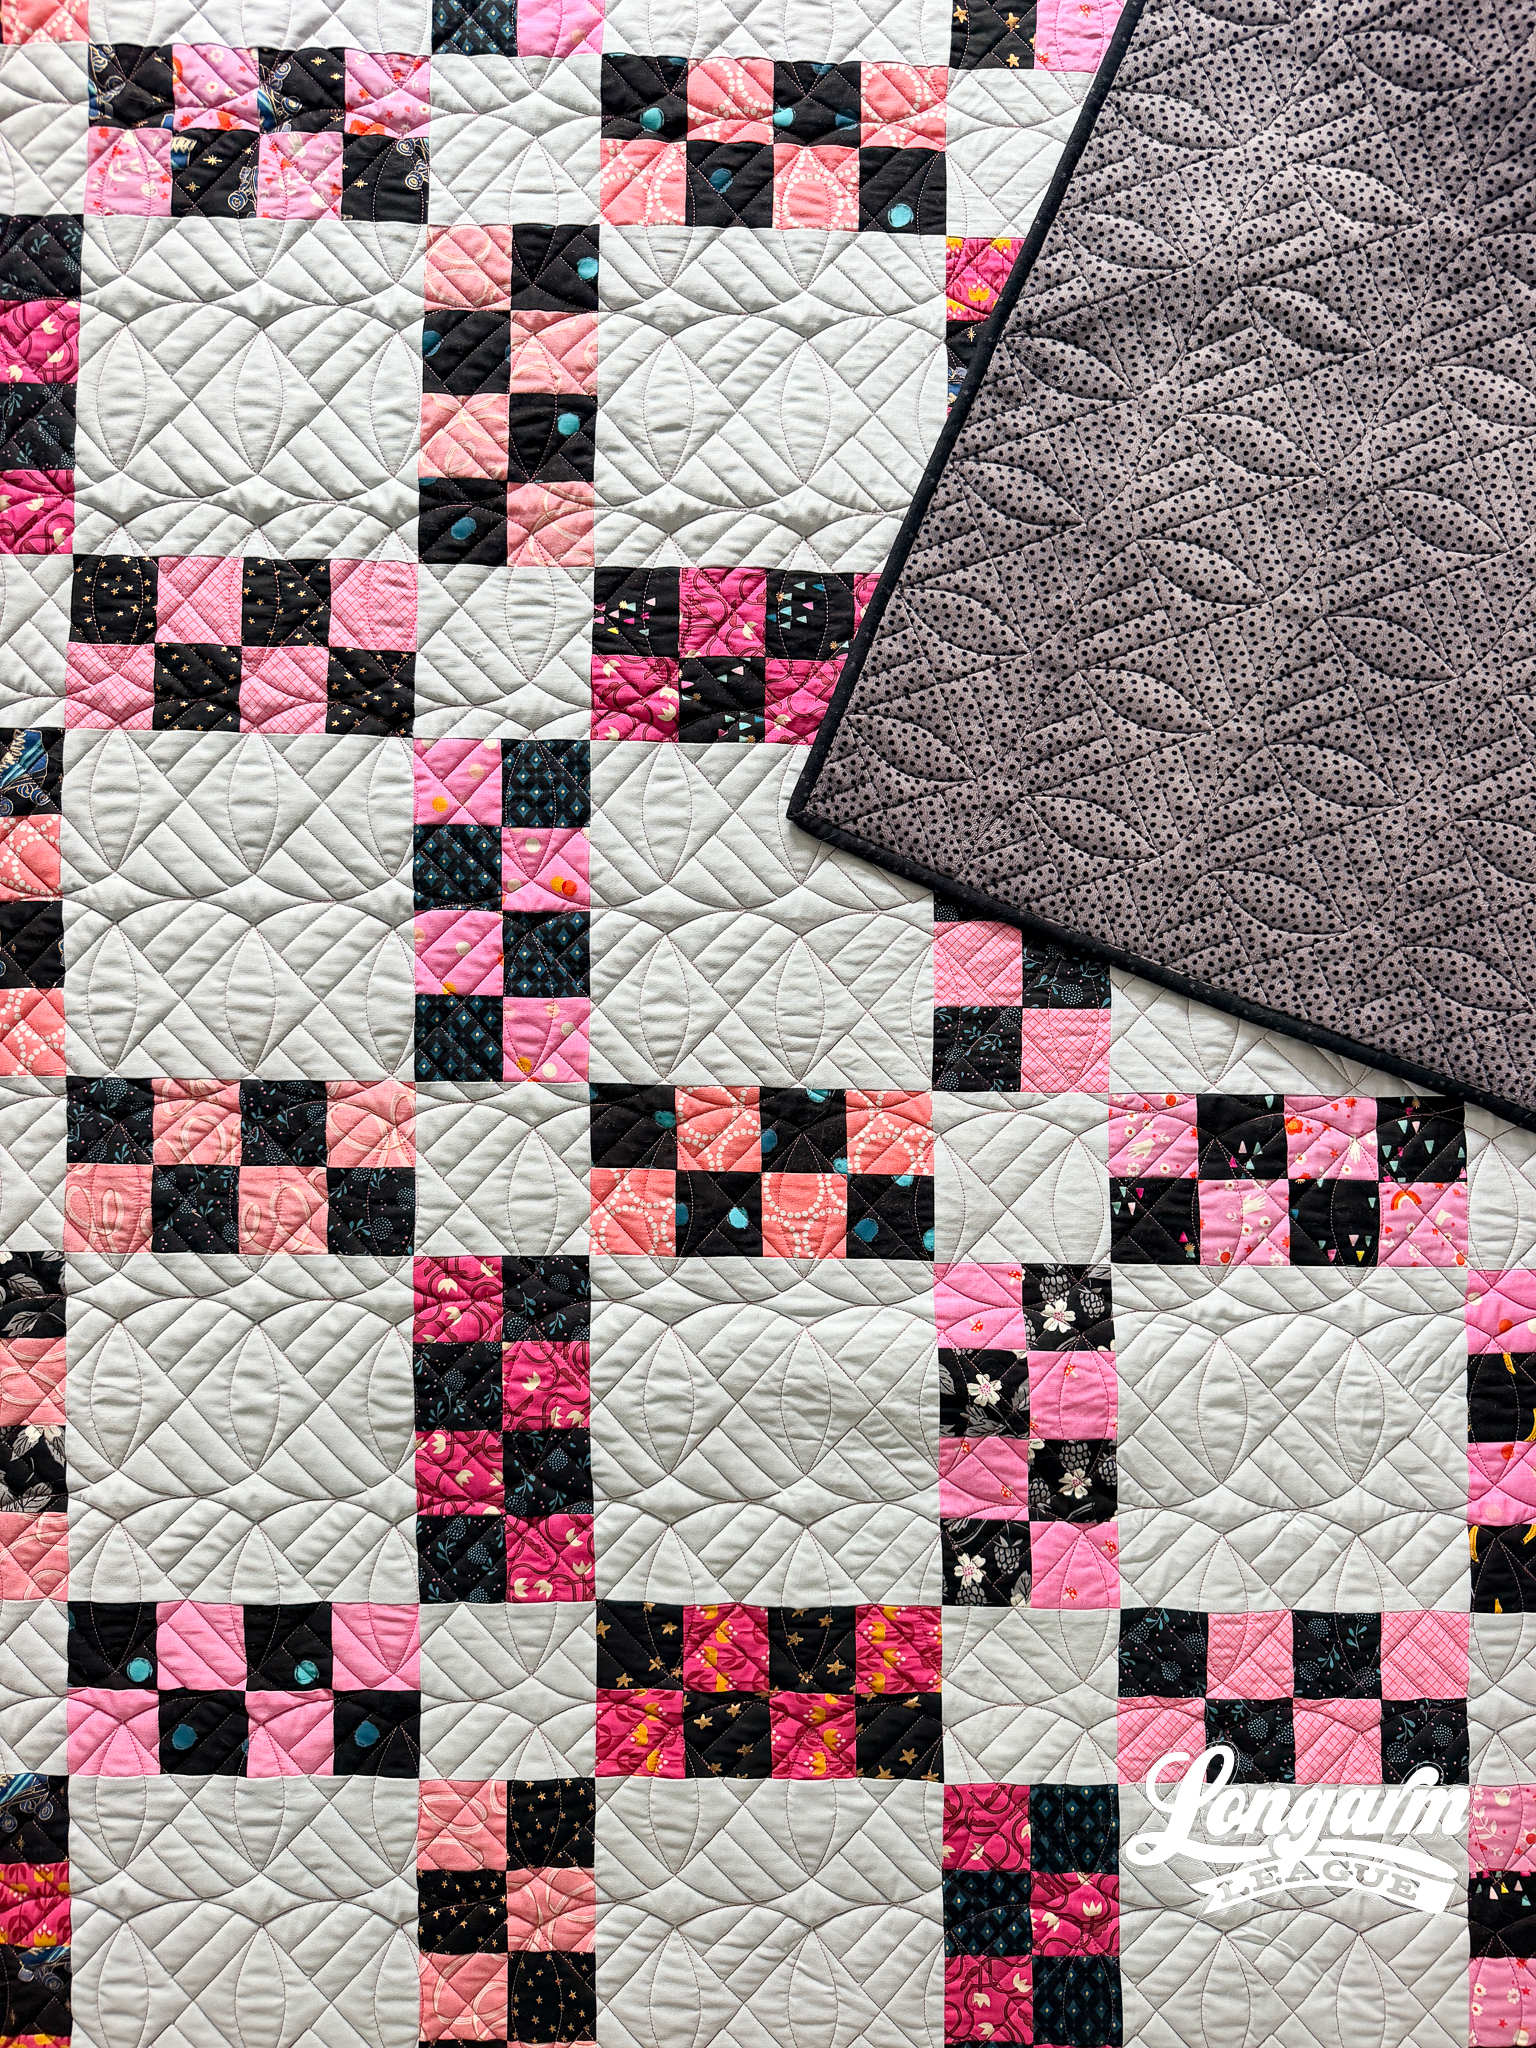
The solid gray fabric acted as a blank canvas and invited me to use a more complex quilting design because I knew the quilting would stand out. The Woven Arcs design matches the playful, modern vibe perfectly, so I had a hunch it'd work well.
Backing and Batting
Last summer, Josh and I met friends Shelly and Ian in Fargo, North Dakota, for a brief getaway, and ended up at Rae-Bon Quilt Shop to look around. I was surprised by the large size of the store, their fabric selection, and their class schedule, especially the classes for kids. Well done, Rae-Bon!
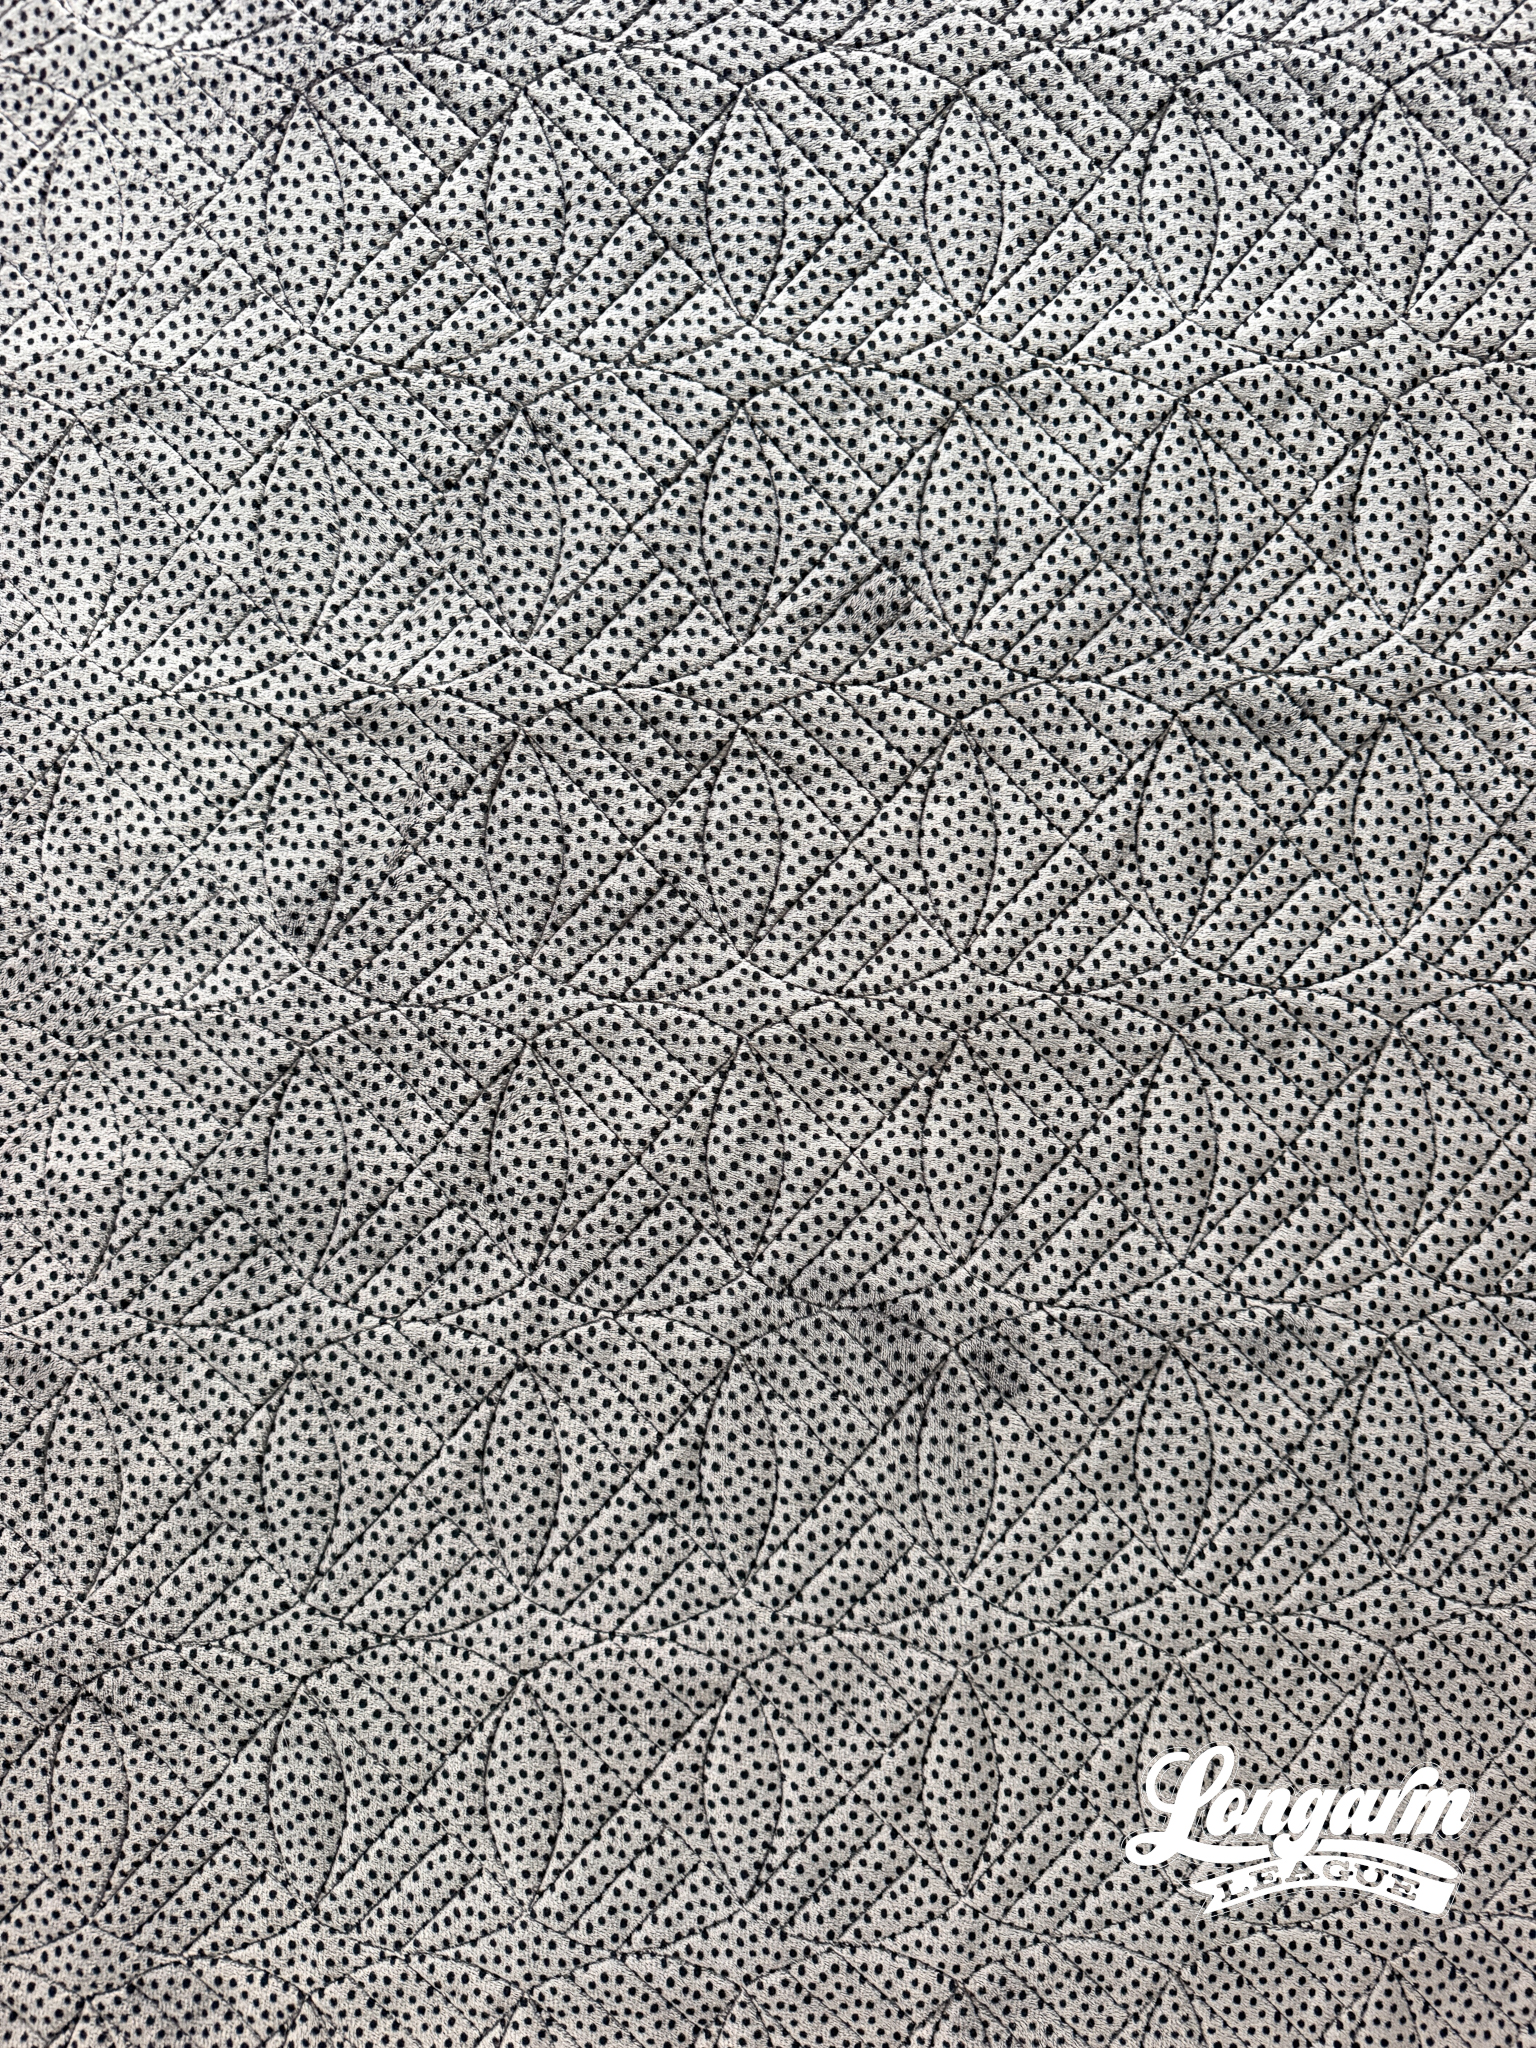
While there, I picked up this minky backing from Shannon Fabrics, Dottie Cuddle in charcoal. I didn't have anything in mind for it at the time, but it worked PERFECTLY for this quilt.
I used a black polyester batting I had on hand from Quilters Dream because I thought the black and pink prints would look more saturated against it. Because I don't typically make darker, saturated quilts, I thought it was a good opportunity to use what I had instead of cutting from my bamboo roll.
These backing and batting choices resulted in a higher-loft, heavier quilt than I normally make. But I can see it being wonderful for cold winter nights. I wish you could feel it—thick and luxurious!
The Quilting Details
Difficulty Level: Intermediate
I rated this edge-to-edge design intermediate because there is no gap between rows. If you have any trouble with designs that require exact placement like this one, please refer to this blog post. In particular, the tips about ensuring the back is loaded straight and the "paper towel (or batting) trick" will help compensate for any inconsistencies as you work your way through the quilt.
Scale
I loved the scale of the design for this quilt top! Sometimes I nail it, sometimes I don't. I think this size worked well for the quilt. You can find the details below. There is "room" for you to increase or decrease the size from what I used here. At the scale given, the straight lines are about 5/8" apart.
A short video at the top of the blog post shows the stitch path.
Here are the sizing specifications for how I set up this quilt using my Intelliquilter (quilt size 64" x 64"):
Row height: 4.5"
Gap: 0"
Pattern height: 4.5" (measurement from top to bottom of the repeat)
Offset: none
Backtracking: some
Here's a look at the included PDF: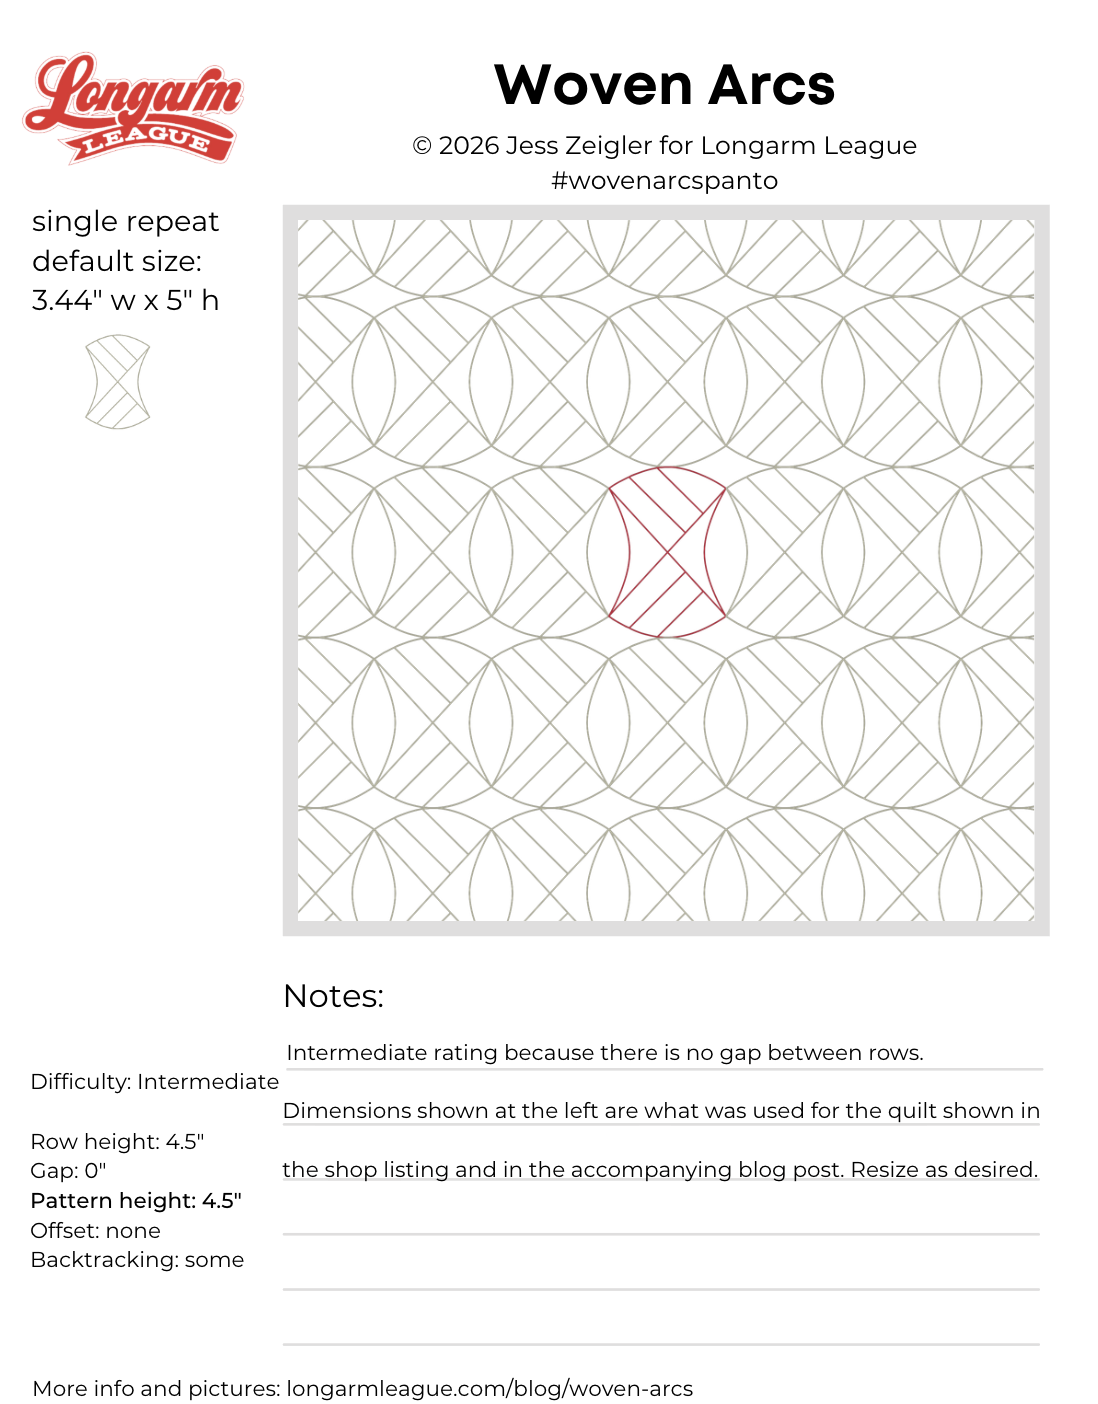
Want new digital pantograph designs like this one on release day (and at a deep discount)? It now also includes access to our online community. Sign up for our Digital Panto Club and get them delivered directly to your inbox on the first Wednesday of each new month. 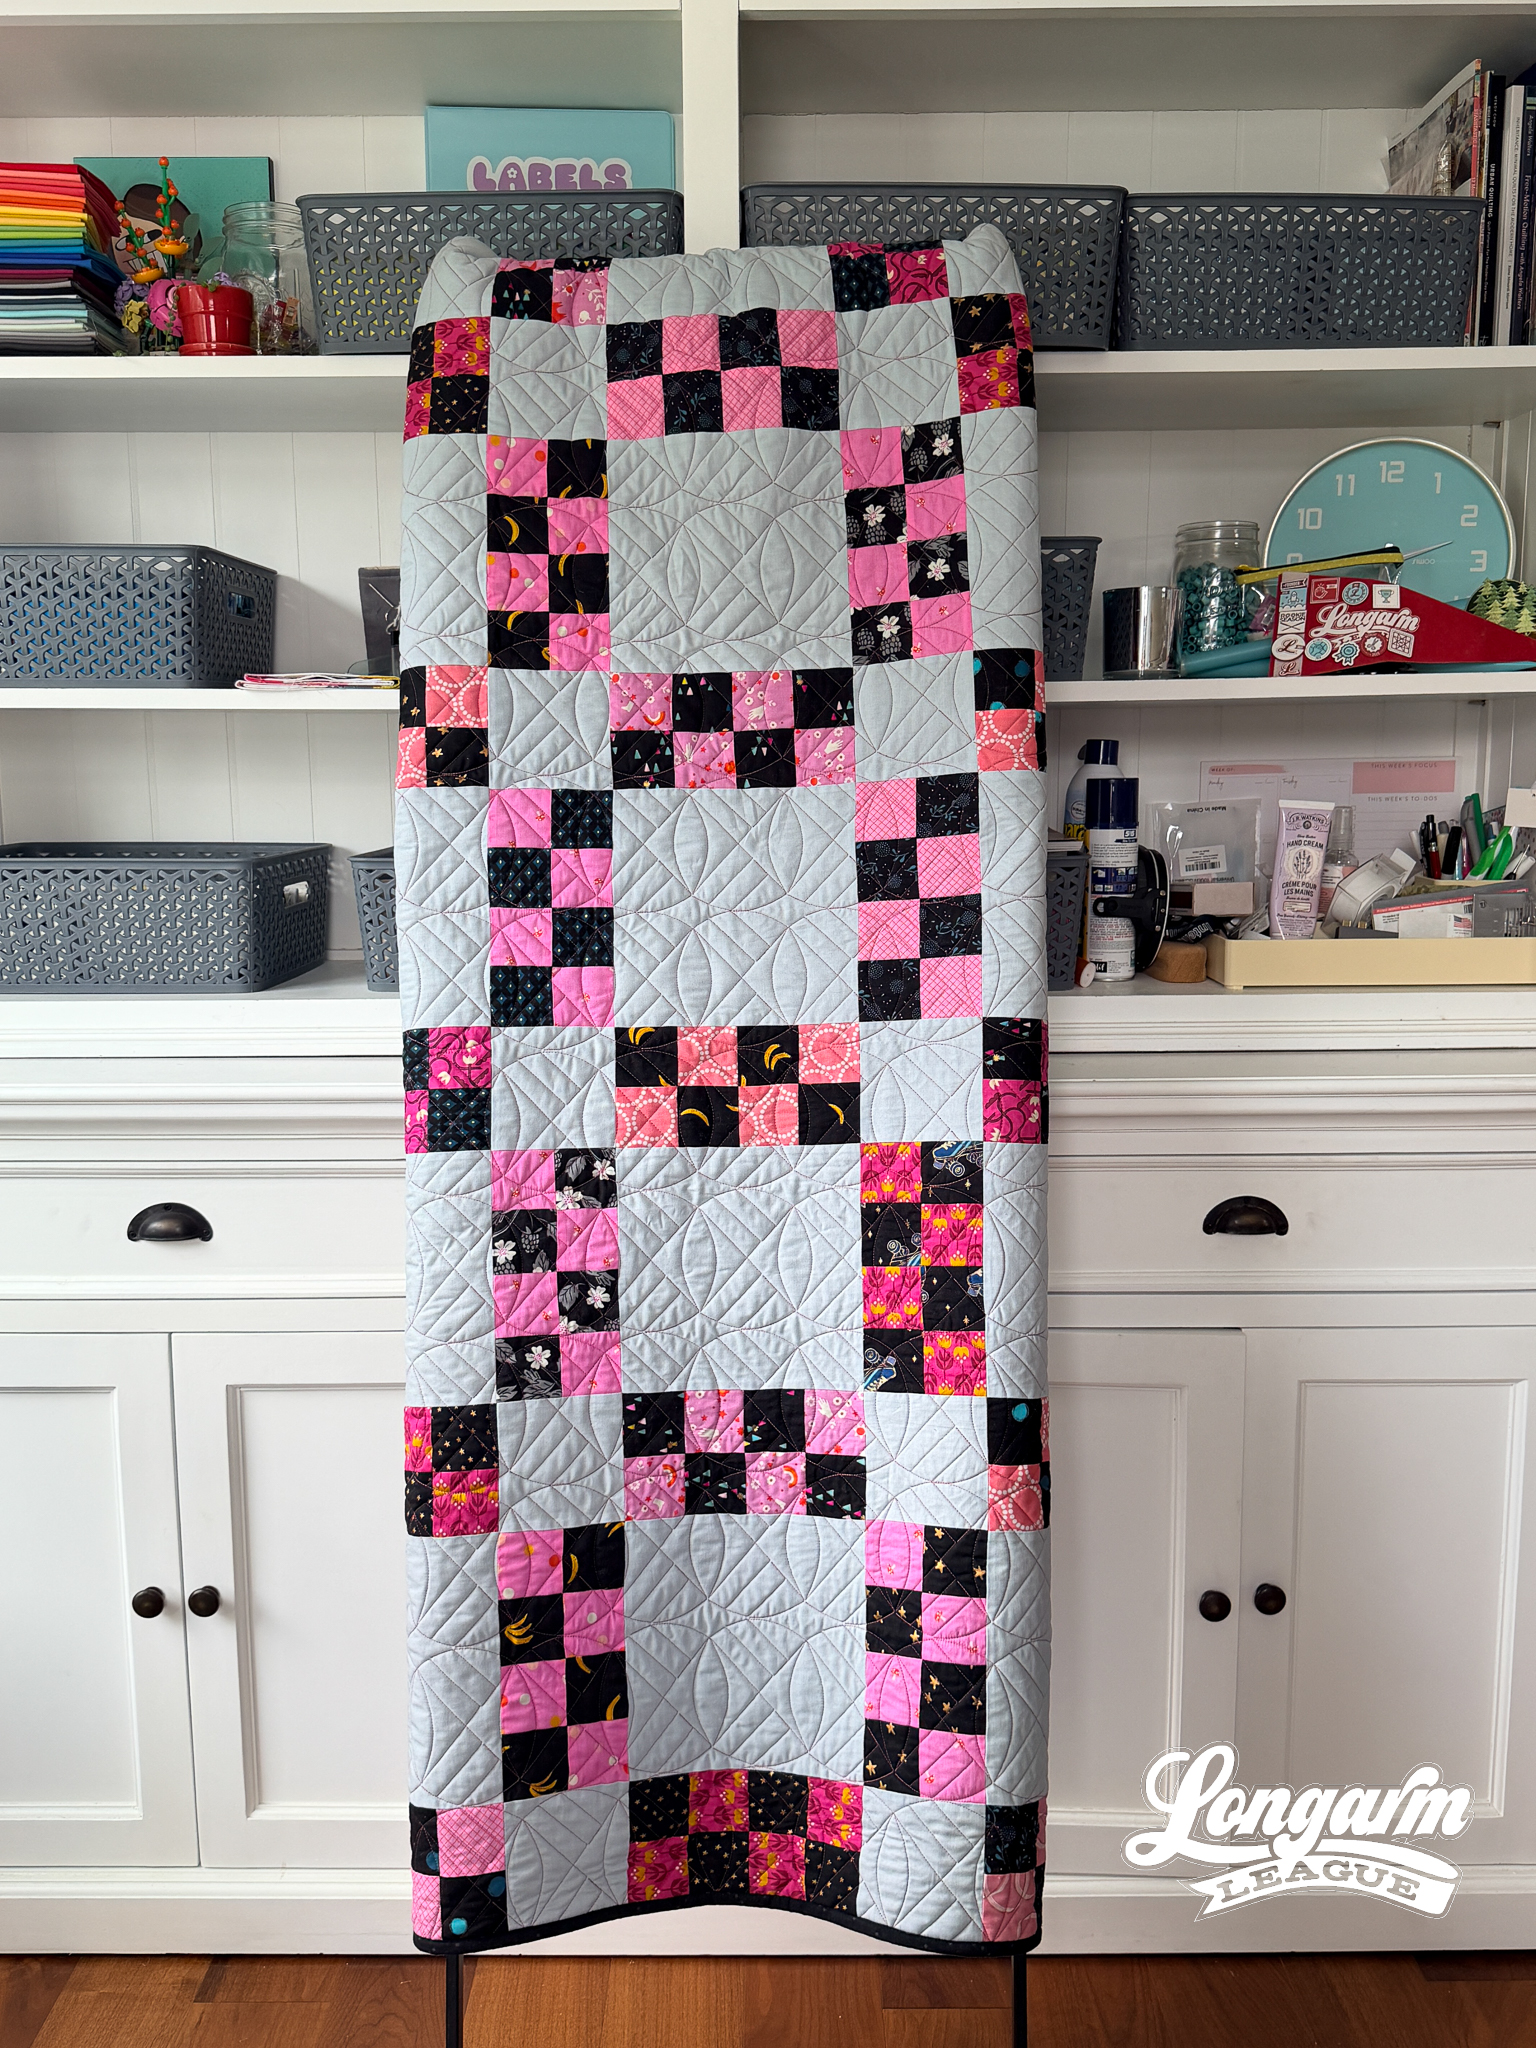

Jess Zeigler
Longarm League Commish & Owner of Threaded Quilting Studio, LLC.


